Installing low voltage landscape wire is a DIY-friendly project that can dramatically enhance your outdoor space with beautiful lighting. Low voltage systems (typically 12 volts) are safe, energy-efficient, and easy to work with – perfect for the DIY homeowner. In this beginner’s guide, we’ll walk you through everything from planning your landscape wiring layout to connecting lights, choosing the right cable, and ensuring a long-lasting installation. We’ll also highlight why using high-quality materials (like Haisstronica’s landscape wires) makes a difference in performance and safety. By the end, you’ll be ready to wire landscape lighting like a pro and avoid common pitfalls. Let’s dive in!
Understanding Low Voltage Landscape Lighting
Before getting into the wiring process, it’s important to understand what a low voltage landscape lighting system is and why it’s popular. A low voltage landscape lighting setup consists of a few basic components:
-
Transformer: A device that plugs into a standard outdoor GFCI outlet and steps down 120V AC to 12V AC. This makes the system low voltage and much safer to work with.
-
Landscape Lighting Wire: A two-conductor insulated cable (commonly called 12 volt landscape wire) that carries power from the transformer to all your light fixtures. This cable is usually weather-resistant and rated for direct burial in soil.
-
Light Fixtures: These can be path lights, spotlights, deck lights, etc., designed to run on 12V. Each fixture typically has its own two lead wires that will connect into the main landscape wire.
-
Connectors: Waterproof connectors (or wire nuts with grease, crimp connectors, etc.) join the fixture leads to the main cable or join sections of cable together.
Low voltage lighting is popular because it’s safe (no risk of dangerous shock, even if you accidentally cut the wire), flexible (you can move fixtures around easily), and DIY-friendly (no need for an electrician or hardwiring into household power). Unlike 120V line-voltage systems, low voltage systems do not require conduit or deep trenches; you can usually bury the cable shallowly or hide it under mulch. This is why outdoor lights electrical wiring is far easier with low voltage systems than with high-voltage ones.
How it works: The transformer sends 12V through the landscape lighting wire to all connected fixtures. Because it’s low voltage, there is a limit to how many lights and how far you can run the wire from the transformer before voltage drop causes lights to dim. We’ll address planning for voltage drop in a later section. Just note that most transformers are rated for a certain wattage load (commonly 100W up to 300W) – meaning the total wattage of all your lights should not exceed the transformer's capacity. For example, a 150W transformer can power 30 lights of 5W each. If you need more lights, you can use a bigger transformer or multiple transformers.
In summary, low voltage landscape lighting uses a special landscape wire and a transformer to create a safe 12-volt system that any homeowner can install. Next, we’ll go over what you need to get started.
Tools and Materials Needed
One great thing about wiring your own landscape lights is that it doesn’t require advanced tools. Here’s a checklist of tools and materials you’ll want on hand before you begin your landscaping wire installation project:
-
Low Voltage Transformer: Choose one with adequate wattage for your lighting design (plus some extra capacity). It should be outdoor-rated and have a built-in timer or light sensor if desired.
-
Low Voltage Landscape Wire: This is the focus of our guide – the cable that connects everything. Typically use 2-conductor landscape lighting wire of an appropriate gauge (common sizes are 16/2, 14/2, 12/2, or 10/2 AWG). We’ll discuss selecting the right gauge in the next section. Make sure the wire is direct-burial rated and weather-resistant. High-quality wire like Haisstronica’s low voltage landscape wire is pure copper and UL-listed for safety.
-
Lighting Fixtures: All the light fixtures you plan to install (path lights, spotlights, etc.), including their stakes/mounts. Most low voltage lights come as kits with two lead wires ready to connect.
-
Wire Connectors: Use waterproof wire connectors to join wires. You have a few options:
-
Pierce-style connectors: Many landscape lights include clip-on connectors that pierce the main cable and make contact. These are convenient but sometimes less reliable long-term.
-
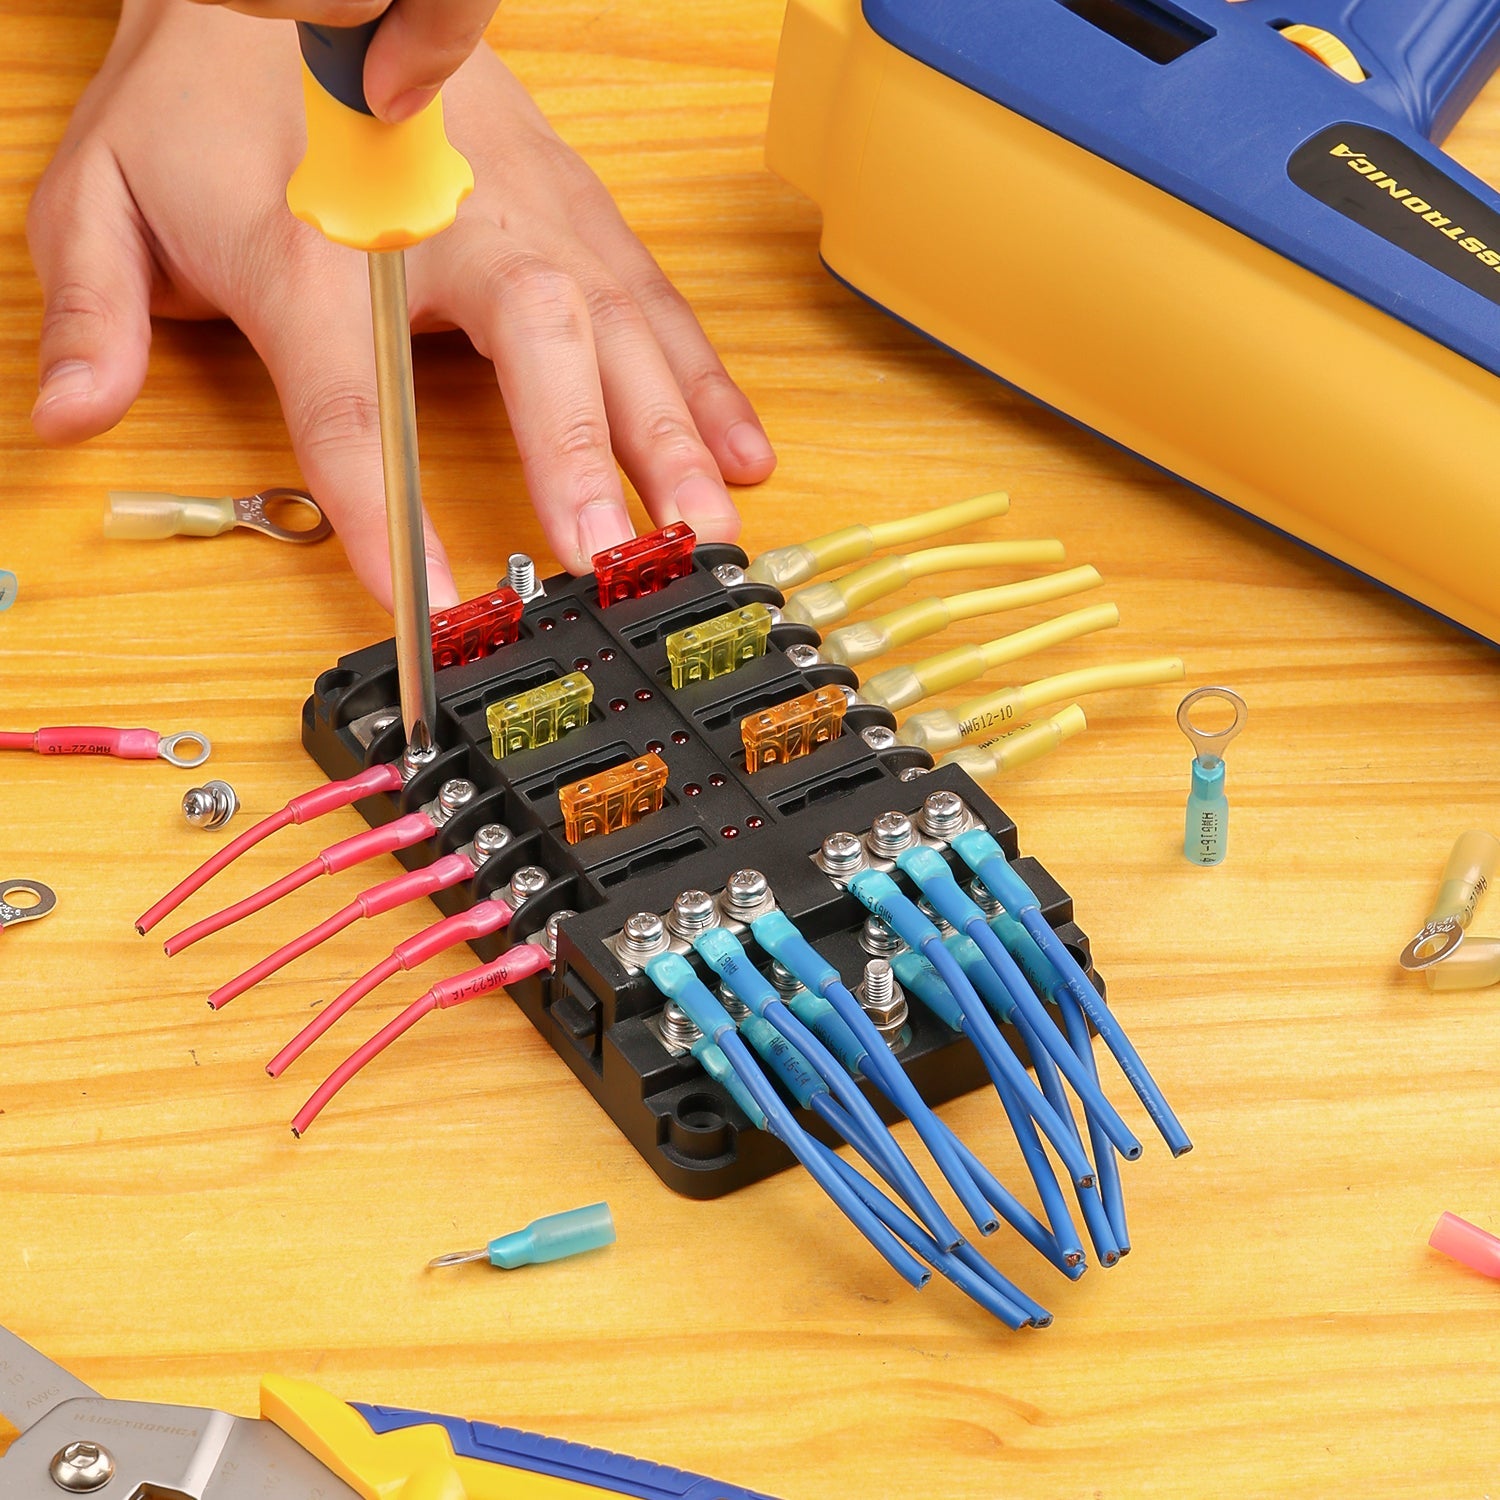
Twist-on wire nuts: For a more secure connection, you can manually splice wires and use wire nuts (preferably filled with silicone grease or gel for waterproofing). Ensure you use the correct size and type – for example, blue or gray gel-filled wire nuts designed for outdoors. Standard wire nuts come in different colors (yellow, orange, red, etc.) denoting the size and number of wires they can secure – a large red wire nut can connect up to four 12-gauge wires. A typical yellow wire nut might handle two or three wires in the 12–18 AWG range. Always check the connector’s rated capacity to avoid overloading it with too many wires.
-
Crimp connectors (butt splices) with heat shrink: These give a very durable, waterproof splice. You insert wires into a brass or copper butt connector and crimp them, then use heat-shrink tubing over the splice. Haisstronica actually specializes in heat-shrink connectors, so this is a great option if you want maximum reliability.
-
-
Wire Stripper/Cutter: An essential tool for cutting the cable to length and stripping insulation off the wire ends. A good pair of electrician’s wire strippers will cleanly strip the insulation without nicking the copper. (If you’re using heavier gauges like 10 AWG, a heavy-duty or ratcheting wire stripper might be needed due to the thickness. In some cases, a battery wire cutter or powered cutter can help cut thick cables, but for most DIY projects a handheld cutter is fine.)
-
Crimping Tool: If you opt for crimp connectors or ring terminals, have a proper wire crimper (sometimes spelled wire krimper by some) on hand. A ratcheting crimper ensures a tight crimp for electrical connectors.
-
Spade/Ring Terminals (Wire Eyelets): Optional, for attaching the main wires to transformer terminals. Some transformers have screw terminals where you insert the stripped wire and tighten it. Others may accommodate or even include ring lugs. Using ring or fork terminals (a type of wire eyelet that goes under a screw) can make a neat, secure connection to the transformer’s binding posts.
-
Electrical Tape: Used to wrap and secure connections after using proper connectors, or to bundle wires. Note: Do not use electrical tape instead of a wire nut or connector – tape alone is not a secure or reliable connection for wires. It doesn’t provide a solid mechanical hold or consistent waterproof seal. Only use tape as an added layer over a proper connector if needed.
-
Trench Tool: To bury the cable you’ll need a way to make a narrow trench. A flat lawn edger, a shovel, or even a flat-head screwdriver can be used to create a 4–6 inch deep slit in the soil for the wire.
-
Tape Measure: For measuring distances during your planning and layout.
-
Protective Gear: Gloves (to protect from sharp fixture edges or burried debris), safety glasses if digging in rocky soil, etc.
Having all these tools and materials ready will make the installation process smooth. Once you’ve gathered everything, it’s time to plan the layout of your landscape wiring and choose the right wire gauge for the job.

Planning Your Landscape Lighting Layout
Good planning is key to a successful landscape lighting installation. Take some time to sketch out your yard and decide where each light will go and how you will run the wires. Here are some planning tips:
-
Map the Lights: Place your lights (or at least markers for them) in the garden or yard where you want them. Consider typical spacing for path lights (often 6-10 feet apart, or per manufacturer’s recommendation) and what features you want to highlight with spotlights. This will give you a visual sense and also help determine wiring routes.
-
Plan Wire Runs: Decide how you will route the main supply cable (the landscape wire) from the transformer to all the lights. Low voltage systems typically use a daisy-chain or T-connector layout: a single cable runs out from the transformer and either goes fixture to fixture, or runs past all fixtures with short spur connections at each light. It’s often best to run the cable along the same path as the lights (e.g., beside a walkway or flowerbed) so that each fixture is easy to tap into the main line.
-
Avoid looping the cable in a closed ring (this can cause uneven voltage distribution). Instead, if you have a very large layout or lights in very different areas, you might plan separate cable runs from the transformer for each group of lights. This hub-and-spoke wiring from the transformer can reduce voltage drop by shortening the length of each run.
-
If you have a run with a lot of fixtures, plan to leave about 18 inches of slack cable at each fixture location. This slack will allow you to pull the cable up and make a connection, or reposition the light slightly, without straining the wires. Coil the slack and bury it at the base of each fixture.
-
-
Measure Distances: Use the tape measure or step off the distances to figure out how much wire you’ll need. Remember to account for going up and down any trees, posts, or for detours around patios, etc. It’s wise to add ~10% extra to your estimate for slack and unexpected turns. For example, if your furthest fixture is 50 feet from the transformer and you have to zigzag, you might actually use 60+ feet of cable to get there and make connections.
-
Voltage Drop Considerations: Low voltage means higher current for a given wattage, and voltage will drop as it travels down long wire runs (due to wire resistance). Too much voltage drop can make far-away lights appear dimmer. Planning can mitigate this:
-
Keep runs short if possible: If one run would be extremely long (over 100 feet) with many lights, consider splitting into two runs from the transformer (e.g., one cable going left with some lights, another going right with the rest). This effectively halves the length each cable carries power.
-
Use a thicker gauge wire for longer runs: Thicker wire (lower gauge number) has less resistance and so less voltage drop. For example, 12 AWG will have less voltage drop than 16 AWG over the same distance. We’ll choose gauge in the next section, but keep in mind where a heavier wire might be needed. If your layout requires, you can even use two different cables: perhaps 12 AWG for the long main run, and then 14 AWG on a shorter branch, etc., though this is rarely necessary for a typical home project.
-
-
Transformer Location: Plan to mount the transformer near an outdoor GFCI outlet, ideally somewhat central to where the lights will go (to minimize cable lengths). The transformer often comes with mounting holes or brackets; it should be at least a foot above ground (to avoid water splash) and in a location easy to access (you’ll need to reach it to change timer settings or adjust things). Many people mount it on an exterior wall near the outlet or on a post. Ensure the location is within the reach of the transformer's power cord to the outlet, or have an electrician install a new outlet if needed.
-
Safety and Codes: Even though it’s low voltage, plan your cable routing in a way that avoids future hazards. Don’t run the wire where it could easily be hit by edgers or shovels (tuck it at the edge of lawns, not through the middle). If you must cross under a lawn, go a bit deeper (6 inches or more) or run through a PVC conduit for protection. Technically, the National Electrical Code often does not require a minimum burial depth for <30V landscape lighting cable, but 6 inches deep is a good rule of thumb and is easy to do. Also, keep the wire separated from other services – e.g., don’t run it in the same trench as high-voltage lines or sprinkler pipes, to avoid confusion and damage.
Taking the time to plan these details will save you headaches during installation. With a clear plan, you’re ready to choose the proper wire for the job and then start installing.
Choosing the Right Landscape Wire (Gauge & Quality)
Not all landscape wires are the same. They come in different thicknesses (gauges) and qualities. Using the right gauge wire for landscape lighting is crucial to ensure your lights get enough power without undue voltage drop. Also, using a high quality wire will ensure your installation lasts for many years. Let’s break down what to look for:
Wire Gauge (AWG) Basics
Landscape lighting wire is typically labeled like 16/2, 14/2, 12/2, 10/2, etc. The first number is the AWG (American Wire Gauge) size of each conductor, and the “/2” means two conductors (a pair of wires molded together in one cable). Lower AWG numbers mean thicker wire. For example, 12 AWG is thicker than 14 AWG, which is thicker than 16 AWG. Thicker wire can carry more current with less resistance, which means it can handle more wattage and longer distances with minimal voltage drop. Thinner wire is cheaper and more flexible but can carry less current before voltage drop becomes an issue.
Here’s a quick guide for landscape lighting wire gauge selection:
-
16/2 wire (16 AWG) – Thinnest commonly used. Good for short runs (say under 50 feet) powering just a few low-wattage LED fixtures. If you only have a small garden with 2-4 LED path lights, 16 gauge low voltage wire might be sufficient. It’s also physically smaller, which can be easier to hide. However, for most installations, 16 gauge is on the lighter side.
-
14/2 wire (14 AWG) – A very common choice for medium-sized lighting systems. It strikes a balance between thickness and flexibility. 14 gauge landscape wire can typically support runs of ~100 feet with moderate load. Many DIY kits actually include 14 AWG cable by default. If you’re unsure, 14 AWG is a safe starting point for most LED landscape lighting setups with a dozen or fewer fixtures.
-
12/2 wire (12 AWG) – Thicker and able to handle more wattage or longer distances. If you plan a larger system (e.g., 200+ total watts of lights, or runs approaching 150-200 feet), opt for 12/2 low voltage landscape wire. It minimizes voltage drop for better brightness uniformity. It’s a bit more costly and slightly less flexible to work with than 14 AWG, but it’s very robust. Many professionals use 12 AWG by default to ensure longevity and capacity.
-
10/2 wire (10 AWG) – Very heavy gauge for special cases. This is usually overkill for typical home LED lighting but might be used for extremely long runs or when powering near the upper limit of a large transformer (e.g. a 300W system with long cable lengths). 10 gauge landscape wire is quite thick (almost like a battery cable) and not as easy to bend. Only use this if your voltage drop calculations show 12 AWG isn’t enough. Keep in mind, 10 AWG is expensive and may not fit some connectors as easily due to its girth.
Tip: It’s okay (and even common) to buy more length than you need. For instance, getting a 250 ft spool of 12-2 low voltage wire is fine even if you only need 200 ft – the extra can be saved for future use or used to add more lights later. Landscape wire is sold in rolls of various lengths (100 ft, 200 ft, 250 ft, 500 ft, etc.). If you have a large project, buying a larger spool is often more economical per foot. For example, Haisstronica offers 12/2 landscape wire 100ft, 200ft, 250ft, or 500ft spools so you can choose based on your needs.
One more consideration: What gauge is 1mm wire? If you’re more familiar with metric sizes, 1.0 mm diameter roughly corresponds to 18 AWG wire (which is 1.02 mm in diameter). So, 1.5 mm diameter is about 15 AWG, and 2 mm is about 12 AWG. In cross-sectional area, 2.5 mm² is roughly equal to 14 AWG. In practice, most all outdoor low voltage wire in the US is labeled in AWG.

Copper vs. Aluminum (and Why Quality Matters)
Always use copper landscape wire for your lighting. Copper has high conductivity, meaning less voltage drop and better performance. You may come across very cheap landscape wires that are “CCA” (Copper-Clad Aluminum) – avoid these for your project. CCA wires have a core of aluminum with a thin copper coating; they are not as conductive as pure copper and can be brittle. They also don’t handle moisture well (aluminum corrodes more easily). As one guide notes, you won’t find outdoor lighting cables that aren’t copper because copper is the best balance of cost and performance for this use. High-quality brands like Haisstronica use pure copper conductors (for example, Haisstronica’s 14 AWG wire has 41 strands of pure copper in each conductor for flexibility and conductivity).
Equally important is the insulation quality. The cable should be insulated for direct burial and outdoor conditions:
-
Look for a UV-resistant PVC jacket so that above-ground portions won’t degrade in sunlight.
-
It should be marketed as direct-burial landscape wire, meaning the insulation is thick enough and durable enough to be buried in soil without requiring conduit. Most landscape lighting wire is flat two-conductor cable with a tough rubbery insulation suitable for burying directly.
-
Temperature ratings matter less for low voltage, but a good wire will remain flexible in cold weather and not melt in high heat. For instance, Haisstronica’s wire is designed to withstand harsh weather – it’s moisture-resistant and rated for a wide temperature range, so it won’t stiffen or crack in winter cold or summer heat.
Finally, make sure the wire is UL listed or certified to relevant standards. This ensures it passed safety tests. Haisstronica’s landscape wires carry UL certification and even VW-1 fire resistance rating, meaning it self-extinguishes if it ever caught fire. While a fire in a 12V system is very unlikely due to the low voltage, using a certified product is just a good practice.
In summary: Choose the thickest gauge that is practical for your project and budget (when in doubt, err on slightly thicker to reduce voltage drop). Use insulated, direct-burial copper wire from a reputable brand. A premium landscape lighting wire might cost a bit more, but it ensures optimal brightness, safety, and longevity for your outdoor lights. Cutting corners on wire quality could lead to corrosion, breaks, or dim lights down the road.
Now that we have the right wire and an understanding of the plan, let’s proceed to the step-by-step installation of the low voltage landscape wiring.
Step-by-Step Installation Guide
In this section, we’ll go through the actual installation process for your low voltage landscape lighting, focusing on installing and connecting the landscape light wire. Follow these steps to ensure a smooth setup:
Step 1: Mount the Transformer and Prepare the Wiring
First, install your transformer in the chosen location. Most transformers can be mounted to a wall or post. Use appropriate screws or hardware as directed by the manufacturer. For example, on wood you might use wood screws into siding or a post, and on brick you’d use anchors or a mounting board. Mount it at least a foot above ground and under a shelter or overhang if possible (though it will be weather-resistant, keeping it out of direct rain can prolong its life). Keep it close to the power outlet; do not plug it in yet until all wiring is done.
Now, run the main landscape cable to the transformer. Most transformers have screw terminals labeled “Common” and “12V” (or multiple voltage taps like 12V, 13V, 14V for large systems – you can use the 12V tap for simplicity in a small install). Take one end of your low voltage wire spool, measure enough length to reach the transformer, and strip about 3/4 inch of insulation off the two conductors. If the cable is flat with two joined conductors, you may need to gently separate the two wires at the end for a couple of inches so you can work with them individually.
Attach the wires to the transformer’s terminals: one conductor to the common terminal, the other to the 12V terminal (on an AC system it actually doesn’t matter which wire goes to which terminal, since it’s AC output – there is no polarity; but consistently use the marked or ribbed side to common if a marking is present). Tighten the terminal screws firmly on the bare copper ends. If the transformer has clamp-style terminals, unscrew enough to insert the wire and then tighten the clamp. Ensure there are no stray copper strands sticking out that could short to the other terminal.
Pro Tip: If your transformer has very small screw terminals or if you want a really secure connection, you can crimp on fork or ring connectors (wire eyelets) to the ends of your cable. This way, you put the ring under the terminal screw and tighten it down. It’s not required, but it can improve the connection. Use insulated ring terminals sized for your wire gauge (for example, yellow ring terminals for 10-12 AWG, or blue for 14-16 AWG) and a crimping tool to attach them to the stripped wire ends.
Leave the transformer unplugged for now. You will only power it up after all lights are connected. At this point, you can turn the transformer's switch (if any) to OFF or unplug it to be certain it doesn’t accidentally energize while you’re working. Safety first.
With the transformer mounted and your main cable attached to it, you can start laying out the cable along your planned route through the yard.
Step 2: Lay Out the Cable and Position Your Lights
Start running the landscape wire from the transformer to the first light location. Lay the cable on the ground following the path you planned (along garden beds, edges of walkways, etc.). Do not bury it yet – leave it on the surface so you can easily make connections and adjustments.
Place your light fixtures near their intended spots. If they require assembly (many pathway lights come in pieces), assemble them according to instructions. Usually, it’s just connecting the top lamp to its post and the stake. If the fixtures came with quick connectors attached to their wires, open those connectors up in preparation (they often hinge open).
As you lay the cable, leave some slack at each fixture point – about 1.5 to 2 feet of extra cable looped near each light is recommended. This slack will let you pull the wire up for working on the connection and provides a buffer if you need to move the light a short distance later.
If you have branching runs (for example, a T-junction where one cable spurs off the main line to go to another fixture or group), simply run the cable to that branching point and cut it. You will later connect all three cable ends (incoming power, outgoing power, and branch) together at that junction using connectors. For now, just figure out where those junctions will be and lay the cables accordingly.
Once the cable is roughly laid out to all lights, double-check everything:
-
All fixtures are in their desired positions.
-
Cable reaches each fixture (with slack).
-
You have not accidentally missed a section or left a light without a feed.
-
Ensure cable isn’t crossing over lawns or open areas where it might be tripping hazard – keep it to edges where it will be buried or hidden.
With the layout confirmed, you can start making the electrical connections at each light.
Step 3: Connect the Light Fixtures to the Cable
This step is where you actually tap the fixtures into the main landscape lighting wire so they light up. There are a couple of ways to do this, as mentioned in the tools section, so choose either the quick connectors or the splice method:
Using Quick Connect Clips (if provided):
Many DIY landscape light kits include pierce-style quick connectors on each fixture’s wires. These typically look like a plastic clamshell. Inside are metal prongs. You place the main cable inside the connector, and when you clamp it shut, the prongs pierce through the insulation of the main cable and contact the copper, simultaneously grabbing the fixture’s wire. Here’s how to use them:
-
Open the connector and position the main cable neatly in the channel provided (there will be two parallel slots for the cable to sit in).
-
Make sure the cable is fully seated. The fixture’s wire ends will be in the connector already (factory-installed).
-
Press the connector halves together. In some designs you might need to squeeze with pliers to drive the metal contacts into the wire; in others, there’s a screw or latch. Follow the product’s instructions. You’ll typically feel or hear a snap when it’s fully closed.
-
Important: After a quick connector is in place, it’s wise to wrap it with a bit of electrical tape as extra insurance. While the connector should be water resistant, tape helps keep it closed and somewhat sealed from dirt. Some connectors also have a little grease inside for waterproofing – check yours; if not, you can also apply a dab of silicone grease where the prongs met the wire.
-
That’s it – quick connectors are done without cutting the main cable.
Quick connectors are very easy, but note that over years, those pierced contact points can sometimes corrode or loosen, especially in harsh environments. If you experience a light not working in the future, the first thing to check is those connections. For better longevity (or if a connector fails), you can resort to the splice method below.
Using Wire Nut or Crimp Splice (permanent method):
For the utmost reliability, many professionals prefer to make a solid splice for each fixture:
-
Using a wire cutter, cut the main cable at the point where the fixture’s leads reach it. Now you’ll have two ends of the main cable (coming from the transformer side and going outwards side).
-
Strip about 1 inch of insulation off each of the two main cable ends. Also strip the ends of the fixture’s two leads (~1/2 to 3/4 inch is enough for fixture leads).
-
You will be joining these wires color-to-color (well, they’re likely all black in low voltage cable, so more accurately: one side of the main to one fixture lead, and the other side of main to the other fixture lead). It doesn’t matter which main wire goes to which fixture wire in an AC system – just ensure one fixture wire connects back into the main “A” wire and the other fixture wire connects to main “B” wire.
-
Twist and secure: There are two common ways:
-
Twist-on Wire Connectors: Take one main wire end and the fixture wire, hold their stripped ends together evenly, and twist on a waterproof wire nut connector clockwise until tight. Give each wire a gentle tug to ensure it’s snug in the connector. Then repeat for the other main wire and the other fixture lead. You’ll now have two wire nut connections – effectively a “T” where the main line was cut to insert the fixture. For outdoor connections, ideally use gel-filled wire nuts (usually blue/orange), or you can squirt some silicone caulk or grease into a standard wire nut before twisting to seal it. Do not just tape over a bare twist – always use an actual connector.
-
Crimped Butt Connectors: This method uses metal crimp connectors and heat shrink for a very durable splice. You’ll need special brass butt splices sized for your wire gauge (and a screwdriver for set-screw types, or a crimper for crimp types). One approach from Home Depot’s guide uses brass connectors with set screws: Slide a brass connector onto one main wire end and tighten its screw, then insert the fixture lead into the same connector and tighten the other screw – connecting the two wires inside the brass tube. Repeat for the other side. Then slide heat-shrink tubing over each connection, and heat it with a small torch or heat gun to seal. If using crimp-style butt connectors, you insert the wires into each end of a cylindrical connector and crimp them in place, then heat-shrink. This yields a waterproof join that is very robust.
-
-
Managing multiple wires: If you’re connecting more than one fixture at the same point or making a branch, you might have 3 or 4 wires to join. For example, at a T-junction with a fixture: you’d have the incoming main wire, outgoing main wire, and the fixture lead – 3 wires to connect at one point. In that case, you need a connector that can handle 3 conductors. A large red wire nut can often accommodate three 12 or 14 AWG wires. Always check the connector’s specifications. For crimping, you might need a larger butt splice that can take 3 wires on one side. If it’s too cumbersome, an alternative strategy is to add a short pigtail wire: connect the two main wires and a short 6-inch piece together with one connector, then connect that pigtail to the fixture lead with another connector. This effectively splices all three.
-
Once your connections are made, seal them up (if not already sealed). For wire nuts, after twisting, you can wrap the connection generously in electrical tape to help keep moisture out (though opinions differ on taping over wire nuts; it’s often considered unnecessary if you have a proper waterproof nut, but a little tape around the base won’t hurt as extra protection). For heat-shrink, ensure it’s fully shrunk and you see sealant ooze out if it’s the adhesive-lined type.
After each fixture is connected, you can gently tug the main cable to ensure the connectors are not loose and that the fixture is secure. Place the connected portion back down. You might want to not bury it yet until you test the system (next step), in case you need to redo a connection.
Repeat this connection process for every fixture in your layout.
Step 4: Test the System and Troubleshoot (if needed)
At this point, all the lights should be wired into the main cable which is attached to the transformer. Before burying the cable, it’s smart to test everything to make sure all connections are solid and all lights work properly:
-
Go ahead and plug in your transformer to the GFCI outlet. If it has a power switch, turn it on. Some transformers might have an integral breaker or fuse; ensure that is not tripped/blown.
-
Your lights should turn on (assuming it’s not mid-day and a photosensor is keeping them off – if your transformer has a photo-cell, you may need to cover it or switch to manual on for this test). Check each and every light to confirm it’s illuminated.
-
If you have a multi-tap transformer (with 12V/13V/14V outputs) and one distant run looks dim, you might move that run’s leads to a higher voltage tap (like 13V) to compensate for voltage drop. This is an advanced adjustment; for a beginner, usually not necessary if you planned gauge appropriately. But it’s something to note if you ever expand the system.
-
Troubleshooting tips if a light is not working:
-
First, check the bulb (or LED) in that fixture. It could be a simple bad bulb. LED fixtures are usually sealed, but if it’s a replaceable bulb, try swapping it with a known good one.
-
Check the connector at that fixture. If it’s a pierce connector, perhaps it didn’t pierce correctly. Try re-clamping it or making sure the metal prongs hit the cable. You might even remove it and use a splice connector instead.
-
If an entire zone of lights is out (like everything past a certain point), the break is likely at the last working light or the first non-working one. Inspect the connection there.
-
Use a voltmeter (if available) to measure voltage on the main cable at the transformer and then at the far end. Under load, you ideally want at least ~11 volts at the far end. If you see something like 9-10V, you have significant voltage drop: consider splitting the run or using heavier wire in the future. But if lights are sufficiently bright, you’re okay.
-
Ensure the transformer’s wattage capacity isn’t exceeded. If you accidentally hooked up too many total watts, the transformer might have shut off (some have overload protection). If lights are very dim or the transformer hums loudly, too many watts could be a cause. In such case, remove some fixtures or get a bigger transformer.
-
If everything looks good, congratulations – your system is functional! Unplug the transformer again before the final burying step (for safety while you finish up).
Step 5: Bury the Cables and Final Cleanup
Now that you know the lights are working, it’s time to hide those cables and make the installation permanent. Low voltage landscape wire is meant for direct burial, so you typically don’t need conduit (unless required in rare cases or you want extra protection crossing under a lawn).
-
Dig shallow trenches along the cable routes. Using a flat spade or a trenching shovel, cut a slot in the soil about 4 to 6 inches deep. In grass, you can push an old lawn edger to create a slit. In mulched beds, just push the mulch aside and open a trench in the dirt. The trench only needs to be an inch or two wide – just enough to lay the cable in.
-
If the cable runs through lawn, you can often just slice the sod with a flat shovel, push the cable into the slit, and step the grass back down. A 6-inch depth is recommended to avoid casual disturbance of the wire. At this depth, routine aerating or shallow digging won’t hit it, yet it’s still shallow enough to do easily.
-
Gently place the cable into the bottom of the trench. Avoid sharp bends or kinks. It’s fine if there is extra slack zigzagging a bit in the trench – slack is good for future adjustments.
-
Do not bury connectors in the soil directly if you can help it. Try to have the wire nuts or quick connectors lie just above ground or slightly above grade covered by mulch or a rock. This makes them easier to access and keeps them out of constant moisture. If a connector must be underground, consider placing it inside a waterproof junction box or at least wrapping heavily with self-fusing silicone tape for protection.
-
Push the soil back into the trench and tamp it down. In grass, press the sod back. In beds, replace the mulch over the wire’s path.
-
Around each fixture, it’s okay to leave a small coil of slack cable buried. This extra wire can be pulled up if you need to reposition the fixture later.
-
Make sure the cable at the transformer is neatly secured too. You don’t want excess cable just lying unburied right next to the house – not only is it unsightly, but it could become a tripping hazard or get cut by a string trimmer. If needed, run it through conduit for just that last foot or two to the transformer, or use cable staples to tack it to a wall or post. Only staple above ground portions, and be gentle – do not pierce the cable. Use plastic insulated staples that fit the cable size.
After burying the cable, re-plug your transformer and test one more time to ensure no connections were disturbed during burial. All lights should come on as before.
Step 6: Set the Timer/Photocell and Enjoy
Most low voltage transformers include a timer or photocell to automate your lights. The final step is to program this so your lights come on at dusk and turn off at a desired time (or at dawn). Refer to your transformer’s instructions, but generally:
-
If it has a simple mechanical timer, set the current time and set the on/off trippers to the times you want.
-
If there’s a photocell (light sensor), you might have settings like Dusk-to-Dawn (on at sunset, off at sunrise) or Dusk + X hours. Choose what suits your needs.
-
Some newer transformers have digital timers or even smart controls via Wi-Fi – set those up per manual.
Once that’s done, neatly close the transformer cover and secure any weather covers on the outlet as well.
Now step back and admire your work! As evening falls, your landscape lights should automatically illuminate, transforming your yard. Walk around and check the illumination levels, adjust fixture angles if needed (e.g., spotlight aiming). If any light is glaring or too bright, you can use shrouds or move it further as needed.
You’ve successfully installed your low voltage landscape lighting with your own hands, saving money and gaining the satisfaction of a DIY job well done.
Before wrapping up, let’s cover a few maintenance tips and ensure your installation remains safe over the long term.

Maintenance and Safety Tips for Landscape Wiring
One advantage of low voltage landscape lighting is that it requires minimal maintenance. However, to keep everything running optimally, keep these tips in mind:
-
Check Connections Periodically: At least once a year (perhaps at the start of summer), inspect a few connectors to ensure they are still tight and corrosion-free. Give each fixture lead a gentle tug to make sure it’s still securely connected. If you used quick connectors and notice any lights flickering or out, it may be time to re-do that connection with a fresh connector or upgrade to a more robust splice.
-
Protect Connections from Water: Water is the enemy of electrical connections. Even though it’s low voltage, poor connections can corrode and lead to failure. All your splices should be waterproof – either grease-filled connectors or well-sealed heat shrinks. If you ever add a light or redo a connection, do not just wrap bare wires with electrical tape – always use a proper connector first. Tape can deteriorate over time, especially underground. It’s fine as an extra layer but not as the primary connection.
-
Avoid Overloading: If you add more lights in the future, calculate your new total wattage and ensure the transformer can handle it. If not, upgrade the transformer or use an additional one. Also ensure your primary cable gauge can handle the extra current – though with LED fixtures this is usually a minor concern since each light uses maybe 4-8W. As a rough guide, 12 AWG cable can handle about 20 amps (which at 12V is 240W) without significant heating. In fact, 12 AWG copper has a safe carrying capacity of 20A per NEC (and can handle more in open air). Your system is unlikely to approach this, but it’s good to know the limits. (For perspective, a huge 2 AWG copper wire has an ampacity of about 115 A at 75°C rating! That’s far beyond any landscape lighting needs.)
-
Monitor for “warm wires”: The cable should not get noticeably warm in use. If you ever touch the cable when lights have been on and feel warmth, that indicates too much current for that gauge (or a poor connection causing heat). “Warming wire” is a sign of overload or a bad splice. Solve this by reducing load or using a thicker cable in that section. All connections should also be cool; a hot connector is a bad connector.
-
Wire Nut Color & Capacity: If you use twist connectors to add or change lights, remember that the color matters for capacity. As noted, yellow wire nuts commonly suit up to 2 or 3 #14 or #12 wires, while red can do 3-4 such wires. Trying to jam too many wires into a small connector can lead to a loose connection or one wire slipping out. It’s a common error when expanding a system. When in doubt, use a larger connector or split the splice with a pigtailed approach.
-
Rodents and Garden Pests: Occasionally, animals might chew on cables (rabbits, mice) especially if the cable has a soy-based insulation (some newer plastics attract critters). If this is a known problem in your area, consider running the cable through a plastic conduit in exposed areas, or use rodent-resistant wire. Check any portions of cable that surface (like near the transformer or fixtures) for chew marks. A damaged insulation can be repaired with weatherproof heat-shrink wraps or by splicing in a new section of wire if needed.
-
Waterproofing Electrical Wires in Lawn: If you ever need to repair a section of cable (for example, an accidental cut with a shovel), be sure to use waterproof splices rated for direct burial. There are handy gel-filled splice kits for irrigation and lighting cables. Never leave an open tape-wrapped splice underground – water will seep in. Use heat shrink butt connectors with adhesive lining, or an epoxy splice kit, to ensure longevity of any repair.
-
Replacing or Adding Lights: You can add more lights by splicing into the existing cable anywhere along the line (as long as the transformer can support it). Follow the same methods – maintaining waterproof connections. If removing a light, you must reconnect the two cut ends of the main cable. Don’t just leave a dead spur. So either join the two cable ends with a butt splice or wire nut to maintain the circuit, or if that section isn’t needed, remove it entirely and join the gap with a new piece of cable.
-
Protecting the Transformer: Make sure the transformer’s outlet has a weatherproof cover (an in-use cover that closes over the plug). Additionally, you might want to put a small bead of silicone where the wires exit the transformer (if it doesn’t have a grommet) to keep bugs and moisture out. During winter, transformers are fine outdoors, but if you get severe weather and aren’t using the lights, you could unplug it or cover it with a ventilated box. Generally, they are built for year-round exposure.
-
Upgrading Lamps: If your system uses halogen bulbs and you later swap to LED retrofits, your wattage load will drop dramatically (which is good). However, sometimes LED lamps are more sensitive to voltage drop (they might shut off below a threshold). If you notice any issues when mixing LEDs, try to keep similar types of bulbs on the same run or check if your transformer is electronic vs magnetic (some electronic low-voltage transformers need a minimum load). With an all-LED setup, you likely have plenty of headroom to add more fixtures if desired.
-
Label or Map Your Wire Runs: It’s helpful to sketch or note where you routed the cables, especially if you have multiple runs. Alternatively, leave a small tag or colored tape at the terminus ends. This way, if you or someone else is digging in the garden later, you know roughly where cables lie. Remember, even though it’s safe to accidentally cut a low volt wire (no shock hazard), you’ll have to repair it, which is extra work.
By following these tips, your landscape lighting wire installation will remain robust and safe for many years. The key is using the right materials (copper wire, good connectors) and taking care during installation. Once everything is in place, maintenance is usually just replacing an occasional burnt-out bulb or adjusting a fixture – the wiring itself should last decades.
Video Tutorials and Additional Resources
For those who learn visually, here are a couple of excellent YouTube resources that demonstrate low voltage landscape lighting installation. Watching these can reinforce the steps and give you confidence before you start your project:
-
“How to Install Outdoor Landscape Lighting” – Ask This Old House (YouTube) – This is a segment from Ask This Old House where a professional electrician walks through installing a path light system, covering transformer setup, wiring, and tips. It’s a great overview for beginners. How to Install Outdoor Landscape Lighting (Ask This Old House)
-
“Easy How to Install Low Voltage Landscape Lighting (for Beginners)” – The Lighting Doctor (YouTube) – A DIY expert known as the Lighting Doctor explains the process in simple terms, showing how to wire landscape lights in a garden and offering helpful pointers on connecting wires and avoiding voltage drop. How to Wire Low Voltage Landscape Lighting – Easy DIY Guide
These videos complement the instructions above and can be very reassuring to watch, especially if you’re new to working with electrical components. Sometimes seeing someone actually crimp a connector or bury a cable helps make the process clear.
Conclusion
Installing low voltage landscape wire and lighting is a rewarding DIY project that can beautify your home’s exterior while adding safety and usability to your outdoor spaces. With a solid plan, the right materials, and the step-by-step approach outlined in this guide, even a beginner can achieve professional-looking results. Remember the key points: use the proper gauge landscape wiring for your needs, make waterproof connections, and take your time to do it right.