A well-maintained ratcheting wire crimper with interchangeable dies can provide years of reliable service. Proper care ensures every crimp – whether on ring terminals, spade connectors, or butt splice connectors – is solid and safe. Maintaining your crimping tool isn’t just about keeping it looking new; it’s about preserving its precision and effectiveness. Even the best crimpers for wire connections can wear down or lose accuracy over time without routine care. Think of your wire crimping tool as an investment – a little upkeep goes a long way toward preventing poor electrical connections or premature tool failure. In fact, industry professionals note that regular maintenance “ensures reliable electrical connections, prevents equipment failure, and maintains compliance with standards”. In this guide, we’ll cover seven essential tips to extend the lifespan of your crimp tool. These include daily cleaning, strategic lubrication, inspecting and replacing the crimping dies, calibration of ratcheting mechanisms, safe storage practices, proper usage, and choosing quality tools. Follow these maintenance tips and your ratchet wire crimpers will continue to perform like new, crimp after crimp.
Tip 1 — Clean Your Crimping Tool After Every Session
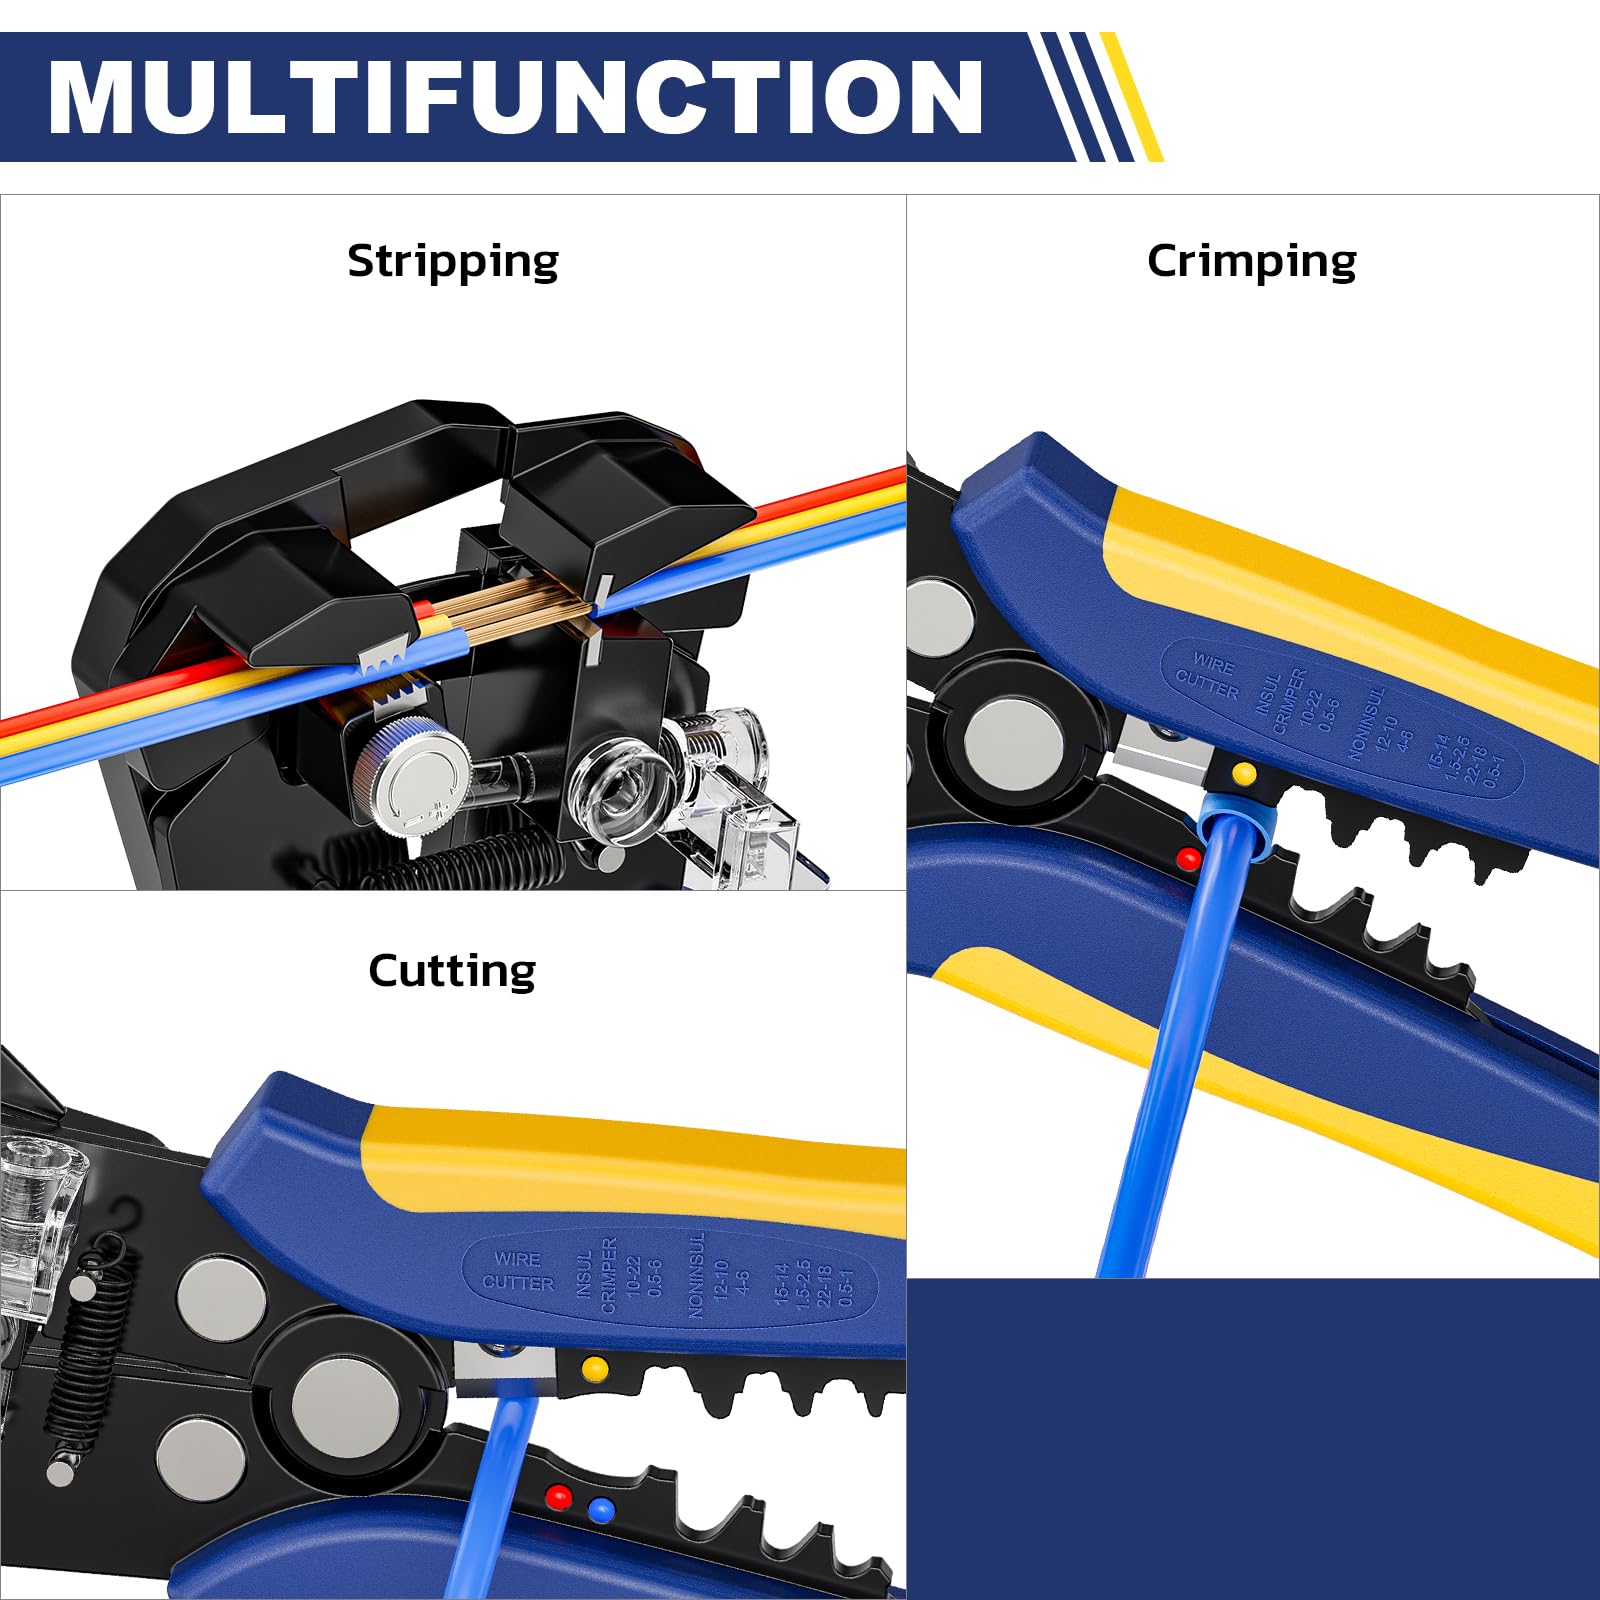
Keeping your wire crimpers clean is the first and perhaps most important step in maintenance. After each crimping session, take a few minutes to wipe down the tool. Use a clean, dry cloth to remove any dust, dirt, or metal shavings from the tool’s surfaces and the crimping dies. Pay special attention to the jaw areas where tiny bits of wire or connector coatings can accumulate. Removing this debris prevents excessive wear and ensures smooth operation of the jaws. Industry experts emphasize that cleaning is probably the simplest yet most crucial aspect of crimp tool care – even a quick wipe with a soft cloth after use makes a big difference. Also, avoid using compressed air to blow out the tool; while it might seem convenient, compressed air can force debris deeper into the mechanism or into crevices. Instead, use a soft brush (an old toothbrush or a small paintbrush works great) to gently sweep out any stubborn particles from the crimp slots and hinge areas. By keeping your crimper clean after every project, you prevent grit from causing abrasion or misalignment over time. This simple habit significantly extends the life of your electrical crimping tool, ensuring it’s ready to make perfect crimped wire connections whenever you need it. (A clean tool not only lasts longer but also produces more reliable crimps for your electrical connectors. Haisstronica’s crimp tools are built tough – add in a quick cleaning routine and you’ll enjoy years of flawless performance from your investment!)**

Tip 2 — Lubricate Pivots & Ratchet (Not the Dies)
Lubrication is vital to keep any mechanical tool running smoothly, and your wire crimping tools are no exception. Over time, repeated crimping can cause the pivot joints and ratchet mechanism of a ratcheting crimp tool to dry out or even rust, leading to stiff operation. To prevent this, apply a light machine oil (such as a 3-in-1 oil or other lightweight lubricant) to the moving parts periodically. Focus on the tool’s hinge pivot, any rotating pins, and the ratchet teeth mechanism. A drop or two of oil is plenty – after applying, open and close the handles a few times to work the oil in and ensure smooth action. Regular lubrication (for example, a quick oiling every few weeks or roughly every few hundred crimps) will reduce friction and wear on your crimping pliers.
However, never put oil or grease on the crimping dies themselves! It’s tempting to think lubricating the die faces might make crimping easier, but experts warn against this. Oiling the crimping surfaces can transfer grease onto your connectors and wires, contaminating the connection. Lubricant on the dies could lead to poor electrical contact or even potential safety hazards (imagine oil causing a bad connection or an arc in an electrical system). Therefore, keep lubricant away from the jaw indentations where it actually crimps terminals – those should remain clean and dry. Just oil the joints and any ratchet release mechanism if your tool has one. After lubricating, always wipe off any excess oil to avoid attracting dirt. (Follow the manufacturer’s guidelines on lubrication frequency and use only a small amount of oil each time. By keeping the pivots of your ratchet crimper tool properly oiled – and the dies oil-free – you’ll ensure your tool operates with buttery-smooth action. Haisstronica’s ratcheting crimpers feature precision pivots, and a tiny drop of oil now and then will keep them performing like the day you bought them!)**
Tip 3 — Inspect & Replace Worn Dies
The crimping dies (the interchangeable jaw inserts or the built-in crimping profiles on your tool) are the heart of any wire crimp tool. They form the crimp that secures your wire to the connector, so their condition is critical. Make it a habit to inspect the dies regularly. Look for signs of wear such as flattening of the crimp profile, chips, cracks, or burrs in the metal. Even slight wear or damage can result in poorly formed crimps – you might start seeing loose wires or connectors that aren’t fully secured if the die isn’t in top shape. Many professionals recommend a quick visual die inspection every day you use the tool. If you notice metal shavings or debris in the die, clean it out gently (a soft brush or wooden toothpick can help dislodge bits without scratching the die).
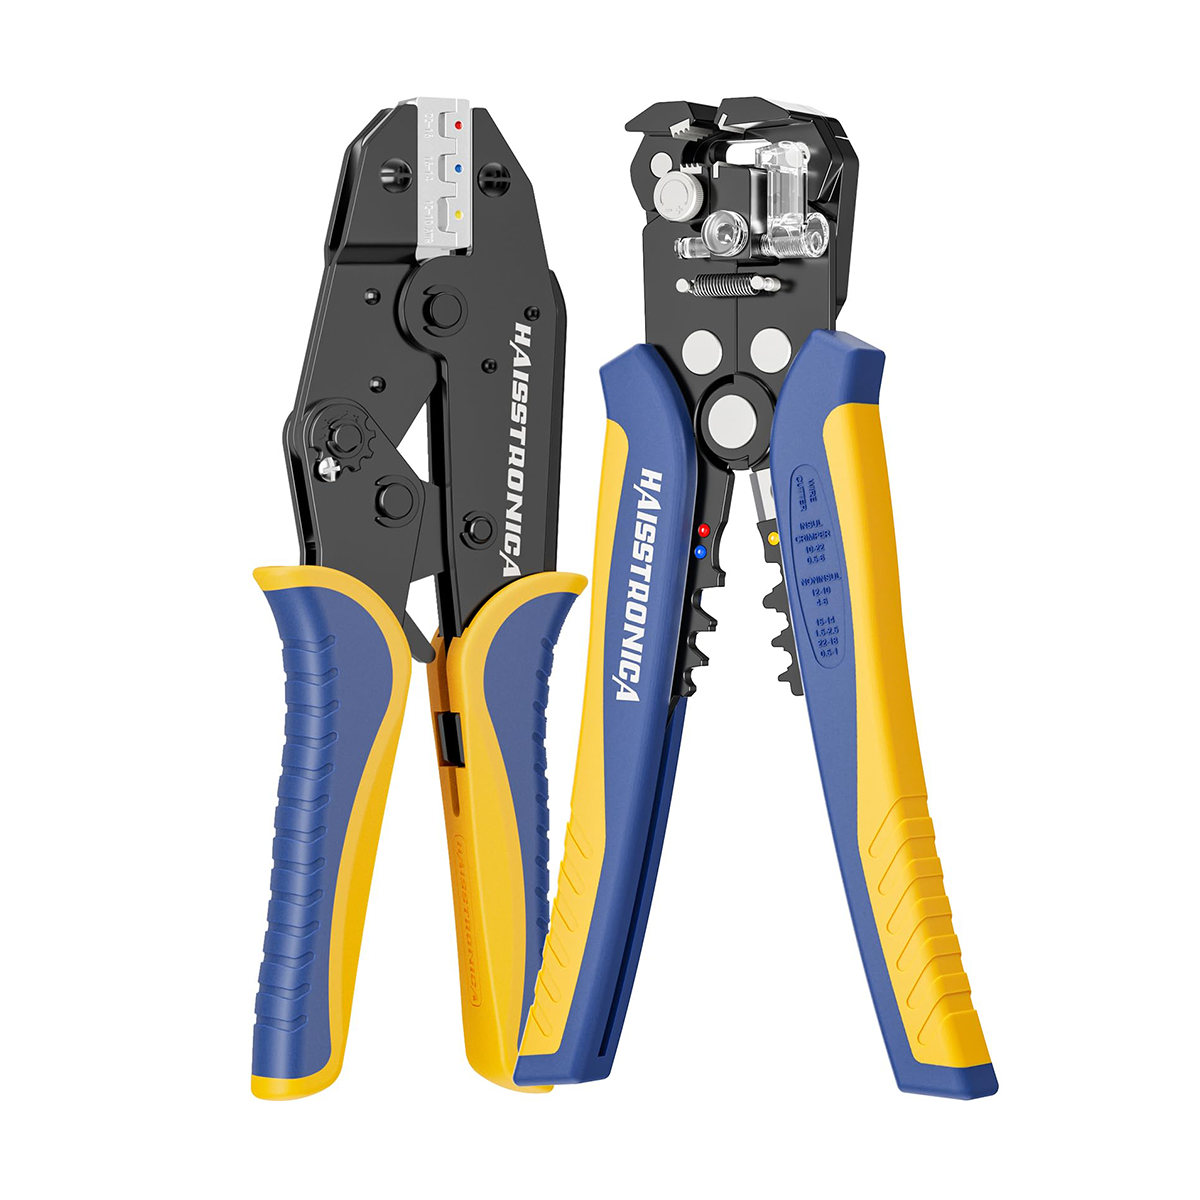
If your tool has interchangeable die sets, that’s a great feature – it means you can replace just the dies when they wear out instead of replacing the whole tool. But even if the dies are fixed, you should plan to replace the tool or send it for service when dies become worn beyond spec. According to industry guidelines, dies should be replaced when you notice burrs, deformation, or crimp dimensions drifting out of tolerance – especially if calibration can’t correct the issue. Using a worn-out die can lead to inconsistent or insecure crimp connections, which is a risk you don’t want to take for electrical safety. Replacing a die (or the crimp tool, if the dies aren’t replaceable) is a small price for maintaining reliable performance. (Keep spare die sets on hand for your most-used connector sizes. Haisstronica’s crimping tools for electrical connectors come with precision-engineered dies, and we offer replacement die sets for many models. This way, when you eventually wear out the crimp connectors dies from heavy use, you can simply swap in new ones and keep on crimping with confidence!)**

Tip 4 — Calibrate Crimp Height & Release Point
Ratcheting crimpers are designed to apply consistent pressure and only release when a crimp is fully compressed – this ensures uniform results. Over time and extensive use, however, the calibration of the ratchet mechanism can drift. Calibration refers to adjusting the tool so that the crimping force and the closed jaw height meet the original specifications. Essentially, you want to make sure your tool is still crimping connectors to the proper tightness and that the ratchet release point is correctly set. If the tool starts releasing too early (before achieving full compression) or requires excessive force, it may be out of calibration.
For general hand crimpers, it’s a good practice to verify and calibrate the tool periodically – many experts suggest doing a calibration check annually, or after a certain number of crimps (for example, after 5,000–10,000 crimps). Calibration can involve using a go/no-go gauge or test crimps measured with calipers to ensure the crimp diameter is within spec. Some high-end or professional crimping tools have an adjustment wheel or screw that lets you tweak the tightness of the crimp (crimp height) or the ratchet tension. Refer to your tool’s manual for the calibration procedure; typically you’d adjust the screw a notch tighter or looser and test crimp until it’s just right. Also, check the ratchet release mechanism – most ratcheting wire crimper tools have an emergency release lever, but calibration ensures the normal release happens only at full crimp. According to one maintenance guide, calibrated tools consistently produce code-compliant connections that pass inspections, whereas a mis-calibrated tool might create crimps that fail pull tests or electrical standards.
If you’re unsure how to calibrate or you use your crimpers in critical installations (aerospace, automotive, etc.), you might send the tool to the manufacturer or a calibration service periodically. They can verify the crimp force with specialized equipment and adjust as needed, providing a calibration certificate. For the average electrician or DIY user, simply monitoring crimp quality and adjusting the tool when crimps start to feel “off” can suffice. Remember: calibration is about quality assurance. (Calibration needs may vary; a tool used daily by an electrician will need checking sooner than one used occasionally. Haisstronica’s ratcheting crimp tools are factory-calibrated for precise crimping of wire connector crimps, and they include an adjustable tension screw. By calibrating when necessary, you’ll guarantee every crimp is tight and every connection using our heat shrink crimp terminals or other connectors is secure. Don’t skip this step if you want professional-grade results every time!)**
Tip 5 — Store Your Crimp Tool Properly (Dry & Secure)
How you store your crimping tool when it’s not in use can greatly impact its lifespan. Proper storage is a maintenance step that people often overlook. Moisture and exposure to the elements are enemies of metal tools – they can cause corrosion, rust, and deterioration of lubrication. Always store your wire crimping tool in a dry, clean environment. If your tool came with a case or pouch, use it! A sturdy case not only keeps moisture out but also protects the tool from dust and accidental impacts. Many ratchet crimpers have a locking latch that keeps the handles closed; engage this lock when storing the tool. Storing the tool in the closed position takes stress off the spring and saves space, and it also protects the dies from dings or bending while not in use.
In addition to a dry location, keep the tool away from extreme temperatures if possible. Rapid temperature changes can cause condensation (leading to rust). Also, avoid tossing your crimping tools unprotected into a drawer with other heavy tools that might bang into them. The goal is to prevent any physical damage and keep environmental factors at bay. If you live or work in a humid area, consider adding a small packet of silica gel (desiccant) in the tool case to absorb moisture. A light coat of oil on the metal surfaces (not the dies) before long-term storage can also ward off rust. As one guide notes, proper storage (cool, dry area, ideally in a toolbox or bag) helps minimize rust or corrosion on the tool. In short, treat your crimper with a bit of care when you’re not using it – it’s a precision instrument, not just another wrench. (Organize your electrical tools so that your crimper isn’t at risk of being dropped or crushed. Haisstronica’s tools come with durable cases for a reason – we want your electrical crimping tool to stay in perfect condition. Store your crimper safely, and it will be ready to deliver perfect crimps on wire connectors whenever you need it, whether you’re on a job site or tinkering in the garage.)**

Tip 6 — Avoid Overloading & Misuse of the Tool
Using your crimping tool correctly is as important for its longevity as any cleaning or oiling. Every tool is designed with certain specifications – maximum wire gauge, compatible connector types, and so on. Pushing your wire connector crimper beyond those limits can damage it. Avoid overloading the crimper by trying to crimp connectors that are too large or hard for its design. For example, don’t try to force a heavy-duty 4/0 gauge cable lug into a small ratchet crimper meant for 22–10 AWG terminals; you could deform the dies or the frame. Similarly, do not use your crimping tool on hardened objects like steel bolts (it might sound obvious, but in the heat of a project some people use whatever tool is in hand!). The crimper is for crimping only the specified terminals and connectors – no makeshift uses as a hammer, clamp, or pliers. In fact, one expert maintenance tip explicitly says to avoid using the tool as a hammer or pry bar to prevent loosening the pivot pins or other damage. Using the tool only for its intended purpose will significantly prolong its life.
Additionally, follow the manufacturer’s recommendations on what connectors and wire sizes to use with your tool. If your terminal crimper is rated for insulated terminals in a certain AWG range, stick to that. For instance, Haisstronica offers different wire crimpers tools for different connector types (insulated terminals, ferrules, coax connectors, etc.). Using the correct tool for each job means you won’t overstress or wear out one universal tool doing tasks it wasn’t meant for. It’s also wise to crimp properly – insert the wire and connector correctly aligned in the die before squeezing. Misalignment can put uneven stress on the dies. As a best practice, only use the tool to crimp the recommended terminals (of the proper size/material) and avoid exceeding its capacity, as this prevents premature wear and tear. In short, treat your crimp tool with respect: no brute force, no corner-cutting using it incorrectly. (Good technique and proper use are part of maintenance! By using your tool correctly every time, you’ll get perfect crimps and also avoid damaging the tool. Haisstronica’s electrical crimp connectors and matching crimp tools are designed to work together – use the right combination and you’ll make robust connections without straining your tool. Remember, a well-used (not abused) tool is a long-lasting tool!)**
Tip 7 — Invest in Quality Tools with Replaceable Parts
One often overlooked factor in tool longevity is the tool’s initial quality. Not all crimping tools are created equal. High-quality professional crimping tools are typically made from better steel, have precision-machined dies, and are designed to allow maintenance (such as calibration adjustments or die replacement). Cheaper or budget tools, on the other hand, might lack these features – they can wear out quickly and might not even allow you to calibrate or replace parts, essentially making them disposable. According to experts, budget-grade crimpers often lack replaceable components and precise tolerances, making proper maintenance difficult or impossible. In contrast, investing in a professional-grade tool from a reputable manufacturer provides better long-term value because it can be maintained and kept in service longer. In other words, a quality tool can actually save you money over time and definitely spare you a lot of frustration.
When choosing a crimping tool, look for features like interchangeable dies, adjustable ratchet tension, and availability of spare parts (springs, ratchet assemblies, etc.). For instance, a crimper with replaceable jaws lets you simply swap in a new die set if the old one wears out, which greatly extends the tool’s life. Sturdy construction and ergonomic design (comfortable grips, smooth ratchet) not only make the tool nicer to use but also indicate it’s built to last through many cycles. Haisstronica is proud to produce heavy-duty crimping tools with exactly these qualities – our tools are made for both electricians and enthusiasts who demand durability and serviceability. By starting with a high-quality electrical crimper tool, you set yourself up for success: you can perform the maintenance tips we’ve discussed, and the tool will respond by working optimally for years. In contrast, an ultra-cheap crimper might not hold calibration, the dies might deform quickly, or it may not have a true ratcheting mechanism (leading to inconsistent crimps). (Do your research and invest in the best wire crimping tool you can reasonably afford. Brands like Haisstronica design crimpers with maintainability in mind – from precision ratcheting crimpers to automotive wire crimping tools with replaceable dies. A quality tool, coupled with proper maintenance, can easily last a decade or more. That means reliable crimps and no surprise tool failures when you’re in the middle of an important wiring job!)**
Conclusion
Caring for your crimping tool is not difficult or overly time-consuming – it simply requires consistency and a bit of know-how. By now, we’ve seen that a little regular maintenance can prevent a host of problems. To extend your crimping tool’s lifespan, remember to clean it after each use, keep it lightly lubricated (while avoiding the dies), check the condition of the dies and other parts, and calibrate the mechanism when needed. Store your tool properly in a dry place and use it correctly within its design limits. These 7 tips are not just “good ideas” – they are essential practices you can’t ignore if you rely on your crimping tools for electrical work. The reward is well worth the effort: a well-maintained crimper will consistently produce strong, safe electrical connections, whether you’re crimping a few butt connectors on a weekend project or doing daily wiring jobs as a professional electrician. In summary, treat your crimping tool with care and it will return the favor with years of reliable service. And if you’re using a Haisstronica crimping tool, you’ve already set yourself up for success by choosing quality – now just follow these maintenance steps to maximize that investment. Happy crimping!
Sources: