Crimping wires is a reliable way to join electrical connectors – when done correctly. But if you’ve ever had a crimped wire pull out or a connector slip off, you know something went wrong with the pressure or technique. In fact, many crimp failures come down to not compressing the terminal “just right.” Traditional crimping pliers or makeshift methods often leave too much to chance, resulting in loose connections, overheating, or broken strands. The good news is that a ratchet crimping tool holds the secret to perfect pressure. By design, ratcheting crimpers apply a precise, repeatable force that virtually eliminates under-crimping or over-crimping. In this article, we’ll explore exactly how these tools ensure a Goldilocks fit on every connector. You’ll learn why crimp height (the crushed connector’s height after crimping) is a more scientific quality measure than how hard you squeeze. We’ll also discuss matching each connector to the right die cavity and calibrating your tool for optimal performance. Let’s break down the mystery of why crimps fail and how to guarantee every wire crimp connector you make is rock-solid. (Pro tip: Using a high-quality ratcheting wire crimping tool from Haisstronica takes the guesswork out of crimping and boosts your success rate with every connection – reliable results that save time and money.)
Ratcheting 101 — How a Ratchet Crimping Tool Ensures “Just Right” Pressure
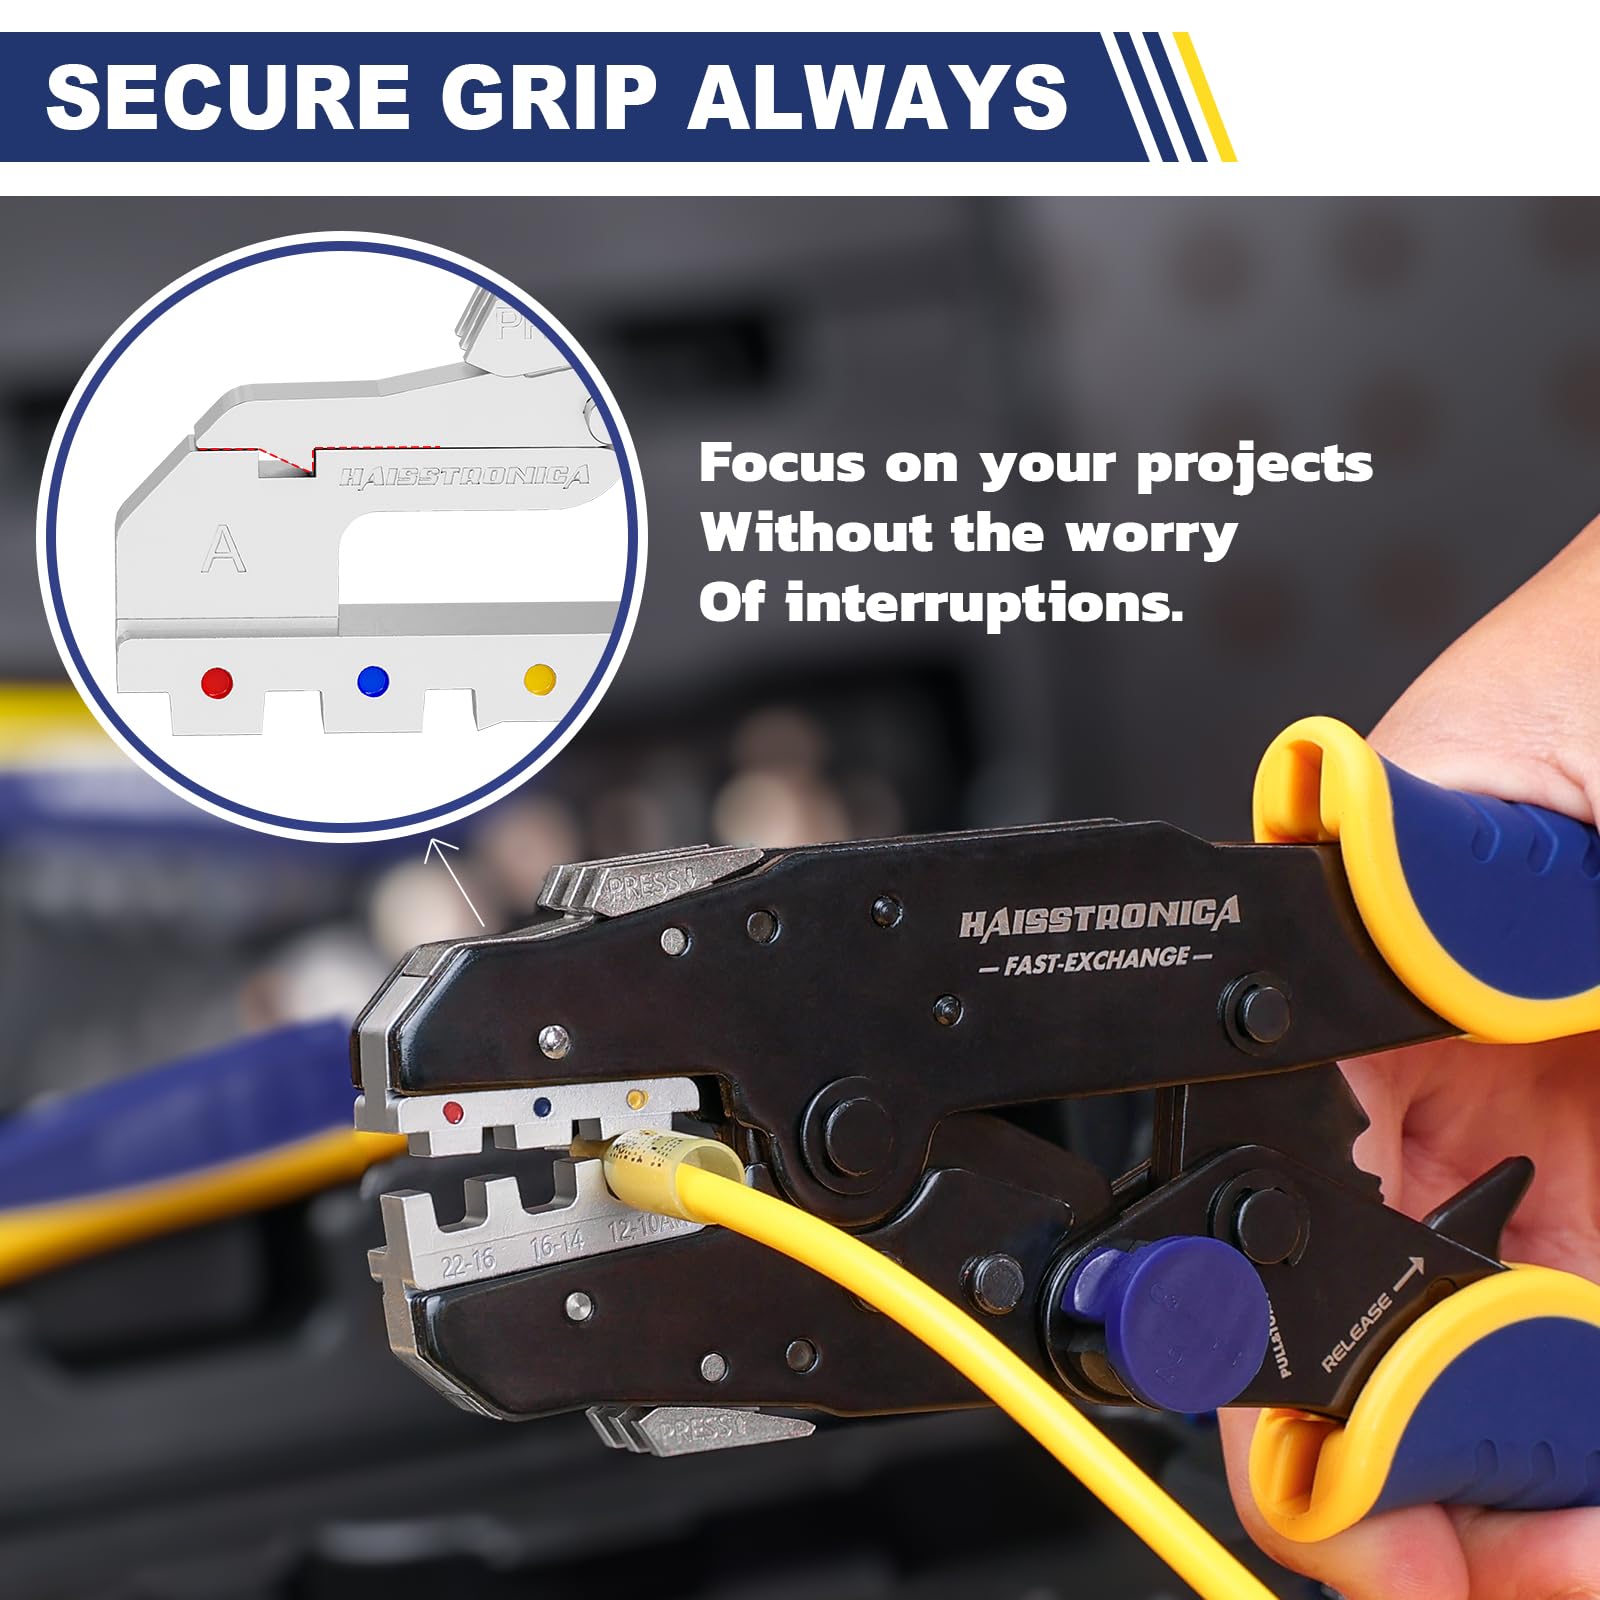
A Haisstronica ratcheting wire crimper with color-coded die slots (red, blue, yellow) for different connector sizes, alongside insulated heat-shrink crimp connectors. The ratchet mechanism ensures each crimp is fully compressed to specification before releasing, preventing incomplete or overly tight crimps.
A ratcheting crimper isn’t your average pair of pliers – it’s a controlled-cycle hand tool engineered to apply exactly the right amount of force on a connector every time. Unlike simple crimp pliers that might let you stop squeezing too early, a ratchet crimp tool won’t release until the full crimp cycle is completed. Inside the tool, a ratchet (pawl and gear mechanism) locks the jaws closed incrementally as you squeeze. Once you start a crimp, you must squeeze to the end – the tool only unlatches when the proper pressure has been achieved. This design guarantees that every crimp gets a consistent, thorough compression. In other words, the ratchet mechanism makes it nearly impossible to under-crimp a terminal (leaving it loose) because you physically can’t open the tool until the crimp is done. It also prevents over-crimping by applying a calibrated maximum force at the end of the cycle, so you don’t crush the connector beyond what’s optimal. The result is a “just right” pressure on the terminal barrel – enough to cold-weld the wire and connector together for a solid electrical bond, but not so much that you damage either. Industry standards call this a “full-cycle” crimp: each crimp is completed with uniform pressure for repeatable quality. This is the secret behind those perfect, gas-tight crimps that professionals and electricians aim for. In fact, leading connector manufacturers like TE Connectivity and Molex design their crimp quality guidelines around the assumption that you’re using a controlled-cycle (ratcheting) tool to meet the specified compression. A proper ratchet crimper can produce connections that pass strict tests for electrical resistance, tension (pull testing), and durability under vibration – far superior to the hit-or-miss results from plain pliers. (When it comes to consistency, a ratchet crimping tool from Haisstronica gives you a major advantage: every crimp is locked in with the ideal pressure, meeting safety standards and ensuring your crimped wire connectors won’t fail. Upgrade to a ratcheting tool and feel the difference in quality and peace of mind with each squeeze!)

Force vs Height — Why Crimped Wire Height Beats “Squeezing Harder” for Quality
Anyone can forcefully squeeze a crimper, but not everyone achieves a good crimp. The key isn’t brute strength – it’s achieving the right crimp geometry. The crimp height (sometimes called the compression height) is the height of the terminal’s crimped barrel after the wire is crimped inside. This tiny measurement – often just a few millimeters or less – is actually a critical indicator of crimp quality. Why? Because for each combination of wire gauge and terminal type, there’s a target crimp height range that yields optimal electrical and mechanical performance. If the barrel is squashed too flat (height too small), you’ve over-crimped: this can crush or break wire strands and even crack the connector, leading to high resistance or a brittle connection. If the crimp height is too large (not enough compression), the wire is loose inside the barrel, causing a weak connection that can heat up or pull out easily. In short, a good crimp isn’t defined by how hard you pressed the tool, but by the resulting shape and dimensions of the crimped connector. This is why professionals measure crimp height with calipers or micrometers, and why many specifications (like IPC/WHMA-A-620 and manufacturer guidelines) give an acceptable crimp height range for each connector. For example, TE Connectivity’s specs for certain contacts allow only on the order of ±0.03–0.05 mm variation in crimp height from the ideal value – a tolerance that underscores how precise this is, far beyond “tighten as hard as you can.”
A ratcheting crimper helps by ensuring each crimp is compressed to a consistent preset depth. Your hand strength or fatigue won’t affect the outcome – as long as the full ratchet cycle completes, the tool delivers the same compression every time. This consistency keeps the crimp height within design limits for the connector, which is exactly what yields a reliable crimp. In contrast, using non-ratchet tools or improper methods might result in erratic crimps: one may be too loose (high crimp height), the next crushed too far (low height), depending on how you felt that day. It’s clear that measuring and controlling the crimped wire height is a more scientific approach than guessing about force. Many advanced production systems even have crimp height monitors or crimp force monitors built-in – these devices check each crimp’s parameters in real time. For instance, automated crimping machines might stop if the force signature is off (indicating a wrong height or missing strand). For the everyday technician or DIYer, you can emulate this quality control by periodically checking your crimps with a caliper to ensure the height is in the expected range. If you consistently use a good ratchet wire crimping tool and the correct die, you’ll find that your crimp heights fall into that ideal window nearly every time. (Bottom line: focus on the outcome, not just effort. When your crimping tool for wires delivers the right crimp height, you get a connection that will withstand tug tests and temperature cycles. Haisstronica’s ratcheting crimpers are engineered for this precision – so your crimped wire connections stay tight and truly meet the spec, without you having to white-knuckle the handles.)

Die & Terminal Matching — The “One-to-One” of Die Cavity, Terminal Type & Wire Gauge
One common reason for crimp failures is using the wrong slot or die for the connector and wire – essentially a mismatch in the crimping equation. A quality crimp is only possible when the wire size, terminal, and crimper die are correctly paired. Think of it as a one-to-one matchup: each connector design and wire gauge has a specific crimp profile that the die should impart. If you cram a small wire into a connector meant for a larger gauge, or use the wrong section of the crimp tool, you’ll either under-compress or over-compress the barrel. The same goes for using an insulated terminal in a die meant for non-insulated, or vice versa. The geometry won’t match, and the crimp can cut into the insulation or leave gaps and voids around the wire. The result? A weak crimp that either falls apart or corrodes internally over time.
Color-coding and sizing: Most wire crimp connectors for general electrical use (like ring terminals, spade connectors, and butt splice connectors) come color-coded by size – for example, red for 22–16 AWG, blue for 16–14 AWG, and yellow for 12–10 AWG. Quality crimping tools for electrical connectors have matching color-coded die cavities to accommodate these sizes. As a rule, always insert your terminal into the crimper’s corresponding die (red on red, blue on blue, etc.) so that the tool forms the correct crimp shape and depth for that connector. Die profile matters too: Insulated terminals typically require a rounded or “B” crimp profile that won’t cut the insulation, whereas open-barrel terminals (found in automotive or PCB connectors) need a specific “U” or “W” profile to curl the tabs properly around the wire. Ferrule crimps often use a square or hexagonal die to form a solid sleeve. Using the wrong die shape can result in missed strands or a crimp that doesn’t hold. Manufacturers like TE and Molex publish tooling charts explicitly to prevent these mix-ups, showing which die set goes with which terminal part number. In practice, this means if you’re crimping, say, an insulated butt connector, you should use a crimper die designed for insulated connectors of that wire gauge – not a makeshift plier or a die for bare terminals. And of course, ensure you’ve stripped your wire to the proper length for that terminal, so the wire fills the barrel and the insulation rests under the insulation crimp (if present). When everything is matched one-to-one (wire, terminal, die), the crimper will form a tight crimp with all strands captured and a neatly closed barrel. Good crimps look symmetric and firm; bad crimps often come from using the wrong tool on a given connector, leading to lopsided or loose results.
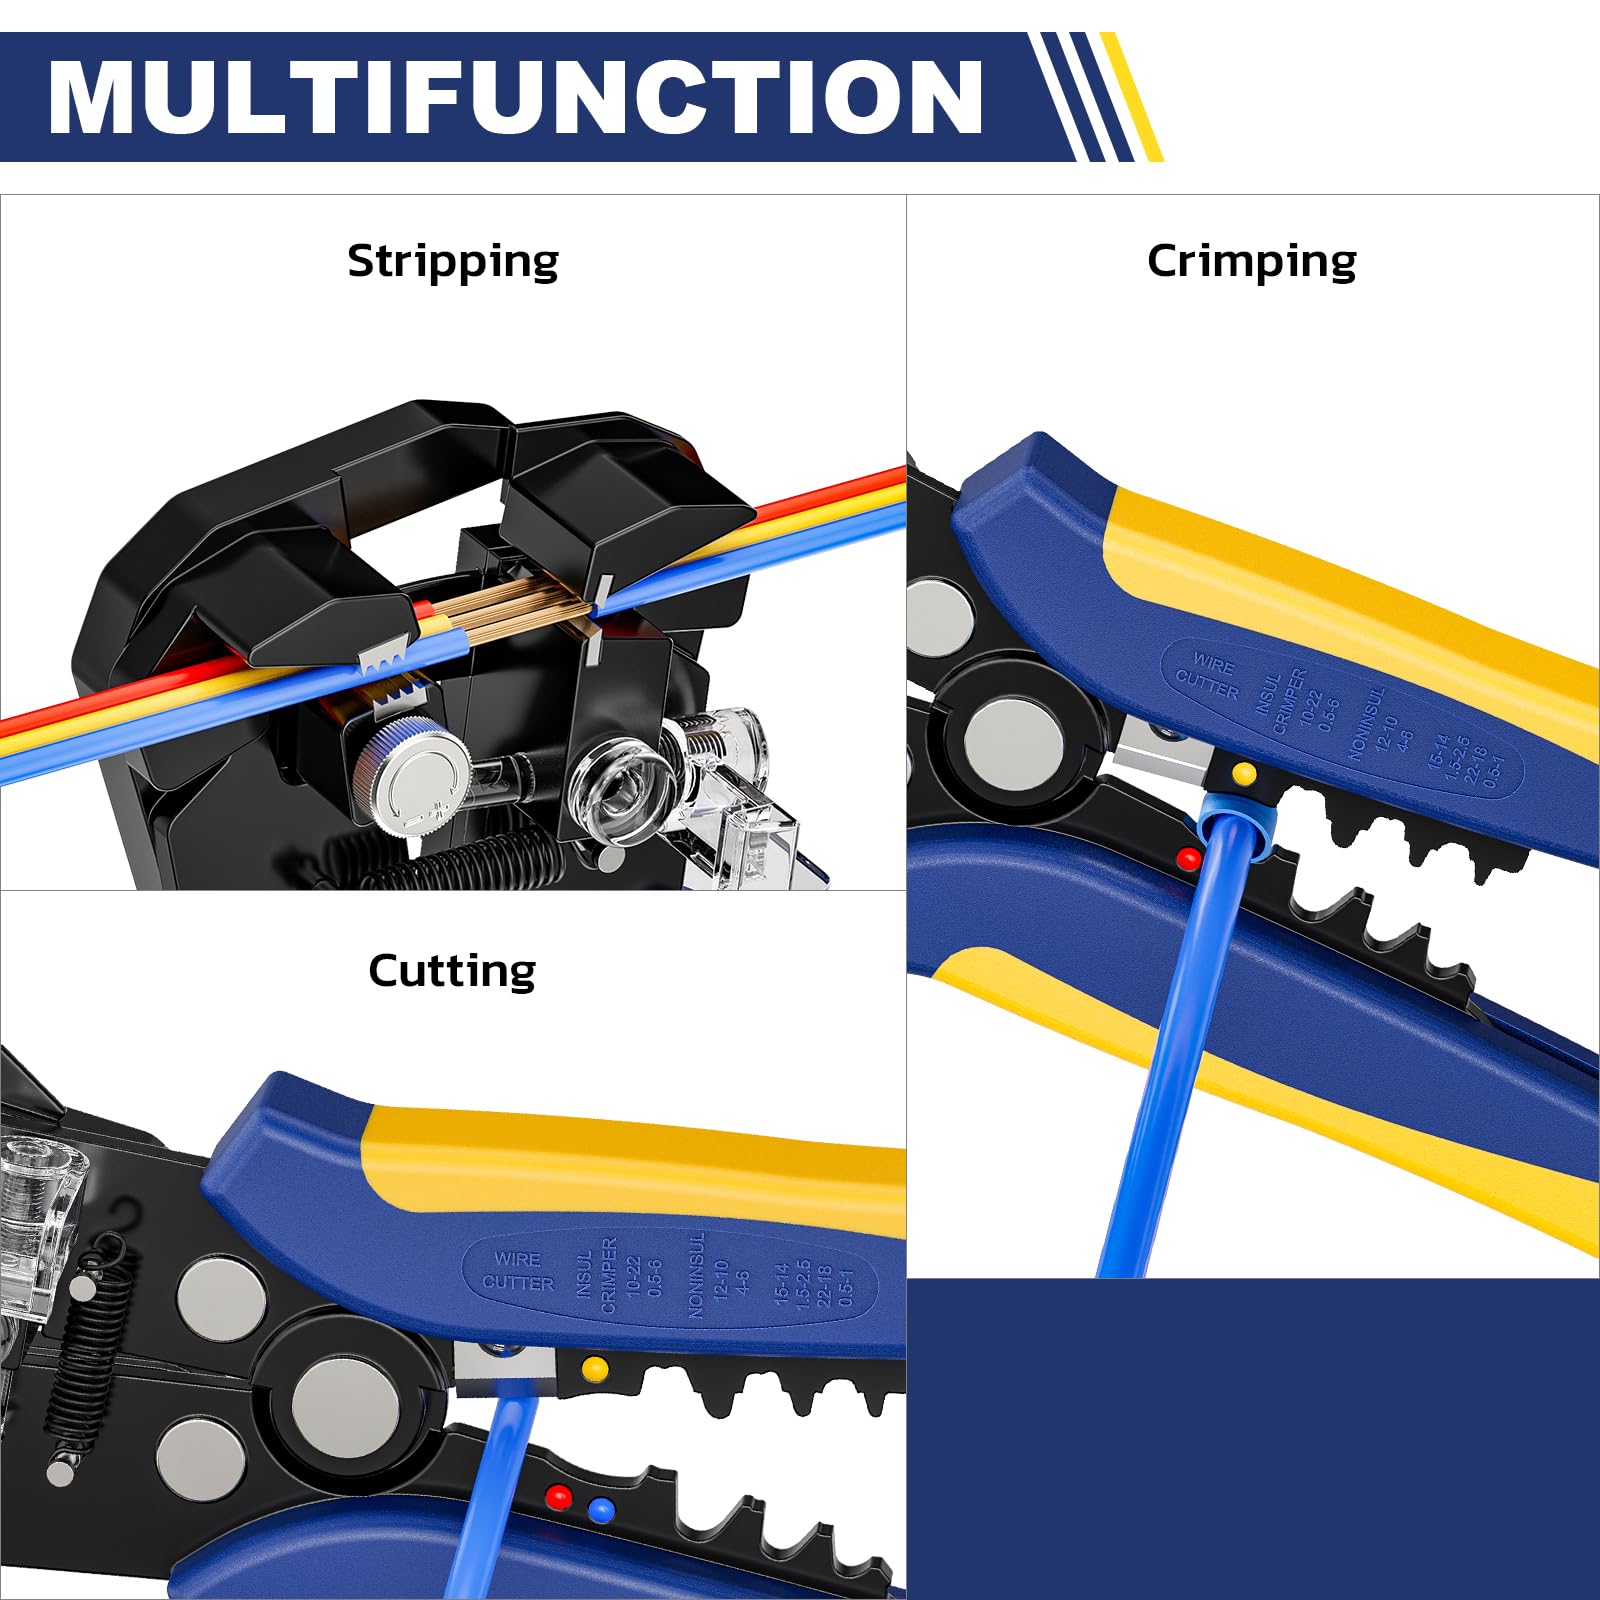
Illustration of the crimping process: Step 1 – Place the correctly sized connector into the matching die cavity of a ratchet crimp tool and squeeze until fully compressed. The example shows an insulated heat-shrink butt connector being crimped in the proper color-coded slot. Step 2 – After crimping, apply heat (for heat-shrink connectors) to seal the connection. Using the right die for the terminal ensures the crimp compresses evenly, allowing the heat shrink tubing to form a tight, waterproof seal around the wire.
Matching your tools and parts also means considering wire gauge. Never force a wire that’s too large into a small connector, as you might think “tighter is better” but it can actually buckle the barrel or not crimp fully around all strands. Conversely, a wire that’s too small for a given terminal will crimp down without achieving a solid grip on the few strands – even if the die closes completely, there may be air gaps or the wire can slip out. The crimp should deform the wire strands into a solid mass (often described as a “cold weld”) and that only happens with the right fit. The IPC/WHMA-A-620 standard and others note that you should see a slight “bellmouth” of wire at the end of the barrel and a proper insulation support crimp – signs that the wire, terminal, and die were correctly chosen. If you follow the terminal manufacturer’s recommendations for which crimping tool or die to use, you’ll dramatically reduce the chance of failures. (Haisstronica helps take the guesswork out of this by offering crimping tools and kits tailored to specific connector types and size ranges. For example, our ratcheting crimper for AWG 22–10 comes with the exact dies needed for red/blue/yellow insulated terminals, so you get a perfect match every time. Using a wire connector crimper that’s designed for your connectors means first-time success and no more mystery “why did this crimp fail?” scenarios.)

Calibration — Tuning Your “Secret Weapon” to the Sweet Spot
Even the best ratcheting crimper needs a little TLC to keep performing at its peak. Over time and heavy use, the tool’s tension can drift or the dies may experience wear. This is where calibration and adjustment come into play – essentially, tuning your secret weapon so that it continues to apply that just-right pressure. Many ratchet crimping tools include an adjustment mechanism (often a star wheel or a thumb screw) that lets you increase or decrease the crimp force slightly. Out of the box, a quality tool like Haisstronica’s will be pre-calibrated for common connectors, but it’s smart to verify and adjust if needed. How do you know if your crimper needs adjusting? The best way is through testing and inspection. Make a sample crimp on the correct wire and connector: if you notice the crimp is too easy to pull off (wires slip out in a tug test) or the crimped barrel is visibly loose, that indicates under-crimping – you may need to increase the tool’s ratchet tension. On the other hand, if the connector is getting cracked, the barrel is flattened excessively, or the tool is extremely hard to close on the proper size connector, you could be over-crimping – which means the tool might be too tight and you should dial the force down a notch. Essentially, deforming or splitting the terminal = too much force; loose grip = not enough force.
Adjusting a ratchet crimper is usually straightforward. Locate the star wheel or adjustment knob (typically accessible on the side of the handle). There will often be plus (+) and minus (–) signs or numbered settings indicating higher or lower crimping force. Use a screwdriver or hex key to loosen the lock screw, turn the wheel a click or two toward “+” for more force or “–” for less, then tighten the screw back to lock the setting. It’s a bit of trial and error: after each small adjustment, do another test crimp on the appropriate connector and examine the result. The goal is to have the crimper release right when the terminal is optimally compressed – not before, and not long after. With a correctly calibrated tool, you’ll feel the ratchet release at the perfect point in the squeeze, and the crimped connector will look clean (no cracks or extreme flattening) and hold the wire firmly (you shouldn’t be able to pull it out). Regular calibration checks are especially important if you use your crimper daily (as an electrician or in production work) or if you’re working with critical connections (e.g. automotive or aerospace wiring) where you absolutely cannot afford a bad crimp. In fact, calibration of crimp tools is part of quality assurance in professional settings: it ensures every tool on the line is capable of meeting the spec on each crimp. The benefits are clear – consistent quality, compliance with safety standards, longer tool life, and fewer failed connections in the field. As a good practice, keep your tool clean (wipe off any debris or copper residue from the dies), and when needed, lightly oil the hinge mechanism so the force remains consistent. Also, spot-check crimp height with a caliper occasionally for critical jobs. If you see the height drifting out of spec, that’s a sign the tool may need adjustment or the dies might need replacement. Using only the recommended connector sizes in each die also prevents excessive wear.
Lastly, remember that even a top-notch tool can’t compensate for poor-quality connectors or the wrong size parts. Always use quality terminals and the correct gauge wire. If you find yourself struggling despite proper calibration, double-check that you’re crimping the right things together. (When you invest in a Haisstronica ratchet crimping tool, you’re getting a product that’s designed for easy calibration and long-term use. Our tools feature clearly marked adjustment dials and robust construction so your “secret weapon” stays reliable over countless crimps. By taking a minute to tune your tool and maintain it, you ensure every crimp is as good as the last. It’s like having a personal guarantee that each connection you make is secure – and that confidence is worth its weight in gold when you’re dealing with critical electrical crimping connectors.)
Conclusion: Crimping is part art and part science – and using a ratcheting crimp tool puts you far ahead on both fronts. If your crimps have been failing, now you know the likely culprits: inconsistent pressure, lack of a full press, wrong die or connector choice, or an out-of-calibration tool. The secret to perfect pressure is built into the ratchet mechanism that forces you to do it right every time. Combine that with focusing on measurable outcomes (like crimp height), matching each connector with the proper tool, and keeping your equipment in tune, and you’ve eliminated the biggest failure points. The result will be crimped wire connectors that are electrically solid and mechanically strong – they won’t shake loose, overheat, or corrode prematurely. Adopting these best practices, endorsed by industry standards and experts, turns crimping from a gamble into a reliable process. You’ll save yourself from the frustration of troubleshooting bad connections and enjoy the confidence that every wire you crimp is a job well done. And if you’re using a quality ratcheting crimper such as those from Haisstronica, you’re already stacking the odds in your favor. Our brand’s tools and connector kits are designed with these principles in mind, so you can crimp with precision and assurance. Remember, a great crimp isn’t just about squeezing – it’s about squeezing right. Now you know the secret, so go make those perfect crimps and say goodbye to failures! Happy crimping, and stay secure.
References: