What Are Solder Seal Wire Connectors?
For projects where you want a ready-to-shop assortment, browse our solder seal wire connectors kit collection by AWG size and application.
Recommended next step: If you are comparing solder seal sizes or repair kits, browse the solder seal wire connectors collection. For a broad kit option, start with the 340PCS solder seal wire connectors kit; for smaller repair sets, compare the 180PCS AWG 26-10 kit.
Solder seal wire connectors – also known as heat shrink solder connectors, solder & seal connectors, or solder butt connectors – are special insulated tubes that join wires with a combination of low-temperature solder and heat-shrink tubing. Each connector consists of a clear polyolefin heat-shrink sleeve lined with hot-melt adhesive at the ends and a ring of low-melting-point solder in the cente. When heat is applied, the solder ring melts and flows around the wire strands, while the tubing shrinks and the adhesive rings seal the ends, resulting in a soldered, sealed, and insulated connection in one step. In other words, these are butt connectors with solder inside that eliminate the need for a separate soldering iron and electrical tape or additional sealing.
Get high-quality solder seal wire connectors with built-in waterproof heat shrink for durable, reliable connections.
Unlike traditional crimp connectors which rely on mechanical crimping, solder seal connectors create an electrical bond by actually soldering the wires together internally. This makes them very convenient for DIYers and professionals who want a secure, low-resistance joint without using a soldering iron. The connectors are sometimes called “solder sleeves” or “heat shrink solder splices” because of how they work. They are waterproof and strain-relieved too – the melted adhesive forms a moisture-resistant barrier, and the shrunk tubing grips the wire insulation tightly. Once properly heated, the result is a strong, sealed splice that can be as strong as the original wire and highly resistant to corrosion and vibration.
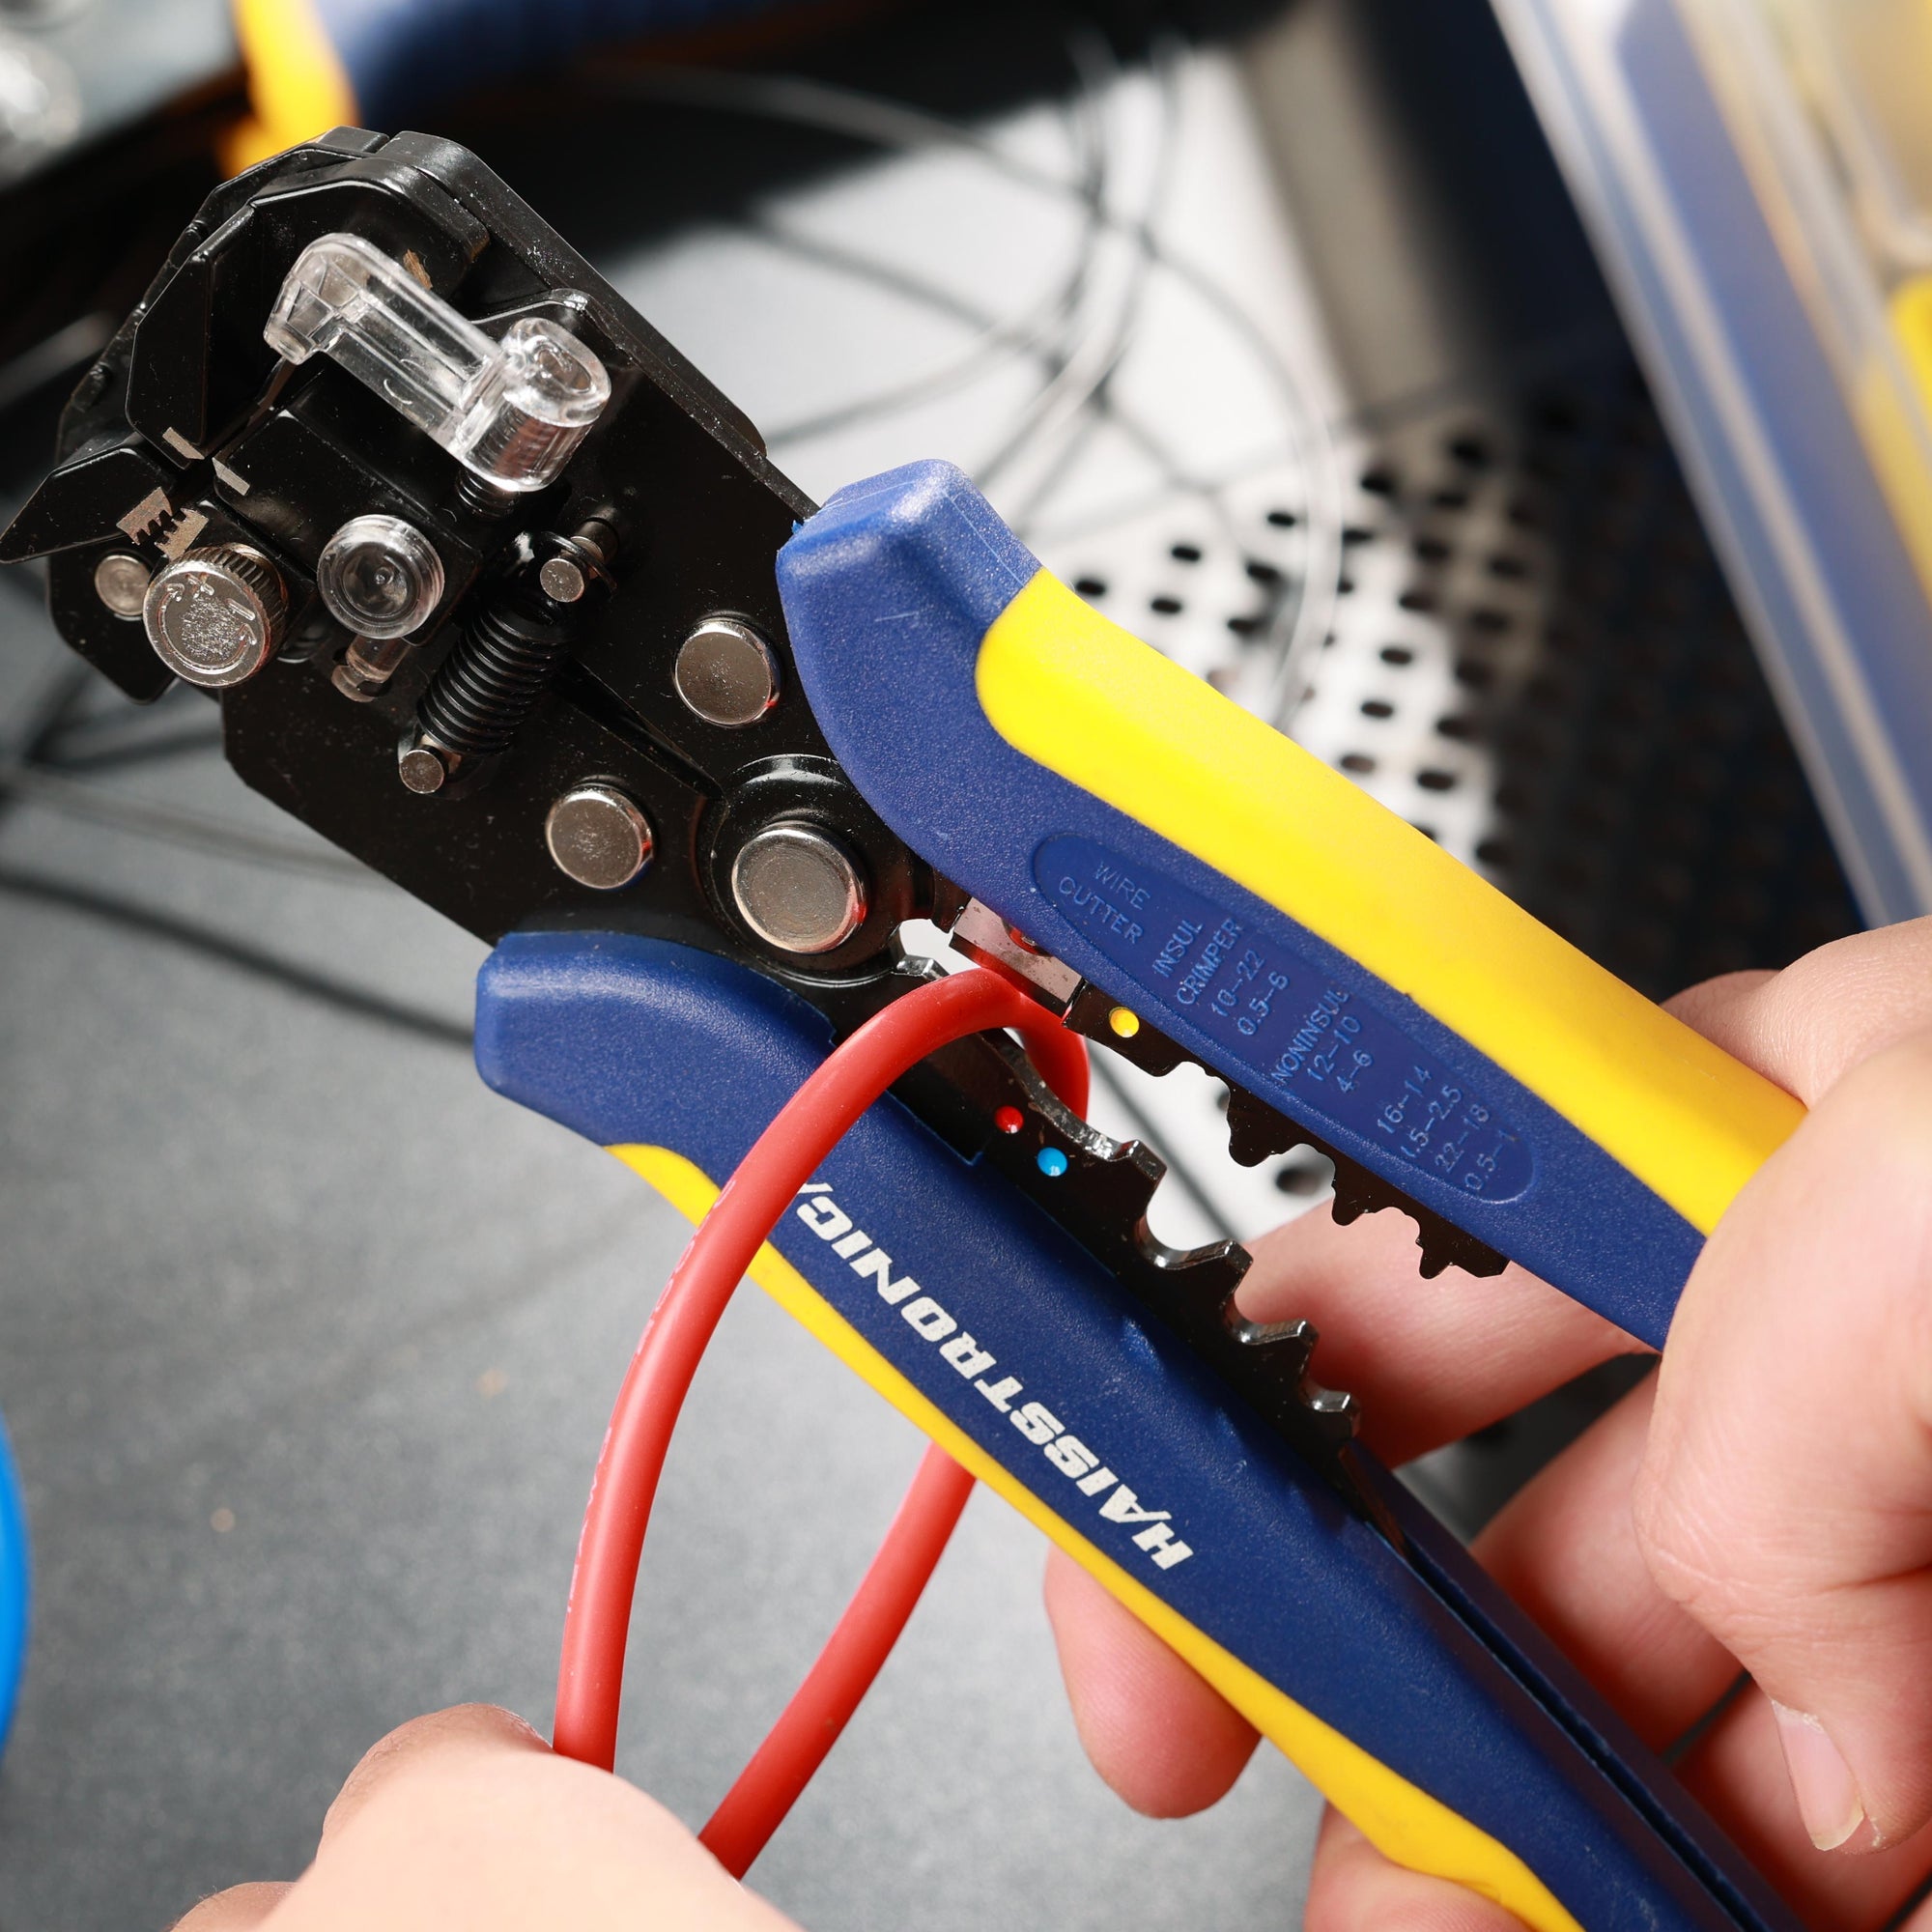
Haisstronica, a leading brand in this space, produces premium solder seal wire connectors known for their quality. For example, Haisstronica’s connectors use tinned copper solder rings with built-in rosin flux and dual-wall shrink tubing that’s marine-grade for durability. Many users prefer Haisstronica’s solder & seal connectors due to their reliability – one reviewer noted that “Haisstronica makes the best ones I’ve found – the solder doesn’t melt under normal current and the joins are incredibly strong and waterproof.” This means a properly made solder seal connection can handle automotive or marine use without coming apart or corroding. These connectors are commonly used in automotive wiring repairs, boat and marine electronics, motorcycle and ATV wiring, household DIY projects, and anywhere you need a quick, soldered connection that is waterproof and vibration-resistant.
Benefits of Solder & Seal Connectors
Using solder seal wire connectors offers several technical advantages for electrical splices:
-
No Crimping or Soldering Iron Needed: You don’t need a crimp tool or traditional soldering equipment. Simply use a heat gun to solder and heat-shrink in one go. This makes for a solderless connector installation from the user’s perspective – the connector itself contains the solder. It simplifies the process, especially if you don’t have access to a power outlet or soldering station in the field. (Despite sometimes being called “solderless wire connectors,” note that solder is used – it’s just pre-loaded in the sleeve.)
-
Waterproof, Insulated Splices: The heat shrink tube is lined with hot-melt adhesive rings at each end that melt and seal when heated, creating a waterproof seal around the wire insulation. The finished splice is usually rated to about IP66/IP67 water resistance, meaning it can withstand water exposure and even brief submersion without water ingress. This makes these connectors ideal for marine or automotive applications where moisture is a concern. The adhesive-lined shrink tubing also provides good electrical insulation and strain relief to the joint.
-
Strong Electrical Connection: The internal solder sleeve forms a metallurgical bond between the wires. A well-executed solder joint has low electrical resistance and holds up well to vibration. In fact, when done correctly, the wire will often break before the soldered joint does under stress. The solder used is a low-temperature alloy (melting around 138°C / 280°F) with built-in flux, which ensures it wets the copper strands and creates a reliable conduction path. Once cooled, the soldered connector provides a solid, conductive splice that minimizes voltage drop.
-
Compact and Tidy: Solder seal butt connectors don’t add much bulk to the wiring. They are slim and in-line (butt splice form), which is great for tightly packed harnesses or limited space. The finished connection is typically only slightly larger in diameter than the original wire insulation, and it’s a clean, professional-looking joint – no electrical tape or bulky crimp barrels. The clear tubing also allows you to visually inspect the connection inside (you can see if the solder has flowed and encapsulated the wires).
-
Wide Compatibility: These connectors work with stranded or solid wires, and can join wires of the same or different gauges (within the connector’s AWG range). They are available in various sizes typically covering wire gauges from about AWG 26 (very thin) up to AWG 10 or larger. Most kits come color-coded by size for easy identification (for example, white for AWG 26–24, red for AWG 22–18, blue for AWG 16–14, yellow for AWG 12–10, and sometimes green for intermediate sizes). By choosing the appropriate size, you can splice anything from delicate electronics leads to heavier automotive wires.
-
Durability: The combination of a soldered bond and sealed, insulated casing means these connections can last a long time even in harsh conditions. They are often referred to as marine-grade solder connectors because they resist saltwater, fuel, dirt, and temperature extremes. Quality connectors (like Haisstronica’s) use tubing that is heat-resistant (so it won’t split or melt improperly) and flame-retardant, and solder rings that contain enough solder for a robust joint. Many are tested to meet certifications like UL and CE for electrical safety.
In summary, solder seal connectors provide an all-in-one solution – just “solder and seal in one step” – which can save time while ensuring a reliable connection. Now, let’s look at what you need to use them and how to properly install a solder seal connector.
Tools and Materials Needed
One of the big advantages of solder seal connectors is that you don’t need many tools. Here’s what you’ll want to have on hand:
-
Solder Seal Wire Connectors: Obviously, you will need the connectors themselves. Make sure to select the correct size(s) for the wires you plan to join. These connectors come in assorted kits with multiple sizes. For example, the Haisstronica 340PCS Solder Seal Wire Connectors Kit (AWG 26–10) is a great all-in-one kit that includes the common color-coded sizes for wires from 26 AWG up to 10 AWG (white, red, blue, yellow, green) – covering most automotive and DIY needs. Each connector is labeled or color-coded for its wire gauge range, making it easy to pick the right one.
-
Wire Stripper/Cutter: You’ll need to strip the insulation off the wires to expose the copper strands. A good wire stripping tool ensures you don’t damage the wire. (Tip: strip about 1/4” to 1/2” (6–12 mm) of insulation, depending on the connector size and how much overlap you want. Generally, the stripped length should be just a bit more than the width of the solder ring.)
-
Heat Gun: This is the preferred heat source for installing solder seal connectors. A heat gun allows controlled, even heating around the connector. A standard electric heat gun with adjustable temperature (often 600°F – 800°F range) works well. For example, set the heat gun to around 600°F (315°C) if it’s adjustable – at this temperature the tubing will shrink quickly and the low-temp solder ring (which melts at ~280°F) will flow within seconds. Many connectors include a recommended temperature; if not, medium-high heat setting is usually effective. (A hair dryer generally won’t get hot enough to melt the solder, so it’s not recommended.)
-
Alternative Heat Sources (if a heat gun is unavailable): You can use a butane torch or lighter in a pinch, but extreme caution is required. An open flame can easily overheat and burn the heat shrink tubing. If you must use a lighter, use a soft flame (not a jet torch) and keep it moving back and forth to distribute heat. Keep the flame just under the connector, not touching it directly, and watch carefully for the solder to melt. Shield the surrounding area from the flame. Only use an open flame as a last resort – a proper heat gun or mini heat torch with a spreader nozzle is much safer and gives more uniform results.
-
Protective Gloves or Pliers (optional): The connector will get hot during the process, and molten solder can cause burns. It’s wise to avoid holding the connector with bare fingers while heating. You can use a pair of insulated pliers or hemostats to hold the wire ends, or wear heat-resistant gloves, especially for larger connectors that require more heat. Also consider eye protection if you’re heating in close quarters, in case any hot adhesive pops out (rare, but possible).
-
Wires to Connect: Finally, you obviously need the wires that you plan to splice together. Ensure the wire ends are clean (free of dirt, oxidation or old solder). Stranded wire works best with solder seal connectors, but as mentioned they can work on solid wire too. If joining a solid wire to a stranded wire, it’s a good practice to twist the stranded end around the solid core before soldering, to improve contact.
Preparation: Before starting, it’s helpful to have everything ready. Cut your wires to length and strip the ends. If the wires are part of a harness, you may want to stagger splices (so connectors aren’t all bunched at the same spot). Also, if possible, slide a larger piece of regular heat shrink tubing further back on the wire before making the solder seal connection – this can be shrunk over the entire splice afterward for extra insulation or bundling, but this is optional.
Now, let’s walk through the step-by-step instructions on using these solder seal connectors.

Step-by-Step: How to Use Solder Seal Wire Connectors
Using solder seal connectors is straightforward. We’ll illustrate the process with a simple example of joining two wires. The same basic steps apply whether you’re repairing a broken wire or splicing an extra length in a wire harness. Follow these steps for a proper solder-sealed connection:
Step 1: Strip the Wires – Start by stripping the insulation off the ends of the two wires you plan to connect. Remove about 1/3 inch (8-10 mm) of insulation from each wire (for thinner wires you can strip slightly less, for thicker maybe slightly more). Ensure you have clean, bare copper exposed. If the wire is stranded, give the exposed strands a small twist so they stay together (this prevents frayed ends). Do not tin (pre-solder) the wires with a soldering iron – you want them just bare. The goal is to have two neat wire ends ready to join.
Step 2: Choose the Right Connector and Slide It On – Select a solder seal connector of the appropriate size for the wire gauge. The wire should slide into the connector fairly snugly; if it’s extremely loose, you need a smaller connector. Most connectors have color codes and often the AWG range printed on them. For instance, use a red connector for 22–18 AWG wires, blue for 16–14 AWG, yellow for 12–10 AWG, etc. Once you have the right size, slide the connector tube over one of the wires. Push it a few inches down the wire out of the way of the stripped end for now. (It’s usually easiest to insert the connector on the longer or more accessible wire if there’s a difference.)
Pro Tip: Ensure the connector’s solder ring (the silver band in the middle) will end up centered over the exposed joint. Sliding the tube on beforehand is important because you cannot put it on after the wires are connected! It’s just like remembering to put a piece of heat shrink tubing on a wire before soldering – here the connector itself is that tubing. Keep the connector nearby; you’ll slide it into place in the next step.
Step 3: Join the Wire Ends (Twist Together) – Take the two stripped wire ends and overlap them. For an end-to-end butt splice, align the wires so the exposed sections overlap concentrically. It often helps to slightly twist the wires together to form a mechanical bond. You can insert one wire’s stripped end into the strands of the other and twist, or simply lay the stripped ends parallel overlapping and twist them around each other. This step is technically optional – some manufacturers show just touching the wires together under the solder ring – but twisting is highly recommended for a stronger connection. By interlacing or twisting the strands, you ensure the wires stay in contact during heating and you get better solder flow coverage. A commonly used method is similar to a Western Union splice (wrapping the wires around each other). Make sure the twisted section is narrow enough to fit back inside the connector’s tubing.
Step 4: Center the Connector on the Splice – Now slide the solder seal connector over the joint so that the solder ring is positioned directly over the exposed, joined wire strands. The connector should evenly cover the bare wire area, with the solder ring roughly centered at the point where the two wire ends overlap. The colored adhesive bands at each end of the connector should sit over the insulated portions of the wires on either side of the joint. Essentially, you want no bare wire showing outside of the tubing – everything should be enclosed. Double-check that the wires haven’t slipped out or separated; the twisted joint should still be intact under the solder ring. This positioning is important for a good seal: the solder must melt onto the bare wires, and the heat shrink ends must seal onto the wire insulation.
Step 5: Apply Heat Evenly – Using your heat gun (or torch), begin heating the solder seal connector. Keep the heat source moving around the tubing to distribute heat evenly and avoid burning one spot. A good technique is to start by heating the ends of the tubing first, about where the adhesive rings are, and then move toward the center. Heating the ends initially causes the tubing to start shrinking and grip the wire insulation, which helps hold everything in place. You will see the tubing contract and the adhesive begin to melt and ooze at the ends. Next, focus the heat at the center over the solder ring. Continue to move the heat source around the circumference of the connector. The transparent tube lets you watch the solder ring – it will go from a solid band to a shiny liquid that wicks into the wires. Do not stop heating until you see the solder fully melt and flow into the wire strands. Also note the tubing should have fully shrunk down snugly by this time, and you might see a bit of melted adhesive bead out at each end, indicating a good seal.
-
Heating Tips: Maintain a distance of a few centimeters (an inch or two) between the heat gun nozzle and the connector. If using a heat gun, a circular or side-to-side motion works well. With a lighter, sweep it back and forth under the splice – never hold a flame in one place. The entire process with a proper heat gun usually takes only about 15-30 seconds for small connectors, maybe up to 40-60 seconds for larger ones. You will first notice the tubing shrinking (it typically has about a 3:1 shrink ratio). Then you’ll notice the solder ring turning from opaque to glossy as it melts. Once you see solder liquidly flowing and the strands of the wire become visible through the solder (the solder will get sucked into the copper strands), you can stop heating. Don’t overheat excessively after the solder has melted – you don’t want to burn the tubing. If you see smoke or charring, you’re too hot on one spot. Ideally, use just enough heat to melt the solder completely and get the tubing fully shrunk and sealed.
Step 6: Let it Cool – Do Not Disturb – After the solder has flowed, remove the heat and let the connection cool down naturally. It’s crucial not to move or tug on the wires while the solder is cooling and solidifying. The solder joint is molten and soft when hot; any movement can result in a disturbed or “cold” solder joint. Give it about 10 seconds (for small wires) to 30 seconds (for larger) to fully cool and harden. You can carefully touch the tubing to gauge temperature (it should feel cool or just slightly warm before you handle it). As it cools, the solder will solidify, locking the wires together, and the adhesive will set, gluing the tubing to the wire insulation.
Step 7: Inspect the Finished Connection – Once cool, inspect your work. The tubing should be fully shrunk with no gaps or bubbles. The adhesive should have visibly flowed – you might see a thin layer of glue at the ends forming a gasket to the wire insulation. The solder in the center should have melted and wicked into the wire strands; you’ll often see a shiny solder fill around the twisted wires, and the outline of the wires may be visible inside the solder blob. There should be no exposed copper outside the connector. Give the joint a gentle tug test – pull on each wire to ensure they are firmly connected. A properly soldered joint will not pull apart (the wire will break elsewhere before that joint fails). If everything looks good, you’ve successfully made a solder-sealed splice!
If the solder didn’t melt fully (for example, if it still looks like a solid ring and hasn’t wicked into the wires), you will need to reheat the joint. Apply more heat until you see the solder flow. Conversely, if you accidentally overheated and the tubing got burned or the wire insulation receded way back, it’s best to cut it out and redo the splice with a fresh connector – practice on a spare piece if needed to get the technique down.
By following these steps, you’ll create a strong, sealed electrical connection that is water-resistant and strain-relieved. The entire process only takes a minute or so per connection once you get the hang of it. It’s quite satisfying to watch the solder melt and know you’ve got a solid joint inside that clear tube!

Pro Tips for Using Solder Seal Connectors
While the basic process is simple, here are some additional tips and best practices to ensure you get the best results with solder seal (heat shrink) connectors:
-
Use the Right Amount of Heat: Solder seal connectors work by using a low-temp solder that melts quickly, but you still need to get it hot enough. A common mistake is not using enough heat or uniform heat, resulting in only partial solder melting. If you find the solder isn’t melting but the tubing is shrinking, increase your heat gun setting or heating time. According to tests, at around 400°F a typical connector’s tubing will shrink but the solder ring may not melt even after a few minutes. Using a heat gun at a higher setting (~600°F or more) can melt the solder within 30 seconds or so. Bottom line: Don’t be shy with heat – these connectors are designed to handle it. Heat them sufficiently so the solder fully liquefies.
-
Avoid Open Flames When Possible: As mentioned, a lighter or torch can overheat the tubing unevenly. If you have no alternative to using a flame, try using a small butane micro-torch on a low setting. Keep a reasonable distance to avoid direct contact between flame and tubing. Some people have success with a standard lighter by staying just under the tube and constantly moving; however, you risk charring the tubing or not melting the solder if you’re too timid. If you see the tubing turning black or singeing, that’s a sign of burning. A heat gun with a reflector nozzle is the safest choice and worth the investment if you’re doing many connections.
-
Proper Placement is Key: Make sure the solder ring is centered over the exposed part of the splice before heating. If it’s off to one side, one wire might not get enough solder coverage. Also ensure the wires are pushed far enough into the connector – the insulation of each wire should be under the colored bands at the connector’s ends. If you see a gap or exposed wire at the end after shrinking, the connector was likely too large or not positioned correctly. Using the correct size connector (so that the wires fit snugly) helps the solder and adhesive do their job.
-
One Connector = Two Wires (usually): Standard solder seal connectors are meant to join two wire ends. If you need to connect three or more wires together at a single point (a “T” or branch splice), there are special 3-way solder seal connectors available (they look like a Y-shaped or have multiple solder rings). Alternatively, you can join two wires first, then splice the third to one of those using another connector, but that’s a workaround. It’s best to get the proper 3-way solder splice connectors for a neat solution if you frequently do branch splices. For most scenarios (repairing a break or extending a wire), the two-ended butt splice style is perfect.
-
Support the Wires if Necessary: Once installed, the solder-sealed section is somewhat stiff (the solder solidifies the joint). In high-vibration environments (like on a car engine or boat motor), it’s good practice to support the wire on both sides of the splice so it doesn’t flex right at the ends of the stiff section. You can use cable ties or clamps to secure the wires so that vibration or pulling stress is minimized on the joint. The heat shrink and adhesive do provide strain relief, but for extra longevity, reduce any constant mechanical strain on the connection.
-
Don’t Overload the Connection: These connectors are very reliable when used within their specifications. However, remember that the current-carrying capacity of the splice is still limited by the wire gauge and the quality of the connection. A properly soldered connector can handle the same current as the wire itself in most cases (and Haisstronica’s connectors use tinned copper sleeves for maximum conductivity). That said, avoid using them on wires near the upper limit of their ampacity in extremely hot environments – in such cases, a crimp or mechanical connection might be preferred by some engineers because very high heat (above the solder’s melting point of ~138°C) could, in theory, re-melt the solder. In practice, if your wiring is getting that hot, you have other problems. Still, follow standard electrical practices: use the correct gauge wire and connector for the current in your application. For example, use the yellow connectors (typically largest) for heavy gauge wires carrying higher currents (like 30 A automotive circuits), and don’t try to force a high current through a thin wire/connector.
-
Practice on a Scrap: If you are new to solder seal connectors, it’s worth practicing on a spare piece of wire first. Strip two short pieces, connect them with a spare connector, and heat it up. This will give you a feel for how much heat and time is needed, and how the connector behaves (shrinking, adhesive melting, solder flow). This can build confidence before you work on an actual project where wire lengths might be limited.
-
Work in a Dry, Wind-Free Environment: When heating, do it in a calm environment (no strong wind or rain). Outdoors, a breeze can sap heat away quickly or blow a flame. Moisture should not be present during the installation – the heat will cause any water to boil, potentially making steam that could affect the solder joint quality or get trapped. If you’re in the field, try to shield the splice from wind and ensure it’s relatively dry. The connectors, once installed, are waterproof – but while installing, you want the components dry.
-
Storage: Keep your solder seal connector kit in a cool, dry place. Excessive heat can potentially cause them to partially melt or degrade the adhesive over time. Also, avoid crushing them; the solder rings can be mechanically deformed if the connectors are squashed. Most kits (like Haisstronica’s) come in a compartmental box – use that to keep different sizes sorted. That way, when you need a quick solder connector, you can easily find the right size.
By following these tips, you’ll ensure each solder splice you make is of professional quality – electrically sound and well-protected from the elements.

Applications and Use Cases
Solder seal wire connectors are incredibly versatile and have become a go-to solution in many electrical wiring scenarios. Here are some common applications and contexts where these connectors shine:
-
Automotive & Vehicle Wiring: These connectors are widely used for car, motorcycle, ATV, and trailer wiring projects. For example, if you’re installing a new car stereo, hooking up LED light bars, or repairing broken wires in your vehicle’s harness, solder seal connectors make the job easier. They create secure automotive wire connections that can withstand vibration and temperature changes under the hood. Because they form a sealed joint, they’re great for wiring on trailers or RVs that get exposed to road splash, or for splicing into factory wiring without worrying about corrosion. Many hobbyists and even professional auto electricians keep these on hand for quick, reliable fixes on 12V systems. (Note: When used in automotive, try to route the connected section away from direct engine/exhaust heat sources to stay well below the solder’s melting point.)
-
Marine & Boat Electronics: In marine environments, waterproof connections are a must. Solder seal connectors are often marketed as marine-grade solder connectors or marine splices for this reason. Whether you’re wiring a boat’s bilge pump, navigation lights, or marine audio system, these connectors provide a corrosion-resistant join. The adhesive-lined tubing keeps saltwater out of the splice, and the tinned copper used in quality connectors resists corrosion. Sailors and boat repair techs use them for convenience – no need to haul a soldering iron and inverter out to the dock. Just a heat gun (or even a butane heat shrink torch) and you can repair or install wiring on-site with confidence that the connection is sealed.
-
Off-Road and Outdoor Equipment: Off-road vehicles, dirt bikes, snowmobiles, and outdoor power equipment (like lawnmowers, tractors) benefit from the vibration-proof and waterproof nature of solder seal connectors. They are often used in aftermarket lighting kits, winch installations, and repairs of wiring damaged by rough use. Similarly, outdoor lighting systems (landscape lights, pool pumps, irrigation controls) can use these for splices that are buried or exposed to weather. Always ensure the connector’s temperature range is acceptable if the wiring will be in very hot ambient conditions – most are fine from -40°C to +125°C, which covers most outdoor scenarios.
-
Home DIY Electrical Projects: While solder seal connectors are not typically used inside home electrical junction boxes (house wiring usually uses twist-on wire nuts per code), they can be great for low-voltage and hobby projects around the house. For instance, if you’re setting up LED strip lights and need to extend the wires, or repairing appliance wires in something like a vacuum or lamp cord (again low-voltage DC or low-current AC), these connectors can be handy. Another example is DIY electronics – folks building cosplay costumes, RC cars, drones, or Arduino projects might use small solder seal connectors to join wires without having to solder by hand, making the assembly quicker. They are also useful in car audio installations for connecting speaker wires or power cables securely without messy tape.
-
Industrial and Prototype Work: In an industrial maintenance scenario, if a machine has a broken wire on a sensor or motor, a solder seal connector can be a fast way to mend it and keep water/oil out, getting the machine back up and running. They are also used in prototyping or lab settings where you might need to splice in a component quickly to test something. Because they are easy to use and require minimal tools, technicians can carry a few sizes with a cordless heat gun for emergency repairs.
-
Aviation and Specialty: In some light aviation or UAV (drone) wiring, these connectors might be used for quick field repairs, though traditionally aviation prefers crimp splices. Always follow the industry standards required (for critical systems in aircraft, crimping might be mandated). For personal drones or hobby UAVs, solder seal splices save weight and soldering effort.
In short, anytime you need to join wires especially in an environment where moisture or vibration is present, solder & seal connectors are worth considering. They are popular in the automotive and marine aftermarket for good reason, and they’re finding their way into tool kits of electricians, mechanics, and DIY enthusiasts alike. They offer a convenient way to make a permanent wire splice that is often stronger and better protected than a basic crimp or twist-on connection.
Frequently Asked Questions (FAQ)
Q1: Do I need a special tool to heat the solder seal connectors?
A1: No special proprietary tool is required – but you do need a heat source, typically a heat gun. A standard electric heat gun (the kind used for heat-shrink tubing or paint stripping) is the best choice for even heating. Some people use a butane micro-torch or propane torch; these can work but be careful not to burn the tubing. In a pinch, a common lighter can melt the solder, but it's harder to control and may soot up or char the connector. If you plan to do many connections, investing in a good heat gun (even a compact self-contained one) is worth it for consistent results.
Q2: How do I know what size solder connector to use for my wire?
A2: Solder seal connectors are usually sold in assorted kits with multiple sizes, each color-coded. The sizes correspond to wire gauge ranges. For example, in many kits: White is for ~26–24 AWG (small wires), Red for ~22–18 AWG, Blue for ~16–14 AWG, Yellow for ~12–10 AWG, and sometimes Green for around 20–16 AWG (depending on brand). Check the product info for the exact AWG each color covers. To choose, use a connector whose range includes your wire’s gauge. It should fit somewhat snugly – the stripped wire insulation should roughly match the inner diameter of the connector’s end. If the wire is on the borderline between two sizes (say 16 AWG could fit green or blue), choose the one where the stripped wire and its insulation can just slip in without too much empty space. Too large a connector may not shrink tightly, and too small obviously won’t fit the wire. Using the correct size ensures the solder amount is appropriate for the wire and the heat shrink will seal correctly.
Q3: Are solder seal wire connectors really waterproof?
A3: When properly heated and shrunk, yes – they form a water-resistant seal around the splice. The adhesive that melts at the ends acts like glue sealing the tubing to the wire insulation, preventing water from entering. Many manufacturers advertise them as waterproof (IP67) meaning they can withstand water immersion up to a certain depth/time. In practical terms, they hold up against rain, splashes, and even being submerged in water (as long as the ends are sealed well). For marine use, they are excellent since they keep saltwater out of the connection, which is a big advantage over plain crimp connectors. However, note that "waterproof" assumes no water can bypass via the wire insulation itself – if you nick or puncture the insulation leading into the connector, water could potentially wick along the strands. So ensure your wires and connector are intact. Also, after installation, do not pull the wires out – if you yank hard enough to partially pull a wire out, you could create a gap for moisture. In summary, a correctly installed solder seal connector provides a sealed splice that is about as waterproof as a wire splice can practically get.
Q4: Can I use these connectors for high-current or critical connections?
A4: Solder seal connectors are used in automotive and marine circuits carrying moderate current (for example 5A, 10A, 15A etc.) with great success. For very high current cables (say large gauge battery cables or starter motor wires), these may not be suitable simply because those wires often exceed the size these connectors come in, and crimped lugs are usually preferred for extremely high currents. Additionally, some industry standards (like in marine ABYC or aerospace) advise that solder-only connections should not be the sole method in critical circuits, because if the joint gets overheated (far above normal conditions) the solder could re-melt. That said, under normal operating conditions, a properly made solder seal connector is very robust – the solder used has a decent melting point (much higher than any ambient temperatures, only a prolonged overload or direct flame would re-melt it). Many users report that these connectors handle automotive currents (even 20-30 amps on thicker wires) without any issues of overheating. If you are unsure or if the connection is mission-critical (e.g. airbag sensor, etc.), you might opt for a professional crimp and seal connector. But for the majority of DIY and repair work, yes, they can handle the current as long as you use the correct gauge connector. Always match or exceed the wire’s current capacity. For example, don’t try to push 30A through a tiny 22 AWG wire with a white connector – that’s a wire limitation, not the connector’s fault. Used appropriately, the connector will not be the weak link.
Q5: What’s the difference between these solder seal connectors and regular crimp connectors?
A5: Both serve the purpose of joining two wires, but they do it differently:
-
A crimp butt connector has a metal ferrule that you mechanically crimp (deform) around the wires, and often also has heat-shrink insulation. It requires a crimping tool and the quality of the connection depends on a good crimp.
-
A solder seal connector uses solder to bond the wires and the heat-shrink tubing is built-in as the outer shell with adhesive. It requires only heat to install, no crimp tool.
Electrical performance: A good crimp vs a good soldered joint are both low resistance and strong. Crimp connectors are traditional in automotive/marine and are very reliable when done with the right tool. Solder seal connectors are a newer alternative that achieve a soldered joint and seal in one step, which many find more convenient. They remove the variability of whether a crimp was done perfectly, since the solder will flow to fill gaps. However, one must heat correctly – an inadequately heated solder seal could be weaker than a proper crimp. So, it’s important to follow the proper technique (as described above). In terms of strain relief: crimp connectors often have a crimped barrel that also grabs insulation; solder seal connectors rely on the adhesive-lined shrink for strain relief. Both, when done right, have good vibration resistance.
Practically, solder seal connectors are great for DIY folks or when you don’t have expensive crimp tools. They especially shine for on-site repairs (no power needed except maybe a butane heat gun). Some professionals use a combination approach (crimp then solder) in critical cases, but that’s not necessary for most fixes. In short, solder seal connectors simplify the process of making a sound electrical connection with built-in solder and sealant. Many find them “the easiest wire connections (no soldering iron required)” as one video title says. They are an excellent option for most low-voltage wiring tasks.
Q6: Where can I buy quality solder seal connectors?
A6: Solder seal wire connectors have become very popular, so they are readily available. You can find them at auto parts stores like AutoZone or Harbor Freight, home improvement stores, and online marketplaces. However, quality can vary. It’s recommended to buy from a reputable brand to ensure the solder and tubing are high quality. Haisstronica is one such brand known for reliable connectors – they offer kits in various sizes (for example, their 340-piece kit mentioned earlier or smaller packs) with marine-grade materials. Another brand is Wirefy, and there are others like Kuject, Sopoby, etc., but Haisstronica’s products are highly rated in the community (and come with certifications). If you search for “solder seal wire connectors” on Amazon or online, look for those with good reviews and clear specifications. For convenience, you can purchase directly from Haisstronica’s online store, which offers the full range of solder seal connectors and kits. They often come in organized boxes with each size separated. In summary, buy a decent kit and it will last you through many wiring projects – having an assortment on hand is very useful.
Q7: Any tips for multiple connections or splicing a harness?
A7: If you need to make several splices in proximity (like repairing multiple break points on a wiring harness), try to stagger the locations of the splices along the wires. This way, once all the connectors are installed, they aren’t bunched up in one lump – staggering maintains the flexibility of the harness and makes it easier to wrap or loom the harness afterward. Also, be mindful of the order: if you have to feed wiring through a conduit or hole, do that before adding the solder connectors, since the slightly thicker connector may not fit through small holes that the raw wire could. Lastly, if you have many wires to join (for example, splicing a 4-wire cable to another 4-wire cable), do them one at a time to avoid confusion, and consider using different connector colors or labels to keep track of which wire is which. The transparency of these connectors can help here – you can see the wire colors through them when double-checking your work.
By now, you should have a thorough understanding of how to use solder seal wire connectors for creating dependable wire splices. With a bit of practice, you’ll find that these heat shrink solder connectors make wiring tasks faster and yield professional-quality results. No more fiddling with separate solder, flux, shrink tubing, and tape – everything is handled in one go. Whether you’re fixing your boat’s wiring, adding lights to your truck, or working on a DIY electronics project, solder and seal connectors can save you time while giving you confidence in the connection.
In conclusion, solder seal wire connectors are a game-changer for quick electrical repairs and builds. They combine the best of soldered connections (excellent conductivity and strength) with the best of heat shrink insulation (waterproof sealing and strain relief). For the technically inclined user, they offer a neat solution that meets the demands of harsh environments. Give them a try in your next wiring project – as long as you follow the proper technique of strip, insert, heat, and cool, you’ll be rewarded with a rock-solid splice.
Shop Solder Seal Connectors
Shop Now →Need connectors for this repair?
Use this guide with the right connector kit so each splice is sealed, insulated, and heated evenly. Shop Haisstronica solder seal wire connectors for automotive, marine, trailer, and DIY wiring repairs.
Browse solder seal wire connectors or choose a solder seal wire connectors kit for AWG 26-10 wiring projects.