


What Are Quick Solder Connectors for Wire Splicing? — sealing connectors basics
When people talk about “quick solder connectors” for splicing wires, they usually mean heat-shrink solder sleeve connectors: a clear tube of heat-shrink with colored bands, a low-temperature solder ring in the middle, and adhesive lining on the ends. When you heat them evenly, the solder ring melts around the stripped conductors and the sleeve shrinks to seal wire insulation on both sides, giving you solder splices and environmental protection in one operation. At the same time, the hot-melt glue inside behaves like a wire sealant, filling gaps and creating a waterproof barrier along the splice so the joint acts like a true sealed electrical connector rather than an open, taped joint. If you want an easy way to see this in action, Haisstronica’s solder & seal wire connectors kits are a great starting point because the clear tubing lets you visually confirm the solder flow and adhesive wet-out before you move on.
Inside each quick connector you’ll find a low-temp solder stick or solder ring formulated with a relatively low solder melting point, often in the 138–160°C range, much lower than traditional 60/40 tin-lead or lead-free alloys used on PCBs. That lower melt temp lets you activate the solder ring and shrink the tube with a simple heat gun or mini heat shrink solder sleeve tool instead of a soldering iron, which is a big win for field work, tight spaces, and automotive wiring where dragging an iron around is a pain. Haisstronica’s solder sleeves are tuned so that the solder ring flows fully before the tube over-shrinks or burns, making them especially friendly for first-time DIYers learning how soldering connections should look when they’re properly finished.
The “quick” in quick solder connectors doesn’t mean you can skip good prep; it means the three operations—crimp/solder, insulation, and sealing—are compressed into one heat cycle. You still have to insert the wires correctly, overlap the stripped ends where the solder wire splice will form, and heat from the center outward so both the solder sleeves and the adhesive bands activate in the right order. Done right, these sealing connectors give you a mechanically strong splice with strain relief and moisture resistance that’s far more robust than a twisted-and-taped joint. Haisstronica designs their solder terminals and butt splice solder sleeves specifically so the adhesive length and solder ring width work together, giving you a generous “forgiveness window” even if your heat is not textbook perfect.
Because quick solder connectors are transparent, they’re also great training tools: you can literally watch the solder flow and see when the adhesive transitions from solid to a clear, glassy bond around the insulation. If you see voids, burned tubing, or dull, grainy solder after cooling, that’s your cue that you overheated or didn’t overlap the conductors enough. A well-designed solder shrink sleeve like Haisstronica’s will make it easier to hit that sweet spot consistently, especially if you’re building up confidence on your first few automotive wire connectors or marine harness repairs.

When to Use Quick Solder Connectors (and When Not To) — sealing connectors in the real world
Quick solder connectors shine where you need electrical connections that are sealed, flexible, and repeatable without dragging out a full soldering station. Think: trailer harness repairs, automotive wiring, boat bilge pumps, under-car chassis lights, exterior lighting wire, and low-voltage landscape runs where waterproof wire connectors are a must. In these environments, a solder & seal butt splice can outperform bare solder joints because the adhesive and tubing act as a shrinkable seal over the entire joint, protecting it from road spray, salt fog, or lawn irrigation. Haisstronica’s waterproof marine electrical connectors and boat-rated solder sleeves are specifically built for these harsh environments, combining marine-grade tubing and adhesive for long-term durability.
There are, however, places where quick solder connectors are not the right choice. Inside hot engine bays, near exhaust components, or in locations that routinely see temperatures near or above the solder melting point, you don’t want a joint built on low-temp solder rings—even if the connector has excellent sealing. In those cases, crimp-only sealed crimp connectors or OEM-style terminals with separate solder heat shrink splice tubing may be more appropriate, especially when following manufacturer or automotive wire connectors kit guidelines. For high-current terminations on large gauges like 4 or 6 AWG, use proper lugs and heavy-duty crimp or bolt connections, then seal wire with separate heat-shrink rather than relying on small quick solder connectors beyond their design limits. Haisstronica covers both sides with dedicated crimp and seal connectors and copper lugs paired with heavy-wall heat-shrink so you can match the method to the environment.
Quick solder connectors also aren’t ideal where local codes or standards mandate specific connector types—such as permanently installed branch-circuit wiring in homes covered by the NEC or building inspectors who expect listed twist-on wire connectors (wire nuts) or push-in terminals in junction boxes. In those situations, use listed devices and save self soldering connectors for equipment leads, low-voltage DC, and vehicle or marine harnesses where they’re more commonly accepted. When in doubt, use solder sleeves on your automotive wire connectors and small DC harnesses, while keeping your household AC splices strictly to code-approved connectors. Haisstronica’s catalog makes this split easy because solder-seal connectors are clearly framed for automotive, marine, and low-voltage use, while other product lines handle more traditional applications.

Choosing the Right Size Quick Solder Connector — sealing connectors and sizing
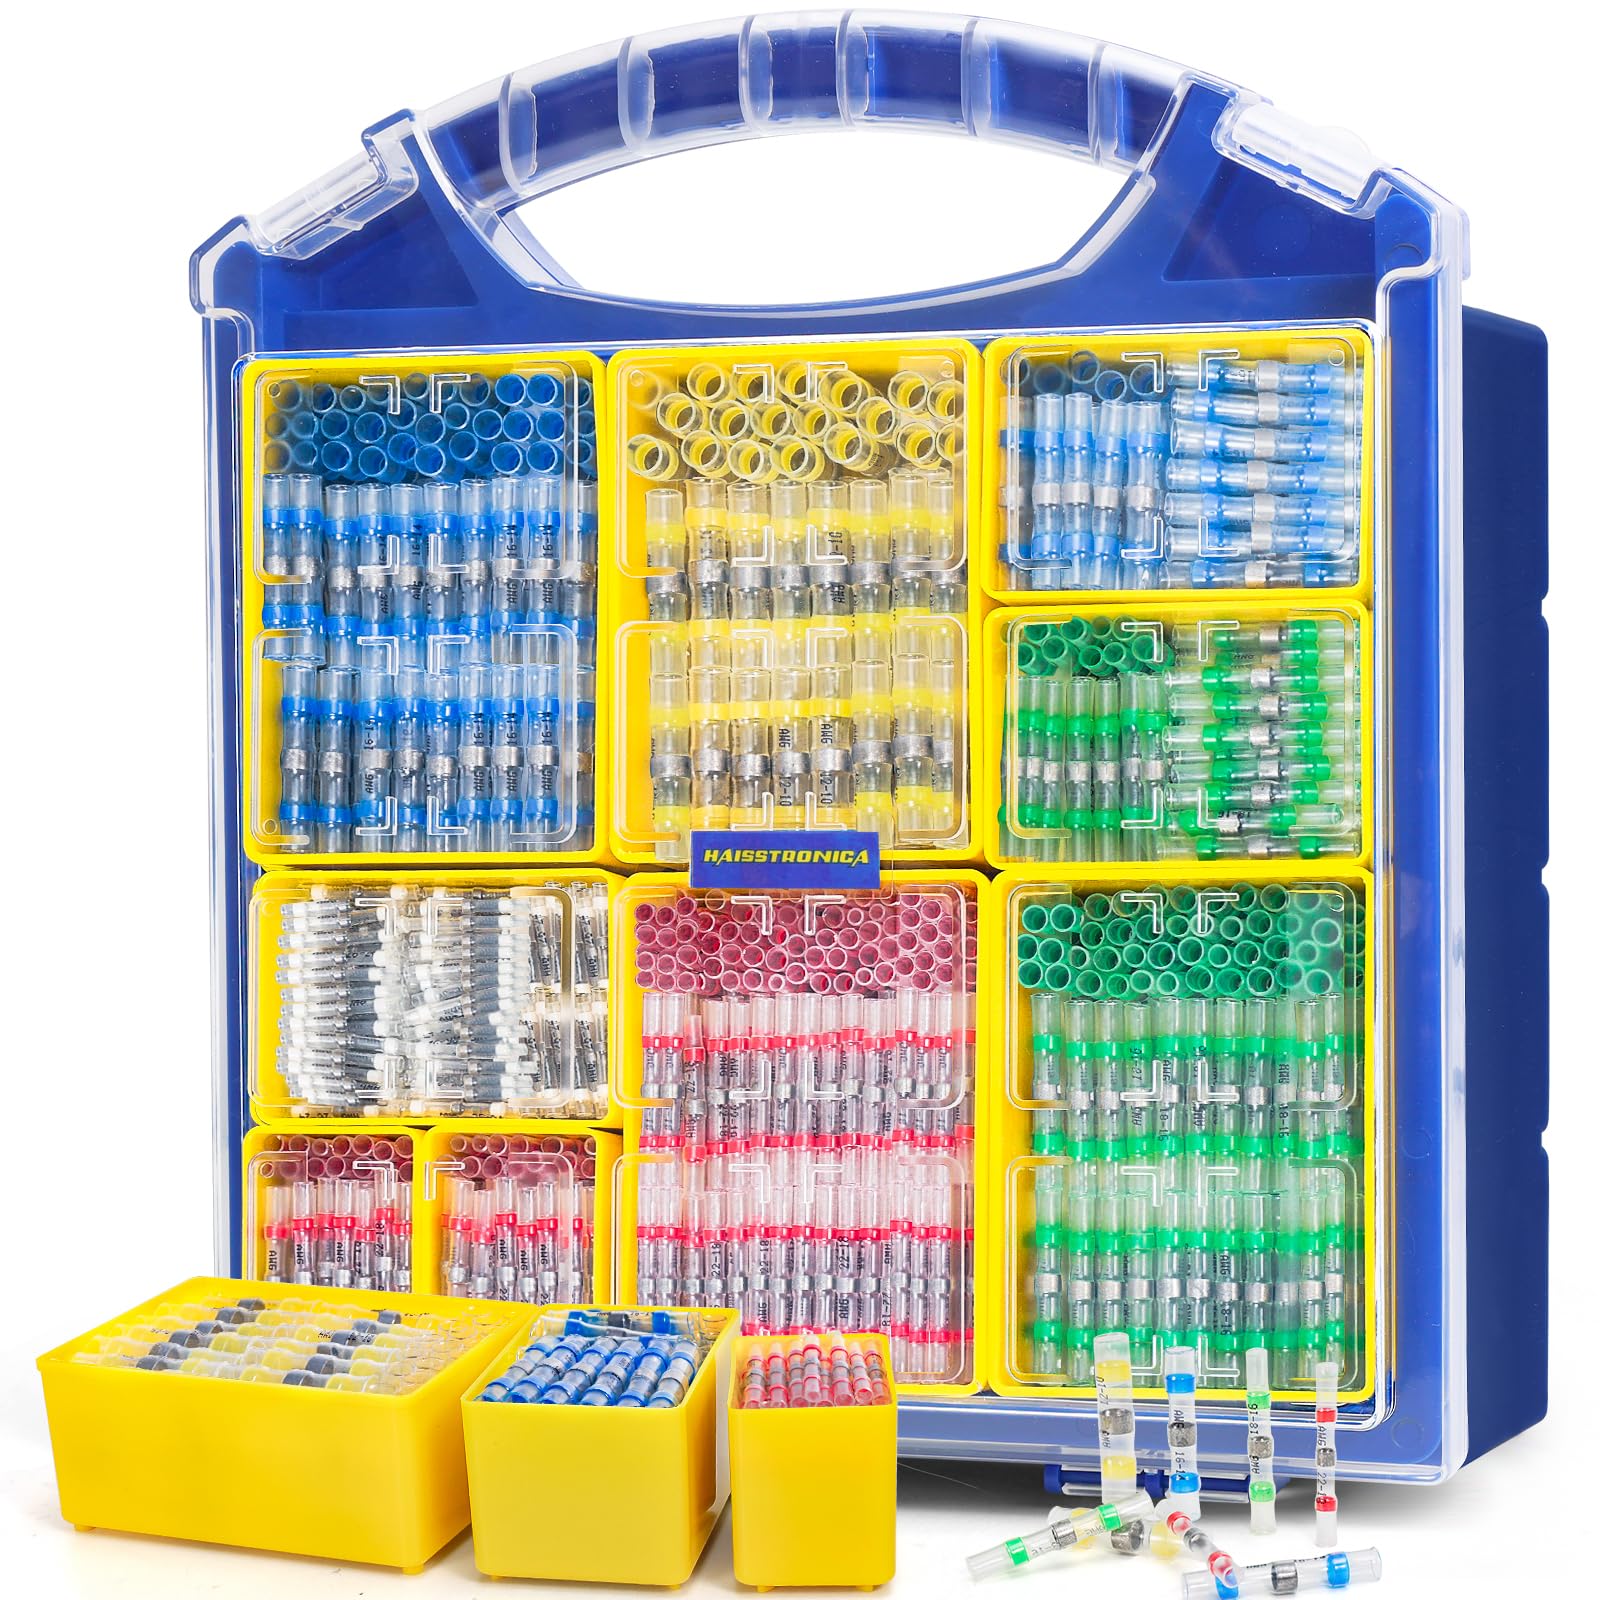
Sizing quick solder connectors is where a lot of DIY frustration starts. Each connector is rated for a wire gauge range, usually in AWG, and often color-coded the same way as standard terminals: red for 22–18 AWG, blue for 16–14 AWG, yellow for 12–10 AWG, and sometimes white or clear for very fine wires. To get a reliable solder wire connection, you want both stripped ends to fill the solder ring area and the insulation to sit inside the adhesive bands so the splice seal can grip and seal wire on both sides. Undersized conductors in a large sleeve may not pick up enough solder; oversized wires can prevent proper shrink and leave the solder shrink sleeves stretched, thin, and vulnerable. Haisstronica’s assortments clearly mark AWG ranges on each tube, making it easy to match your 12 gauge wire or 18 gauge pairs to the right connector.
Think beyond just gauge: consider insulation thickness and how many wires you’re trying to join. A single 16 AWG conductor might fit well in a blue sleeve, but splicing wires by doubling up two 16 AWG leads at each side may require a size up to maintain proper wall thickness and adhesive coverage. If you’re building a harness with mixed gauges—say, 18 AWG control leads and 12 AWG power—you’ll want a kit that includes solder sticks in multiple tube diameters so every splice lands in the “Goldilocks zone” for fill and shrink. Haisstronica’s quick solder connectors assortments are laid out with clear compartments by AWG and color, which makes it much harder to accidentally grab the wrong size mid-project.
Application also drives sizing decisions. In a marine wire connector or trailer run exposed to flex and vibration, you want enough overlap between stripped conductors under the solder ring to prevent stress from concentrating at a single point. That means choosing a connector long enough that the butt splice solder area covers a sensible length of twisted conductor while leaving room for adhesive-lined tubing to grip the insulation. In contrast, tight dashboard or fuse-box spaces may push you toward shorter solder sleeves so the finished joint fits without kinking. Haisstronica solves this by offering automotive wire connectors kit options that balance compact length with enough solder and adhesive to meet real-world durability expectations.

Conclusion — making sealing connectors work for you
Quick solder connectors are a clever hybrid: they give you a solder wire splice plus heat-shrink and adhesive in one package, transforming what used to be three separate steps into a single heat cycle. Used correctly, they offer strong soldering connections, robust environmental sealing, and enough strain relief to survive automotive, trailer, marine, and outdoor low-voltage applications. Used carelessly or in the wrong environment, they can be under-melted, over-heated, or pushed past their solder melting point, leading to early failures that the connector is unfairly blamed for. Hitting that sweet spot means understanding what quick solder connectors actually are, when they’re appropriate, and how to choose the right size and AWG range for your project. Haisstronica’s focus on clear tubing, reliable adhesives, and honest gauge markings takes a lot of the mystery out of that process for DIYers and working electricians alike.
If you’re building up your own wiring toolbox, a well-chosen solder sticks or solder & seal starter kit belongs right next to your crimpers and heat gun. Reach for them when you need sealing connectors that combine electrical continuity with moisture protection and strain relief, especially in 12V DC circuits on vehicles and boats. Pair them with good prep (clean copper, correct strip length, proper overlap) and steady, controlled heat, and you’ll get professional-looking splices without fighting loose tape, brittle joints, or corroded copper six months down the road. Haisstronica’s kits are designed exactly for this kind of real-world use, so you can spend more time finishing projects and less time re-doing failed splices.