Quick Take—Why 10 AWG Feels Hard (10 Gauge Crimping)
Crimping 10 gauge wire (10 AWG) can feel like trying to crush a rock – it’s significantly thicker and tougher than the smaller wires most crimp tools are designed for. In fact, a 10 AWG copper conductor has about 5.3 mm² cross-sectional area (≈2.59 mm diameter), roughly double that of a 14 AWG wire. More metal means more force needed to deform the crimp connector around it. Industry standards illustrate this well: according to UL testing, a proper crimp on a 10 AWG wire must withstand around 80 pounds of pull force without coming apart. That’s a lot of force – imagine reliably supporting a small person’s weight by your crimped connection! No wonder 10 gauge crimping feels hard with ordinary tools. If you’ve ever tried using a basic crimper or (heaven forbid) generic pliers on a thick cable, you probably ended up with sore hands and an incomplete crimp. The key takeaway is that crimping heavy-gauge wires isn’t about brute strength alone; it’s about having the right technique and equipment. This is why electricians and seasoned DIYers invest in quality wire crimping tools designed for larger wires. A specialized approach – and some heavy-duty tool hacks – will let you crimp 10 AWG securely without breaking a sweat. (By the way, investing in a high-quality crimp tool now, such as Haisstronica’s heavy-duty wire crimper for large connectors, can save you a lot of effort and frustration in the long run.)
Pick the Right Tool (Ratcheting Crimper / Mini-Hydraulic)
When it comes to taming thick wires, choosing the right crimping tool is half the battle. Not all crimpers are created equal – some are built for light-duty tasks (like small wire connector crimps on 20 AWG or 18 AWG), while others are engineered to handle heavy-duty lugs and thick cables. For 10 gauge crimping (and larger, like 8 AWG), a ratcheting crimper is often the minimum requirement. Ratcheting crimp tools have an internal mechanism that locks as you squeeze, ensuring you apply consistent pressure and only release when the crimp is fully compressed. This not only guarantees a proper crimp but also significantly reduces the hand force needed, preventing fatigue. In other words, a good ratchet crimping tool can make a huge wire feel much smaller by giving you mechanical advantage and controlled pressure.
For frequent or high-volume crimping of heavy gauge wires, you might step up to a hydraulic crimping tool (often a mini hand-pump style or even battery-powered). These deliver several tons of crimp force with minimal effort – for example, some hand-operated hydraulic crimpers output 5 to 12 US tons, enough to tackle cables far beyond 10 AWG. In fact, industrial pros acknowledge that for really big wires, hand force alone might not cut it; jobs may “demand the power and consistency of hydraulic force” to get a reliable crimp. The good news is you don’t need a giant bench press – compact mini-hydraulic crimpers are available for DIY use, enabling you to crimp large connectors (even 8 AWG, 6 AWG, or larger lugs) with a few easy pumps of a handle.
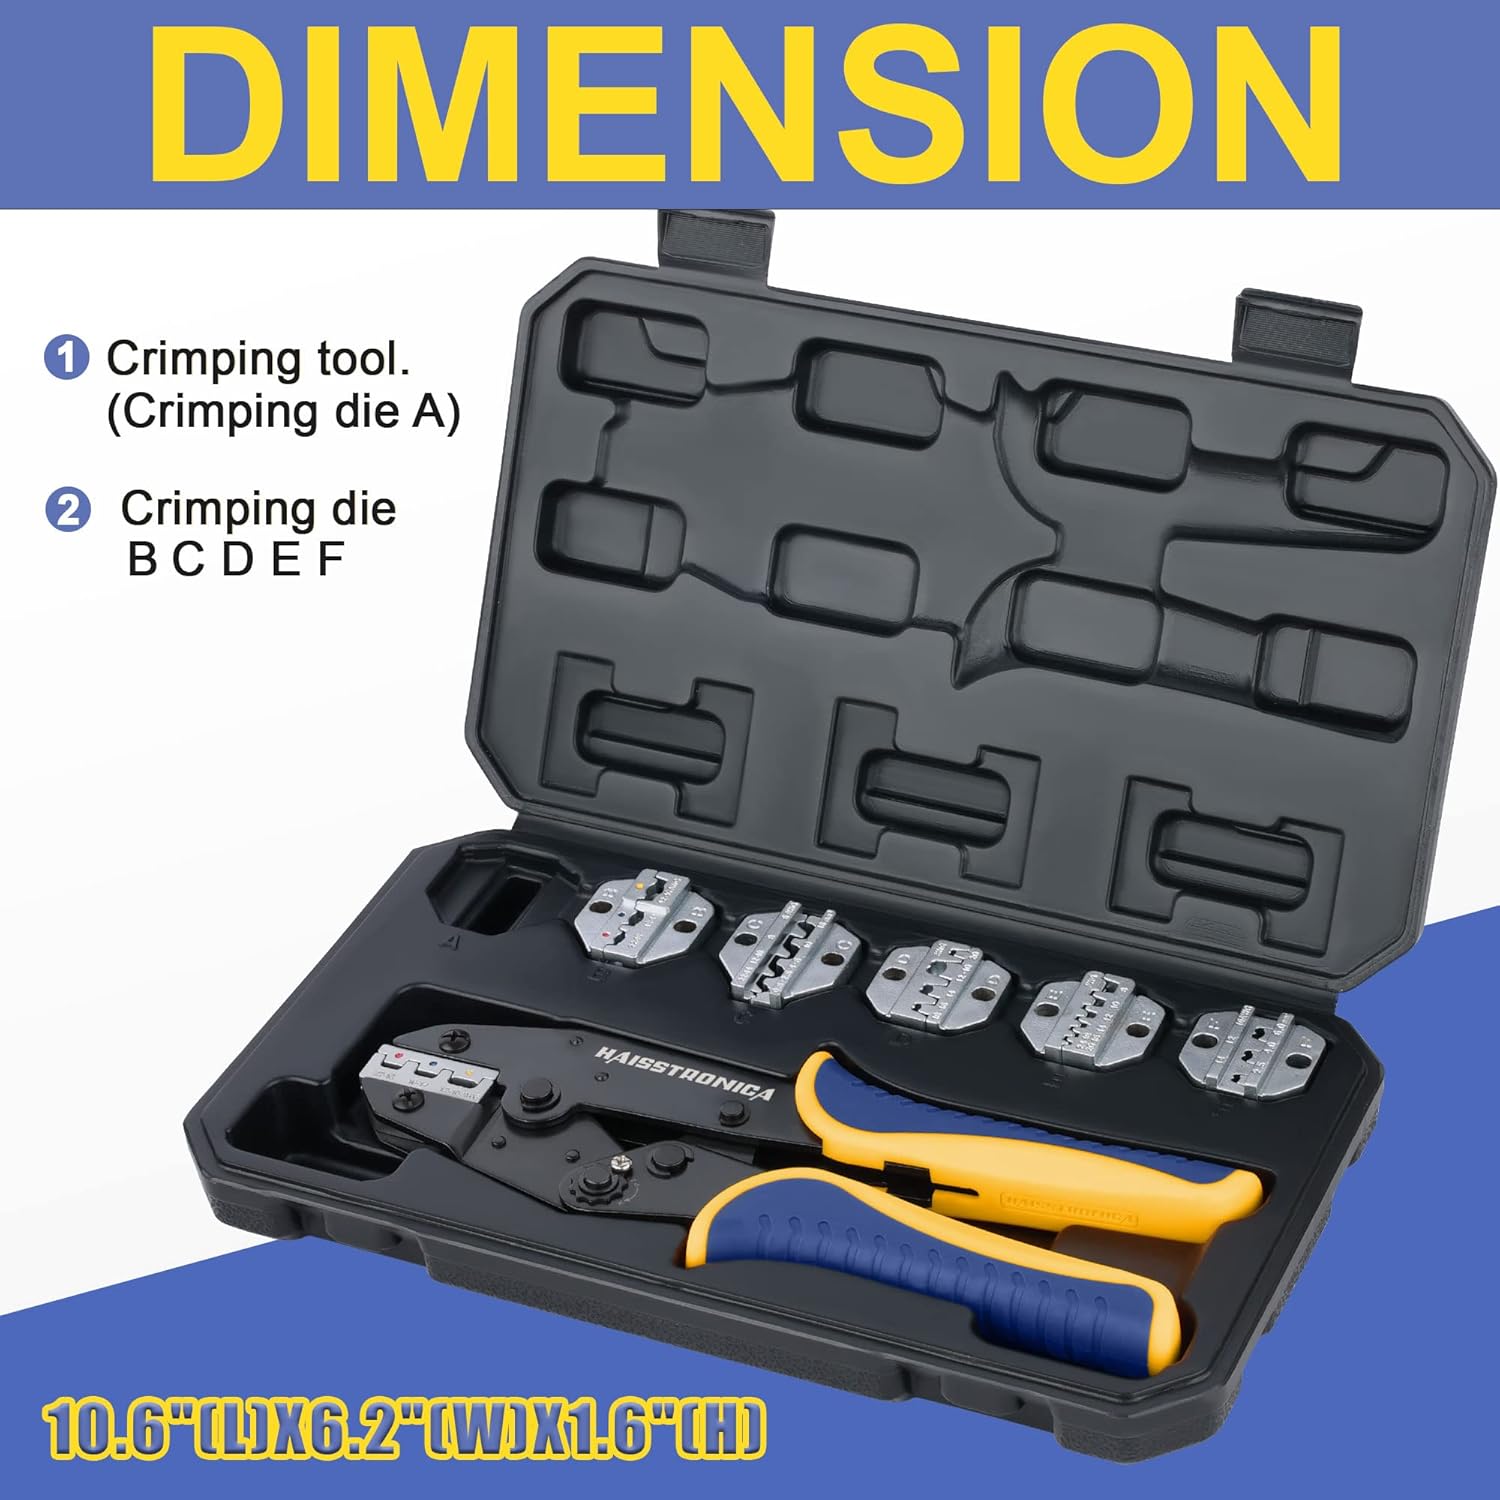
Between a quality ratcheting crimper and a hydraulic unit, which should you choose? If you’re mainly crimping insulated terminals, ring connectors, or butt connectors in the 10–12 AWG range, a heavy-duty ratcheting crimper will usually do the job fine (make sure it’s rated for 10 gauge). Look for one with long handles or compound leverage for extra oomph, and one that won’t release until the crimp is properly formed – this ensures a uniform, tight crimp on the connector every time. Many ratcheting crimpers like Haisstronica’s are designed to cover AWG ranges up to 10 or even 8, and have adjustable tension if needed for fine-tuning. On the other hand, if you frequently work with battery cables or large lugs, or just want to make crimping virtually effortless, a mini hydraulic crimper is a great addition. It’s essentially a portable press that can swage a big copper connector onto thick wire with almost no hand strain. Some even come with interchangeable dies covering a wide range of wire sizes (for example, 16 mm² up to 50 mm² or more). Remember, using the right tool for the job isn’t just about convenience – it ensures a proper electrical connection. So, don’t torture yourself with make-shift methods; a purpose-built ratcheting crimp tool or cable crimper will spare your hands and yield a better crimp. (Haisstronica offers both a ratcheting wire crimper for 22–10 AWG and heavier hydraulic-assisted crimpers, so you can pick the tool that fits your needs and say goodbye to squashed knuckles.)

Match Dies, Terminals & Wire (12–10 Yellow Terminals / Die Profile)
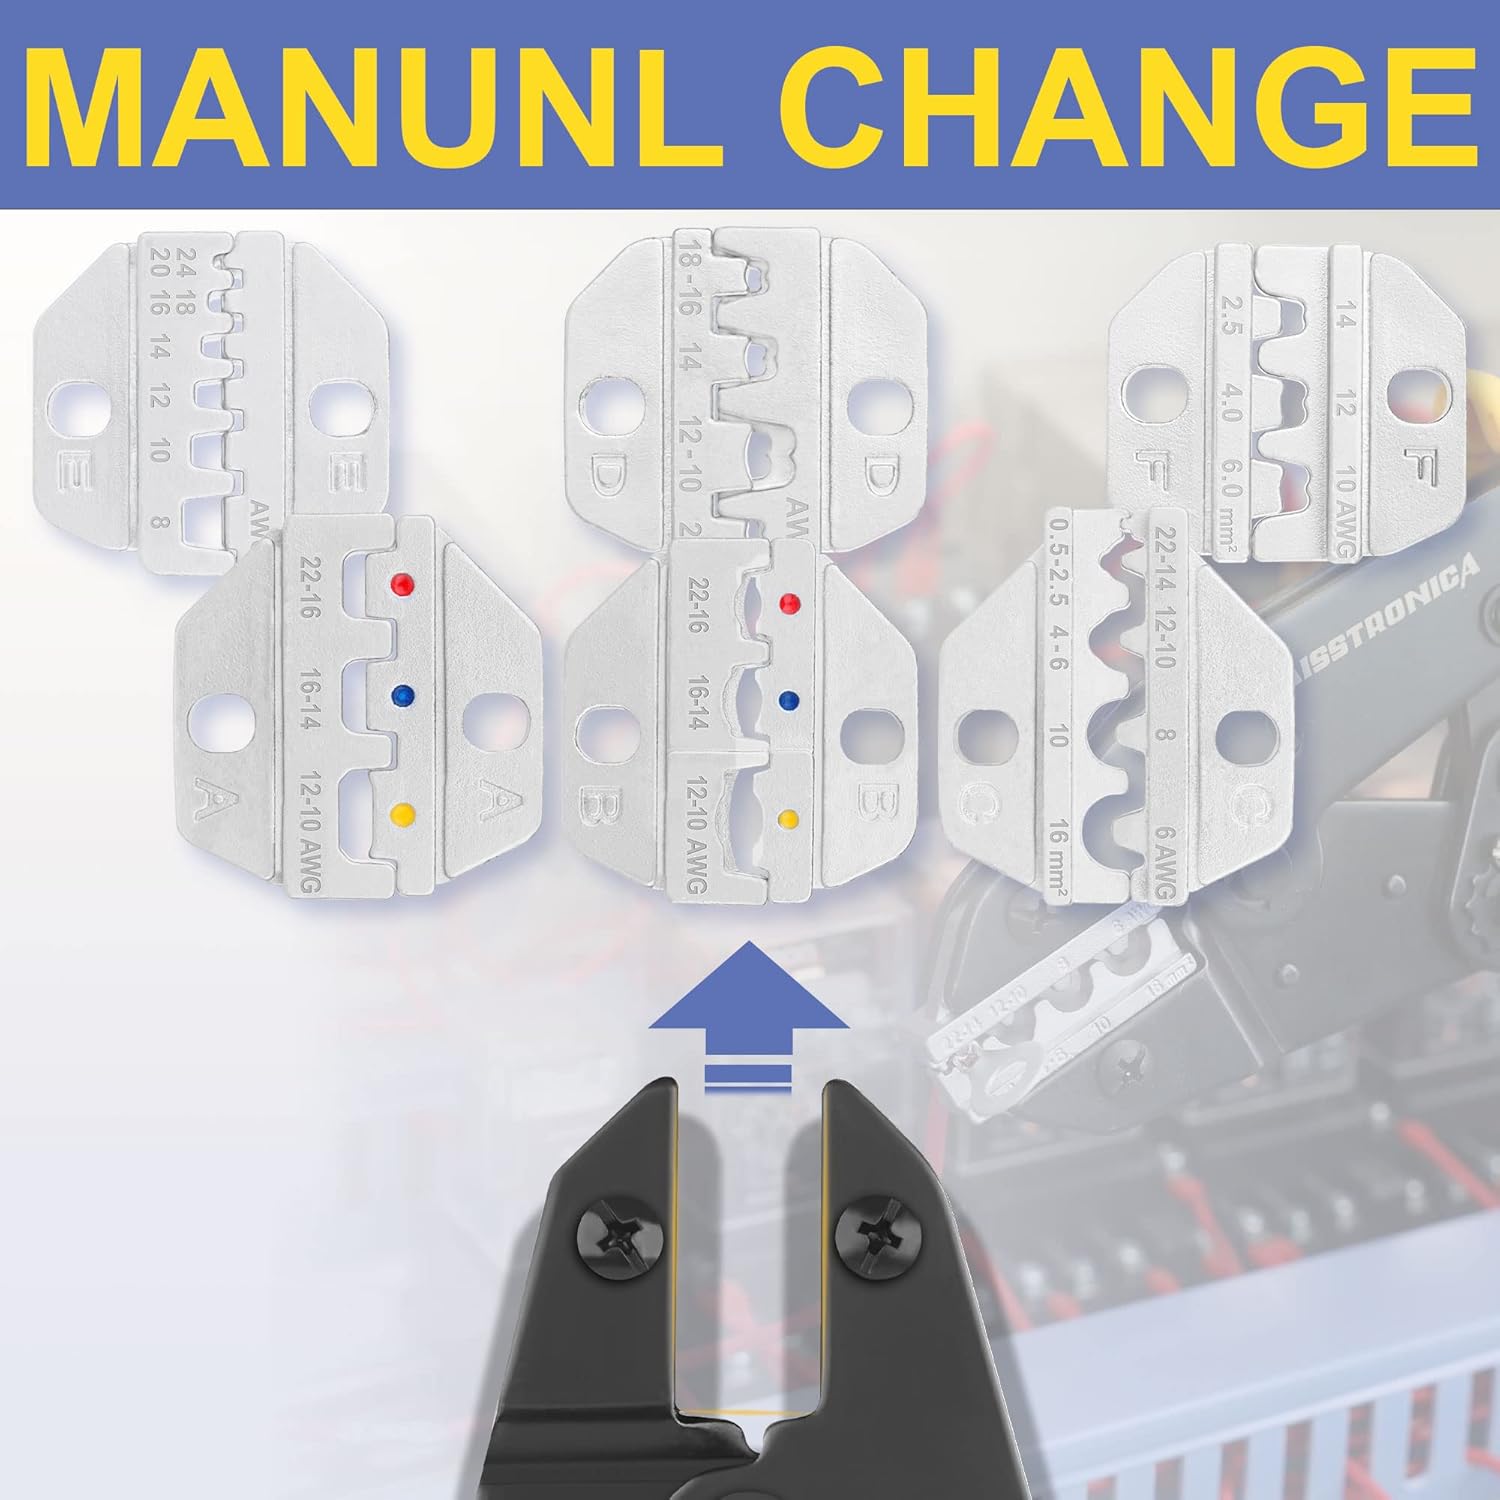
Using the beefiest crimping tool won’t help if you don’t match the die, terminal, and wire size correctly. Think of it as the Goldilocks principle of crimping: too large or too small a die and you’ll either over-crimp (damaging the connector) or under-crimp (leaving it loose). For insulated terminals and splices, industry standards have made this easier by color-coding connectors by wire gauge. In the U.S. system, yellow insulation typically denotes 12–10 AWG terminals – you’ll see this on yellow ring terminals, spade lugs, and butt connectors meant for wires in that range. Correspondingly, many crimp tools have a yellow mark or label on the die nest that is intended for crimping those yellow 12–10 gauge connectors. Using the yellow-coded slot (or the die stamped “10-12” AWG) ensures the tool’s teeth compress the connector to the right degree for a solid crimp. For example, if you accidentally use the “red” 22-16 AWG die on a yellow connector, you’ll likely end up with an incomplete crimp; the die is too loose for the wire size. Conversely, using a die meant for, say, 8 AWG on a 10 AWG connector might over-crimp and cut into the metal or insulation. It’s critical to choose the die nest that matches your wire gauge and connector type.
Also consider the terminal style: insulated vs. non-insulated terminals require different crimp profiles. Insulated terminals (like our example yellow vinyl or nylon connectors) usually crimp best in a rounded or omega-shaped die that compresses the ferrule without puncturing the insulation. Non-insulated lugs often use an indent or hexagonal crimp that bites directly into the metal. Many professional crimping tools come with interchangeable die sets for different connector styles. Always check that you have the right die installed or selected for the specific connector. As Wirefy’s crimping guide emphasizes, using the wrong die or tool for the connector can create crimps that are “too tight or too loose, which decreases reliability and safety”. In short: match the color, match the number, match the connector.
How do you know which die to use? Thankfully, most quality wire crimpers tools have clear markings. Look for engraved wire gauges, colored indicators, or labels like “10–12” or “yellow” on the die. If your tool uses removable die cartridges, they often have the AWG range stamped on them. Consult the tool’s guide – it will specify which die slot to use for a given connector type and size. And don’t mix up metric cable sizes with AWG – a die marked for 6 mm², for instance, is roughly equivalent to 10 AWG, but verify in the manual if applicable. One more tip: use the matching quality connectors. A cheap off-size terminal might not crimp correctly even with the right die. Stick to reputable brands (for example, Haisstronica’s 12–10 AWG crimp connectors are built to spec and color-coded for easy identification). They’ll fit the dies properly and have the right metal thickness to form a secure crimp. By pairing your 10 gauge wire with a yellow 10 AWG-rated connector and crimping it in the corresponding die, you set yourself up for success – a tight, mechanically sound crimp that won’t pull off under load. (All Haisstronica terminals follow the standard color coding and sizing, so when you use our terminal crimper tools with our yellow connectors, you’ll get a perfect match and a hassle-free crimp every time!)

Heavy-Duty Tool Hacks (Effort-Saving Tips)
Even with the right crimping tool and matched components, 10 gauge wiring jobs can be made easier with a few clever tricks. Here are some heavy-duty hacks to crimp like a pro with minimal sweat:
-
Leverage is Your Friend: When using manual crimpers (especially large ratcheting crimpers), position the tool for maximum leverage. For instance, you can place one handle against a firm surface or use both hands on the grips to get extra force. Many electricians will set the crimper on a bench or floor for the final squeeze on a tough crimp, effectively using their body weight to assist. An ergonomic handle design helps, but there’s no shame in creatively bracing the tool to gain an advantage – the goal is a tight crimp with less strain on you. (High-quality tools like Haisstronica’s ratchet crimper are designed to reduce required hand force, but you can always use smart positioning to further ease the process.)
-
Pre-crimp and Final Crimp: A handy DIY trick for stubborn large connectors is to do a two-step crimp. Start by giving the connector a light crimp or “pre-crush” either with your crimp tool on a wider setting or even with a pair of vice-grip pliers, just enough to hold the wire in place. Then perform the final crimp with the correct die for full compression. This pre-crimp can reduce the effort needed on the final squeeze because the connector is already partially compressed around the wire. Just be careful not to deform it too much in the wrong spot – the idea is to slightly snug it, then let the proper die finish the job. This technique is especially useful if your hand strength is limited or if your crimper is right at its capacity with 10 AWG.
-
Use a Vise or Impact Crimper: If you don’t have an expensive hydraulic crimper, one hack is to use a simple hammer-style crimp tool but operate it with a bench vise instead of hammer blows. These hammer/anvil crimpers are inexpensive devices where you place the connector and wire and hammer the top to deform it. However, whacking with a hammer can be awkward and uneven. By placing the assembly in a sturdy vise and tightening down, you get a slow, controlled crimp with less physical violence. Users report that this method yields a solid crimp without needing superhero grip strength. Similarly, some folks have used hydraulic bottle jacks or C-clamps as makeshift presses for crimping very large lugs – a bit extreme for 10 AWG, but it shows the principle of applying steady force with tools you might already have.
-
“Cheater Bar” for Crimpers: If your manual crimp tool has short handles that make 10 AWG tough to crimp, you can extend the handles with a length of metal pipe slipped over them (commonly called a cheater bar). This increases your leverage dramatically. Caution: use this hack sparingly and only if the tool is robust enough, because excessive force can damage a lighter-duty crimper. But a quality heavy-duty wire crimper should handle it. For example, a long piece of conduit over the handle of a hex lug crimper can turn a strenuous two-hand squeeze into an easy one-hand pull. Always ensure the die is properly aligned on the connector before applying that extra leverage to avoid any tool slippage.
-
Double-Crimp for Long Barrels: Some heavy-duty connectors (like lengthy butt splices or ferrules) might require two crimps along their length for a secure connection. If your 10 AWG butt connector is extra long, crimp one end of the barrel over the wire, then move the tool slightly and crimp the other end of the barrel. This distributes the compression and can actually reduce the force needed at each point, compared to trying to crimp the whole thing perfectly in one go. It also ensures the entire barrel grasps the wire. Many electrical connectors crimp best with this two-bite method when they’re large. Just remember to only strip as much insulation as needed for the barrel length of each crimp.
-
The “Squeeze and Squash” DIY Fix: In a pinch without the ideal tool, users have improvised by using a regular crimper plus some muscle from other tools. One DIYer shared that they crimped a 10 AWG splice a couple of times with a small crimper then “squished them good with a large pair of channel locks” to finish the job. While not an official method (and not pretty!), it speaks to an important point: the crimp doesn’t care how you applied the force, as long as you achieve a solid compression of the connector onto the wire. So if you must improvise, using large pliers or vice grips after your crimper might secure a connection that your underpowered crimp tool couldn’t on its own. Of course, this is a last resort hack – whenever possible, use the proper crimping tool for electrical connectors to get a uniform result.
Finally, don’t overlook the obvious hacks: keep your tools calibrated and in good shape. A ratcheting crimper can often have its tension adjusted – if it’s too hard to close on the specified gauge, check the manual for how to tweak the tension screw so you’re not needlessly over-exerting. Lubricate the pivots of your crimpers so they operate smoothly. And take advantage of any automatic crimping features; for instance, some electric or battery crimpers will do the squeezing for you at the press of a button – a worthwhile investment if you do a ton of crimping work.
Using these tricks, even a tough job like 10 AWG becomes much easier. The combination of mechanical advantage, correct technique, and a bit of ingenuity will have you crimping heavy wires confidently. (Many of these effort-saving features are built into Haisstronica’s professional crimping tools – from ratcheting mechanisms that prevent under-crimping to ergonomic handles that maximize leverage. With the right tool in hand, you’ll implement these hacks and get flawless crimps without breaking a sweat!)

Conclusion
Crimping hefty 10 gauge wires may have a reputation for being labor-intensive, but with the knowledge and tools discussed here, you’ll find it’s very manageable – dare we say, easy. The key is understanding why 10 AWG feels tough (its size demands more force) and countering that with the right equipment (like quality ratcheting wire crimpers or hydraulic-assisted tools) and proper techniques. By picking the right tool for the job and ensuring your dies, wire, and connectors are all correctly matched, you set a solid foundation for success. Add on the heavy-duty hacks – leveraging your strength smartly, using two-step crimps, and other tricks – and you won’t even break a sweat making secure, reliable connections on thick wires. In fact, your crimps will meet professional standards, holding tight under extreme pull tests and electrical loads. Remember, a well-executed crimp is essentially a cold weld between the wire and connector; it should become a single, solid conducting piece of metal. With the insights from this guide, you can achieve that even on challenging 10 AWG cables. So arm yourself with a good heavy-duty crimping tool, slide on that yellow connector, and crimp away – Haisstronica is here to make sure every crimp is a success, no matter how tough the wire. Happy crimping, and stay connected (securely)!
References: