What “Crooked” Really Means (Definition & Quick Self-Check for Electrical Crimp Connectors)
When we say a crimp looks “crooked,” we mean the crimped connector isn’t aligning straight with the wire. In a proper crimp, the terminal barrel is compressed uniformly without bending. By contrast, a crooked crimp is visibly angled or skewed – technicians sometimes call it “banana-shaped” if the connector bows to one side. Essentially, the connector ends up at an angle relative to the wire instead of straight in line. A quick visual self-check can usually spot this: Is the connector tilted or the crimp off-center? A good crimp should appear neat, centered, and straight, with the wire visible in the terminal’s inspection window and no cracks or flares in the metal. If the crimped connector looks uneven or lopsided, that’s a red flag. In fact, industry guidelines say a finished crimp must be uniform and straight – any crooked or angled appearance is a sign of a bad crimp that should be redone. For a fast test, gently flex the wire: a straight, solid crimp won’t wobble, but a crooked one might show gaps or allow the wire to twist. Remember, even if a crooked crimp seems to hold, it can lead to electrical issues (like high resistance or intermittent contact) down the line. Ensuring each crimp is straight and secure is crucial for reliable electrical connections. Using quality crimp connectors and the right wire crimping tools (like Haisstronica’s professional crimpers) makes it much easier to achieve straight, secure crimps every time – giving you confidence in every electrical connection.

Root Causes of Crooked Crimp Connectors (8 Common Reasons)
Why do crimps end up crooked? Here are 8 common causes behind those slanted or skewed crimp connectors, electrical DIYers and pros alike should watch out for – and how to address each issue:
-
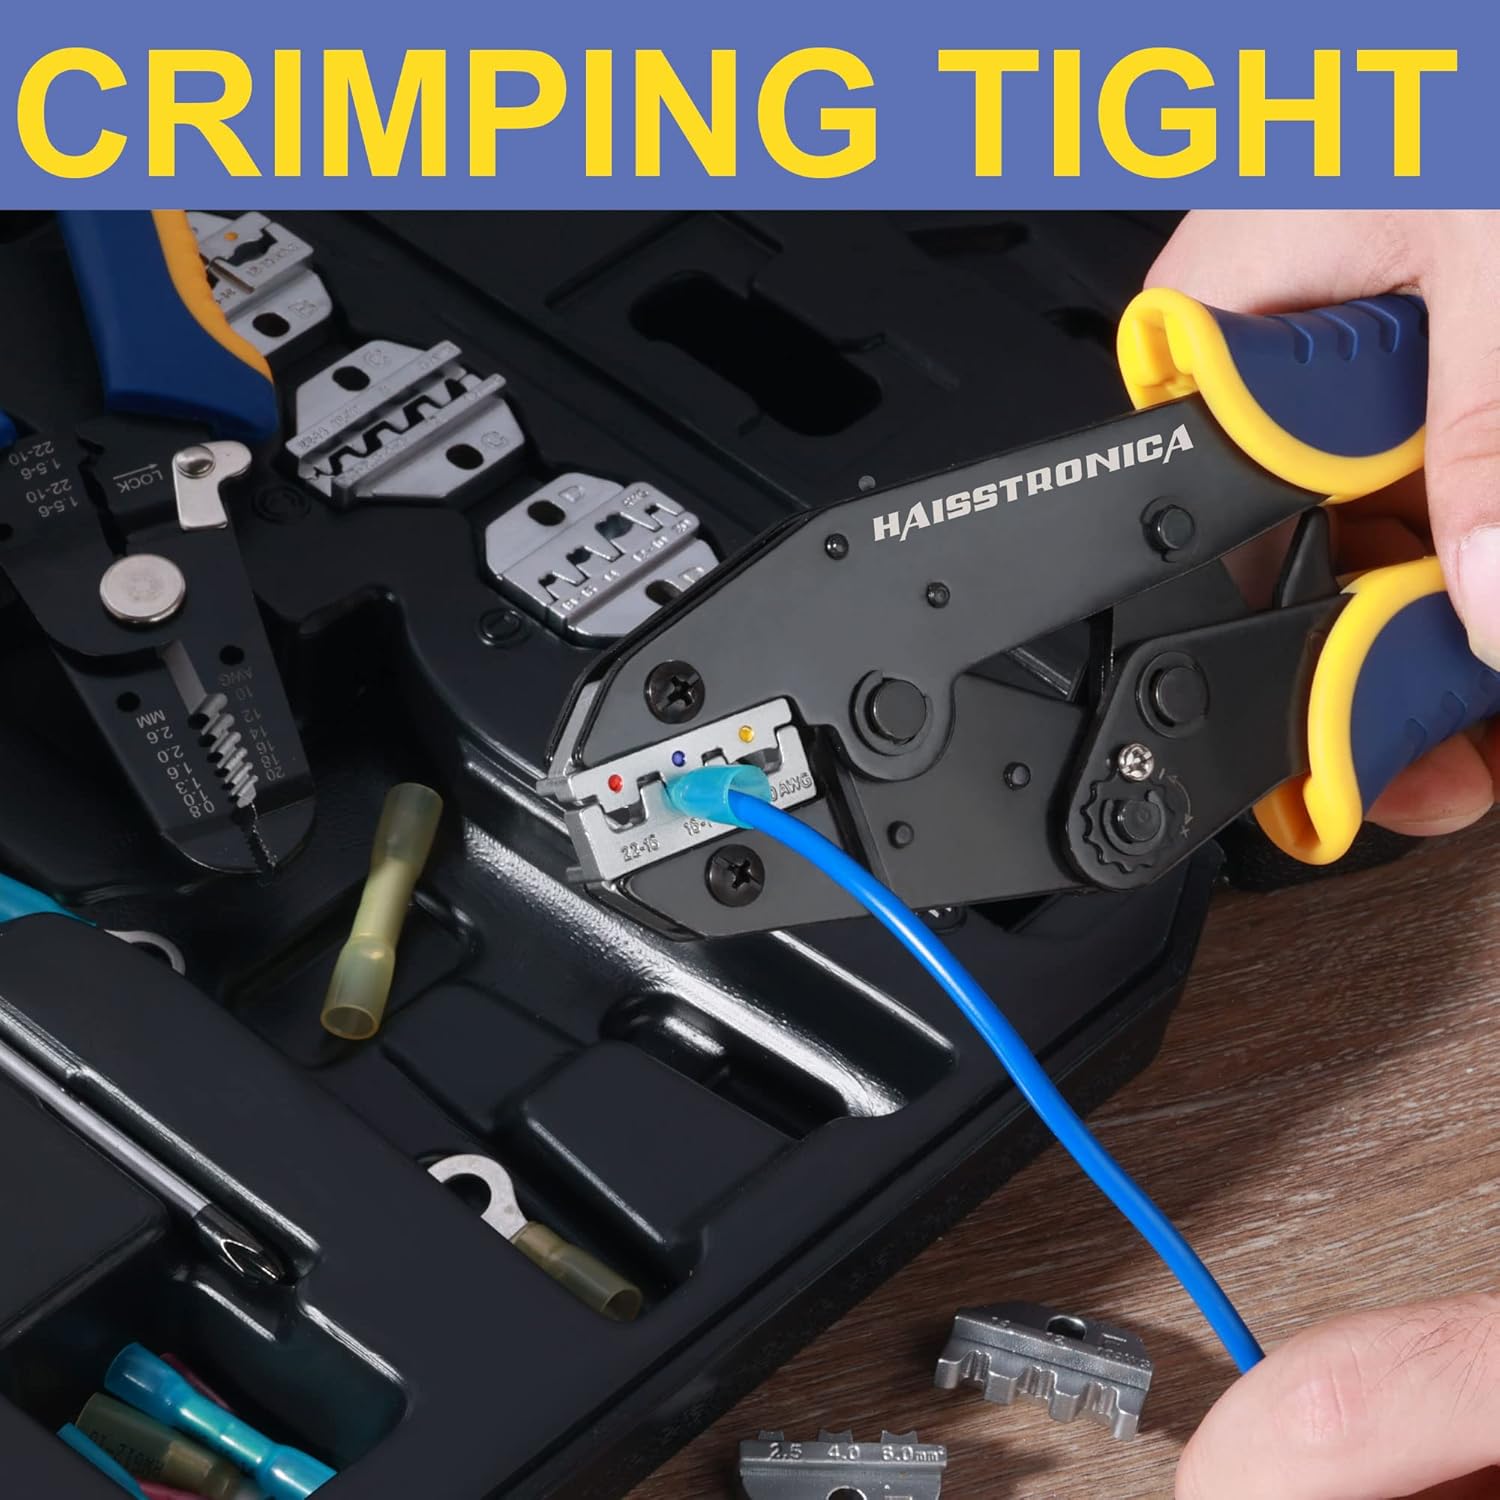
Using the Wrong Tool (e.g. Pliers Instead of a Crimper): One of the biggest culprits for crooked or malformed crimps is using an improper tool. Regular pliers or generic “crimping pliers” often apply uneven pressure, resulting in a deformed connector or a crimp that’s pinched more on one side. These tools can’t provide the consistent 360° compression that a dedicated wire crimping tool does, leading to lopsided crimps. Always use a proper wire crimping tool or, better yet, a ratcheting crimper designed for your connectors. A ratcheting crimp tool applies even, controlled force and won’t release until the crimp is complete, greatly reducing crooked outcomes. In short, don’t grab those old pliers – upgrade to a real crimper. Haisstronica’s ratcheting wire crimper tools are purpose-built to prevent uneven pressure, helping you avoid crooked crimps from the start.
-
Wrong Connector Size for the Wire Gauge: Using a connector that doesn’t match your wire’s gauge can also cause crooked or poor crimps. If the connector barrel is too small for the wire, you may have to force the wire in, deforming the terminal; if it’s too large, the crimp can collapse unevenly because there’s empty space on one side. An undersized connector will get over-crimped and crushed (since too much metal is being compressed), often bending or flaring out the terminal. An oversized connector, on the other hand, won’t crimp tight enough around the wire, potentially splaying or twisting as the tool closes. The result in both cases is often a misshapen, angled crimp. The solution is simple: always use the correct connector size for your wire. Most crimp connectors electrical projects use color-coded insulated terminals (red, blue, yellow, etc.) which correspond to specific wire gauge ranges. Verify the AWG range on the connector package and ensure it matches your wire. This ensures the connector barrel is neither too tight nor too loose, so the crimp can form evenly. Takeaway: fit the connector to the wire. Haisstronica’s wire connectors are clearly labeled by gauge and color-coded, making it easy to choose the right size and achieve a straight, solid crimp on your wires every time.
-
Incorrect Crimping Die or Slot Selection: Many crimping tools have multiple die cavities (for different sizes or types of terminals), and using the wrong one can lead to a crooked crimp. For instance, crimping a small terminal in an oversized die might only press one side of the barrel, bending it, while crimping an insulated connector in the wrong shape die could pinch it unevenly. Moreover, using a tool or die not designed for your terminal type (e.g. using a cheap single-size crimper on a heat-shrink butt connector meant for a ratcheting die) will cause alignment problems. Mismatched dies and terminals – those not meant to work together – can result in exactly the kind of misalignment that produces a crooked crimp. Always match your tool’s die to the connector: if your crimper has color-coded slots or labels (like red/blue/yellow or specific AWG markings), use the correct one for the connector you’re crimping. For interchangeable die sets, use the die that fits your connector’s profile (e.g. open-barrel vs. closed-barrel, insulated vs non-insulated). The manufacturer’s tooling guide is your friend here – for example, TE Connectivity and Molex publish recommendations showing that the wrong die geometry can cut strands or leave voids in the crimp (which often goes hand-in-hand with a crooked or incomplete crimp). Using the right crimping die ensures the compression is uniform. Bottom line: the die and terminal must match. Haisstronica’s crimping tools come with precisely sized die cavities (and even interchangeable dies for different connector types) so that each crimp is perfectly formed, not crooked or skewed due to a mismatched tool.
-
Misalignment When Crimping (Not Holding the Connector Straight): Even with the right tool and parts, human error can bend a crimp. If the connector and wire aren’t held perpendicular to the crimper jaws during the crimping action, one end of the barrel will start to crimp before the other, causing a crooked result. In practice, this can happen if you insert a connector at a slight angle or if the wire is pulled to one side while crimping. For example, in hydraulic hose crimping, a “crooked crimp” occurs when the assembly isn’t held straight in the die – the same concept applies to electrical wire terminals. To avoid this, ensure the terminal is seated flat and straight in the crimp tool’s nest before you squeeze. The wire should run straight out of the connector, not at an angle. Some tools have positioning guides or markings to help line things up – use them. It can also help to lightly close a ratcheting crimper on the connector first (just enough to hold it) so you can check alignment before fully crimping (more on this in the next section!). If you’re using a manual crimp tool without a ratchet, take extra care to stabilize everything. A helpful tip: be sure the cable axis is exactly perpendicular to the die when crimping – otherwise, as one manufacturer warns, “a crooked crimp could result.” Keeping your work aligned at 90° will ensure both sides of the crimp compress evenly. For best results, take a moment to align the connector and wire in the tool. Using a quality ratcheting crimp tool can assist greatly here – Haisstronica’s ratcheting crimpers hold the connector steady, giving you a free hand to position the wire so every crimp comes out straight, not sideways.
-
Improper Wire Insertion Depth or Position: A subtler cause of crooked crimps can be how the wire is inserted into the connector. If you don’t strip enough insulation, the wire might not reach far enough into the barrel, leaving a gap on one side that can collapse unevenly. Alternatively, if the wire is stripped too long or pushed in too far, the insulation crimp might end up where the copper should be, and the conductor isn’t in the right spot – leading to a weak crimp that can deform. If some wire strands miss the barrel (for example, a few stray strands bending backward outside the connector), the crimp will certainly be uneven. The key is to strip the wire to the proper length and insert it fully so that all strands are inside the terminal barrel and the wire’s insulation is just at the end of the barrel. You should usually see the copper strands just visible through the little “window” of the connector before crimping. When the wire isn’t fully inserted, one side of the connector barrel may end up crimping down on empty air or insulation, rather than copper – this often yields a lopsided crimp (and a poor electrical connection). Always double-check: once the wire is in the connector, give a slight tug to ensure it’s seated, and verify the exposed copper (the “conductor brush”) is at the right length per the connector specs. Proper wire prep and placement go a long way. Many wire crimping connectors kits (including Haisstronica’s) provide strip-length guides. By following those and making sure the wire is correctly positioned, you’ll avoid the frustration of a crooked crimp caused by a simple insertion mistake. And if you’re not confident, Haisstronica also offers wire connector crimpers with built-in wire stops to help position everything perfectly.
-
Excessive Crimping Force (Over-crimping): Believe it or not, it is possible to crush a connector so hard that it bends or warps. Over-crimping typically happens with manual crimpers (especially non-ratcheting types or cheap tools) where the user applies far more force than needed, or uses a too-small die on a connector. The connector’s metal barrel can only compress so much – once it’s fully crimped around the wire, additional force has to go somewhere, often causing the connector to flare out or bend sideways (hence the “banana” shape). If you notice the terminal is significantly deformed, cracked, or the crimped shape is not symmetric, you might be over-squeezing. As one guide notes, if a crimped terminal comes out bent like a banana, ease up on the crimp tool. The fix here is to use a tool with a proper ratcheting mechanism or calibration that applies the correct pressure. Ratcheting crimpers, for example, are designed to release only after achieving a specific compression – this prevents you from over-crimping as long as you’re using the right size connector/die. Also, pay attention to the connector’s design: some insulated terminals will form a particular shape when properly crimped – if you continue squeezing beyond that, you’re likely over-crimping. In short, crimp firmly but not beyond the point the tool is meant to stop. If your tool doesn’t have a stop, practice on spare connectors to get a feel for when the crimp is “done”. Using a ratchet crimping tool can virtually eliminate over-crimping by automatically applying the optimal force. All Haisstronica ratcheting crimpers are factory-set to achieve a solid crimp without crushing the connector to oblivion – so you get a tight crimp without any crooked distortion or damage to the terminal.
-
Low-Quality or Damaged Connectors: Sometimes the issue isn’t you or your tool at all, but the connectors themselves. Cheap, poor-quality crimp connectors may use thinner or brittle metal that doesn’t deform evenly. Instead of forming a nice compression around the wire, a flimsy connector might buckle or twist under pressure, yielding a crooked result even if you do everything right. Similarly, connectors that have manufacturing defects (off-center seams, inconsistent barrel thickness) or ones that have been damaged (e.g. dropped and slightly bent, or reused connectors) can crimp improperly. For instance, a connector with an off-center seam might fold more on the weak side when crimped. Using properly made, high-quality connectors is important for this reason – they are built to crimp snugly without unexpected bending. Look for terminals made of tin-plated copper (for electrical connectors) and those that meet standards like UL. In fact, experts note that using unverified “mystery” connectors can lead to crimp failures; UL-listed connectors paired with the correct tools help ensure a reliable crimp. If you suspect a batch of connectors is giving you trouble (you notice many crimps turning out crooked or failing), it might be the components. Try a connector from a different manufacturer or lot and see if the result improves. Also, inspect your terminals: if one looks misshapen or has an off-center barrel seam, set it aside. In summary, not all connectors are created equal. Investing in good electrical crimp connectors pays off in consistency. Haisstronica’s connectors, for example, use robust copper cores and durable insulating sleeves that crimp uniformly without cracking or bending – giving you a straight, reliable crimp. Don’t let a 5¢ bargain connector ruin your work; quality parts matter!
-
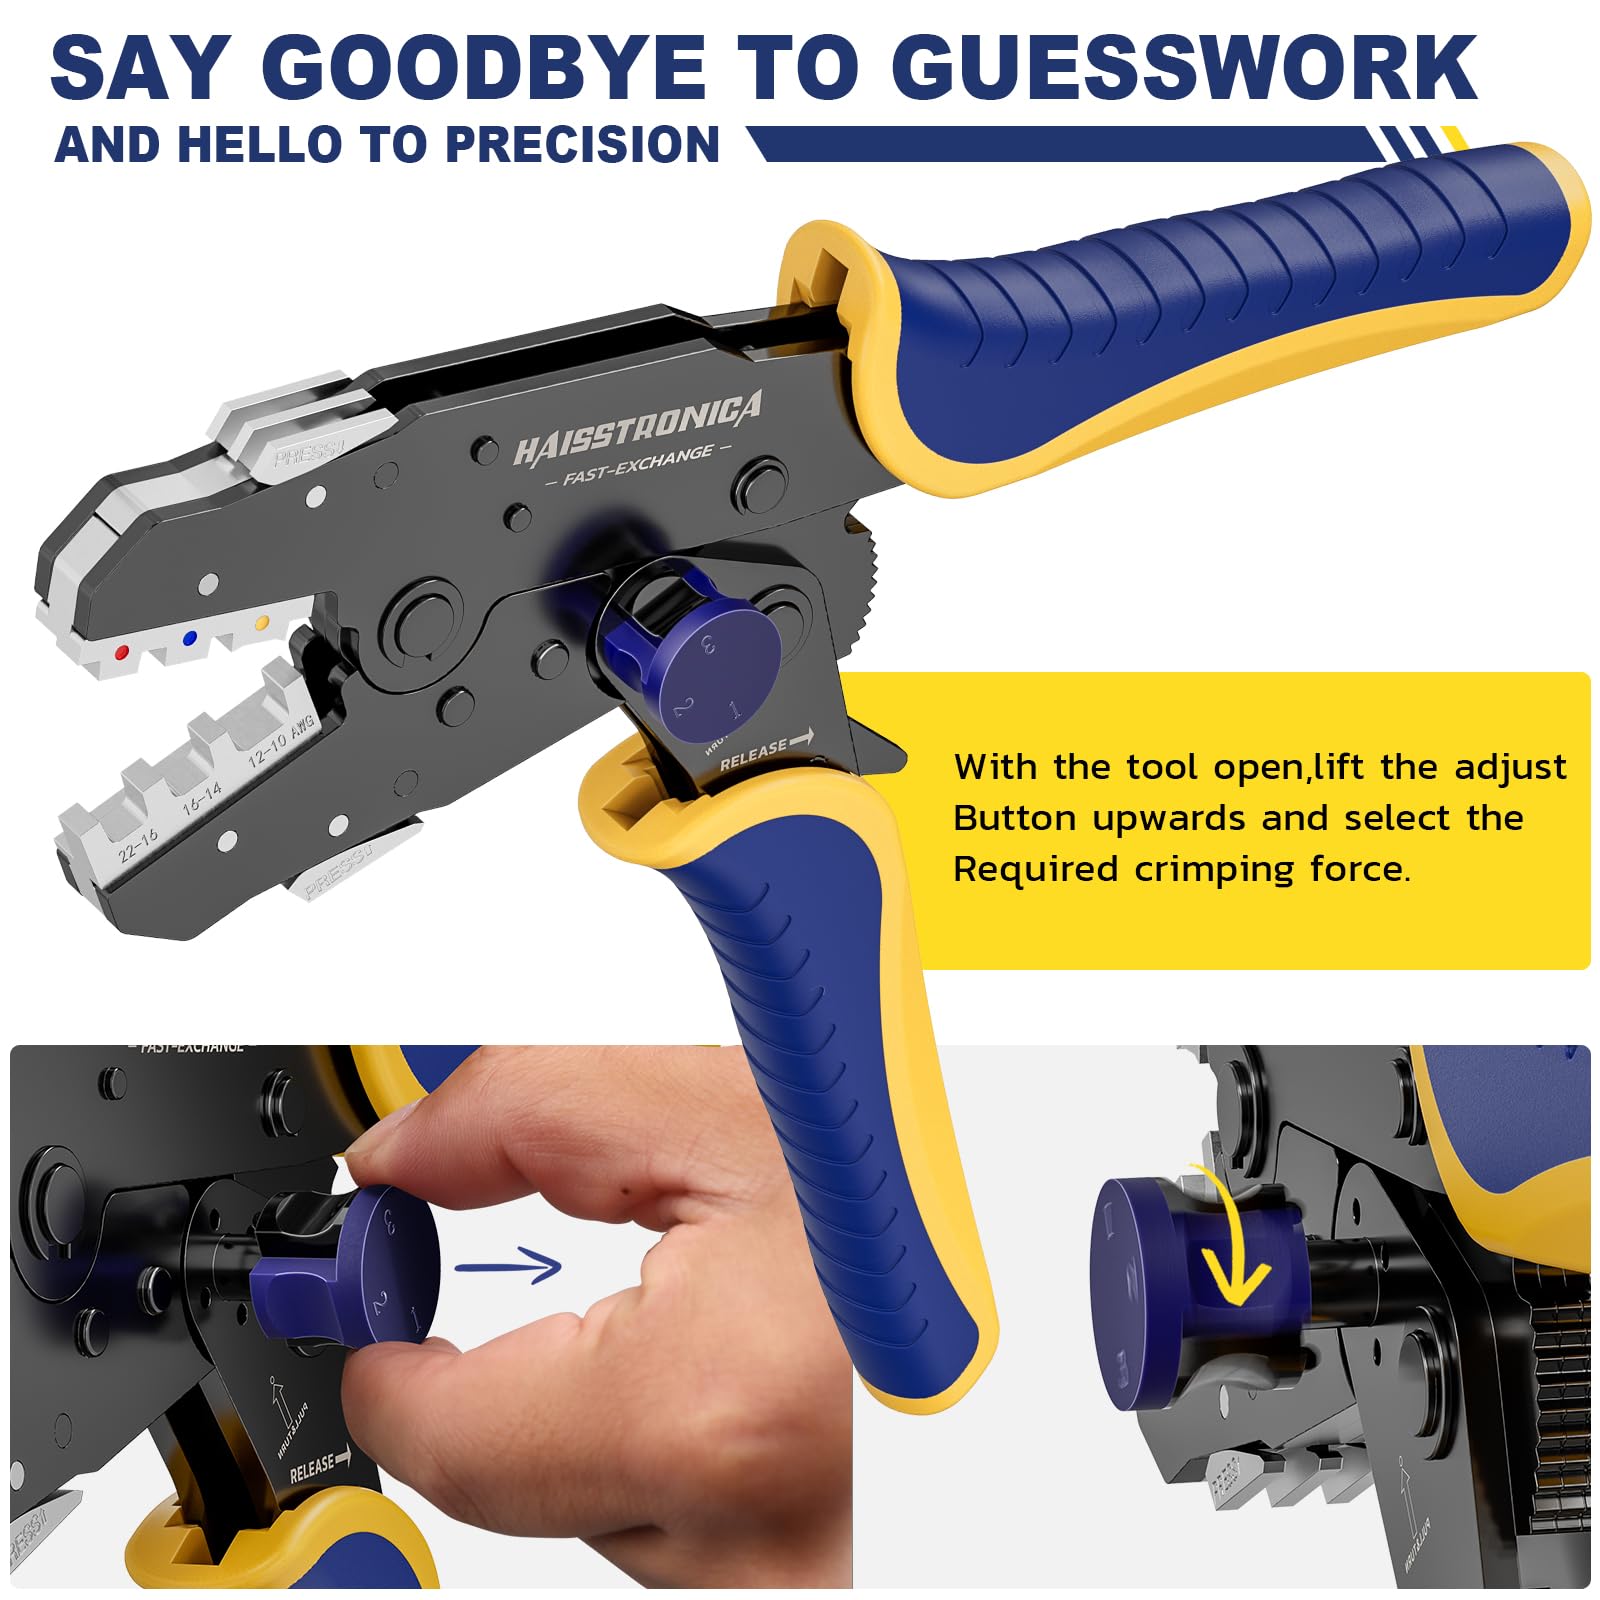
Worn-Out or Mis-Calibrated Crimping Tool: Tools can be a hidden cause of crooked crimps. Over time, the jaws of a crimping tool can wear or misalign. If one side of the die closes slightly before the other due to wear, every crimp you make might press harder on one side of the connector – resulting in a tilt or a crimp that’s thicker on one end. Inconsistent alignment can also stem from factory mis-calibration or if a tool gets dropped and bent. Wear and tear is expected with heavy use – even high-end electrical crimpers tools require maintenance. Frequent use can loosen the hinges or cause slight die offset, and that will definitely affect crimp symmetry. The best practice is to regularly inspect and, if possible, calibrate your crimping tools. Most ratcheting crimpers have an adjustable tension wheel to calibrate the tightness; follow the manufacturer’s instructions to keep it within spec. Also check for die alignment by closing the tool on an empty setting – the die halves should meet evenly. If you see a gap on one side or the dies don’t line up flat, the tool may need adjustment or replacement to avoid crooked crimps. Keeping the tool clean (no debris in the jaws) also helps ensure even compression. Ultimately, using the right tool for the job includes maintaining that tool. If you’re using an old bargain-bin crimper that’s seen better days, it might be time for an upgrade. Make sure your electrical crimping tool is in top shape. Haisstronica’s crimp tools are built for durability, but we still recommend periodic checks. We even offer calibration guidelines and replacement die sets – because a well-aligned tool is essential to crimps that are tight and straight, not distorted. Taking care of your tool will take care of your crimps!

The One-Hand Fix (One-Handed Crimping Technique to Fix Crooked Crimps)
After covering the causes of crooked crimps, let’s talk about a game-changing technique to fix alignment issues: the “one-hand” crimping fix. The concept is simple but incredibly effective – it involves using a ratcheting crimper tool in a way that frees up one hand, so you have better control and alignment. Here’s how to do it step by step:
-
Step 1: Pre-load the Connector in the Crimp Tool. Place your terminal into the correct die slot of a ratchet crimping tool, and squeeze the handles just enough for the jaws to grip the connector lightly. The ratchet mechanism will click and hold the connector in place. (Important: don’t deform it yet, just secure it.) Now the connector is fixed in the tool without you holding it.
-
Step 2: Insert the Wire with Your Free Hand. With the connector already held by the tool, you can use your free hand to insert the stripped wire into the connector. Slide it in until the stripped end bottoms out and you can see the copper through the inspection hole. Because the tool is holding the terminal, you can use one hand to adjust the wire’s position precisely – ensuring no strands are bent out and the wire is perfectly seated. Take a second to visually confirm that everything is straight: the wire should be entering at 90°, and the connector is sitting correctly in the die.
-
Step 3: Crimp and Finish. Now that the connector and wire are properly aligned, go ahead and squeeze the crimper handles fully with one or both hands until the ratchet cycle completes. The tool will apply even pressure all around the connector, and then release automatically when the crimp is done. You’ve just made a straight, secure crimp using essentially one hand to position and one hand to crimp – instead of the frustrating juggle of trying to hold the wire, connector, and tool all at once.
This one-handed pre-hold technique is powerful because it addresses the root of many crooked crimps: things moving out of alignment as you try to perform the crimp. By letting the tool act as your “extra hand” to hold the connector, you remove that instability. It’s especially useful in tight spaces or when you don’t have a helper. Many professional electricians use this approach by default: insert connector in ratcheting crimper, click to hold, insert wire, then complete the crimp. The result is a consistently straight crimp, since you were able to focus on alignment before applying full force. It’s worth noting that this trick largely requires a ratcheting crimp tool; a non-ratchet tool typically won’t lock partially, and thus can’t hold the connector for you. Yet another reason to use a ratchet crimper for electrical work. Also, some connectors (especially heat-shrink butt connectors) can be a bit slippery – the ratchet hold helps a ton in those cases. With practice, you’ll be able to do this quickly with one hand, which can significantly speed up your workflow while improving quality. So give the one-hand fix a try. Haisstronica’s ratcheting wire crimper tools are ideal for this technique, as they are designed with a smooth ratchet mechanism that lets you easily pre-grip the terminal. By crimping smarter (not harder), you’ll eliminate crooked crimps and get perfect results with less hassle. It’s like having a third hand when you need it!
Die & Terminal Matching (Avoiding Crooked Crimps from the Start)
The final piece of the puzzle is making sure you’re using the right crimping tool and die for the specific terminal – essentially matching the “recipe” so that crooked crimps don’t happen in the first place. We touched on die selection earlier in the causes, but let’s expand: different connector types require different crimp profiles. For example, an insulated vinyl butt connector is usually crimped with a rounded or oval die that won’t cut the insulation, whereas an open-barrel uninsulated terminal (like the pins used in automotive or Dupont connectors) uses a tool that makes a “B-crimp” or folded crimp. If you used the wrong style – say crimping a Dupont pin with a standard oval crimper – you might end up with a misshapen crimp that looks crooked or has one wing not folded properly. This is why die & terminal matching is so important: the tool’s crimp geometry must match the connector’s design. Using the appropriate size is part of it (as discussed, matching gauge), but using the appropriate shape is equally critical to avoid inherent crookedness or deformities. Manufacturers often design specific crimpers for their terminals (e.g., RJ45 plug crimpers vs. hex crimpers for cable lugs vs. indent crimpers for insulated forks). While it might be tempting to use one crimp tool for “everything,” doing so can lead to suboptimal crimps. If you notice, for instance, that every time you crimp a certain type of terminal it comes out skewed, it could be that your tool isn’t the right match for that terminal style.
So how do we avoid these problems? Select the proper tool for the connector before you crimp. Check the terminal packaging or spec sheet – often it will recommend a tool or at least show the crimp profile required. Ensure your crimping tool (and die, if interchangeable) is designed for that type of terminal. For example, use a ferrule crimper (often square or hex crimp profile) for wire ferrules, a flag terminal crimper for flag terminals (sideways connectors), and so on. If you use the correct pair, the crimp will naturally tend to form straight and even, because the die is applying pressure exactly where it should. If you mix and match incorrectly, you’re fighting the design. As Panduit notes in a crimping quality guide, mismatched die sets or terminals can create alignment problems and compromise crimp quality. That compromise often manifests as a crooked or partial crimp. Conversely, proper die alignment and matching yield a uniform compression on the connector, which is what we want.
Additionally, consider calibration and wear here as well: a perfectly matching die won’t perform if it’s out of alignment, so ensure both halves of the die meet correctly (many quality tools have adjustment or can be calibrated). If your tool has interchangeable dies, double-check you’ve installed the die set properly and fully tightened any locking mechanisms – a half-seated die is a recipe for a slanted crimp. Also, use the tool in the orientation intended. Some crimpers have a “top” and “bottom” for the connector (for instance, many open-barrel crimp tools specify which jaw should face the seam of the terminal). Follow those guidelines, because reversing a connector in the jaws can also cause uneven crimps (the tool might be designed to press harder on one side by design).
In summary, to avoid innate crookedness, make sure your crimping setup is correctly matched: right connector, right size, right die, right tool positioning. When everything is matched up, the crimp should form smoothly and straight by default. If you’re unsure, Haisstronica is here to help: we offer a range of specialized crimping tools electrical professionals use, each tailored to specific connector types (from insulated terminals to heavy-duty lugs). By choosing the proper Haisstronica crimp tool for your terminal, you’re essentially guaranteeing a proper match – which means a reliable, straight crimp. Die and terminal in harmony make for an easy crimping experience with no “inherent” crookedness to worry about.

Conclusion: Crimp with Confidence – No More Crooked Connections
Crooked crimps might be a common annoyance, but as we’ve seen, they’re not inevitable. By understanding what a crooked crimp looks like and pinpointing why it happens, you can take concrete steps to prevent it. Often, the solution comes down to using the right tools and the right technique: a quality ratcheting crimper (to apply even pressure and enable tricks like the one-hand fix), correctly sized and shaped connectors and dies (to ensure a proper fit and alignment), and good workmanship habits (like straight insertion and not over-crimping). We identified eight major causes of crooked crimps – from the obvious (wrong tool or connector size) to the subtle (tool wear or slight mis-angle during crimping). The good news is each cause has a fix or preventive measure, and most are easy to implement with a bit of care and the help of modern crimping tools.
By applying the “one-hand fix” technique, you eliminate one of the biggest variables in crimping: alignment. And by matching your dies and terminals, you remove any intrinsic mismatch that could cause trouble. As you incorporate these practices, you’ll find your crimps not only look better (nice and straight!) but also perform better – a straight crimp is usually a strong crimp, ensuring low resistance and high pull-out force as intended. Remember, every crimp connector in an electrical system is a critical link in the chain; a crooked or sloppy crimp can be a point of failure, whereas a solid straight crimp is a point of reliability.
No more settling for “good enough” crimps or wrestling with connectors that come out at funny angles. With the right approach and quality equipment, you can crimp with confidence. So the next time you terminate a wire, you’ll know exactly how to keep that connector straight and true. Happy crimping, and may all your connections be secure! When in doubt, gear up with proven tools and connectors – Haisstronica’s range of electrical crimping tools and premium connectors embodies these best practices, helping you achieve perfect crimps every time. Say goodbye to crooked crimps and hello to professional-grade connections.
Sources: