Know Your Tool — crimp wire
A crimp tool converts hand force into controlled die travel to plastically deform the terminal barrel around the conductor and insulation. In a proper crimp wire joint, the metal‑to‑metal contact area is maximized and trapped oxides are displaced, producing a low‑resistance, “gas‑tight” connection (NASA workmanship guidance describes crimping as a properly engineered cold weld).
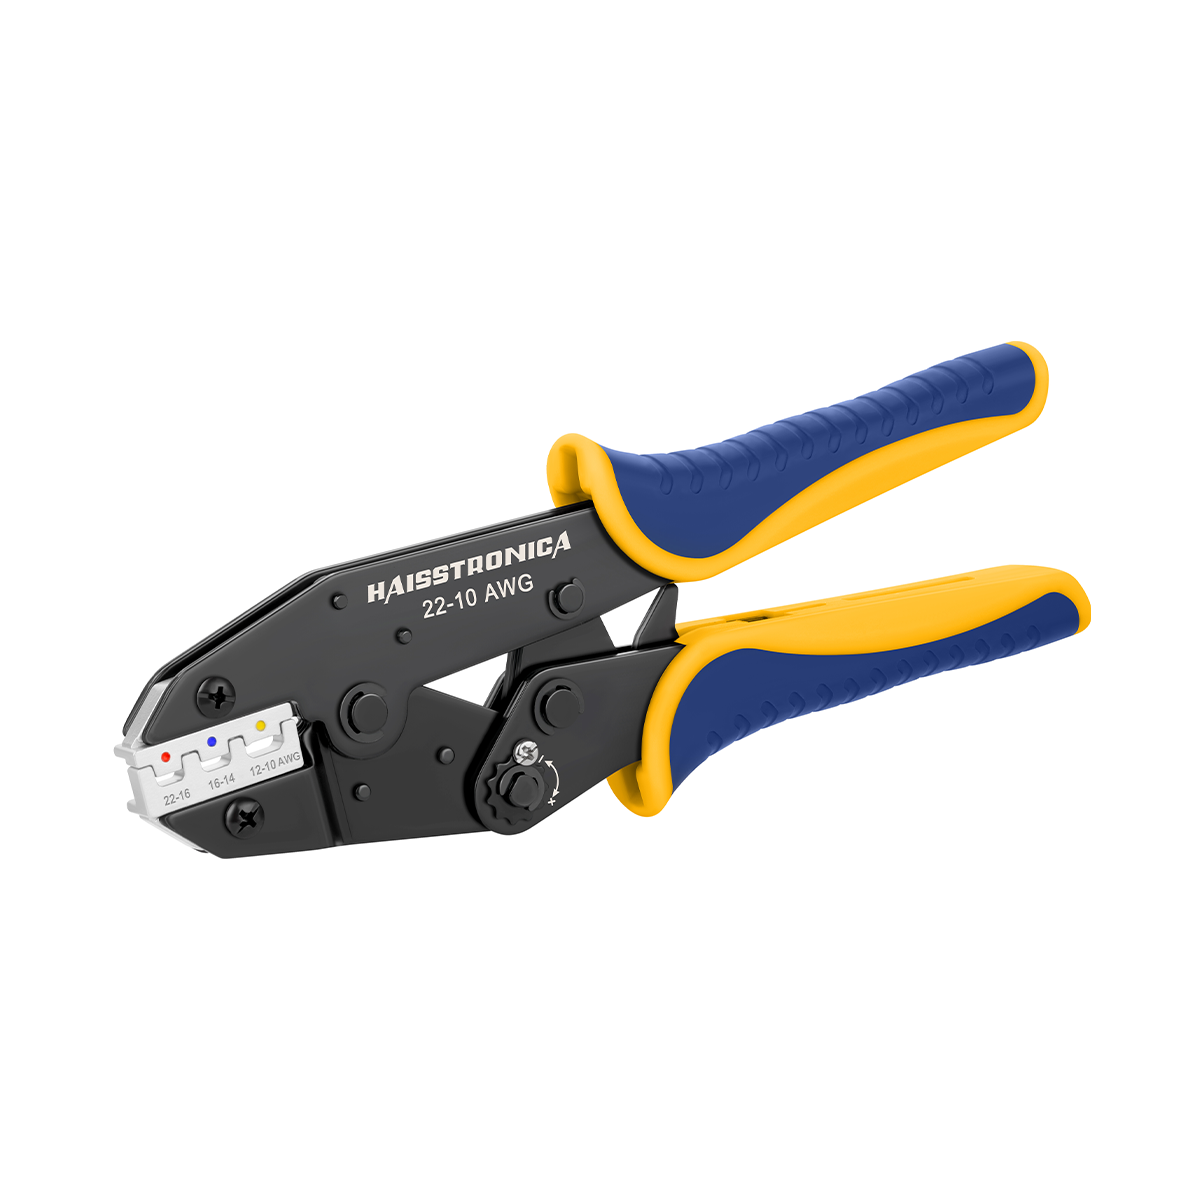
Key parts of a ratcheting wire crimping tool (AWG 22–10):
-
Frame & ratchet: Maintains a fixed stroke; the jaw won’t release until the cycle is complete, which keeps your compression consistent from one crimp to the next. (Many quality tools include a calibrated ratchet mechanism.)
-
Dies/anvils: The cavity profiles (red/blue/yellow color codes for insulated, or letter/number codes for uninsulated/ferrules) set the final crimp height and geometry. Molex and other manufacturers emphasize crimp height as the primary quality metric.
-
Gauge window/locator: Centers the terminal and sets insertion depth so the conductor strands land fully under the conductor barrel.
-
Release lever: Lets you back out a mis‑set terminal before you mash it.
Bench tip: If your tool is adjustable, record the click/scale setting that yields an in‑spec crimp height for each terminal family; consistency is everything. (See UL/Interpower guidance for pull‑out checks to validate settings.)
Mini checklist before your first crimp wire today
-
Confirm wire gauge (AWG 22–10 for this tool).
-
Select matching terminal family (insulated heat‑shrink, vinyl, nylon, or bare).
-
Choose the matching die cavity; test on scrap to confirm crimp height.
-
Clean copper strands; no solder tins or flux residue.
Ready to upgrade to consistent, one‑handed results? Try the Haisstronica Ratcheting Wire Terminal Crimping Tool (AWG 22–10) — optimized dies for heat‑shrink connectors and color‑coded guidance.
👉Prefer a heat shrink crimper feel? Haisstronica is designed for it.

Select Wire, Terminals & Dies — crimp wire
Match three things: conductor size, barrel style, and insulation support. Connector makers call this the “system approach.” Select the terminal by wire gauge and insulation diameter, not by guesswork. Molex’s Quality Crimping Handbook details why crimp height and the correct barrel geometry matter more than brute force.
1) Wire (AWG & stranding)
-
Use the manufacturer’s recommended AWG range (e.g., 22–18 red, 16–14 blue, 12–10 yellow for standard insulated terminals).
-
Fine‑strand automotive cable compresses differently than building wire; stay within the specified strand class for the terminal.
2) Terminal type
-
Insulated heat‑shrink butt/spade/ring: Weather-resistant and ideal for vehicles and outdoor gear.
-
Vinyl/nylon insulated: Good general purpose, but less sealing.
-
Non‑insulated (open‑barrel/“F” crimp): Common in OEM harnesses; requires profile‑specific dies and exact strip control.
-
Ferrules: For panel screws and spring‑clamp terminals, not for ring/spade applications.
3) Die cavity
-
Use the color code or cavity number that matches both the terminal family and AWG.
-
For open‑barrel (OEM style), use the exact die form (conductor wing + insulation wing).
-
Verify with a micrometer: measure crimp height and compare to the terminal spec sheet; many handbooks include target heights and tolerances.
Pull‑out expectations: UL 486A‑B provides minimum tensile pull‑out values by gauge to confirm mechanical integrity; simple bench pull checks are a practical go/no‑go.
Pro pick to bundle with your connectors: the Haisstronica Ratcheting Wire Terminal Crimping Tool (AWG 22–10) — crisp die profiles for heat‑shrink, vinyl, and nylon terminals, plus a full‑cycle ratchet for repeatability.
👉Do crimping battery cable lugs with HD presses; terminals with Haisstronica.

Strip Length & Conductor Prep — crimp wire
The rule: strip just enough insulation so all strands sit under the conductor barrel and zero strands extend into the inspection window. NASA’s workmanship material and major connector makers stress that correct strip length and undamaged strands are foundational to a gas‑tight joint.
How to set strip length (two easy methods):
-
Barrel‑depth method (fast & accurate):
-
Hold the terminal beside the wire.
-
Mark the distance equal to the conductor barrel length (not the insulation support).
-
Strip to that mark; twist lightly only if the strands splay.
-
-
Spec‑sheet method (repeatable):
-
Read the maker’s strip‑length table (often 4–6 mm for common insulated terminals).
-
Use the same measurement every time; build a small jig or sharpie marks on your bench.
-
Do not tin the strands before crimping. Solder cold‑flows under pressure and temperature, which reduces contact pressure and can cause micro‑movement, rising resistance, and eventual overheating—this “solder creep” failure mode is well‑documented in workmanship guidance.
Damage control while you crimp wire:
-
No nicks: A nicked strand reduces cross‑section → higher resistance and lower pull‑out.
-
Clean copper: If the wire is oxidized, cut back to bright copper.
-
Insulation support: Make sure the insulation crimp captures the jacket for strain relief (where applicable).
Quality checks you can do at the bench:
-
Crimp height within spec (use calipers; see Molex handbook).
-
Bell‑mouths at both ends (small flares that protect strands).
-
Wire visible in the inspection window, but not protruding past the barrel.
-
Pull test: firm tug matching UL expectations for your gauge.
Make this easy on yourself: pair your connectors with the Haisstronica Ratcheting Wire Terminal Crimping Tool (AWG 22–10) — consistent strip‑length results and repeatable compression help you pass pull tests the first time.
👉A precise wire connectors crimping tool—Haisstronica delivers.

Step‑by‑Step: Complete Crimp Procedure (AWG 22–10)
-
Select & prep
-
Wire gauge confirmed; pick matching insulated terminal.
-
Choose the correct die cavity on your wire crimping tool/crimper tool.
-
-
Strip to the conductor‑barrel depth; no nicks, no tinning.
-
Seat the terminal in the die first (for insulated styles), aligning the seam to the anvil as recommended by the terminal supplier.
-
Insert the wire until copper is visible in the inspection window and strands are fully under the barrel.
-
Crimp — close the ratcheting crimp tool fully; allow the full cycle to complete before releasing.
-
Inspect — verify crimp height, bell‑mouths, and that the insulation support has grabbed the jacket.
-
Test — perform a quick pull‑out; optional: measure milliohm resistance if you have a meter. UL/Interpower provides practical pull‑out references.
Need a reliable all‑rounder for butt, ring, and spade heat‑shrink terminals?
Haisstronica Ratcheting Wire Terminal Crimping Tool (AWG 22–10)
👉Clean heatshrink crimps—Haisstronica applies even force.

Crimp Styles & What the Dies Do — crimp wire
Insulated closed‑barrel (butt, ring, spade).
-
Uses color‑coded dies (red/blue/yellow).
-
Conductor barrel forms a hex/oval; insulation barrel grips the jacket as strain relief.
-
Aim for smooth transitions, no sharp flashing.
Open‑barrel (“F” crimp) terminals.
-
Separate wings for conductor and insulation; requires terminal crimpers with the correct profile.
-
The conductor wings curl into the strands for a dense, rectangular cross‑section; the insulation wings curl around the jacket only.
-
Because die geometry is critical, many tools incorporate controlled‑cycle ratchets for consistency.
Ferrule crimps.
-
Square or hex dies consolidate fine strands for panel blocks and PLCs; not for ring/spade duties unless specified by the device maker.
Why die shape matters: Different barrels need different compression envelopes to reach the target crimp height and density without cutting strands. Major connector handbooks show acceptable cross‑sections and dimensional limits; use those to fine‑tune your tool’s setting.
One tool, many terminals: the Haisstronica ratcheting frame with matched dies makes it straightforward to achieve the correct profile on insulated terminals—ideal for heat‑shrink connectors in vehicles and outdoor projects.
👉Make a reliable butt crimp—Haisstronica, one‑and‑done.

Troubleshooting in 60 seconds — crimp wire
-
Wire pulls out: Wrong die or under‑compressed; re‑check AWG and cavity, verify crimp height, and repeat. (Use UL pull‑out as a spot check.)
-
Burnt or discolored insulation: You crimped on top of the jacket; reduce strip length.
-
Splayed strands at the bell‑mouth: Strip length too long or wire not fully inserted.
-
High resistance (warm to touch): Oxidized copper or nicked strands; recut and re‑crimp.
-
Randomly bad crimps: Ratchet out of calibration; clean the tool, inspect dies, and consider service/calibration (Panduit and others detail routine checks).
Save time chasing gremlins: start with a tight tool/connector match. The Haisstronica AWG 22–10 ratcheting set is designed around common insulated terminals so the right profile is just a click away.
Print‑and‑use bench checklist (AWG 22–10)
-
Verify AWG, pick terminal, pick die.
-
Strip to barrel depth; no tinning.
-
Seat terminal → insert wire → full ratchet cycle.
-
Inspect bell‑mouths, crimp height, and strain relief.
-
Pull‑test; optional milliohm check.
-
Label the harness and log the cavity/setting used.
Wrap‑up
A reliable crimp wire joint is the product of (1) the wire crimping tool and dies, (2) terminals that truly match the wire and insulation, and (3) disciplined strip length and inspection. Follow the steps here—grounded in NASA workmanship notes, UL pull‑out practices, and connector‑maker handbooks—and you’ll get repeatable, low‑resistance connections on everything from trailer lights to marine pumps.
Ready to put it into practice? Equip your bench with the Haisstronica Ratcheting Wire Terminal Crimping Tool (AWG 22–10) and compatible heat‑shrink terminals so every crimp clicks into spec the first time.
Our Top User-friendly Picks
Versatile by design, the Haisstronica ratcheting tool simplifies sensor splits and accessories that use a 3 way crimp connector. Its ergonomic lever and quick‑release make it a practical crimper tool for cable in field service. When you crimp cables, expect consistent sealing and pull strength every time.
👉For a 2 gauge wire crimper, go heavy; Haisstronica for 22–10.