電気工事を行う際、電気技師であれ、DIYであれ、電線の被覆を剥ぐことは欠かせない作業の一つです。ワイヤーストリッパーは、この目的のために設計された小型の手動工具で、電線から保護被覆を剥がすために使用されます。電線を剥がす際の主な注意点は、下にある金属導体を損傷することなく被覆を剥がすことです。このブログ記事では、適切な電線被覆剥がしがなぜ重要なのか、よくある間違いを避けるべき点、そして安全かつ効果的に電線を剥がすのに役立つ様々なタイプの電線被覆剥がし工具(シンプルな手動ワイヤーストリッパーから高度な自動ワイヤーストリッパーまで)について解説します。
主な懸念事項:電線導体の保護
電線の被覆を剥ぐとは、電気接続のために外側の絶縁体を取り除き、金属部分を露出させることを意味します。この工程で最も注意すべきことは、電線の導体に傷をつけたり、切断したりしないことです。銅(またはアルミニウム)導体が損傷すると、電線が弱くなり、様々な問題を引き起こす可能性があります。ある情報源は次のように述べています。「表面の小さな傷は重要ではありません。円周に深い傷をつけると、弱点が生じます。それが問題の原因となります。」適切な工具と慎重な技術を用いれば、銅に傷をつけたり、引っ掻いたりすることなく絶縁体を剥ぐことができます。
導体に傷や損傷があると、なぜそれほど大きな問題になるのでしょうか?主な理由は次のとおりです。
-
導電性の低下:切断または傷がついた電線は断面積が小さくなるため、導電性が低下し、電気抵抗が増加します。そのため、負荷がかかった状態で電線が高温になることがあります。極端な場合には、過熱により絶縁材が溶けたり、火災の危険が生じたりする可能性があります。
-
機械的な弱点:ノッチ加工が施された電線は、特に曲げたり振動させたりした場合に断線しやすくなります。配線作業時や使用中に、ノッチ加工によって応力が集中し、断線の原因となることがあります。断線は断線や断続的な接続を意味し、電気工事の信頼性を損ないます。
-
接続不良:電線被覆を剥く目的は、きれいな金属部分を露出させ、しっかりと接続できるようにすることです(ネジ端子の下やコネクタ内部など)。絶縁材が剥がれていたり、電線が部分的に切断されていたりすると、接続不良が発生します。撚線では数本の撚線しか接触せず、単線では接触不良となり、抵抗と発熱が高くなります。
-
ショートと安全上の危険性:逆に、絶縁体を剥ぎすぎると(過剰に剥ぎすぎると)、必要以上にむき出しの導体が露出してしまいます。このむき出しになった余分な電線が他の電線や金属面に誤って接触し、ショートを引き起こす可能性があります。ショートはブレーカーを落としたり、部品を損傷したり、さらには通電中のむき出しの電線が接触すべきでないものに接触すると、感電や火災を引き起こす可能性もあります。
まとめると、電線を被覆を剥く際に考慮すべき主な要素は、導体を損傷させず、適切な長さの導体だけを露出させることです。過不足なく露出させることが重要です。適切な技術と高品質のワイヤーストリッパーを使用することで、この目標を達成できます。誤った方法(古いナイフの使用や、ストリッパーのノッチの向きが間違っているなど)は、導体に傷をつけたり、被覆を剥がれが不十分になったり、芯線が抜けたりする原因となり、電気工事の安全性と効率を損なう可能性があります。 一方、正しく被覆を剥がした電線は良好な接触を確保し、 「電気系統の故障、ショート、さらには火災の可能性を事実上排除します。」

避けるべきワイヤーストリップのよくある間違い
ツールについて話す前に、電線を剥く際によくある間違いをいくつか挙げておきましょう。これらを知っておくことで、間違いを避けることができます。
-
不適切な工具の使用:多くのDIY愛好家は、手元にあるナイフやペンチで電線の被覆を剥がそうとします。ナイフは緊急時には使えますが、被覆の切り口が不均一でギザギザになり、電線を切ってしまう可能性が高くなります。適切な電線ストリッパーの使用を強くお勧めします。作業が簡単で、電線へのダメージもはるかに少ないからです。(次のセクションでは、ストリッパーの種類について説明します。)
-
ノッチまたはサイズ設定の誤り:ほとんどの手動ワイヤーストリッパーは、異なる電線サイズに対応する複数のスロットを備えており、自動ケーブルストリッパーは設定を調整できる場合があります。電線に対して小さすぎる穴を使用すると、強く押し込みすぎて銅線を切断するリスクがあります。大きすぎると、絶縁体を全く切断できません。必ず電線サイズとツールのノッチまたは設定を一致させてください。 これにより、金属導体ではなく絶縁体のみを切断することができます。
-
力を入れすぎないでください:電線の被覆を剥がすのに、それほど強い力は必要ありません。極端に強く押し付けたり、強くねじったり、引っ張ったりすると、導体が切れてしまう可能性があります。目的は、被覆だけを切断し、理想的には周囲全体に切り込みを入れ、それから引き剥がすことです。最新の電線剥き工具は、必要最低限の深さまでしか食い込まないように設計されています。もし無理やり剥がさなければならない場合は、正しいスロットを使用しているか、工具の刃が鋭利かどうかを再確認してください。
-
被覆の剥ぎ取り不足または過剰:どの程度の被覆を剥ぐ必要があるか注意してください。被覆の剥ぎ取りが不十分(十分に剥がしていない)の場合、端子やコネクタの下に被覆が残り、良好な電気接触が妨げられる可能性があります。一方、被覆を剥ぎ取りすぎると、余分な裸線が露出し、誤って接触したり、時間の経過とともに腐食したりする可能性があります。コネクタまたは端子に必要な被覆剥ぎ取り長さを測り、その長さよりも少し長めに剥ぎ取ってください。そうすることで、被覆がコネクタにしっかりと密着します。
-
通電中の電線の被覆剥き:これは安全上の注意事項ですが、念のため言っておきます。通電中の電線や電源に接続されている電線は絶対に被覆剥きしないでください。電線を被覆剥きする前に、必ず回路または機器の電源を切ってください。そうしないと、工具が露出した導体と他の機器を繋いでしまい、感電したり回路がショートしたりする可能性があります。電線に通電しているかどうか不明な場合は、電圧テスターを使用してください。
-
結果の確認を怠る:電線を被覆を剥がした後は、少し時間を取って確認してください。露出した金属部分は光沢があり、きれいですか?(変色している場合は、新しい部分を被覆を剥がすか、清掃する必要があるかもしれません。)撚り線の撚り線を誤って切断していませんか?単線に深い傷はありませんか?損傷が見つかった場合は、その部分を切断し、再度適切に被覆を剥がすことをお勧めします。細い電線の場合は、拡大鏡や明るい照明が役立ちます。後で故障する可能性のある、損傷した電線を取り付けるよりも、被覆を剥がし直す方が賢明です。
これらの間違いを避けることで、成功への道の半分は歩み寄ったと言えるでしょう。残りの半分は、仕事に適したツールを選ぶことです。これが次の話題につながります。

ワイヤーストリッピングツールの種類
適切なワイヤーストリッパーを選ぶことで、ワイヤーの被覆剥きが容易になり、導体へのダメージも防ぎます。シンプルな手持ち式のワイヤーストリッパーやカッターから、高度な機械まで、様々なツールが販売されています。ここでは、主な種類とその用途について説明します。適切なワイヤーストリッパーツールは、被覆剥きの作業効率を向上させ、電線へのダメージも防ぎます。そのため、適切なツールに投資する価値は十分にあります。
手動ワイヤーストリッパー(標準調整式ストリッパー)
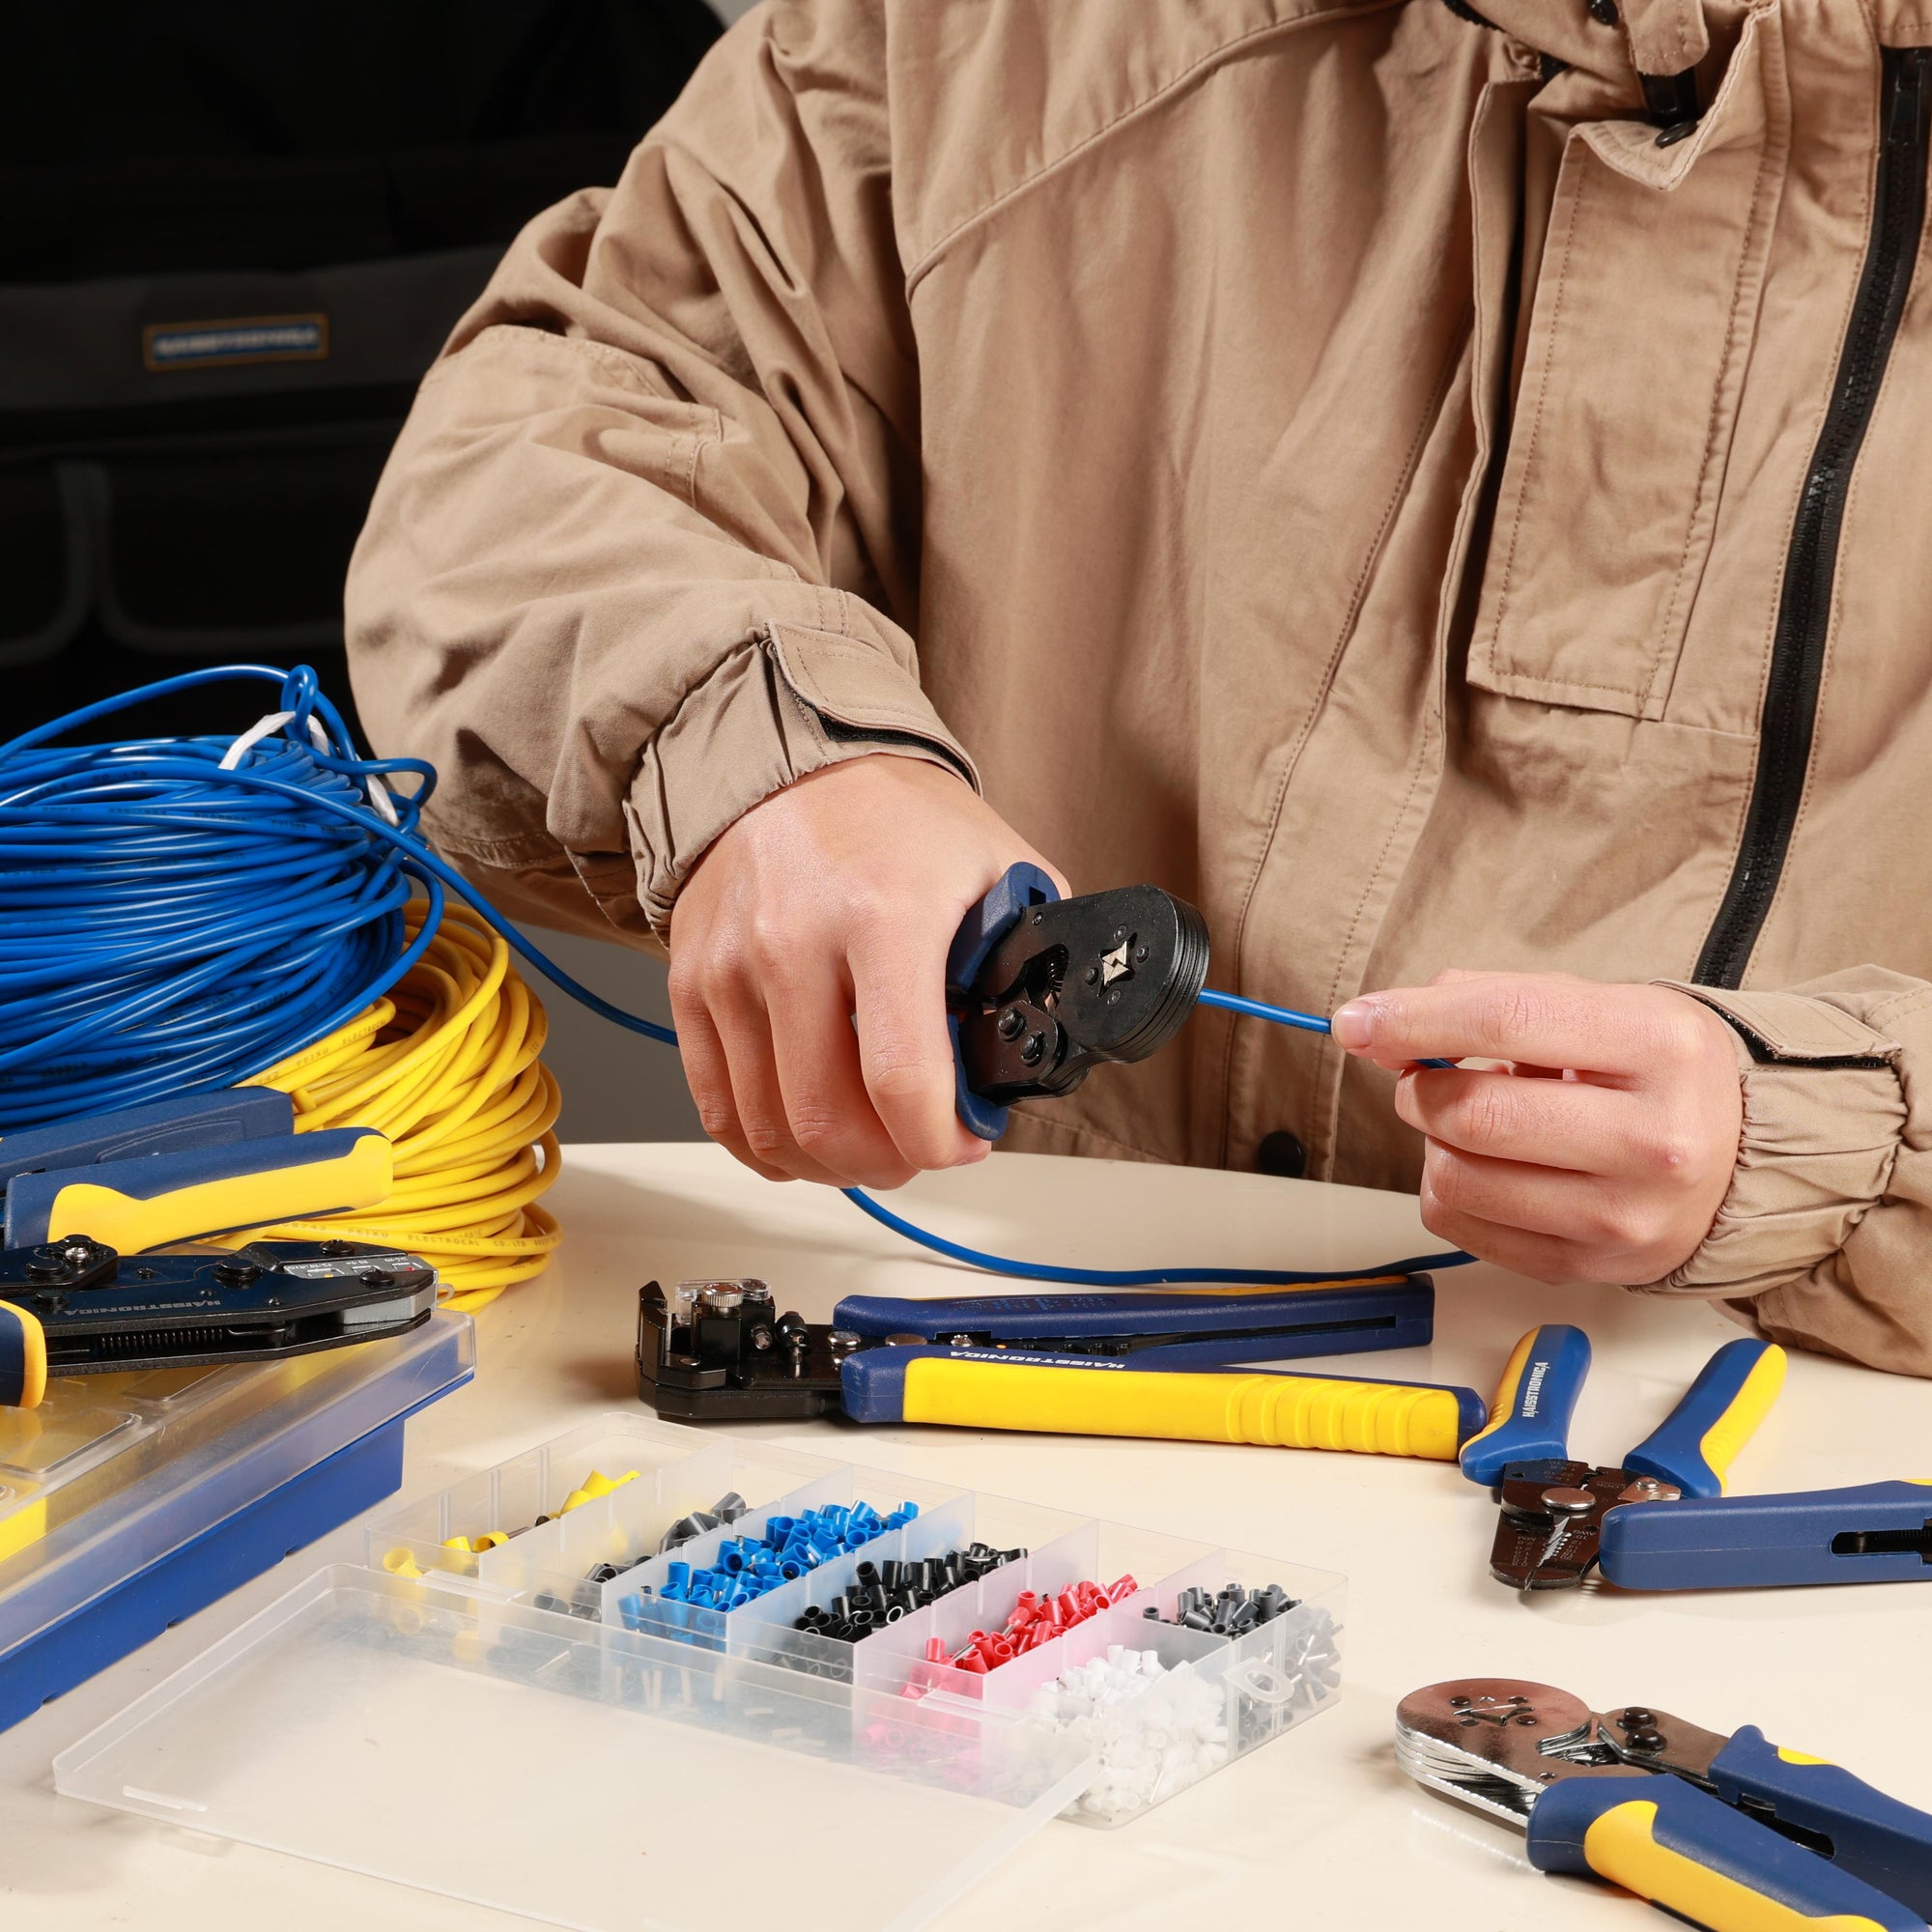
複数のゲージノッチを備えた一般的な手動ワイヤーストリッパー。このタイプのワイヤーストリッパーツールは、ノッチを選択することで、異なるサイズのワイヤーを剥がすことができます。手動ワイヤーストリッパーは、電気技師やDIY愛好家が最もよく使用するタイプです。シンプルなペンチのような手持ち式ツールで、様々なサイズの刃のノッチが反対側に付いています。ワイヤーをゲージに合ったノッチに挿入し、ハンドルを握って絶縁体を引き抜きます。これらのツールはハサミやペンチに似ていることが多く、ワイヤーカッターが内蔵されているものも多くあります(そのため、ワイヤーストリッパーやカッターと呼ばれることもあります)。優れた手動ストリッパーは、導体を傷つけずに絶縁体の周りをきれいに切断します。
手動ストリッパーのいくつかの機能:
-
複数のゲージ用スロット:通常、複数のサイズがあらかじめ設定された穴(例:10AWG、12AWG、14AWGなど)があります。これにより、ワイヤーに合ったスロットを選択するだけで、迷うことなく作業できます。調整可能なワイヤーストリッパーには、刃の張力を調整するための微調整ネジが付いているものもあり、より正確な調整が可能です。
-
汎用性:手動ストリッパーは、適切なノッチを使用すれば、単線の銅線から家電製品の撚線コードまで、様々な種類の電線に使用できます。安価で持ち運びやすく、多目的用途やDIYプロジェクトに最適です。電気工事士向けのワイヤーストリッパーの多くはこのカテゴリーに分類され、快適なグリップと耐久性のある刃を備えているため、日常的なプロユースにも耐えます。
-
習得のコツ:手動ストリッパーの使い方は簡単ですが、絶縁体が切れたかどうかは感覚で確認する必要があります。初心者は力加減が甘すぎたり、強すぎたりすることがあります。少し練習すれば、これらのツールを使って銅線を切ることなく確実に絶縁体を剥がすことができます。ポイントは、絶縁体が緩むのを感じるまでしっかりと押さえ、それから引っ張ることです。銅の削りかすや切れた芯線が見えたら、次回は力を弱めてください。
自動・自動調整式ワイヤーストリッパー
自動ワイヤーストリッパーの実演。この自動ケーブルストリッパーは、電線を掴み、一押しで被覆を剥がすので、複数の電線をまとめて作業する場合の作業効率が格段に上がります。配線作業が多い方にとって、自動ワイヤーストリッパーは大きな時間節約になります。このツールは、電線を掴み、被覆を切断し、剥がすまでを一動作で完了する巧妙なメカニズムを備えています。電線の端をツールに挿入し、ハンドルを握るだけで、あとはツールがやってくれます。自動ストリッパーは、多数の電線を素早く剥がしたり、狭い場所で片手で剥がしたりする必要がある場合に特に便利です。
自動ストリッパーの重要なポイント:
-
自動調整機能:多くの自動ストリッパーは自動調整式ワイヤーストリッパーです。つまり、手動でノッチや設定を選択することなく、様々なサイズのワイヤーに対応できます。ジョーが自動的に適切な直径で絶縁体を挟み込み、剥ぎ取ります。この機能は、異なるサイズのワイヤーを複数使用する場合に役立ちます。ツールを頻繁に調整する必要がありません。(例えば、22 AWGのセンサーワイヤーから14 AWGの電源ワイヤーに切り替える場合、優れた自動調整式ワイヤーストリッパーはどちらのサイズにも対応できます。)
-
スピードと効率:自動ケーブルストリッパーは、動作がシンプルで、ねじったり慎重に引っ張ったりする必要がないため、手動ツールよりも速く電線を処理できます。数百本の端末を被覆を剥がす配線プロジェクト(例えば、制御盤の組み立てや車の配線交換など)では、自動ストリッパーを使用すると生産性が大幅に向上します。専門的な現場や組み立て作業では、電線を一括で被覆を剥がす電線ストリッパーや空気圧式ストリッパーも使用されます。これらの電動ストリッパーは、モーターまたは空気圧を利用して被覆を素早く剥がすため、高負荷の被覆剥ぎ作業や大量の被覆剥ぎに最適です。
-
安定した結果:自動ストリッパーは正しく使用すれば、非常に均一な被覆剥き長さが得られ、導体へのダメージを最小限に抑えることができます。工具の品質が良く、指定された電線サイズ範囲内で使用すれば、電線を傷つけることはありません。ただし、非常に安価な「自動」ストリッパーは、特に極細または極太の電線では、誤差が生じる場合があることに注意してください。必ず必要なゲージをカバーする自動ストリッパーを使用してください(ほとんどのストリッパーは10~24 AWGなどの範囲に対応しています)。また、工具の刃は常に清潔で鋭利な状態に保ってください。摩耗した刃は、絶縁体をきれいに切断するどころか、裂けたり押し潰したりする可能性があります。
ヒント:自動調整式ストリッパーには、一般的に2つのタイプがあります。1つは、1対のジョーで掴んで剥がすタイプ(上の画像参照)で、もう1つは、ピボットで挟み込む機構を備えたタイプ(複合自動ストリッパーと呼ばれることもあります)です。どちらも目的は同じです。いくつか試してみて、どちらが使いやすいか確認してください。自動ストリッパーはかさばることがあるので、非常に狭い場所では手動ストリッパーの方が使いやすいかもしれません。

複合型および特殊剥離工具
標準的な手動および自動ワイヤーストリッパーのほかにも、ワイヤーストリッピングに関連する特殊工具や多目的工具がいくつかあります。プロジェクトに応じて、以下の工具を検討してみてはいかがでしょうか。
-
オールインワン・ストリッパーツール(ストリッパー/カッター/クリンパー):多くのプロは、ワイヤーストリッパーとクリンパー、そしてカッターが一体となった多機能ツールを好みます。これらのツールには通常、ストリッパー用のノッチ、カッティングブレード、そしてコネクタ用の圧着ジョーが付いています。このようなツールがあれば、3つのツールではなく1つのツールを持ち運ぶことができます。便利で柔軟性が高く、同じペンチでワイヤーの被覆を剥がしてからコネクタを圧着することができます。専用のストリッパーほど正確に被覆を剥がせないという欠点はありますが、高品質なモデルは一般的な用途には十分です。DIYの電子機器や自動車の作業用にストリッパーキットを組み立てる場合は、多目的ストリッパー/クリンパーが最適です。
-
サーマル ワイヤー ストリッパー:ホット ワイヤー ストリッパーとも呼ばれるこれらのツールは、刃で切る代わりに熱を使って絶縁体を取り除きます。たとえば、赤外線ワイヤー ストリッパーは(赤外線要素を介して) 熱を絶縁体に直接伝え、絶縁体を柔らかくしたり溶かしたりして、簡単に剥がせるようにします。同様に、加熱した刃を使って熱いナイフのように絶縁体を切るものもあります。大きな利点は、導体に機械的なストレスがかからないことです。これは、非常に細いワイヤーや、切断が難しい絶縁体 (航空宇宙で使用されるテフロン加工のワイヤーなど) には非常に重要です。レーザー ワイヤー ストリッパーはその進化版です。レーザーを使用して絶縁体を極めて正確に気化させます。ハイテク産業では極細ワイヤーに使用されます。これらのツールは高価で特殊なため、DIY の環境では一般的ではありませんが、存在を知っておくのは良いことです。
-
**ヘビーデューティーおよび**エア式ストリッパー:太いケーブル(バッテリーケーブル、溶接ケーブル、太い多芯ケーブルなど)を扱う場合や、大量の電線を被覆除去する必要がある場合は、その作業に適したヘビーデューティーワイヤーストリッパーがあります。手持ち式でありながら太い電線に対応する頑丈なジョーを備えたものもあれば、ベンチマウント式のものもあります。例えば、エア式ワイヤーストリッパーは、圧縮空気を使用して被覆除去動作を行い、幅広い電線サイズを高速で処理できます。 これらは産業環境でよく見られます。一般家庭や趣味で使う人には、エア式ストリッパーはおそらく必要ないでしょうが、中間的な選択肢として「ユニバーサル」ワイヤーストリッパーがあります。ユニバーサルストリッパーは、複数のケーブルタイプに対応できるように販売されています。例えば、1つのツールで、標準の絶縁電線、同軸ケーブル、さらにはイーサネットケーブルのジャケットまで、様々な機能を使って剥がすことができます。万能なソリューションを目指していますが、効果にはばらつきがあります。ホームシアターの設置やネットワークと電気配線の併用など、多様な配線作業を頻繁に行う場合は、ユニバーサルケーブルストリッパーが便利です。
-
自動車用ワイヤーストリッパー:これは厳密には別の工具ではなく、自動車の配線作業に適したストリッパー全般を指します。自動車用ワイヤーは、極細線(センサーや電子機器用)から中細線(照明やアクセサリー用)まで幅広く、柔軟性を高めるために撚り線が使用されることが多いです。優れた自動車用ワイヤーストリッパーは、通常、自動調整式または手動式で、一般的な自動車用ワイヤーサイズ(8AWG~20AWG)に対応しています。特筆すべきはスパークプラグワイヤーです。これは、カーボンまたは金属芯線を持つ太い(多くの場合7mmまたは8mm)点火ケーブルです。スパークプラグワイヤーの被覆を剥がすには、内芯線を傷つけることなく厚い絶縁体を取り除く必要があります。専用のスパークプラグワイヤーストリッパー(多くの場合、プラグ端子用の圧着工具と併用)を使用すると、この作業が容易になり、シリコン絶縁体をきれいに剥がして新しいスパークプラグブーツを取り付けることができます。自分で車の整備やスパークプラグワイヤーの自作を行う場合、このツールは非常に役立ちます。
-
色分けと特殊設計:すべての工具が無地の鋼板製というわけではありません。ピンク色のワイヤーストリッパーやその他の色付き工具は、特別版キットや慈善活動の一環として販売されている場合もあります(例えば、乳がん啓発活動を支援するためにピンク色の工具セットを提供している企業もあります)。色は、工具を区別したり、特定のサイズ範囲を示したりするのにも役立ちます。色は機能には影響しませんが、ストリッパーにはさまざまなモデルがあることを示唆しています。人間工学に基づいたデザイン、バネ式ハンドル、ラチェット機構など、さまざまなものがあります。最適な選択は、具体的なニーズによって異なります。最も頻繁に使用する電線の種類とサイズを考慮し、それらに対応できるワイヤーストリッパー(またはストリッパーセット)を選択してください。
どの工具を使うにしても、常に鋭利で良好な状態であることを確認してください。刃が鈍っていたり、刃の位置がずれていると、絶縁材が破れたり、余分な力が必要になったりする可能性があり、導体損傷のリスクが高まります。高品質なワイヤーストリッパーの多くは、刃持ちを良くするために硬化鋼で作られています。もしお使いのワイヤーストリッパーが古くなっていたり、非常に安価なモデルだった場合は、配線の品質向上のために買い替える時期かもしれません。
安全かつ効果的に電線を剥がすためのヒント
懸念事項とツールについて説明しましたので、次は、ご自身と電線の安全を確保しながら、プロのように電線を被覆除去するためのヒントをまとめた簡単なチェックリストをご紹介します。目指すのは、導体を損傷なくきれいに被覆除去し、しっかりと接続できるようにすることです。
-
まず電源を切ってください:電線やケーブルに電流が流れていないことを必ず確認してください。作業中の機器のブレーカーを切るか、電源プラグを抜いてください。被覆を剥がす前に、テスターを使って電線に電流が流れていないことを再確認してください。これにより、被覆を剥がす際に感電やショートを防ぐことができます。
-
適切な工具/ゲージを選ぶ:被覆剥き工具は電線の種類に合わせて選びましょう。ナイフや不適切な工具ではなく、適切なワイヤーストリッパー(手動または自動)を使用してください。 工具を適切な電線ゲージに設定するか、電線にぴったり合うノッチを選択してください。工具に張力調整機能(一部の自動ストリッパーなど)がある場合は、電線の太さに合わせて調整してください。
-
切り込みを入れる、切断しない:ストリッパーは、絶縁体の周囲に切り込みを入れ、切断するようにしてください。金属導体を実際に切断してはいけません。通常、複数回回転させる必要はありません。ほとんどのストリッパーは、しっかりと握り、軽くひねるだけで十分です。ナイフを使用する場合は(最後の手段としてのみ)、刃を絶縁体の周りで軽く転がし、絶縁体を貫通する程度にしてください。銅線には貫通させないでください。 。
-
まっすぐに引っ張って剥がす:被覆を切ったら、電線の端からまっすぐに引っ張って剥がします。多くの工具はこれを自動で行ってくれます(自動ストリッパーは引っ張って剥がしてくれます)。手作業で行う場合は、片方の手で電線をしっかりと持ち、もう片方の手でストリッパーまたは被覆片を引き抜きます。被覆を剥がす際に電線を急激に曲げると、細い電線が切れてしまう可能性があるため、注意が必要です。
-
適切な長さの被覆を剥ぐ:接続に必要な長さだけ被覆を剥ぎます。ネジ端子の場合は約1cm(ネジから露出する電線がないようにするため)です。圧着コネクタの場合は、コネクタのバレルに電線が収まる程度に被覆を剥ぎ、余分な電線がはみ出さないようにします。余分な電線を残す(過剰に被覆を剥ぐ)と、ショートや腐食の原因となる可能性があります。誤って被覆を剥ぎすぎた場合は、余分な長さを切り落とし、やり直してください。
-
露出した導体の点検:被覆を剥がした後、むき出しの電線を点検してください。きれいで(絶縁材の破片が残っていない)、傷がついていない状態である必要があります。撚線から切れた芯線が垂れ下がっていないこと、単線に深い傷や切り込みが入っていないことを確認してください。損傷が見られる場合は、新しい電線で被覆を剥がし直すことをお勧めします。わずか1分で完了し、接続の完全性を確保できます。重要な作業では、専門家の中には、被覆を剥がした電線の端を軽く引っ張って、断線していないことを確認する人もいます。軽く引っ張っても耐えられる場合は、おそらく無傷です。
-
ストリッピングツールのメンテナンス:使用後は刃に付着した絶縁材の残留物や銅片を拭き取ってください。工具に調整ストッパーやネジが付いている場合は、しっかりと締められていることを確認してください。刃は使い続けると鈍くなりますが、高品質な工具では刃の交換が可能です。ワイヤーストリッピングツールを清潔で鋭利な状態に保つことで、絶縁材をスムーズに切断し続け、電線を傷つけることはありません。
これらのヒントに従うことで、主なリスク (ワイヤの損傷や安全上の危険) を最小限に抑え、剥ぎ取りプロセスを迅速かつ簡単に行うことができます。
結論
被覆を剥く作業は必ず丁寧に行い、金属に傷や切れ目が入らないように注意し、作業内容を二重に確認してください。適切に被覆を剥がした電線は電気を効率的かつ安全に伝導し、配線作業の信頼性を高めます。つまり、時間をかけて、電線に合った適切なストリッパーを使用すれば、プロ並みの仕上がりと完璧に動作する回路が手に入ります。配線作業を楽しんでください!