Quick Answer — You Need Both a Crimping Tool and a Soldering Iron
If you work with electrical wiring, you’ll encounter situations where a wire crimping tool is the best choice and others where a soldering iron is ideal – in truth, most professionals use both methods in different scenarios. A crimped connection and a soldered connection can each achieve a reliable, long-lasting joint when done properly. Crimping involves compressing a wire and connector together, forming a secure mechanical bond, while soldering involves melting a filler metal to create a bonded alloy between components. Both techniques have unique strengths, and neither completely replaces the other. In practice, savvy electricians and DIYers keep a quality ratcheting crimping tool along with a soldering iron so they can choose the optimal method for each job. The bottom line: you need both tools in your arsenal to cover all your wiring tasks – and investing in reliable equipment (like Haisstronica’s professional crimpers and solder connectors) ensures each connection is safe and durable.
From an electrical and safety standpoint, a properly executed crimp offers a gas-tight mechanical connection that can actually outperform solder in harsh conditions. On the other hand, a correctly soldered joint provides excellent conductivity and is indispensable for circuit board work or delicate electronics. Rather than viewing it as “crimping vs. soldering” where one wins, think of it as having two techniques that complement each other. Many wiring projects even combine approaches – for example, you might crimp on a terminal lug for a secure mechanical hold and use solder on a PCB for component connections. By having both a high-quality wire crimp tool and a soldering iron ready, you’ll be equipped to create dependable connections in any situation (and Haisstronica offers top-notch options for both, ensuring you’re never caught without the right tool for the job).
(Remember: using well-made connectors and tools, such as Haisstronica’s heat-shrink crimp connectors and ergonomic ratchet crimpers, will maximize the reliability of your work – a smart investment for anyone serious about safe electrical connections.)
Crimp vs Solder: How Each Joint Works (Mechanics vs Metallurgy)
To understand when to choose crimping or soldering, it helps to know how each type of joint actually holds a wire. A crimped joint is fundamentally a mechanical bond: you use a crimping tool (often a specialized crimper plier or ratchet crimping tool) to deform a metal connector around the wire. This compression essentially “cold welds” the wire strands to the connector barrel, creating a tight interface with no air gaps. In a proper crimp, the metal of the terminal and the copper of the wire are pressed together so firmly that they produce a near-continuous metal connection – effectively one solid piece at a microscopic level. The result is a strong connection with low electrical resistance, often sealed against air and moisture (especially when using insulated crimp connectors or heat-shrink crimps). Because no heat is involved, the wire retains its flexibility right up to the joint, and the connector remains ductile. This means a crimped wire can flex and vibrate without the joint cracking, which is a big reason crimping is favored in high-vibration environments. In short, crimping uses mechanical force to achieve connectivity, turning separate pieces into a unified, electrically conductive assembly (a process that, as noted, can form a durable cold weld when done correctly). Using the correct terminal crimper (with the right die for your connector type) is key to achieving this effect – Haisstronica’s ratcheting crimp tools, for example, are designed to apply precise pressure for a perfect crimp every time, so you get that ideal mechanical bond reliably.
By contrast, a soldered joint is a metallurgical bond. Soldering uses heat (from a soldering iron or other heat source) to melt a soft metal alloy (solder, typically a tin-based alloy) and flow it into the strands of the wire and onto the connector surface. When the solder cools and solidifies, it forms a continuous metal bridge that bonds the parts together. Essentially, the solder acts like a glue made of metal – it isn’t the wire or the terminal itself, but a new alloy that fuses them. This creates an excellent electrical connection as long as the solder adheres well (thanks to flux cleaning the surfaces) and the joint is not disturbed during cooling. A soldered joint can be very strong electrically and reasonably strong mechanically, but it does introduce a rigid section of metal. Unlike a crimp, which leaves the wire strands pressed together but still flexible at the edges, solder wicks into the wire and solidifies the strands. This area (often just beyond the soldered end of a wire) becomes stiff and can be a point where flexing wire may eventually break due to metal fatigue. The soldering process also involves heat up to ~250°C or more, which can potentially damage insulation or components if not careful. However, when done properly, soldering yields a solid, low-resistance connection that is permanent. It’s especially useful for connecting wires to electronic components or PCB pads where crimping is not applicable. Soldered connections are also very neat and compact – no bulky connector needed – which is why you’ll see soldering in small electronics and PCB wiring, whereas crimping is common for attaching wire connectors (like rings, spades, or butt splice connectors) to the wire. With a quality soldering iron and proper technique, you can make excellent solder joints. Haisstronica provides solder seal connectors that incorporate low-melt solder rings inside heat shrink tubing, combining solder bonding with built-in insulation – a handy solution for quick field repairs that require minimal tools.
One way to summarize the difference is: crimping produces a secure mechanical lock between wire and terminal, while soldering produces a metallurgical fuse of wire and metal via a solder alloy. Each has pitfalls if done incorrectly – a poor crimp (e.g. using the wrong tool or a cheap connector) might come loose or allow corrosion, and a bad solder joint (e.g. “cold” solder or insufficient wetting) can be resistive or crack over time. In terms of electrical performance, both methods are very effective when executed right. In fact, industry experts note that the imperfections in either method (like voids in a crimp or a cold solder joint) are what typically cause failures, not the method itself. A perfect crimp versus a perfect soldered joint will both conduct electricity well; the choice is more about mechanical strength and service conditions. It’s also worth noting that crimping usually requires the exact right hardware (specific connectors matched to specific crimp tools and wire sizes) whereas soldering is more universal (any wire that fits can be soldered with a basic iron). The upfront cost for a good electrical crimping tool can be higher, but the consistency and speed can pay off in professional settings. (Tip: Always use the proper crimping pliers or tool for the connectors you have – never improvise with general pliers. A makeshift crimp done with the wrong tool can be unreliable, and trying to “fix” it by adding solder often does more harm than good. Instead, equip yourself with a proper ratchet crimper from a reputable brand like Haisstronica for safe, consistent results.)

Crimp or Solder? Decision Matrix — Pick by Environment & Requirement
So how do you decide between using your wire crimping tool or your soldering iron for a given task? The best method depends on the environment the connection will face and the requirements of the project. Below is a practical decision matrix (key considerations) to help you choose crimp vs. solder for common scenarios. In many cases, the choice is clear-cut; in others, you might even use both or choose based on personal preference and available tools. Ultimately, understanding the strengths of crimped vs. soldered joints will guide you to the right choice. And no matter which method you choose, using quality materials – like Haisstronica’s tinned copper crimp connectors or high-grade solder – will ensure the best outcome for your wiring job.
1. Vibration & Movement: If the connection will experience significant vibration, motion, or mechanical stress (think automotive wiring in an engine bay, marine wiring on a boat, or machinery), crimping is usually the better choice. A well-executed crimp with a proper ratcheting crimper tool creates a joint that can flex with the wire and won’t develop fatigue cracks due to a rigid solder spine. Soldered connections, by contrast, can crack over time in high-vibration settings because the soldered portion is inflexible. This is why the automotive and aerospace industries overwhelmingly prefer crimped terminals for wires – in fact, in the auto industry, crimping is the standard and soldering wires is often avoided for reliability reasons. If you’re wiring a car, motorcycle, aircraft, or anything that moves, reach for the wire crimpers and use quality crimp terminals (preferably with adhesive-lined heat shrink for strain relief). For example, Haisstronica’s heat shrink butt connectors provide a vibration-resistant crimped splice with built-in strain relief, perfect for automotive repairs – a quick crimp with their ratchet crimper and you have a sealed, flexible joint ready for the road.
2. Moisture, Corrosion & Harsh Environments: In wet or corrosive environments (outdoor installations, marine settings, industrial equipment exposed to the elements), both methods can work if properly sealed, but crimped connections with the right accessories often have an edge. A crimped joint, especially when using adhesive-lined heat shrink tubing or connectors, forms an airtight seal that keeps out water and oxygen. This prevents corrosion inside the joint and maintains low resistance over time. Soldered joints can be made safe in moisture too (for instance, by coating in heat shrink or potting compound), but any gap or imperfect seal can let moisture in, potentially causing corrosion at the copper-solder interface. Additionally, certain solders (if not using rosin-core electronics solder) could leave acidic residues if not cleaned, which might aggravate corrosion. In any harsh environment, reliability is key – crimping is often recommended for its proven track record in such conditions. Many electrical connectors crimp on (like ring terminals for marine use) are tin-plated to resist corrosion and, when crimped, exclude air to fend off oxidation. If you do solder in these scenarios, ensure you seal the joint thoroughly (e.g. dual-wall heat shrink or silicone) to protect it. Using high-grade materials helps: Haisstronica’s marine-grade crimp connectors and solder seal connectors both have adhesive-lined insulation that locks out moisture, so whether you crimp or solder the connection, it will be shielded from the environment.
3. Temperature Extremes: Consider the operating temperature. Solder has a melting point (common 60/40 solder melts around 188°C, lead-free around 217°C). If your connection could get hot (near an engine, high-current wire that warms up, etc.), a soldered joint might soften or “creep” over time under heat. Crimped connections don’t melt – the metals are physically pressed, not reliant on a low-melt alloy. High temperatures can also accelerate creep in solder, potentially loosening the joint. For under-hood automotive wiring or industrial machines near heat, crimping is generally a safer bet. On the flip side, at very low temperatures (far below freezing), solder can become brittle, whereas a crimped joint will usually maintain integrity as long as the metal doesn’t fracture (which it shouldn’t if properly done). So for wide temperature swings or extreme heat, go with crimp (and use the appropriate high-temp rated terminals). This is why many electricians’ crimping tools are used in building wiring for high-current connections – they rely on mechanical crimp terminals or lugs that won’t loosen with heat. Haisstronica offers heavy-duty lug crimping tools and connectors that are designed for demanding temperature and current conditions, ensuring your connections stay tight even when the heat is on.
4. Electrical Requirements (Current & Voltage): Both crimped and soldered joints, if done correctly, have very low resistance and can handle high current. However, one thing to watch is wire size and type. For very large gauge wires (say 4 AWG, 2 AWG, or bigger cables like 0 gauge used in battery or power connections), soldering is often impractical – it’s hard to get enough heat to flow solder through such a large conductor, and the joint may cool unevenly. Large wires are almost always terminated with crimp lugs using specialized heavy-duty wire crimpers (often hydraulic or hammer crimp tools) rather than soldered. Crimping scales well to big cables with the right tool. Conversely, for very fine wires or electronic components, soldering is more practical (you can’t really crimp a 30 AWG wire to a tiny sensor without a custom connector; you’d solder it). Also, certain high-frequency or precision electronic connections (like coaxial cables or RF connectors) require specific crimping to avoid impedance issues; these use calibrated hexagonal crimp tools for consistency. If maximum conductivity is critical, note that a badly done crimp (with air gaps or partial crimps) could have slightly higher resistance than a solid soldered joint – but a proper crimp actually forms a solid mass of metal that is extremely conductive. In fact, one discussion pointed out that a correctly done crimp essentially fuses all the wire strands together with no air space, making it as electrically sound as a soldered joint. For most electrical connectors crimp vs solder, the difference in milliohms is negligible when executed properly. So, base your decision on practical factors (like wire size and connector type) more than pure conductivity. When working with high currents and large wires, equip yourself with the right crimp lugs and a compatible crimping tool for wires (Haisstronica has professional crimping tools for various gauges). For tiny wires or PCB connections, keep a quality soldering station on hand. And remember, Haisstronica’s product line includes everything from butt connector crimping tool kits for automotive wires to fine Dupont connector crimping tools for electronics, so you can always match the method to the current and wire size at hand.
5. Speed, Convenience & Volume: If you have many connections to make (for example, wiring up a whole car or assembling batches of cables), crimping is generally much faster and more consistent. A quick squeeze with a ratchet crimper yields a finished connection in seconds, and with consistent pressure every time, the quality is uniform. This is why in manufacturing and field service, you’ll see a lot of crimping – even automated crimping machines are used for production because they can make hundreds of crimps per hour with precision. Soldering each joint, by contrast, takes more time and skill for consistency. Soldering also usually requires a stable environment (you need a power source for the iron, a relatively clean, wind-free area especially if using heat-shrink solder sleeves, etc.). If you’re out in the field (say repairing a trailer hitch wiring by the roadside), crimp connectors might be more practical than running an extension cord for a soldering iron. On the other hand, if you’re at a workbench doing an electronics project, soldering small connections might be straightforward and you might not even have crimp terminals for that purpose. Also consider rework and disassembly: Crimp connections (like a ring terminal screwed to a post, or a quick-disconnect spade) can often be disconnected and reconnected easily. Soldered connections are more permanent and require desoldering to undo. So for applications that may require maintenance or part replacement (swapping a component, adding a wire later), you might lean toward crimped terminals or connectors. Ultimately, both methods have a place in terms of convenience – some tasks are simply easier one way or the other. Having both tools at your disposal gives you flexibility. Many DIYers start with just a soldering iron because it’s inexpensive and versatile, but as projects scale up, adding a good crimper tool (like Haisstronica’s all-in-one crimping kits) will dramatically speed up and strengthen your wiring jobs. And if you’re doing professional or automotive work, a ratcheting crimp tool is a must-have for efficiency and quality control.
6. Compliance & Standards: In certain industries and according to electrical codes, you might not actually have a choice – the method could be dictated by standards. For example, building electrical codes (like NEC in the US) require any soldered wire splices to be mechanically secured first (e.g. twisted together or crimped) before soldering. This is basically a rule to prevent solely soldered splices in home or commercial AC wiring, because if the solder melts due to overload, the connection could fall apart. In these cases, a mechanical crimp or connector is mandatory, and solder is optional. Similarly, in aerospace and other high-reliability fields, crimping with certified tools is the norm – NASA’s workmanship standards show detailed crimp instructions and generally discourage soldering of heavy-gauge wire connections for reliability concerns. If you’re working on automotive wiring and want to adhere to best practices, you’ll choose crimps (and many aftermarket automotive wiring kits come with crimp-on terminals). In small electronics and PCB assembly, of course, soldering is the standard (you can’t crimp a component lead to a PCB pad). So always consider if there are external requirements or guidelines for your project. If unsure, err on the side of crimp for wires to connectors, and solder for wires to boards or within sealed electronic modules. Or simply use the method that yields the most robust connection for the conditions. To cover all bases, it’s wise to have both a reliable wire crimping tool and a soldering setup available. Haisstronica, for instance, provides UL-certified crimp connectors and tools that meet industry standards, so you can crimp with confidence that your connection meets code and spec. They also supply high-quality solder seal connectors for quick inline splices that meet IP67 waterproof standards, blending compliance with convenience.
In summary of the decision matrix: use your crimping tool when you need a fast, sturdy connection that can endure vibration, heat, or when dealing with large wires and standard connectors; use your soldering iron when precision or small-scale connections are needed, or when attaching wires to electronic components. And in many cases, use both together – for example, crimp a terminal end and then solder that terminal onto a board, each method where it’s best suited. Having both options available (and knowing which one to deploy) is what separates a skilled builder from a beginner. By stocking both types of connectors (crimp terminals and solder sleeves) and tools, you’ll always have the right solution at hand. As professionals often say, the best approach is not crimp vs solder, but crimp and solder as appropriate. Haisstronica facilitates this by offering comprehensive wiring kits that include an assortment of wire crimp connectors along with solder connectors, so you can adapt to any scenario and ensure a safe, long-lasting connection every time.

Match the Hardware — Choosing the Right Crimping Tools and Connectors
Whichever method you choose – crimp or solder – using the proper hardware for that method is absolutely crucial. This section helps you “match the hardware” by selecting the right tools and connectors for a given job, ensuring that your crimped or soldered joints perform as expected. Skimping on the appropriate tool or connector not only makes the job harder, it can result in a weak connection. Let’s break down a few guidelines:
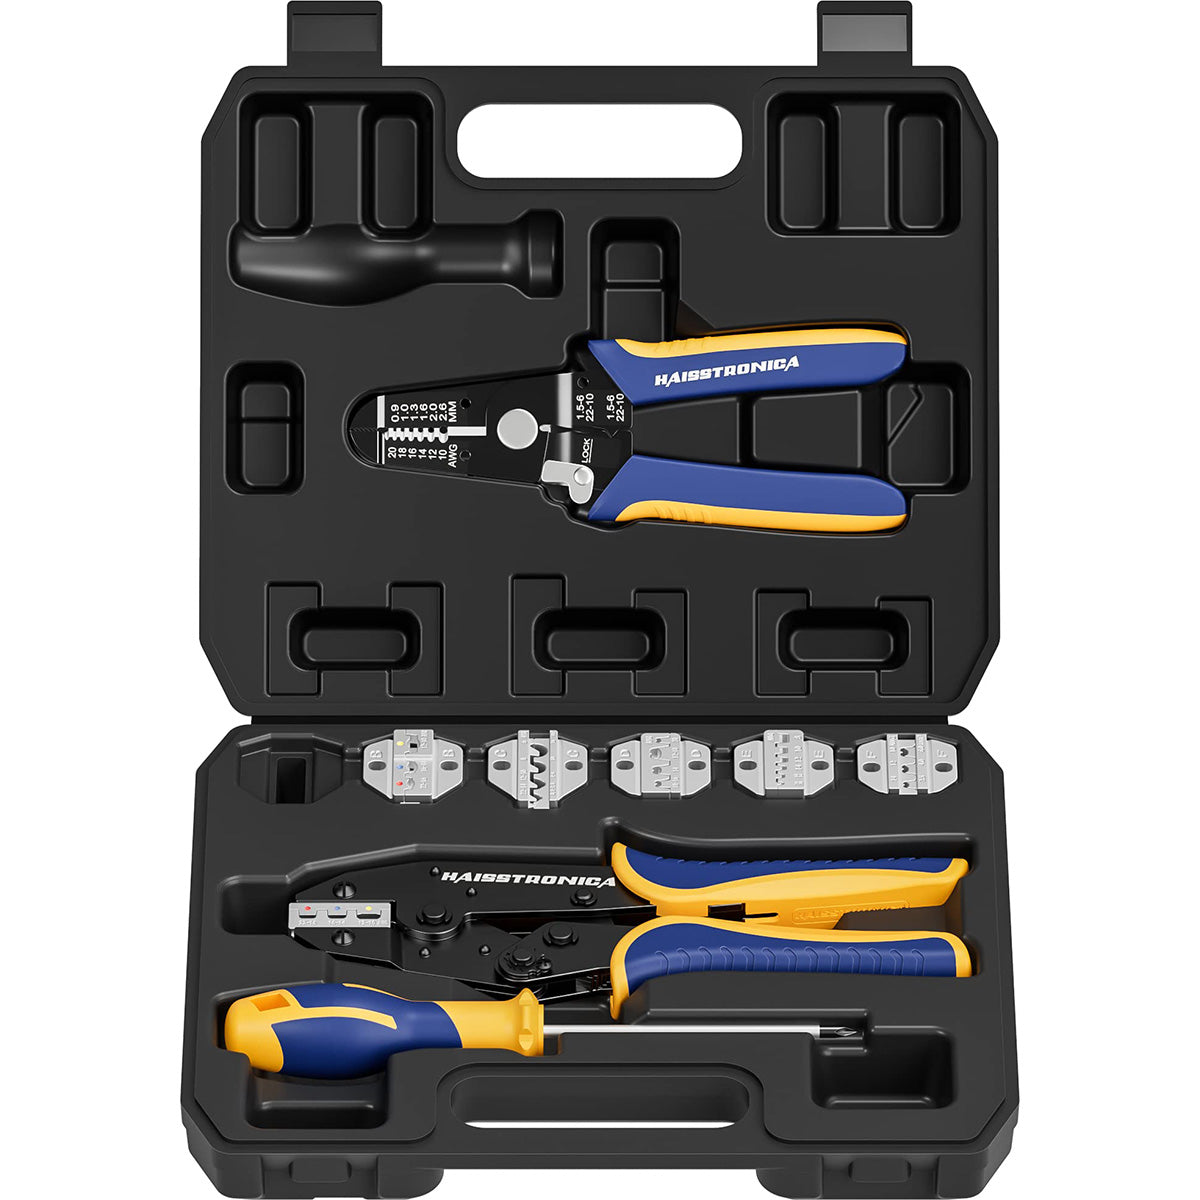
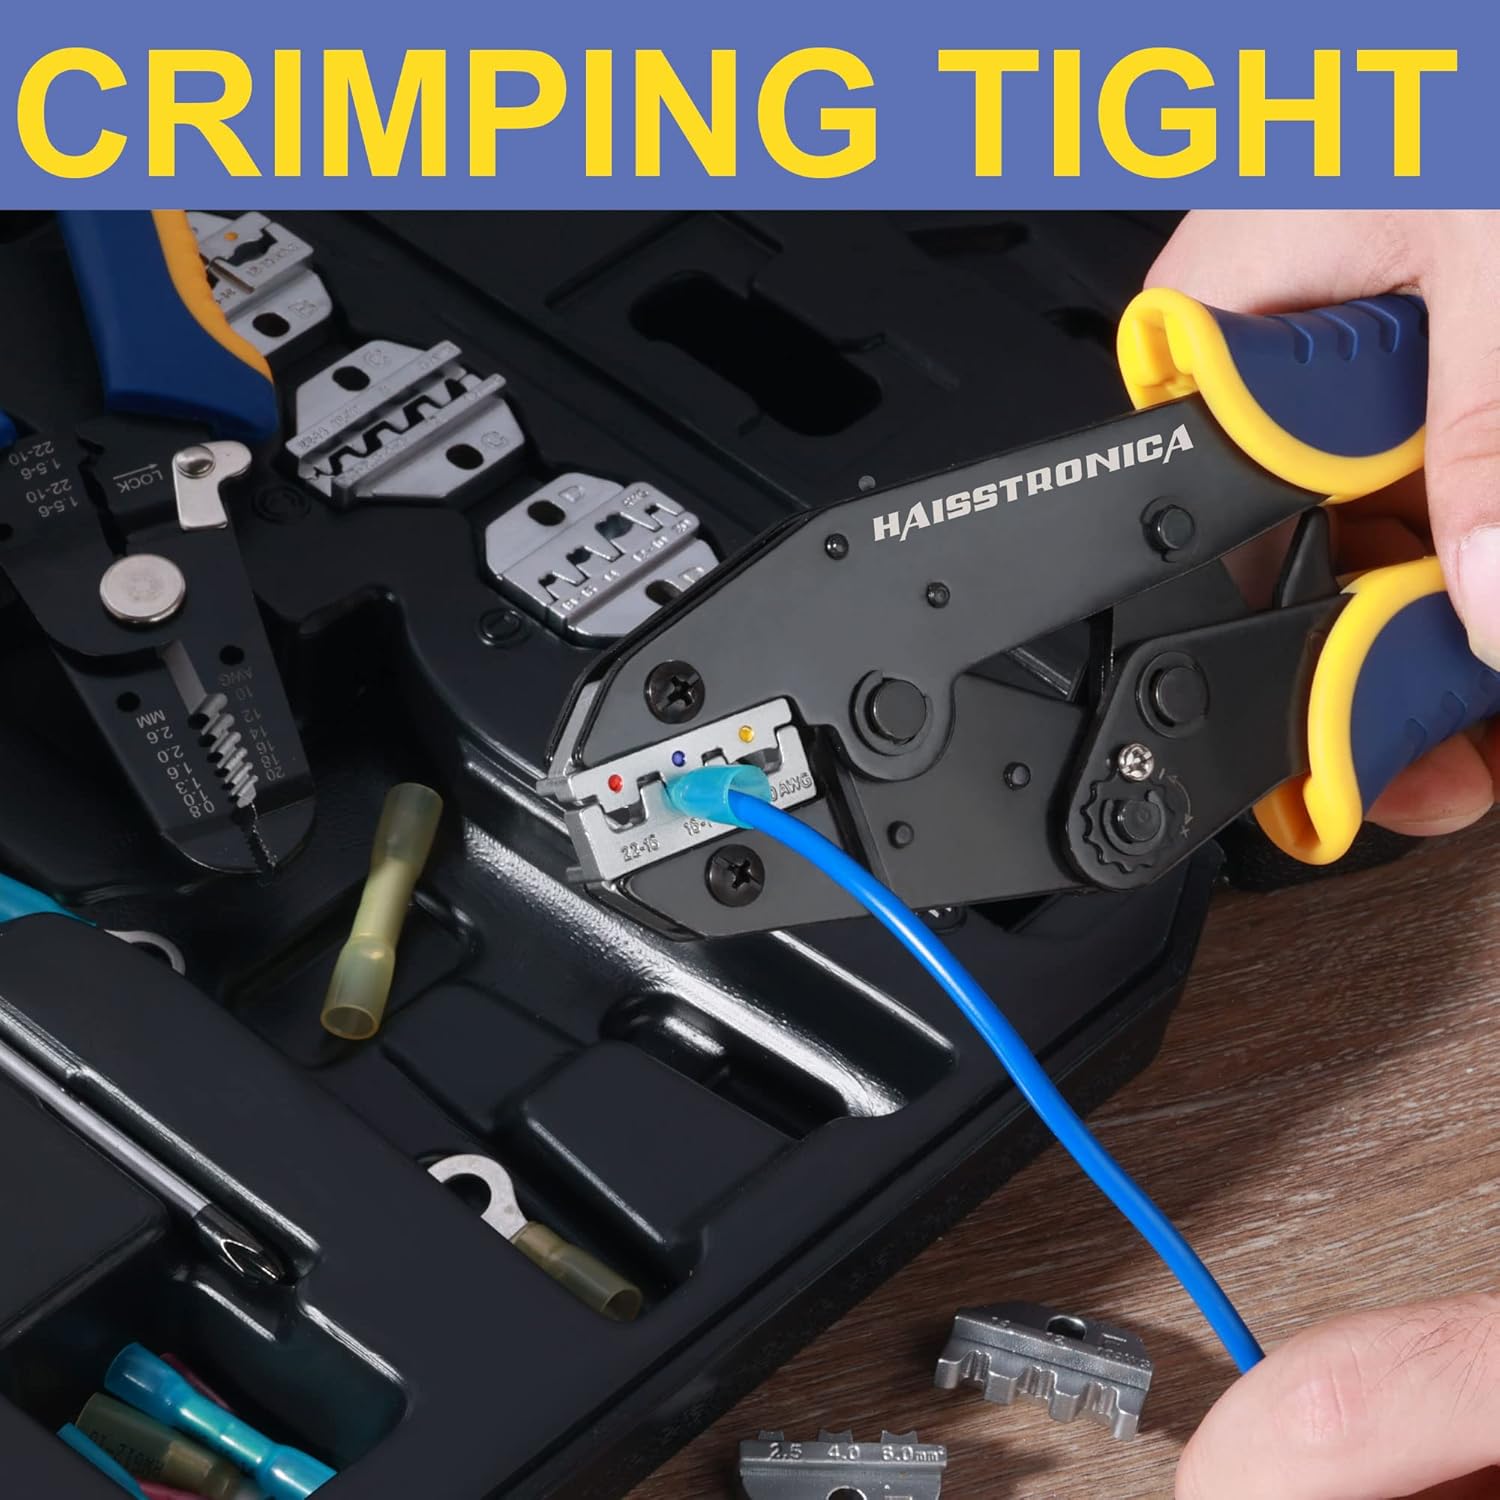
Matching Crimp Connectors to Crimping Tool: Crimp connectors come in many styles (ring terminals, spade terminals, butt splices, ferrules, blade connectors, coax crimps, etc.), and crimping tools are often designed for specific connector types and sizes. For example, the crimper you use for insulated automotive terminals (the common color-coded red/blue/yellow connectors) is typically a ratcheting crimper with interchangeable dies or specific die nests for those sizes. If you tried to use a large cable lug crimper on a tiny insulated terminal, it wouldn’t work – and using pliers or an incorrect tool risks a poor crimp that could pull out. Always check the range (in AWG or mm²) of your wire crimping tools and ensure they cover the wire gauge and terminal type you’re working with. Many quality crimpers (like Haisstronica’s ratchet crimpers) have multiple jaws or die positions for various connector sizes, ensuring a tight crimp on each. For uninsulated terminals or ferrules, you might need a different style tool (for instance, a square crimper for ferrules, or a hexagonal crimp tool for heavy lugs). The key is: the terminal, tool, and wire gauge must match. Manufacturers often provide charts – e.g., yellow insulated ring terminals might be for 12-10 AWG wires and should be crimped in the corresponding groove of the tool. When matched correctly, the crimp tool applies the right amount of compression to form that solid connection without cutting or under-crimping the wire. If you find yourself improvising (say you only have a cheap plier-style crimper that doesn’t ratchet), be aware that consistency might suffer. It may be worth upgrading to a proper ratcheting crimp tool which will only release when the crimp is fully compressed – this guarantees each crimp is complete. Haisstronica’s crimp tools are designed to pair with their connectors, taking the guesswork out of it. Whether you need a terminal crimper for heat-shrink connectors, a heavy-duty lug crimper for battery cables, or a mini crimper for Dupont pins, they have a tool tailored to that purpose, so you get a perfect crimp without damage or slippage.
Choosing Solder and Iron for the Task: Not all soldering jobs are the same either. Soldering a tiny circuit board joint is very different from soldering a thick wire. Make sure you have the appropriate soldering iron tip and wattage for the task – a higher-power iron (or even a soldering gun) may be needed for heavy gauge wires or connectors to ensure you can heat the joint quickly and flow the solder before heat spreads too far. Use a good electrical solder (rosin core for electronics, or a solder paste if you’re doing something like soldering a copper lug in certain rare cases). For most wire connections, a 60/40 tin-lead solder or a quality lead-free solder with flux core will do. Also, consider using solder seal heat-shrink connectors for convenience: these are the transparent tubes with a low-melt solder ring and adhesive lining – they allow you to slide the tube over stripped wires, heat it with a heat gun, and achieve a soldered, sealed joint without a soldering iron. They are handy for repairs in the field when you have a heat source but maybe not an iron. However, be cautious to use them only in appropriate conditions (moderate vibration and where allowed by code) as they essentially solder the wires together and add glue for strain relief. If a joint will experience stress, a crimp connector might be preferable. Finally, always keep your tools in good shape: a dull crimper die or a poorly tinned iron tip can sabotage an otherwise good technique. If you’re outfitting your workshop, Haisstronica can be a one-stop shop: you can get a professional wire crimping tool, sets of assorted crimp connectors, as well as solder seal connectors and even heat shrink tubing. By matching their connectors with the recommended crimp tool or heat tool, you’re ensuring each connection is made with the hardware it was designed for – maximizing performance and safety.
Avoiding Mixed-Method Pitfalls: One common mistake is trying to mix crimping and soldering on the same joint without understanding the implications. For instance, some people think adding solder to a crimped connection will “make it better” – in reality, this typically weakens the joint. When you flow solder into a crimped connector, you introduce rigidity and can actually cause the wire to fracture at the end of the solder (as discussed earlier). Plus, if the crimp wasn’t sound to begin with, solder won’t magically fill large gaps without creating other issues. Industry standards (like NASA’s) advise not to solder after crimping, and many connector manufacturers will consider a crimped connector that has been soldered as not meeting spec. The best approach is: do one or the other properly. Use the right connector and tool, and you shouldn’t need to add solder to a crimp. Conversely, don’t crimp a connector that’s meant to be soldered (for example, some connector pins for avionics are either crimp-type or solder-cup type – follow the intended method). Use the connectors as designed: if it’s a crimp terminal, crimp it; if it’s a solder lug or cup, solder it. Following this guideline ensures you’re playing to the strengths of each connection type. When in doubt, consult the connector’s datasheet or instructions. Haisstronica’s products, for instance, clearly indicate the proper method – their solder seal connectors are meant to be heated (not crimped), whereas their crimp terminals are designed for crimping with the matching tool. By sticking to the recommended hardware and technique, you’ll avoid unreliable connections. And if you ever need help choosing the right crimping tools electrical kits or solder connectors for your project, Haisstronica’s customer support can guide you to the ideal hardware match.
Scaling Up with Advanced Tools: If you frequently work on wiring, you might consider more advanced crimp tools or even automated solutions. For example, there are automatic wire crimpers and pneumatic or electric crimping machines that can make repetitive crimping easier – useful for production environments or if you have difficulty with hand tools. There are also wire crimping machines for specific connector types (like those used for Dupont connector pins in electronics or IDC ribbon cable connectors). While these are overkill for hobbyists, professionals might invest in them to improve speed and consistency. Soldering, too, can be scaled up – from using solder pots for dip soldering wires to using reflow tools for soldering many joints at once. The point is, as your project demands grow, ensure your hardware scales with it. Don’t try to force a cheap light-duty crimper to do a heavy-duty job – you’ll end up with subpar crimps. Instead, get the right tool for the gauge (e.g., a hydraulic crimper for large gauge or a dedicated plug wire crimper for making spark plug wires). The right hardware combination is what yields a connection that meets professional standards. Brands like Haisstronica are great about offering “matched” hardware – for example, their 400-piece connector kits come with the appropriate crimp tool so you can handle a wide range of wire sizes with confidence. By matching the hardware from the start, you ensure that each crimped or soldered connection in your project is as strong as the last, saving you from headaches down the line.
Final Hardware Tip – Quality Matters: It should be emphasized that the quality of your connectors and tools will directly reflect in the quality of your joints. Cheap, off-spec crimp connectors (the kind that come with bargain bin kits) may use thinner metal or poor plating that doesn’t crimp well or corrodes easily. Similarly, a low-quality crimp tool might not apply even pressure or could misalign the crimp. Investing in good tools and connectors is part of “matching the hardware” to the task. The same goes for solder: a high-quality solder wire and a temperature-controlled iron will make soldering far more successful than a subpar iron and unknown solder that might be acidic. Given that these connections are often critical (e.g., in automotive or home electrical, a failed connection could be dangerous), spending a bit more on trusted hardware is well worth it. Haisstronica has built a reputation for reliable crimping supplies – their connectors use tinned copper and thick insulation that won’t puncture during crimping, and their tools are calibrated for those connectors. By choosing such reputable hardware, you essentially guarantee that when you crimp or solder as instructed, you’ll get a rock-solid result. It’s an easy way to take the guesswork out of wiring quality and ensure every connection you make is one you can trust.

Conclusion: Crimping vs Soldering – A Dual Approach for Success
When it comes to electrical connections, the debate of crimping tool versus soldering iron isn’t about picking one winner – it’s about knowing when and how to use each to your advantage. We’ve seen that crimped connections shine in scenarios requiring mechanical robustness: they’re the go-to for high-vibration environments, heavy currents, and when you need quick, repeatable installations. Soldered connections, on the other hand, are invaluable for precision work: they let you make compact joins on circuit boards and reliably link wires in a controlled setting. Rather than replacing one method with the other, experienced technicians integrate both. They’ll crimp where a crimped wire connector is best (for example, attaching a wire to a ring terminal that bolts into a fuse block) and solder where solder excels (for example, tinning the ends of wires or soldering a connector onto a PCB). Each method complements the other, and together they cover virtually all wiring needs.
The key takeaway is exactly as our title suggests: you need both. For a truly professional and resilient wiring project, you should have a good wire crimping tool and a reliable soldering iron at the ready. Use the earlier decision matrix as a guide, but also trust the requirements of your specific application. If a certain standard or project condition leans toward one method, go with it – or even double up (for instance, some high-end cable assemblies use a crimped connection for primary strength and a touch of solder for additional electrical stability – though only do this if specified, as we discussed). With knowledge and the right tools, you can create connections that are electrically sound, mechanically strong, and long-lasting.
As you build out your toolkit, prioritize quality. A connection is only as good as the materials and tools used to make it. By choosing high-quality crimp connectors, proper gauge wire, and good solder, you ensure that whether you crimp or solder, the joint will hold up. This is where brands like Haisstronica come in – they provide top-tier crimping tools, wire connectors, and solder seal products that take the guesswork out of quality. Using their products, you can confidently crimp a connector knowing it will form a solid bond, or use a solder seal splice knowing it will shrink and hold tight against moisture. The result is peace of mind that your work won’t fail when it matters most.
In conclusion, the crimp-vs-solder question isn’t an “either/or” – it’s a “when/where”. Master both techniques, arm yourself with both tools, and you’ll be prepared for any wiring challenge. A true craftsman in the electrical trade recognizes that crimping and soldering are both indispensable skills. So next time you plan a wiring project, don’t limit yourself. Grab your ratcheting wire crimper and your soldering iron, because using each where appropriate will give you the best of both worlds: the mechanical reliability of a crimp and the solid conductivity of a soldered joint. With Haisstronica’s range of wiring solutions at your side – from premium wire crimpers to heat-shrink solder connectors – you’ll have everything you need to make every connection a success. Happy wiring!
References: