
Introduction
Have you discovered solder seal wire connectors and wondered if you can shrink them with a simple lighter? These convenient connectors – also known as solder butt connectors, solder wire connectors, or heat shrink solder connectors – let you join wires easily by soldering and sealing them in one step. They are popular for quick, waterproof wiring fixes in automotive and electronics projects. Many DIYers ask, "Do I need a special heat gun, or can a flame do the job?" The short answer is yes, you can use a lighter to heat these connectors – but carefully, as a lighter works more slowly and can risk charring the tubing. In this blog, we’ll explain what solder seal connectors are, how to use them (with tips for using a lighter safely), real-life application scenarios, how to choose the best connectors, and answer frequently asked questions.
Safer Heat Guide
Choose the Right Heat Source Before You Buy
Use this quick check before choosing solder seal connectors, a heat gun, or a field repair setup. The goal is a fully melted solder ring, sealed tubing, and no burned insulation.
Recommended
Heat gun for clean solder flow
Best when you are working at home, in a garage, or on planned vehicle and trailer repairs.
Use with: solder seal wire connectors.
Emergency only
Lighter for field repairs
Works only when the flame keeps moving and the tubing is not scorched. Slower and harder to control.
Use only for: temporary or low-risk repairs.
Portable option
Mini heat tool for kits
Useful if you want a compact repair setup that is easier to control than an open flame.
Pair with: assorted connector kits.
Practical recommendation: buy solder seal wire connectors when you want a no-crimp waterproof splice, and add a heat gun if you use them regularly.
👉 Finish repairs faster using Haisstronica soldering butt connectors—tap to buy.

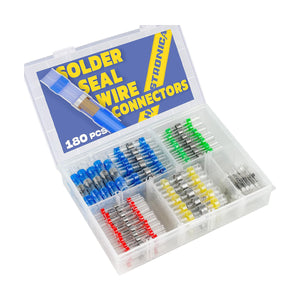
What Are Solder Seal Wire Connectors?
Solder seal wire connectors are a type of heat shrink butt connector that contain a ring of low-melting-point solder and heat-activated adhesive inside a shrinkable tubing. In other words, they combine soldering and heat shrinking in one fast, easy process – you simply insert your stripped wires into the connector and apply heat. The solder ring melts and fuses the wires together while the outer tubing shrinks and seals the connection with waterproof adhesive. This creates a soldered, insulated, and waterproof wire splice without needing a separate soldering iron or crimp tool. These connectors are sometimes called solder and seal connectors, solder sleeves, or self-soldering wire connectors because the soldering happens internally. They provide the electrical conductivity of a soldered joint and the protection of a sealed heat-shrink tube in one step, making them quick solder connectors ideal for automotive, marine, and general wiring repairs.
Compared to traditional connectors, solder seal connectors can achieve a strong, low-resistance bond. For example, high-quality solder seal connectors have solder that won’t remelt under normal current loads and produce strong, waterproof joins. This makes them reliable even in vibration-prone or moist environments, which is why they’re often marketed as marine grade heat shrink connectors. In summary, these wire connectors solder themselves to your wires when heated, resulting in a solid soldered wire connection with minimal tools or mess.
👉 Trust Haisstronica butt connectors with solder for secure, low-resistance links—shop today.

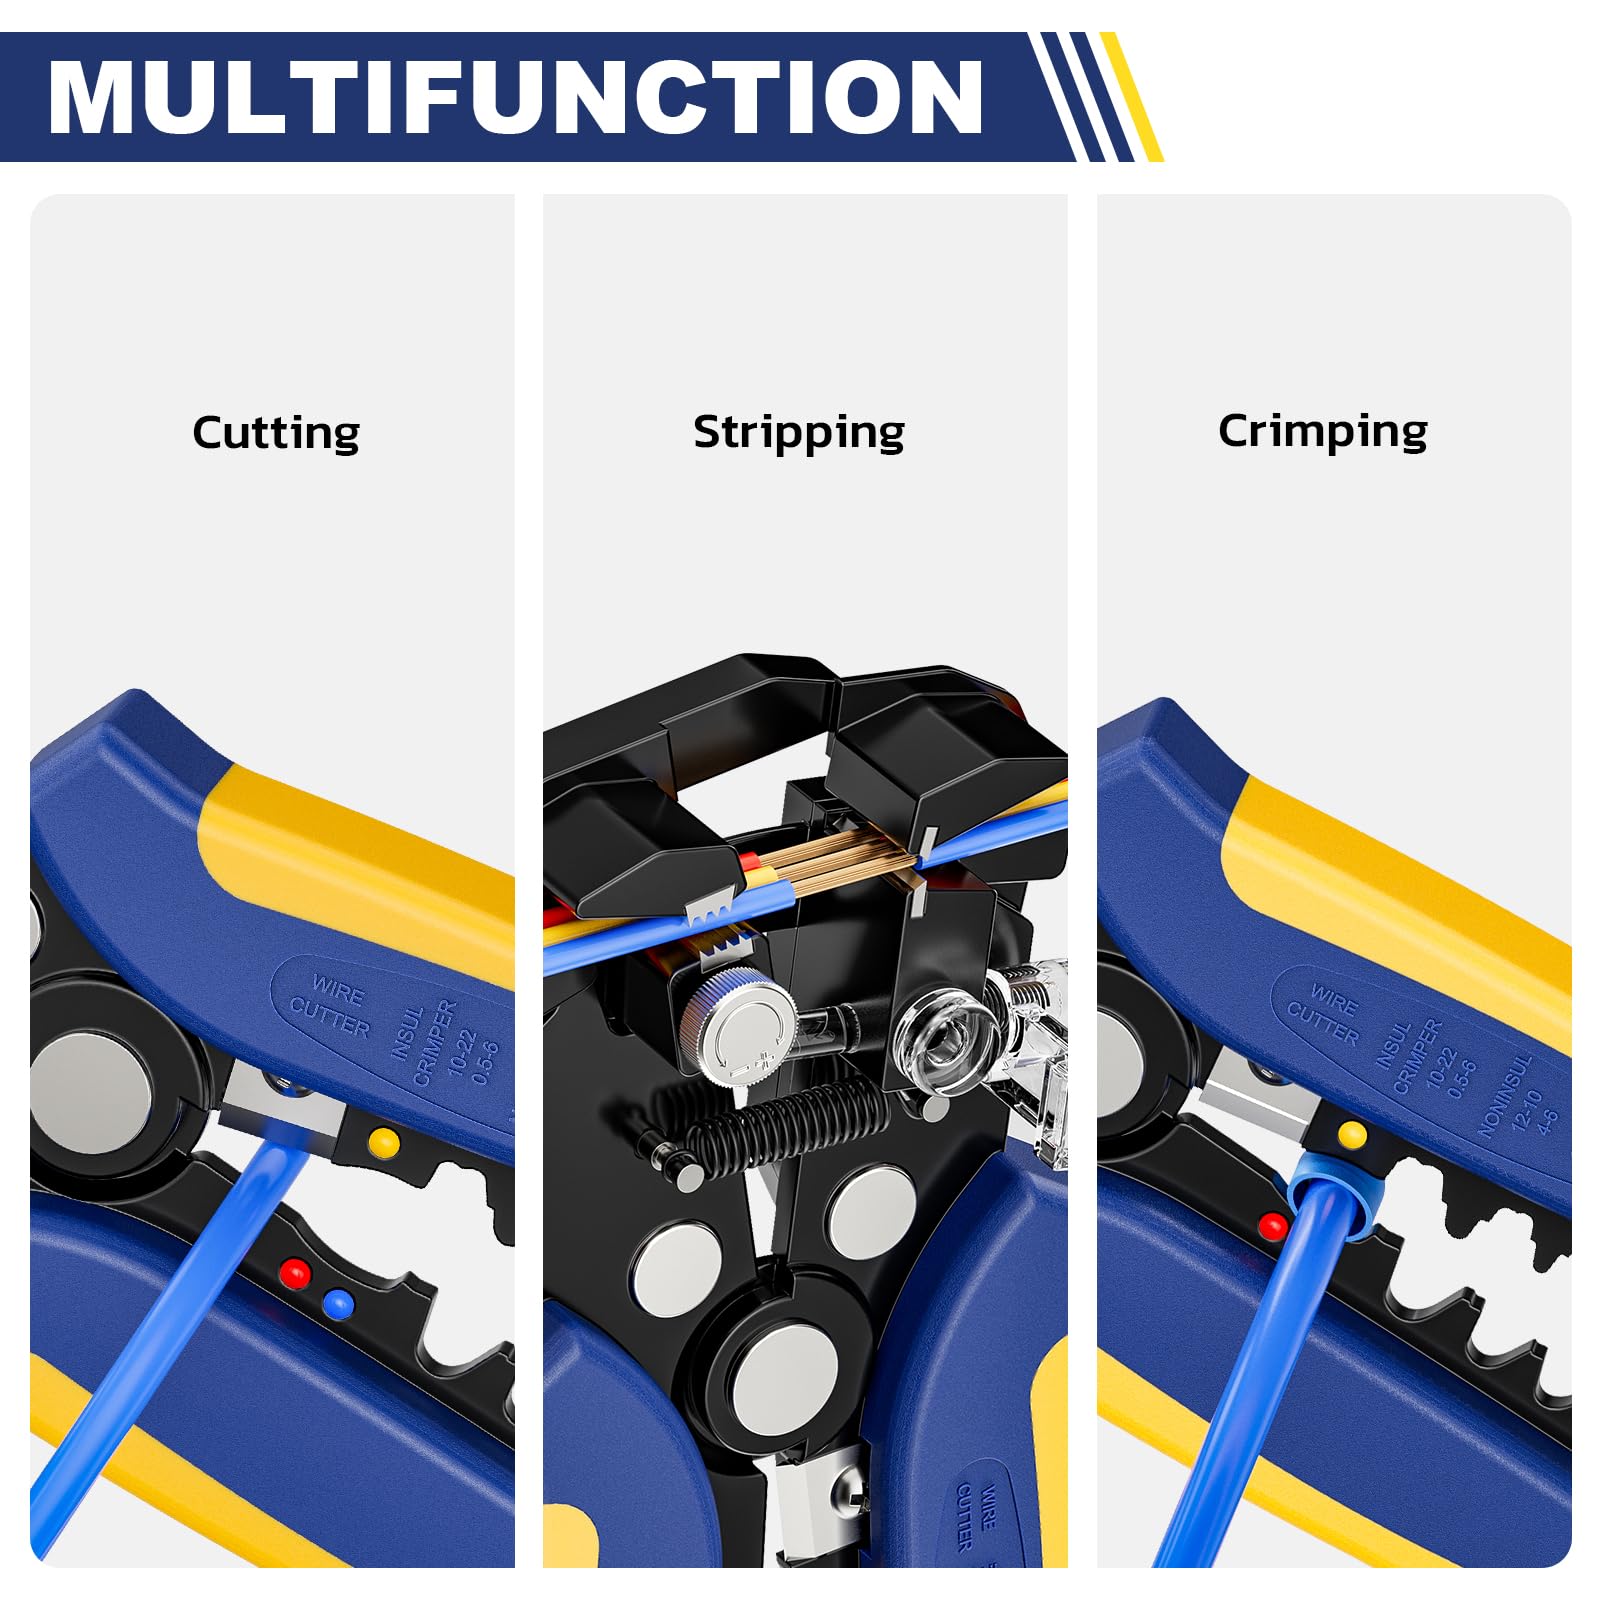
How to Use Solder Seal Wire Connectors (Step-by-Step)
Using solder seal connectors is straightforward. Here’s a step-by-step guide to make a proper solder wire connection. All you need are the connectors, your wires, and a heat source (preferably a heat gun, but a lighter or micro-torch can work in a pinch):
-
Prepare the Wires: Cut and strip the insulation off the ends of the wires you plan to join (about 1/4 inch of bare wire exposed). Ensure the wire ends are clean and not frayed. If you’re joining two wires, twist the exposed strands together slightly – this isn’t strictly required, but overlapping or twisting can help form a better mechanical bond inside the connector.
-
Insert into the Connector: Slide the appropriate size solder butt connector over one wire end, then insert the other wire end so they overlap under the solder ring in the center of the connector. The connector’s metal solder ring should be positioned directly over the twisted wire joint. Make sure no bare wire is exposed beyond the tubing; the insulated parts of the wires should lie under the colored bands on each side of the solder ring (these bands are sealant that will glue to the insulation).
-
Apply Heat (Evenly): Using a heat gun is the recommended method – keep it a few inches away and move it back and forth over the connector. If you do not have a heat gun, you can use a lighter or a small butane torch, but be very cautious to avoid burning the tubing or wire insulation. When using a lighter, keep the flame moving under the connector rather than holding it in one spot. A small blue butane torch lighter works best, as it produces a hot, focused flame without a lot of soot. Do not use a match or candle flame – those are harder to control and may soot up or burn the connector. As you apply heat, you’ll notice the heat shrink tubing start to contract around the wires and the solder ring begin to melt. Continue heating until the solder fully melts and flows into the wire strands and the tubing has fully shrunk. This typically takes only a few seconds with a heat gun, and a bit longer with a lighter (hence the lighter being slower)kabasi-connector.com. Tip: Heat from the center (solder area) first, then work towards the outer edges to ensure solder melts before the tubing fully shrinks.
-
Allow to Cool: Remove the heat and let the connector cool undisturbed for a few seconds. The solder will solidify, forming a solid solder joint between the wires, and the adhesive in the tubing will set, gripping the wire insulation. Avoid tugging the wires until it cools. Once cool, inspect the connection – the tubing should be snug with no charring, the solder ring should appear flowed out into the wire, and you might see a bit of clear adhesive at the ends. The result is a securely soldered and sealed connector joining your wires.
By following these steps, you’ll create a strong electrical connection that is also protected from water and corrosion. Remember, while a lighter can shrink solder connectors, the best practice is to use a heat gun for more even heating. If a lighter is your only option, take care to heat gradually and evenly. Done correctly, these heat shrink solder connectors make wiring fixes quick and solderless (from the user’s perspective) – no need for a soldering iron or crimping tool at all!
👉 Keep a pack of Haisstronica solder sticks on hand—perfect matches for our connectors.

Application Scenarios
Where can you use solder seal connectors? These connectors shine in any situation where you need a reliable wire splice without a full soldering setup, especially in outdoor or vehicle settings that demand durability. Here are some common applications:
-
Automotive Wiring Repairs: Solder seal connectors are widely used in cars, motorcycles, RVs, and trucks to repair or add wiring for headlights, stereos, trailer lights, etc. The vibration-resistant solder joint ensures wires won’t come loose, and the sealed tubing keeps out moisture and road grime. This makes them excellent for automotive wire connectors in both engine bay and interior wiring (though avoid direct contact with engine/exhaust heat). They’re often preferred over twist-and-tape fixes or even standard crimp connectors in DIY auto projects for their reliability.
-
Marine and Outdoor Use: Thanks to the waterproof seal, these are popular as marine solder connectors for boats, jet skis, and outdoor equipment. For example, wiring on a boat trailer or dock lights can be exposed to water – solder seal connectors, often marketed as waterproof wire connectors, will keep the connection dry and corrosion-free. The adhesive-lined shrink tubing provides a waterproof wire seal, making them effectively sealed electrical connectors that are great for any wet or humid environment (garden lighting, landscape wiring, etc.).
-
Home DIY Electronics: If you’re installing LED strip lights, fixing appliance cords, or working on hobby electronics, solder and heat shrink connectors simplify the job. You can join low-voltage wires for home theater systems, drones, RC cars, or Arduino projects without soldering irons. They give a neat finish with both a soldered connection and insulation. For indoor use where moisture is less a concern, they still provide a secure connection and strain relief. Even for home automotive garages, keeping an automotive connectors kit with these on hand is useful for quick fixes.
-
Industrial and Other Uses: In some cases, these connectors are used in aerospace or industrial wiring harnesses as sealed connectors for splicing, though usually only when a reliable heat source is available to ensure proper solder flow. They are also handy for emergency fixes in the field – for instance, off-road vehicle repairs or outdoor equipment maintenance – since you can perform a solid splice with just a lighter. However, critical or load-bearing connections (like in aviation) might still prefer traditional crimp splices that can be verified. In general, anywhere you'd use a standard butt splice connector, you can use a solder seal connector for added security.
👉 Solve splices quickly with Haisstronica soldering butt connector kits—get yours now.

Buying Guide: How to Choose the Right Solder Seal Connectors
When shopping for heat shrink solder seal wire connectors, you’ll encounter various brands and kit sizes. Not all connectors are equal in quality, so consider the following factors:
-
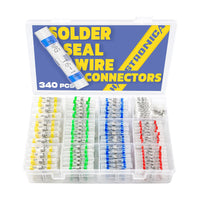
Size and Wire Gauge Compatibility: Solder seal connectors come in different sizes, usually color-coded by wire gauge. Common colors are white, red, blue, yellow, and green solder connectors, covering a range from very small wires (e.g. 26-24 AWG) up to larger wires (10-12 AWG or more). Ensure the kit you buy covers the wire sizes you need. For example, a 340-piece solder seal wire connector kit might include 5 colors for AWG 26–10 (white, red, blue, yellow, green). Using the correct size is important – too large and the solder may not fully flow into the thin wires; too small and the wires won’t fit properly.
-
Quality of Solder and Tubing: Look for marine-grade heat shrink connectors which have dual-wall tubing (outer polyolefin heat shrink plus inner adhesive lining). The low-temp solder inside should melt at a reasonable temperature (often around 138°C/280°F if it’s a bismuth-tin alloy) so that a household heat gun or lighter can melt it. Cheap connectors sometimes skimp on the solder ring (too little solder) or use tubing that doesn’t shrink tightly or lacks adhesive. Read reviews or choose reputable brands to ensure the solder fully melts and seals without needing excessive heat. Waterproof solder connectors should have visible adhesive rings at each end that ooze slightly when heated, indicating a good seal.
-
Certifications and Materials: If you need reliability, check if the connectors meet any standards or have certifications (some advertise meeting UL, CE, ISO criteria). High-quality connectors use pure copper crimp barrels (even though you’re not crimping, the wires sit in a copper sleeve with solder) for better conductivity. The tubing should be durable and flame-retardant. One clue to quality is temperature rating – good connectors can handle operating temps and are heat resistant once shrunk (important for under-hood automotive use). As one reviewer noted, “Haisstronica makes the best ones I’ve found – the solder doesn’t melt under normal current and the joins are strong and waterproof”. In other words, invest in connectors that won’t fail you in critical conditions.
-
Kit Quantity and Accessories: These connectors are often sold in kits of 50, 100, or multiple hundreds. If you do wiring frequently, a larger kit offers the best value and ensures you have various sizes on hand. Some kits come with a handy storage case. A few might even include a mini butane heat tool or wire stripper. Make sure the kit clearly labels the sizes or has partitions for each color. For beginners, an assorted heat shrink connectors kit is useful so you’re prepared for any project.
-
Brand and Reviews: There are many brands out there – for instance, Haisstronica, Wirefy, Sopoby, SolderStick, and others all offer similar solder seal connectors. It’s wise to read user reviews or watch demonstration videos for the brand you’re considering. Well-known brands often ensure consistent quality solder rings and thick tubing. Beware of ultra-cheap no-name packs, as they might use subpar solder alloy or thin heat shrink that could crack. Sticking to a reputable brand can make the difference between a solid connection and a failed one. That said, even the best solder seal connectors are relatively affordable, so opting for a quality kit is a good investment for your toolbox.
-
Tools for Heating: While not part of the connector purchase itself, consider getting a proper heat gun if you’ll use these often. A basic electric heat gun isn’t very expensive and will heat the connectors quickly and evenly. If you prefer portability, look into a butane-powered heat gun or torch. Some brands sell butane soldering kits or small torches that are perfect for this. Using the right heat tool will improve your success with solder seal connectors. (In a pinch, a common lighter works, but as we discussed, use caution with open flames.)
In summary, for the best solder seal wire connectors, choose a kit that covers your needed sizes, has good reviews on its solder quality and waterproof performance, and is sold by a trusted brand. One such example is the Haisstronica kit below, which meets these criteria.
👉 Make installs easy with Haisstronica solderless electrical connectors—waterproof results, zero hassle.

Where to Buy Solder Seal Wire Connectors (Purchase Guide)
You can find solder seal wire connectors at many auto parts stores and online retailers. Local hardware and automotive stores (like Harbor Freight or AutoZone) often carry them in the electrical section, which is handy if you need them nearby or immediately. However, for the widest selection and value, online is king. Amazon stocks many brands, and specialty wiring suppliers have them too. If you’re looking for a reliable, all-in-one solution, consider getting an assorted connectors kit that includes multiple sizes.
One recommended option is the Haisstronica 340PCS Heat Shrink Solder Seal Wire Connectors Kit (for AWG 26–10 wires). This kit provides premium solder butt connectors in all the common sizes and colors, ensuring you have the right connector for any job. The connectors are marine-grade and meet industrial standards, combining solder and seal in one step for a secure result. You can purchase this kit directly from Haisstronica’s website:
👉 Buy Now: 340PCS Heat Shrink Solder Seal Wire Connectors Kit for AWG 26-10 – Haisstronica
(Buying through the official site or authorized sellers guarantees you get genuine, high-quality connectors with warranty and support.)
With the right product in hand, you’ll be ready to tackle your wiring projects confidently, even if all you have on hand is a lighter for the heat!
FAQ (Frequently Asked Questions)
Q: Can I use a lighter instead of a heat gun on solder seal connectors?
A: Yes, you can use a common lighter (or preferably a small butane torch lighter) to heat solder seal connectors. As discussed, a lighter will work to melt the solder and shrink the tube, but it may be slower and requires careful technique. Keep the flame moving to avoid burning any one spot. Many users successfully use lighters in the field for quick fixes. However, whenever possible, a heat gun is recommended for more uniform heat. The key is to fully melt the solder ring; if using a lighter, concentrate the flame on the solder until it flows, then heat the tubing ends. Always take care not to directly scorch the tubing or wire insulation.
Q: How do I know the connection is good after heating?
A: Inspect it. A properly melted solder connector will have visible solder flowed into the wire strands (you might see it shining in the wire joint area) and the tubing will have fully shrunk without discoloration. The wires should feel securely locked in; give a gentle tug on each wire – they should not pull out. Also check that both ends of the tubing have melted adhesive sealing around the insulation (slight ooze is okay). If any part didn’t shrink or solder didn’t melt, you may need to reheat a bit more (or in worst case, cut it out and do again with a new connector). After cooling, the splice should be strong – the goal is a soldered connection inside a sealed tube. If done right, these connections are very robust.
Q: Are solder seal wire connectors really waterproof?
A: When properly heated and allowed to cool, yes – they form a water-resistant seal. The heat shrink is lined with hot-melt adhesive that melts and squeezes around the wire insulation, preventing water ingress. This makes them essentially waterproof wire connectors for practical purposes (great for marine or outdoor use). Keep in mind “waterproof” in wiring means it can resist water, splashes, and even brief submersion, but it’s still wise to not leave a splice continuously submerged. In harsh environments, using a bit of dielectric grease on the wire ends before shrinking can add extra moisture protection. But overall, a correctly installed solder seal connector is far superior to just twisting wires together or using electrical tape, especially anywhere moisture might be present.
Q: Do I need to crimp these connectors?
A: No crimping is required with solder seal connectors – that’s one of their advantages. The solder sleeve in the middle provides the electrical connection by melting around the wires, and the shrink tube provides mechanical support by gripping the insulation. You simply heat them to both solder and seal in one step. In fact, there’s no metal ferrule to crimp externally (the solder itself acts as the "crimp" internally when it solidifies). Some people do choose to lightly crimp or squeeze the connector with pliers before heating, just to hold the wires in place – this is optional, but not necessary if you have everything aligned well. Crimping too hard could squeeze out the solder before it melts. So, you do not need a crimp tool at all for these; just heat. That’s why they’re sometimes considered solderless connectors from the user’s perspective (no manual soldering, no crimping).
Q: Solder seal connectors vs crimp connectors – which is better?
A: It depends on the application and preference. Solder seal connectors offer the benefit of a true soldered electrical joint, which generally means low resistance and high conductivity, plus the built-in sealant for waterproofing. They’re very easy for beginners since you just need heat. Crimp connectors, on the other hand, require a crimping tool to deform a metal barrel around the wires. A properly done crimp can be extremely strong and reliable (and is commonly used in aviation and OEM automotive wiring). Crimping doesn’t require heat, which can be an advantage in explosive environments or when heat could damage other components. However, crimp connections are only as good as the tool and technique used – a poor crimp can come loose or corrode if not sealed. There are also heat shrink crimp connectors (crimp and then heat the insulation), which add sealing but still rely on the crimp for conductivity. Solder seal connectors essentially make crimp-and-seal an all-in-one process. For DIY and many repairs, solder seal connectors are more foolproof and convenient. For mission-critical connections or very large gauge cables, some professionals might still prefer a heavy-duty crimp followed by separate heat shrink. In short, both have their place, but for everyday wire splicing, solder seal connectors offer an excellent combination of ease and effectiveness.
Q: Will the solder in these connectors hold up to engine heat or high current?
A: The solder used in most of these connectors is a low melting point alloy (often with a melting temp around 138°C). Once it cools, it forms a solid bond just like any soldered connection. Under normal automotive currents and temperatures, the connections hold up well – as noted, quality connectors’ solder doesn't melt under normal current loads. The tubing typically is rated for at least 125°C or higher. That said, if you place the splice in an area that regularly exceeds the solder’s melting point (for example, directly on an engine block or next to an exhaust manifold), there’s a risk the solder could soften over time. Also, extremely high current through a small joint could generate heat. In critical high-heat areas, you might opt for a crimp connector or relocate the splice away from the heat. But in practice, for most engine bay wires (which usually stay under ~100°C), these connectors perform just fine. Just be mindful of where you use them – avoid direct contact with extreme heat sources. For added security in automotive use, support the wire so the joint isn’t flexing near hot vibrating engine parts. When used appropriately, the connectors create sealed splices that can last for years even in rough conditions.
Q: Are there solder seal connectors for more than two wires (like 3-way splices)?
A: Yes, there are solder seal splice connectors designed to join three or even four wires in a single connector. A common type is a 3-way solder seal connector, which has multiple solder rings or a longer solder section to accommodate 3 wires intersecting. The idea is similar: you insert all wires and heat to solder them together. These can be useful for branching a connection. However, they are a bit trickier to use because you must ensure all wires overlap properly under the solder. They also come in specific sizes for the total gauge combination. If you need to split one wire into two, a 3-way connector can do it in one step. Otherwise, you can also join two wires, then join the third to one of those using a second connector (daisy-chain). For most cases, the standard two-wire butt-style connectors are more common. But multi-wire sealed connectors do exist for special use cases.
Q: Any tips for best results using these connectors?
A: Here are a few quick tips:
-
Use the right size: If in doubt, use the smallest connector that fits the wires – this ensures the solder has a smaller gap to fill and the shrink tubing seals tightly.
-
Keep wires still while cooling: Movement can cause a “cold solder joint.” Hold the wires steady until the solder solidifies.
-
Practice on a scrap first: If you’re new to solder seal connectors (especially using a lighter), practice on spare wires to get a feel for how much heat and time is needed.
-
Don’t overheat: Stop heating once the solder flows and tubing has shrunk. Overheating can burn the tubing or boil off the adhesive. A little charring on the tube is cosmetic, but avoid it if possible.
-
Route and secure the splice: After installing, secure the spliced section with some extra slack and maybe a zip tie or clamp so it’s not under strain. This prolongs the life of the connection by preventing flexing right at the joint.
-
By following these best practices, your soldered connections will be solid and long-lasting.
Our Top User-friendly Picks
Haisstronica solder butt connectors wrap conductors with low-melt solder that wicks through the splice, creating a strong, low-resistance joint. The heat-activated adhesive inside these butt connectors with solder forms a waterproof seal that stands up to vibration, salt, and grime—ideal for trailers, boats, and engine bays. Our color-coded tubing simplifies soldering butt connectors selection and delivers consistent, professional results without extra flux or tools.
👉 Choose Haisstronica solder wire connectors for clean, strong bonds—click to shop.
We hope this guide has illuminated how to use solder seal wire connectors and the do’s and don’ts (yes, even using a trusty Bic lighter can do the trick with care!). These handy heat shrink solder connectors make electrical repairs accessible to anyone, delivering professional results with minimum fuss. Now you can tackle your next wiring project with confidence, knowing you have a quick, effective way to solder and seal those connections in one go.