Are crimps better than solder? Choose by movement, access and repeatability
There is no universal winner. High-vibration harnesses and repeat professional work usually favor a matched ratchet crimp. Compact field repairs without a crimper can favor a correctly heated solder-seal sleeve.
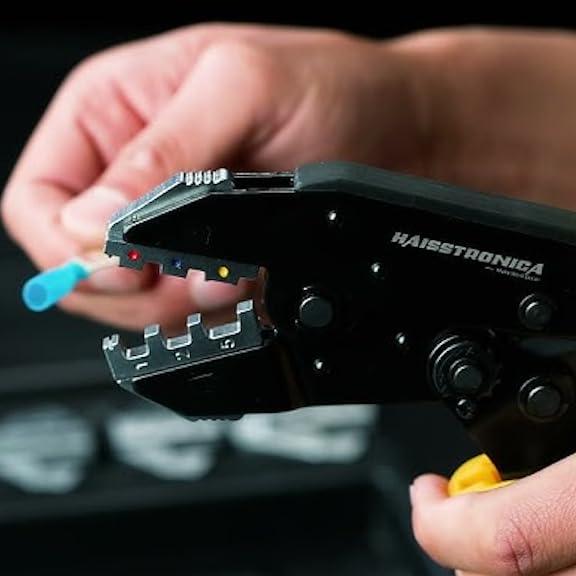
Choose a ratchet crimp
A matched crimp preserves conductor flexibility beyond the barrel and supports repeat pull-tested work.
Choose a ratchet crimp
A full-cycle tool and matched terminal family improve speed, inspection and process consistency.
Choose solder seal
A correctly sized sleeve needs only clean wire, alignment and controlled hot air to splice and seal.
Follow the governing standard
Do not override an OEM, marine, aviation or safety specification with a generic “better” claim.
Define the circuit
Check the standard
Rate movement + heat
Choose the method
Match the tool
Start with the application standard—not the internet debate
Before comparing tools, identify the circuit, conductor type, wire gauge, current, temperature, moisture exposure, movement and inspection requirement. If an OEM procedure or governing standard specifies a termination method, that requirement comes first.
Crimp vs solder seal: compare the failure modes
| Decision factor | Matched ratchet crimp | Solder-seal sleeve |
|---|---|---|
| Mechanical flexibility | Keeps strands flexible beyond a correctly formed barrel. | Solder can stiffen the conductor; support both sides and avoid repeated flex. |
| Heat effect | No installation heat when using a crimp-only terminal. | Needs enough heat for solder wet-out and adhesive flow without damaging insulation. |
| Sealing | Adhesive-lined heat-shrink terminals seal when fully recovered. | Sleeve combines solder and adhesive-lined shrink in one part. |
| Repeatability | High with the correct die, ratchet cycle and terminal family. | Depends heavily on heat distribution, wire alignment and cooling. |
| Access + portability | Requires room for the tool head and handles. | Useful where a crimper is unavailable but controlled hot air can reach the splice. |
| Inspection | Inspect barrel formation, conductor position and pull-test samples. | Confirm solder flow, full tubing recovery, adhesive at both ends and a cooled pull test. |

Use a matched ratchet crimper and heat-shrink terminals
Choose the die for the terminal family—not by AWG alone. Complete the full ratchet cycle, inspect the barrel and pull-test samples before production work.
Crimp path: five controls that make it repeatable
- Match connector family and die profile. Insulated, heat-shrink, open-barrel and ferrule terminals require different forming geometry.
- Match wire gauge to the terminal. Strip only the specified length and keep all strands intact.
- Position conductor and insulation correctly. Copper belongs in the conductor barrel; intact jacket belongs in the support or seal area.
- Complete the ratchet cycle. Do not release early or add extra “insurance” squeezes after the tool releases.
- Inspect and pull-test. Check symmetry, insulation damage and conductor retention before the connection enters service.

Use a solder-seal kit with controlled hot air
Choose this route when a crimper is unavailable or too bulky, the splice will not flex repeatedly, and you can heat the sleeve evenly until solder and both adhesive rings flow.
Solder-seal path: five controls that prevent a hidden weak joint
- Cut back to clean copper. Remove corrosion, damaged strands and contamination before sealing.
- Select the sleeve by conductor gauge. Both adhesive rings must recover tightly over intact insulation.
- Center the solder ring. Stabilize the overlap so conductors do not move while the solder melts.
- Use moving, controlled hot air. Flow the solder through the strands and recover both ends without scorching the tube.
- Cool, inspect and pull-test. Confirm solder wet-out, adhesive at both exits and no gaps, splits or movement.
Three situations that settle the decision quickly
Movement decides
Repeated vibration and bending usually move the decision toward a supported crimp termination.
Access decides
When handles cannot fit but controlled hot air can, a solder-seal sleeve may be the practical repair method.
Repeatability decides
A ratchet cycle, matched die and inspection plan make the crimp path easier to standardize.
Frequently asked questions
Strength alone is incomplete. A matched crimp often performs better under vibration because it avoids solder wicking and preserves flexibility; a well-supported solder-seal splice can be effective in low-movement repairs.
Do not add steps automatically. Solder can wick beyond a crimp and create a stiff transition. Follow the terminal manufacturer or governing procedure for the intended termination method.
A production crimp has repeatable visual and pull-test criteria. A transparent solder-seal sleeve helps you see solder and adhesive flow, but heating technique remains a major variable.
Both can resist moisture when the correct adhesive-lined product is fully installed. Seal performance depends on wire fit, tubing recovery, adhesive flow, routing and exposure—not the joining method alone.
Buy for the work you repeat. Common automotive heat-shrink terminals justify a matched ratchet crimper; occasional compact repairs may justify a solder-seal assortment and controlled heat gun.
Choose one path—then buy the complete system
For vibration and repeat work
Pair a matched ratchet crimper with the correct heat-shrink terminal family. Verify die profile, AWG and sample pull strength.
Shop the Ratchet Crimper → Browse Wire Crimpers →For compact, low-movement repairs
Pair the correct sleeve assortment with controlled hot air. Verify solder wet-out, adhesive flow and strain relief.
Shop the Solder-Seal Kit → Browse Solder-Seal Connectors →