


Introduction: Solder and seal wire connectors – often called solder seal wire connectors, solder and seal wire connectors, or solder butt connectors – are a game-changer for easy, soldered wire connections. These connectors combine low-melting-point solder with adhesive-lined heat shrink tubing in one handy package. By simply applying heat, you get a soldered, sealed, and insulated wire splice without needing a separate soldering iron or crimp tool. This guide for complete novices will explain what these heat shrink solder connectors are, how to use them step-by-step, where they’re used, how to choose the right ones, and answer common FAQs – all to help you make safe, durable electrical connections and improve your wiring projects’ reliability.
👉 Seal every splice with Haisstronica solder seal wire connectors—marine-grade, waterproof performance.

Definition: What Are Solder & Seal Wire Connectors?
Solder seal connectors (also known as solder wire connectors, solder sleeve connectors, or soldering butt connectors) are a type of butt splice connector designed to create a soldered, waterproof wire joint with minimal effort. Physically, each connector is a short tube of heat-shrink material with a ring of solder in the middle and rings of heat-activated adhesive at each end. To use one, you insert stripped wire ends from each side into the tube so they overlap under the solder ring, then heat the connector. As it heats, the solder melts and flows around the intertwined wire strands, “soldering” the wires together, while the outer tubing shrinks and the inner adhesive melts and seals to the wire insulation. The result is a strong soldered connector that is also insulated and weatherproof. In essence, these solder connectors combine the electrical bonding of solder with the strain relief and sealing of heat shrink – all in one step. They are sometimes marketed as “self-soldering wire connectors” or “solder stick connectors” because the solder is built-in and no soldering iron is needed. Compared to traditional crimp connectors (which rely on mechanically crimping a metal ferrule onto the wires), solder and seal connectors don’t require a crimp tool and can be easier for beginners to use while still providing low-resistance, secure joins.
Operation Steps: How to Use Solder & Seal Connectors
Using solder seal connectors is straightforward and perfect for DIYers and professionals alike. Follow these steps to ensure a proper soldered splice:
-
Strip the Wires: Use a wire stripper to remove about 1/4 inch (6–8 mm) of insulation from the end of each wire. Make sure the exposed stranded wire is clean and not frayed. For stranded wire, you can twist the strands together slightly so they stay neat (this is optional but helps). (This prepares the wires for a solid connection – do not tin them with solder beforehand, as you want the connector’s solder to do the work.)
-
Insert Wires into the Connector: Choose the right size solder seal wire connector for your wire gauge (connectors are color-coded by AWG size – e.g. red for 22–18 AWG, blue for 16–14 AWG, yellow for 12–10 AWG, etc.). Slide the connector’s tube over one of the wires before joining them. Then push the two stripped wire ends into the connector from opposite sides so that they overlap under the solder ring at the center. Ensure no bare copper is sticking out beyond the tubing, and position the solder ring right where the wires meet.
-
Apply Heat Evenly: Using a heat gun (recommended) or a butane micro-torch, heat the connector uniformly. Focus first on the center solder ring area until you see the solder melt and flow into the wire splice, then heat the outer parts so the tubing fully shrinks and the adhesive rings at the ends melt and bond to the wire insulation. Keep the heat source moving to avoid burning the tubing. A proper heat gun set around ~600°F (~315°C) works well – at this temperature the low-temp solder (which melts around 280°F) will liquefy in seconds. You’ll often see a bit of adhesive ooze out the ends, indicating a good seal.
-
Let it Cool: Remove the heat and let the connector cool undisturbed for a moment. As it cools, the solder solidifies into a solid conductive bond and the heat shrink plastic hardens, gripping the wires. Do not pull on the wires while it’s hot. After a minute, give the connected wires a gentle tug to ensure the soldered wire connectors have a firm hold and the wires won’t slip out. A correctly installed connector will have a shiny solder joint visible through the clear tubing and no gaps or bubbles in the shrink tube. The joint should feel secure and waterproof once cooled.
That’s it – you’ve made a soldered butt splice that is electrically secure and environmentally sealed. No crimping tool or electrical tape needed! When done properly, these soldering connectors create a permanent connection that can tolerate vibration and moisture.
👉 Upgrade to Haisstronica solder and seal wire connectors—click to build faster, cleaner circuits.

Application Scenarios: Where to Use Solder Seal Connectors
Solder seal connectors are used in a wide range of applications – from industrial control boxes (left), to automotive wiring repairs (center), to marine and boat electrical systems (right). They create sealed, waterproof splices ideal for harsh or wet environments.
Because of their convenience and reliability, solder and seal connectors have become popular in many electrical wiring scenarios:
-
Automotive Wiring: These connectors are frequently used in car, truck, and motorcycle wiring harness repairs. For example, if you’re installing new headlights, fixing trailer wires, or repairing a broken wire under the hood, heat shrink solder connectors provide a durable, waterproof join that resists engine compartment heat and vibration. Automotive professionals often favor them (or crimp-and-seal connectors) for under-hood repairs where weatherproofing is crucial. In fact, vehicle manufacturers recommend using either a crimp-and-seal butt connector or solder with adhesive-lined heat shrink for any under-hood or exposed wiring repair – not plain electrical tape. The sealed solder connection prevents oxidation and corrosion in critical circuits.
-
Marine & Boat Electronics: Waterproof solder connectors are a favorite for boat wiring and marine electronics because they create sealed wire splices that keep out saltwater and moisture. Whether you’re wiring bilge pumps, navigation lights, or fish finders, these connectors ensure a corrosion-proof connection. They are often referred to as marine solder connectors since they meet IP67 waterproof standards when properly installed. Unlike regular twist-on connectors or plain crimp terminals, solder seal connectors won’t let water seep into the joint, which is vital in marine environments.
-
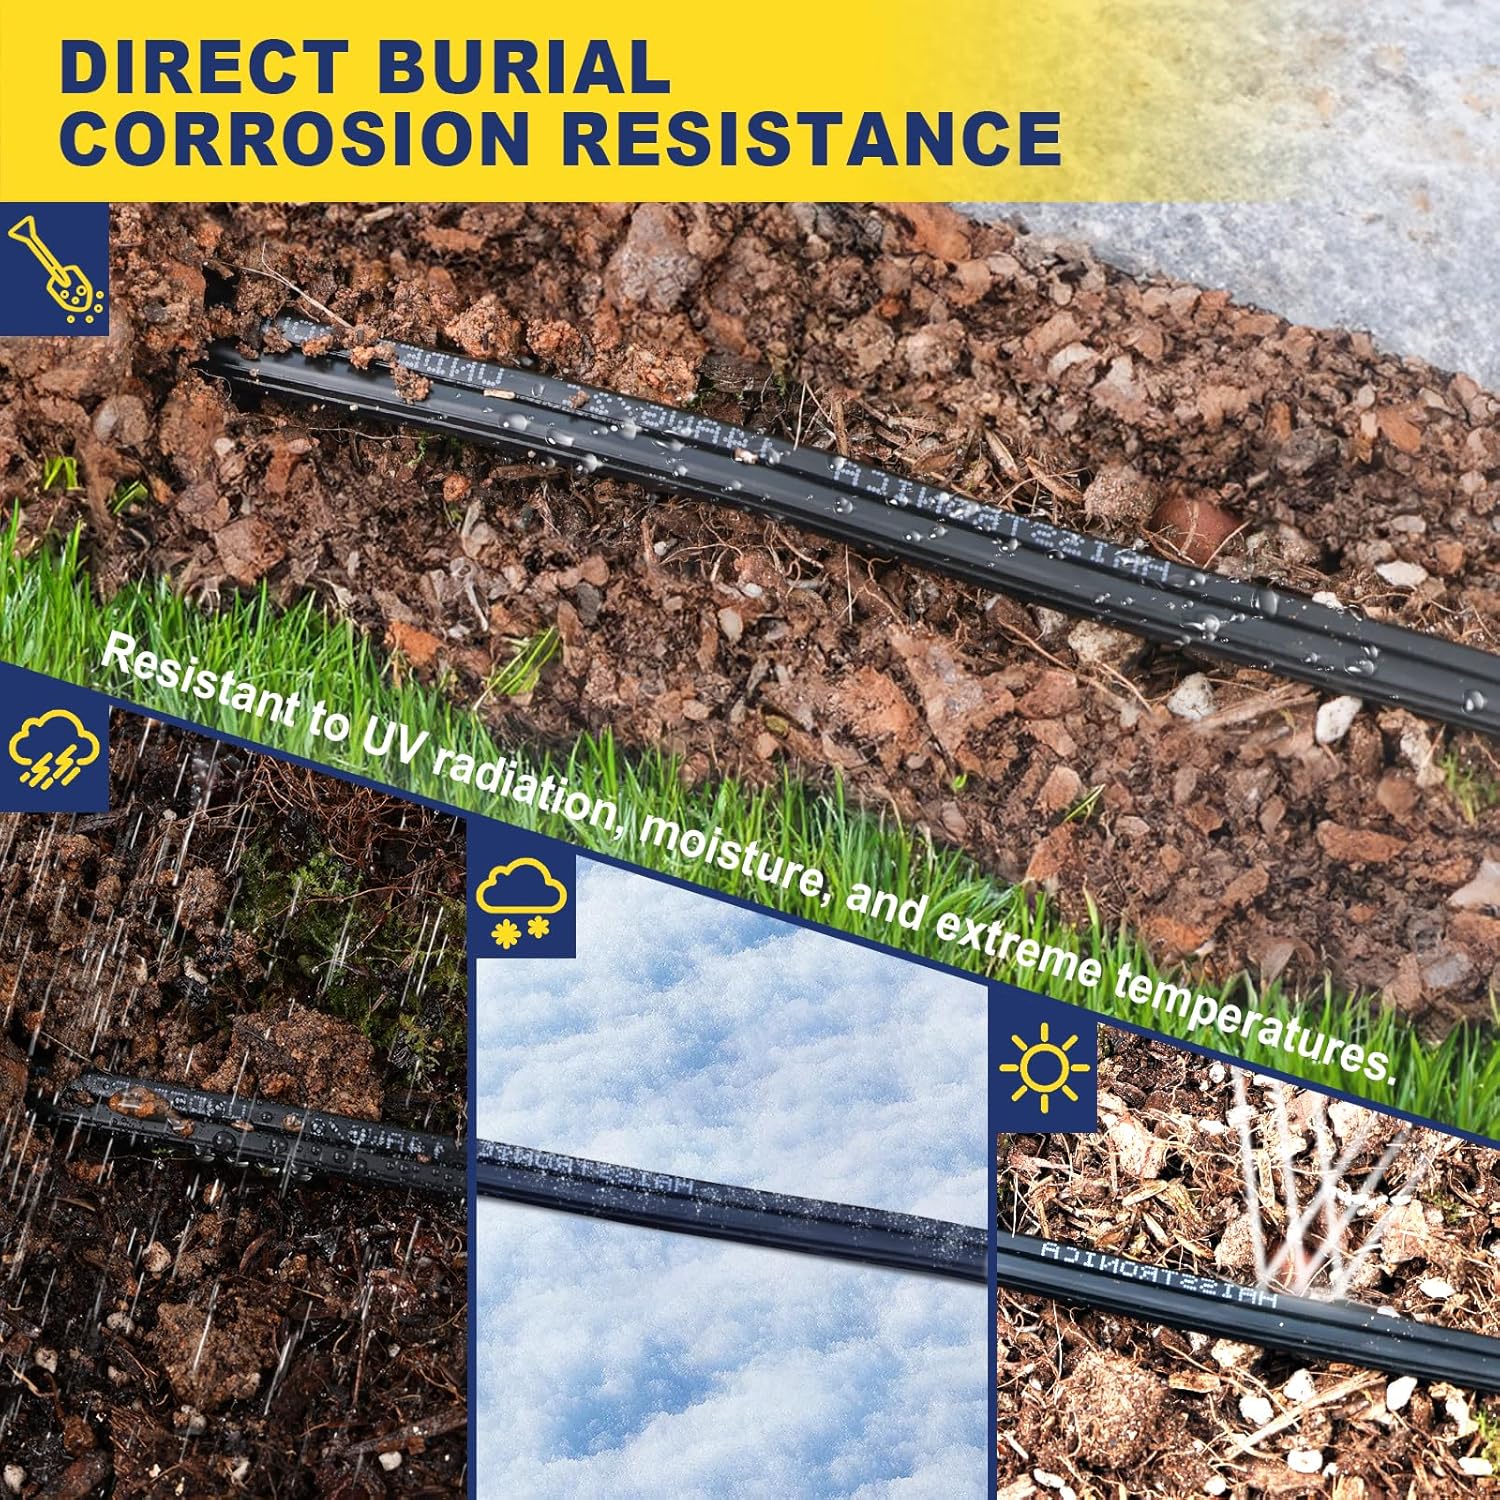
Home, DIY, and Outdoor Projects: You can also use these solder wire connectors for household and DIY tasks – for instance, fixing appliance wires, extending speaker cables, repairing lawn mower or ATV wiring, or hooking up LED strips. Outdoor lighting and irrigation systems benefit from the weather-resistant seal. Anywhere you’d normally use a crimp butt splice or a solder joint plus heat shrink, you can use a solder seal connector to simplify the job. They’re equally useful for electronics hobbyists building gadgets or drones, since they make neat, compact splices without needing bulky connectors.
In summary, solder & seal connectors are ideal for any application requiring a secure, insulated, and moisture-resistant wire splice. They excel in automotive, marine, and outdoor use, but are just as handy for everyday electrical fixes. Many users keep an assortment kit in their toolbox or glove compartment for quick wire repairs on the go. (Keywords: solder wiring connectors, sealed wire terminals, waterproof solder electrical connectors, automotive solder connectors, marine soldering cable)
👉 Choose Haisstronica solder seal wire connector solutions for reliable, heat-shrink protection—shop now.

Selection Guide: How to Choose the Right Connectors
Not all heat shrink solder connectors are created equal. Here are some tips to select the best solder and heat shrink connectors for your needs:
-
Match the Wire Gauge: Solder seal connectors come in various sizes to accommodate different wire thicknesses. They’re usually color-coded by AWG range. For example, most kits use white for ~26–24 AWG, red for 22–18 AWG, blue for 16–14 AWG, yellow for 12–10 AWG, etc. Always choose a connector size that matches your wire’s gauge (or range). If the connector is too large, it may not shrink tightly or the solder amount may be insufficient; too small, and your wire won’t fit. The stripped wire with insulation should slide into the connector snugly. Check the product info or labeling on the connector for the AWG specification. Using the correct size ensures a solid mechanical bond and proper amount of solder for that wire size.
-
Quality of Solder & Tubing: Look for high-quality solder seal wire connectors that use low-temperature solder alloy and dual-wall (inside adhesive) heat shrink tubing. Reputable brands will use solder that melts at a low temp (around 138°C/280°F) but is stable under normal electrical loads (so it won’t re-melt during use). They will also have thick, durable shrink tubing with hot-melt adhesive that forms a tight seal. Cheaper no-name connectors might skimp on solder (resulting in a weak joint) or use tubing that doesn’t adhere well or cracks over time. It’s worth investing in marine-grade solder connectors that are certified (UL, CE, etc.) for safety and performance. For instance, Haisstronica’s solder connectors use pure tinned copper sleeves and meet IP67 waterproof standards for reliable results.
-
Brand and Reviews: Because these products are popular, many brands offer them – quality can vary. You can find them at auto parts stores like AutoZone or Harbor Freight, and online on Amazon or other retailers (“solder seal wire connectors near me” will likely turn up local options). Stick to well-reviewed brands known for consistency. Haisstronica is one such trusted brand, with connectors praised for strong solder bonds and good adhesive seal. Other names include Wirefy, Kuject, Sopoby, and even some store brands (e.g. Everstart). When shopping, read reviews or look for indications of testing/certifications. A little research ensures you get soldered connectors that won’t fail prematurely.
-
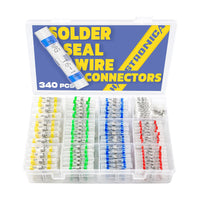
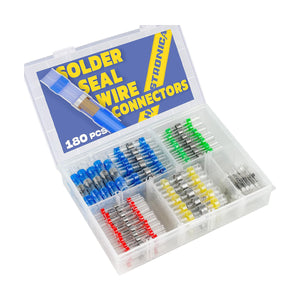
Kit Size and Extras: These connectors are often sold in assorted kits (50pcs, 120pcs, 340pcs, etc.). Beginners may want an assorted kit covering multiple sizes so you’re prepared for any project. For example, the Haisstronica 340PCS Solder Seal Wire Connectors Kit (AWG 26–10) is a popular choice that includes all common sizes in a handy case – perfect for DIYers who need a range of solder connectors on hand. (You can check out the product here: 340PCS Heat Shrink Solder Seal Wire Connectors Kit.) Such kits often come with a storage box and sometimes even a mini heat tool. Ensure the kit covers the wire gauges you’ll use most. Additionally, consider if you need related tools – for frequent use, a good heat gun and wire stripper will be invaluable (some sellers offer combo kits with tools included).
By following this guide, you’ll pick solder and seal connectors that are appropriate for your wires and reliable in the long run. Quality connectors might cost a bit more than the cheapest options, but they pay off by providing secure, soldered wire splices that stand the test of time (and weather).
👉 Snap watertight joins with Haisstronica solder butt connector tech—add to cart.

FAQ (Frequently Asked Questions)
Q1: Do I need a special tool to heat these solder seal connectors?
A1: No special tool is required – you don’t need a soldering iron at all – but you do need a heat source. The recommended tool is a basic electric heat gun, which provides controlled, even heat around the connector for a reliable seal. A heat gun set to about 600°F (315°C) is ideal, as it will shrink the tubing and melt the low-temp solder quickly. If you don’t have a heat gun, you can use a butane soldering torch or even a lighter in a pinch, but be extremely careful. Keep a small flame moving under the connector (not directly on it) to avoid burning the tubing. Avoid using a hair dryer – most don’t get hot enough to melt the solder. In summary, any high-heat source works, but for best results a proper heat gun is the safest and easiest tool for these heat shrink solder connectors.
Q2: Are solder and seal wire connectors really waterproof and reliable?
A2: Yes – when properly heated and installed, solder seal connectors create a water-resistant, sealed splice that is very durable. The heat-shrink tubing has an inner layer of meltable adhesive that, once heated, bonds to the wire insulation and seals out water. In practice, a correctly made connection can be immersed in water (as often demonstrated in product tests) without failing. This makes them ideal for marine and automotive use where moisture or corrosion is a concern. They also hold up well under vibration because the solder creates a solid bond and the tubing provides strain relief. However, it's important to use them as intended: if you were to pull a wire halfway out or not fully shrink the tubing, you could leave a gap for moisture. But assuming proper technique, these soldered wire connectors are about as waterproof and vibration-resistant as a wire splice can get, comparable to professional crimp-and-seal connectors. Always give the finished splice a tug test and inspect that the tubing has fully shrunk with a bit of adhesive visible at the edges – that’s how you know you’ve got a good seal.
Q3: A technician is performing a wire repair on a circuit under the hood of a vehicle. Technician A says to use solder and adhesive-lined heat shrink tubing or a crimp-and-seal connector. Technician B says to solder and use electrical tape. Which technician is correct?
A3: Technician A is correct. In any automotive repair exposed to the elements (like under the hood), the splice must be weatherproof. The two acceptable methods are either using a crimp-and-seal heat shrink connector or soldering the wires and covering with adhesive-lined heat shrink tubing. Both of those methods ensure a sealed, corrosion-resistant connection as recommended by car manufacturers (OEMs). Simply soldering and wrapping with electrical tape (as Tech B suggests) is not recommended in such areas – tape is not a permanent seal and can unwrap or allow moisture in over time. In fact, General Motors, Chrysler, and other OEMs specifically advise using crimp-and-seal connectors or solder + adhesive heat shrink for wiring repairs. Electrical tape might be acceptable for indoor or protected locations, but under the hood it’s likely to fail. So, always use a solder seal connector or a crimp heat shrink connector for automotive wiring fixes to ensure longevity and safety.
Q4: What’s the difference between these solder & seal connectors and regular crimp connectors?
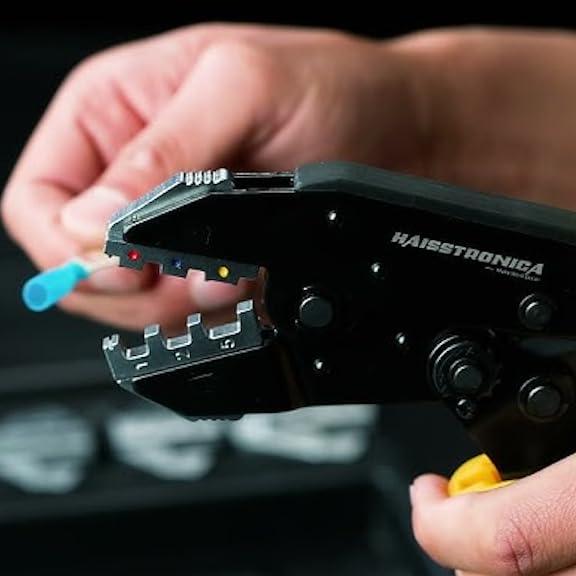
A4: Both types are used to join wires, but they work a bit differently. A standard crimp butt connector has a metal barrel that you compress (crimp) around the stripped wires, usually with a crimping tool, and often you then heat shrink the insulation for protection. A solder seal connector, on the other hand, doesn’t require a crimp tool – it uses solder to bond the wires together, and the outer tube is the heat shrink insulation. Installation of a solder connector only requires heat, not pressing with a tool. In terms of performance, a properly crimped connection and a properly soldered connection are both strong and have low electrical resistance. Crimp connectors have been used for decades in automotive and are very reliable if crimped correctly with the right tool. Solder seal connectors are a newer alternative that achieve a similar result (and include the sealing step in one go). They are great for people who might not have an expensive crimp tool, or for quick field repairs (you only need a heat source). One thing to note: with crimp connectors, the quality depends on making a good mechanical crimp; with solder connectors, the key is applying the right amount of heat so the solder fully melts and flows. When done properly, both will hold up to vibration and environmental stress. Many DIYers love solder seal connectors for the convenience, while some professionals still prefer a crimp for critical connections. In fact, you can even do both in critical cases – crimp the wire lightly and then solder and shrink it for extra assurance (though this isn’t usually necessary for most repairs).
Q5: Where can I buy good solder seal wire connectors?
A5: These connectors have become very popular, so they’re widely available. In the US, you can find them at automotive retailers (AutoZone, O’Reilly, NAPA, Harbor Freight, etc.), in the electrical aisle of many hardware/home improvement stores, and of course online (Amazon, eBay, and specialty tool sites). The key is to buy from a reputable brand or source so you know you’re getting quality connectors. You might also encounter generic kits on marketplaces; just look at reviews to ensure the solder melts and the tubes seal properly. For convenience, you can purchase directly from the manufacturer’s online store or Amazon listings. For example, Haisstronica offers kits in various sizes, such as their 340-piece solder seal connector kit we linked above, which is a great starter kit for most wire sizes. Buying an assorted kit is usually economical and gives you a selection of connectors for different gauge wires. If you only need a specific size (for example, a bunch of solder seal ring terminals or spade connectors for a project), those are available too. But for most DIY and automotive applications, an assorted butt connector kit will cover your needs. Always ensure the kit comes with the appropriate range of sizes for your wires and that it includes dual-wall heat shrink (with adhesive) connectors – which almost all solder seal connectors do by design.
Our Top User-friendly Picks
Haisstronica solder seal wire connectors use precision hot-melt rings (often called solder sticks) that melt, flow, and set in seconds for a durable, weatherproof bond. These solder and seal wire connectors deliver a one-step solder-plus-shrink process that locks out moisture and corrosion on marine, automotive, and outdoor projects. Heat-shrink tubing adds abrasion resistance and strain relief, while gauge markings on the polyolefin sleeve make size selection instant. Get clean, repeatable joints that outlast crimps and tape.
👉 Go pro with Haisstronica solder butt connectors—durable seals for harsh environments.

With the above information, you should be well-equipped to start using solder and seal connectors for your electrical projects. They offer an easy, one-step solution to splice, solder, and seal wires, making them an excellent choice for beginners and experienced technicians alike. By choosing the right connectors and following the proper technique, you’ll get clean, professional, and long-lasting results in your wiring repairs or installations. Happy soldering!


1 comment
Mark Haven
I’m wondering if I can use this to connect RG58U coax cable. There would then be one heat shrink connector on the center wire. After it cools I’ll then put a larger heat shrink connector over the braid – which surounds that center wire. Will the heating of the outer connector still leave the center wire and braid still be electically isolated. I’ll be using this for a marine antenna wire.
I’m wondering if I can use this to connect RG58U coax cable. There would then be one heat shrink connector on the center wire. After it cools I’ll then put a larger heat shrink connector over the braid – which surounds that center wire. Will the heating of the outer connector still leave the center wire and braid still be electically isolated. I’ll be using this for a marine antenna wire.