


When stripping the insulation off an electrical wire, it’s crucial to avoid nicking or cutting into the metal conductor underneath. Even small nicks or cuts around the wire can create weak points in the copper. Deep nicks essentially thin the wire at that spot, which weakens it mechanically and electrically. A nicked wire may break when bent or vibrated, and a partially cut-through conductor has less capacity, leading to higher resistance and heat buildup. In short, nicking the wire jeopardizes the wire’s strength and safety by making it prone to failure.
A self-adjusting wire stripper being used on an automotive wiring harness. This wire stripping tool cleanly removes insulation without damaging the copper conductor. Proper wire stripping technique is an essential skill for DIYers, electricians, and automotive enthusiasts. Beginners often underestimate the importance of using the right wire stripper tool (also known as a cable stripper or wire stripping tool) for the job. Some may even try using knives or scissors, or search for a “wire striper” (common misspelling for wire stripper), but using a dedicated wire stripper is the most effective and safest tool to remove insulation without harming the wire. In the next sections, we’ll define what it means to nick a wire, outline the correct steps to strip wires without nicks, discuss common use cases, recommend how to choose the best wire stripping tools, and answer frequently asked questions.
👉 Go pro with Haisstronica automatic cable stripper—smooth, accurate pulls on AWG 24–10. Buy now.

What Does “Nicking the Wire” Mean? (Definition)
Nicking the wire refers to accidentally cutting into the metal conductor of the wire while stripping off the insulation. This usually happens when the stripping tool is too sharp, set to the wrong size, or used with too much force, causing it to bite into the copper. A slight scratch or score on a copper wire might not seem like a big deal, but if the cutter goes deep enough to cut some strands (in stranded wire) or carve a notch in a solid wire, it creates a weak point. Such a nicked conductor can break under stress or carry less current safely. The goal of proper wire stripping is to remove only the insulating jacket and leave the metal conductor fully intact and smooth. That’s why professionals use quality wire strippers with the correct notch size – these tools are designed to cut through insulation without cutting the wire itself. Many manual wire strippers and cutters have multiple gauge holes; when used correctly, they cleanly cut the insulation and leave the copper undamaged. In contrast, using a knife or an improper tool makes it easy to accidentally carve into the wire. Always remember: the aim is to expose clean metal without any nicks or loss of wire strands.
👉 Haisstronica auto wire stripers: self-adjusting jaws, AWG 24–10 coverage. Click to shop.

How to Strip a Wire Without Nicking It (Operation Steps)
Stripping a wire safely requires the right technique and a bit of practice. Follow these steps to remove insulation without nicking the wire:
Stripping insulation from a wire with a manual wire stripper tool. Using the correct notch for the wire gauge prevents cutting the copper strands.
-
Prepare the Wire and Tool: Make sure the wire is not live (always turn off power!). Choose a proper wire stripping tool – ideally a dedicated wire stripper (manual or automatic) that matches the wire gauge. Using the right tool is safer and far more effective than improvising with a knife or pliers.
-
Select the Correct Gauge Notch: Identify the wire’s gauge (thickness) and use the corresponding hole or setting on your wire stripper tool. For example, if stripping 14 AWG house wire, use the 14 AWG slot. Most electrician wire strippers have multiple labeled notches. Using a hole that’s too small will bite into the copper, and too large won’t cut the insulation at all – so match the size carefully.
-
Position and Clamp: Insert about 1/2 inch of the wire end into the stripper’s notch. Clamp down firmly on the handles so that the blades cut just through the insulation. Do not twist or yank violently. High-quality wire stripping pliers are designed to cut the jacket cleanly with moderate pressure. If you have to squeeze extremely hard or jerk the tool, double-check you’re using the correct notch (or that your tool’s blades are sharp).
-
Remove the Insulation: Once clamped, gently twist the tool slightly (for manual strippers) and then pull toward the wire end. The plastic insulation should slide off, leaving the copper conductor exposed. In a self-adjusting wire stripper, this process is automatic – the tool grips, cuts, and pulls in one squeeze. Automatic wire stripping tools can save time here, especially for multiple wires, as they strip in one motion.
-
Inspect the Exposed Wire: After stripping, look closely at the bare wire. It should be shiny and unscathed. Ensure you haven’t cut into any strands of a stranded wire or carved a ring into a solid wire. If you notice any nicked or cut strands, or a notch on the solid conductor, trim off that segment and strip the wire again properly. It’s better to lose a tiny length of wire than to install a weakened, nicked wire. Also, remove any remaining bits of insulation. A clean strip with no damage sets you up for a solid electrical connection.
Pro Tips: Practice on scrap wires first to get a feel for the pressure needed. Use a good-quality automatic wire stripper or adjustable wire strippers for easier results – many auto wire strippers grip and strip without requiring you to judge the pressure. Remember that alternate tools like knives or scissors demand extra caution because they can easily nick the wire. Whenever possible, stick with a proper wire stripper and cutter combo tool for the most reliable outcome.
👉 Level up with Haisstronica automatic wire stripers—clean cuts, zero nicking, pro speed. Get yours.

Common Scenarios for Stripping Wires (Application)
Why might you need to strip wires in the first place? Here are some common application scenarios where wire stripping is required, and why doing it correctly (without nicks) is so important:
-
Home Electrical Projects: If you’re replacing a light switch, installing a ceiling fan, or adding a new outlet, you’ll be stripping the insulation off household wires. Residential electrical wires (often 12 or 14 AWG solid copper) need clean, nick-free ends for secure connections under screw terminals or wire nuts. Nicking these wires can make them break as you push switches/outlets back into electrical boxes, or lead to hotspots. Using a quality electrical wire stripper ensures you don’t damage the conductors in your walls.
-
Automotive Wiring Repairs: Working on car or boat wiring (like installing a new stereo, fixing a trailer light, or replacing battery cables) involves stripping multi-stranded wires. Automotive wires undergo vibration, so a nicked automotive wire can break even faster under the hood. Here, using the right automotive wire strippers or an automatic wire stripper is invaluable. For example, when splicing a speaker wire or repairing a harness, you want all those fine strands intact for maximum conductivity. Special spark plug wire strippers are used for ignition cables, which have thick insulation.
-
Electronics and DIY Gadgets: Hobby projects (Arduinos, Raspberry Pi, RC cars, home theaters, etc.) often use small-gauge stranded wires. Stripping these requires a delicate touch or a precision fine wire stripper so you don’t accidentally cut off half the strands. Nicking wires in electronics can cause intermittent connections – a nightmare for troubleshooting. Whether you’re building a drone or repairing headphones, a good precision wire stripping tool will help you expose just the right amount of conductor without damage.
-
Cable Networking and Others: Stripping isn’t limited to power wires. You might strip coaxial cables for your TV or Ethernet cables for networking. These have multiple layers to cut. In these cases, you’d use a coax cable stripper or universal cable stripping tool designed for that purpose. The principle remains: don’t nick the inner conductor. In general, whenever you splice wires together or attach connectors, you’ll strip the ends first – and ensuring no nicks means your splices will be strong and safe.
In all these scenarios, the key is to use the right wire stripping tools and techniques to get a clean strip. A properly stripped wire exposes the ideal length of conductor (usually about 3/8” to 5/8” depending on the connector) with no scoring or cutting of the metal. This maximizes the contact area and minimizes any risk of the wire breaking or overheating later. Whether you’re a professional electrician or a DIY beginner, taking care to avoid nicks when stripping will pay off in the longevity and reliability of your electrical work.
👉 Choose Haisstronica automatic wire stripper for effortless, consistent AWG 24–10 results. Add to cart.

How to Choose the Right Wire Stripper (Purchasing Guide)
Choosing a quality wire stripper tool is just as important as good technique. The right tool makes it easier to strip wires without damage. Here are some tips for selecting the best wire stripping tool for your needs:
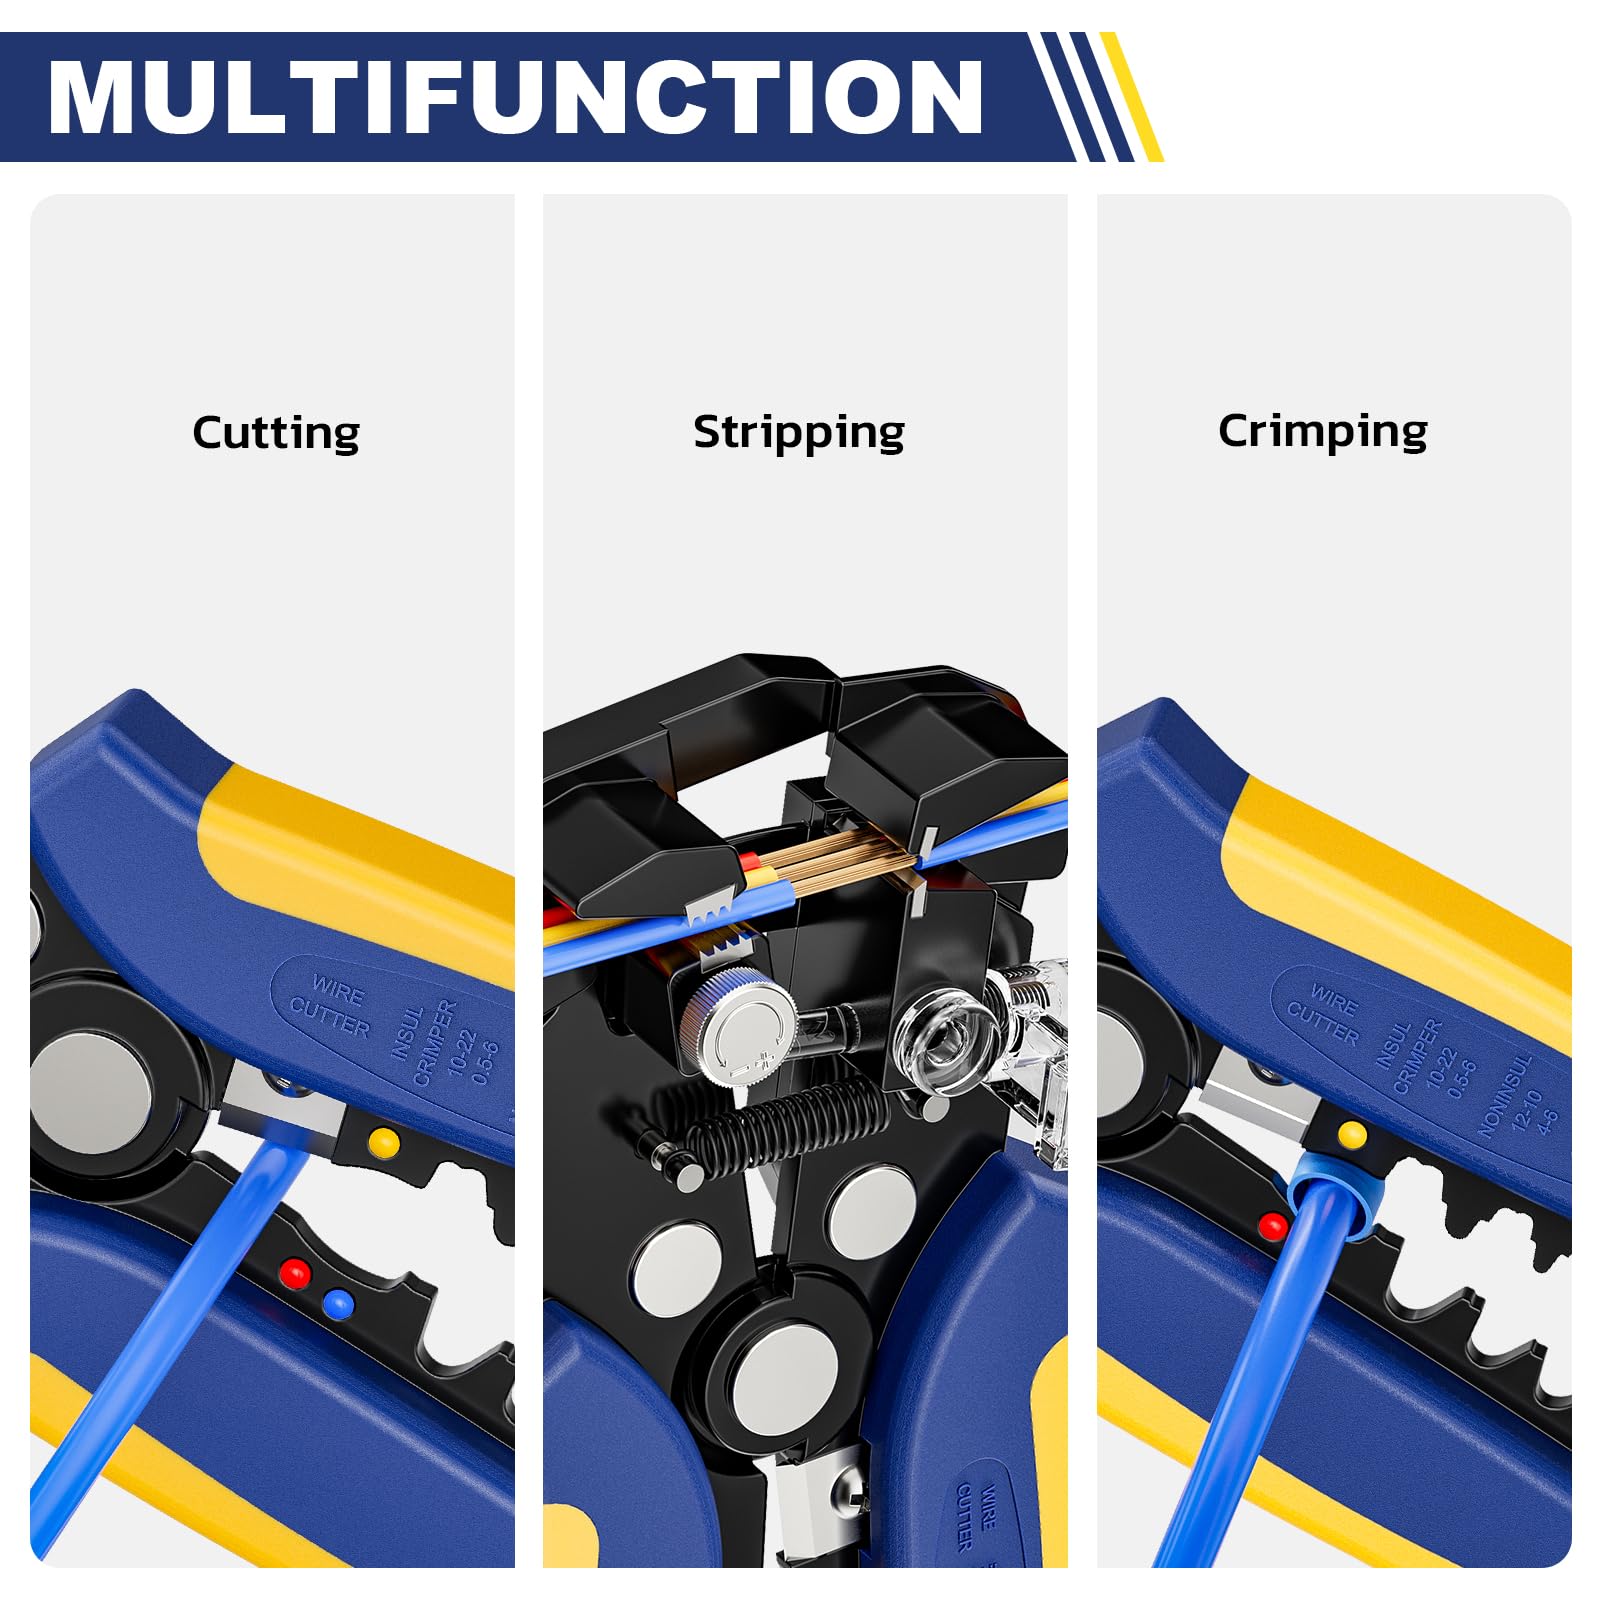
A versatile self-adjusting wire stripper (Haisstronica AWG 10–24) that strips, cuts, and crimps wires. This automatic wire stripper 10-24 AWG range tool adapts to different wire sizes, making stripping easier for beginners.
-
Match Your Wire Gauges: Look for a tool that covers the range of wire sizes you’ll work with. For instance, the self-adjusting wire stripper for AWG 10–24 (10 to 24 gauge) in the image above automatically adapts to various wire thicknesses. Most common electrical wire strippers handle around 10–22 AWG. If you work on very fine wires (like 30 AWG in electronics) or very heavy cables (8 AWG, 6 AWG battery cables), make sure the stripper is rated for those. Using the correct size range ensures the blades cut the insulation and won’t nick the wire as long as the tool is good quality and used properly. High-quality automatic cable stripper tools give consistent, nick-free results within their specified range – always check that your stripper covers the gauge you need.
-
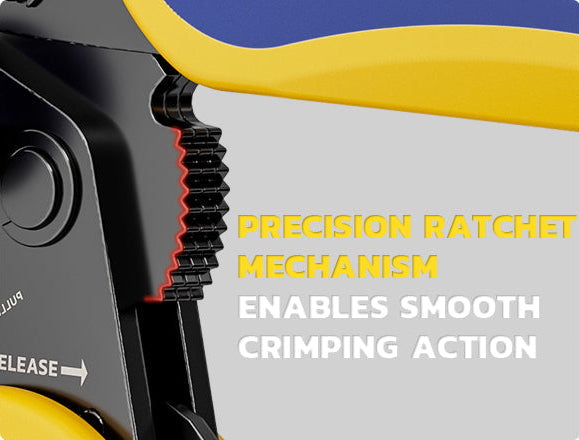
Manual vs. Automatic: Manual wire strippers are the basic plier-like tools with multiple notches. They are inexpensive, reliable, and let you feel the cut – great for general use if you don’t mind the learning curve. Automatic wire strippers (including self-adjusting wire strippers) have a mechanism that grips and strips in one squeeze, which can be faster and more user-friendly for beginners or high-volume work. For example, an automatic wire stripping tool like a self-adjusting model saves time if you’re stripping dozens of wires, and it reduces the chance of error. However, very cheap auto strippers may struggle on extremely small or large wires, so invest in a quality one. Beginners often prefer automatic or self adjusting wire stripping tools because they minimize technique issues – you get a clean strip every time without worrying about pressure.
-
Additional Functions: Many wire strippers come as multi-tools. You’ll find wire stripper and cutter combos (with a blade for cutting wire built-in) and even wire stripper crimper multi-tools that can strip insulation and crimp terminals. These 2-in-1 or 3-in-1 tools (sometimes sold as a wire stripper kit or part of a larger stripper set) add convenience. For instance, some Haisstronica models combine stripping, cutting, and crimping for insulated and non-insulated terminals in one tool. If you frequently attach connectors, a wire stripping and crimping tool can streamline your work. Just ensure the multi-tool isn’t sacrificing stripping precision – quality models should still strip cleanly.
-
Ergonomics and Build Quality: A comfortable grip and solid construction are important, especially if you’ll use the tool a lot. Look for electrician wire stripper models with cushioned, non-slip handles and good spring action. High carbon or alloy steel blades tend to stay sharp longer and make cleaner cuts (dull blades can tear insulation or force you to squeeze too hard). Adjustable tension or a tuning screw is a plus on manual strippers to dial in perfect cuts. It’s worth avoiding the super cheap off-brand strippers – as one DIYer quipped, “there are a LOT of terrible $5 wire strippers out there” and they can cause more nicks and frustration. Spending a bit more (often $10–20 range) on a reputable brand will pay off in performance.
-
Specialty Stripping Tools: For unusual tasks, there are specialized tools. For example, thermal wire strippers (a.k.a. hot wire strippers) use heated elements to melt or vaporize insulation. These are useful for very fine magnet wires or tough Teflon insulation where using blades could nick the conductor. Unless you’re dealing with those scenarios (e.g. aerospace wiring or coil winding), you won’t need a thermal wire stripping machine – they’re more for industrial use. Similarly, there are heavy-duty wire strippers and ratcheting cable strippers for large cables like battery wires, as well as pneumatic or electric stripping machines for production environments. Most beginners won’t need these; a good handheld universal wire stripping tool will handle the typical wires found in automotive, household, or hobby projects. Even aesthetic options exist (the same tool might come in different colors – you can even find blue or pink wire strippers to suit your style!). The bottom line: choose a tool that fits the type of wiring you’ll do, feels sturdy, and has good reviews for not damaging wires.
Recommended Product: If you’re looking for a beginner-friendly yet professional-grade tool, consider the Haisstronica Self-Adjusting Wire Stripper for AWG 10–24. This automatic wire stripper adapts to various wire sizes without adjustment, ensuring you strip insulation cleanly without nicking the conductor every time. It also doubles as a cutter and crimper, making it a versatile addition to your toolkit. Investing in a quality tool like this will make your wire stripping tasks faster, easier, and much safer.
👉 Meet the Haisstronica auto wire stripper—precision stripping from AWG 24–10 in a single squeeze. Try it today.

FAQ: Wire Stripping and Wire Stripper Tools
Q1: What happens if I accidentally nick the wire while stripping?
A: If you nick a wire, you’ve essentially damaged the conductor. Even a small notch can create a weak spot that may break later (especially if the wire is moved or bent). A nicked wire also has reduced thickness at that point, so it heats up more under load and can become a failure point. In fact, a wire that’s been notched is far more prone to snapping if it’s vibrated or bent, because the nick acts like a stress concentration where a crack can start. Electrically, if you cut partially through a stranded wire, you’ve reduced the current-carrying strands which leads to higher resistance and possible overheating. For safety, it’s best to cut off the damaged portion and re-strip the wire correctly. It’s never worth risking a poor connection or future break by leaving a deeply nicked conductor in your circuit. In summary: nicks cause weakness, so if it’s more than a very superficial scratch, strip again with a fresh section of wire.
Q2: What is the most effective and safest tool to use to strip insulation from electrical wire?
A: A dedicated wire stripper is the most effective and safest tool for stripping insulation from electrical wires. These tools are specifically designed to cut through the plastic or rubber insulation without cutting or nicking the metal wire underneath. Using a proper wire stripping tool ensures you get a clean cut on the insulation every time, which is crucial for a solid electrical connection. In contrast, using knives, scissors, or other improvised tools greatly increases the risk of accidentally slicing into the conductor. So, for any electrical project – big or small – reach for a quality wire stripper (cable stripper) for the best results. It will make the job easier and protect the integrity of your wires.
Q3: Can I strip wires without a wire stripper (for example, with a knife or pliers)?
A: It is possible, but extreme caution is required. Many people have stripped wires with whatever tools were on hand – a utility knife, a pair of side cutters, even teeth in a pinch – but these methods often result in nicks or cuts to the wire. For instance, using a knife, you’d carefully score around the insulation and pull it off, but one slip and you’ve cut into the copper. Pliers can pull insulation, but if they pinch too hard, they’ll damage the wire. Scissors might have a notch that can cut insulation, but again, control is tricky. These improvised techniques are prone to error, which is why they’re generally not recommended. If you must strip a wire without a proper stripper, do it very slowly and gently – and know that you’re taking a risk. Dedicated wire strippers are strongly recommended because they make the job safer and easier. In fact, most professionals won’t strip wires with a knife unless absolutely necessary, because they want to avoid any chance of nicking the conductor. So while you can do it, the best practice (especially for beginners) is to use the correct tool – a good wire stripper – which almost guarantees a perfect strip every time.
Q4: Should I get a manual wire stripper or an automatic one?
A: It depends on your preference and how often you’ll strip wires. Manual wire strippers (the kind with multiple holes and maybe an adjustable screw) are simple, durable, and give you fine control. They’re great for precision work and are the go-to for many electricians. With a manual stripper, you learn to feel when the insulation is cut through – it might take a few tries to get the technique, but they’re very reliable once you do. Automatic wire strippers, on the other hand, are very convenient – you just insert the wire and squeeze, and the tool grips, cuts, and pulls off the insulation in one motion. They’re fantastic if you have a lot of wires to strip or if you want to save time and reduce hand fatigue. For beginners or hobbyists, an automatic (especially a self-adjusting wire stripper) can remove a lot of the guesswork. A good automatic stripper won’t nick the wire as long as it’s used on the wire sizes it’s designed for. In fact, many autos adjust themselves to the wire gauge, which is super handy if you’re stripping a mix of wire sizes back-to-back. The downside is that cheap automatic strippers can sometimes malfunction on very thin or very thick wires, so you want a quality one. In summary: if you value speed and ease, go for a self adjusting wire stripper tool (auto stripper). If you prefer a bit more control or are only doing occasional stripping, a trusty manual wire stripper will serve you well. Some people even keep both types in their toolkit!
Q5: How can I tell if I’ve nicked a wire or not?
A: After you strip a wire, inspect the bare conductor closely (good lighting or a magnifier helps for small wires). On a solid wire, look for a shiny copper surface – if you see a visible groove or notch going around the circumference, that’s a nick. Run your fingernail over it; if it catches, the wire was likely cut into. On stranded wire, check if any strands were cut off or if there are fewer strands than the wire should have. Often when people nick stranded wire, you’ll see a few tiny copper strands left behind in the insulation you removed, or the twist of the strands will look uneven/thinner. In the images above, for example, you can see how a proper strip leaves all strands intact. If only, say, 5 out of 7 strands remain connected, the wire was partially cut. Also, gently bend the stripped end: a nicked solid wire might bend more easily at the weak point (or even snap off). If you’re unsure, it’s safest to assume it might be nicked and re-strip. It’s better to waste a half-inch of wire than to have a hidden weak spot. Over time, you’ll get a feel for the right pressure to avoid nicks altogether – and using a quality wire stripper tool with the correct notch will make this much easier.
Our Top User-friendly Picks
Wire strippers, wire cable stripper, and even “wire srippers” searches point to this do-it-all tool. One pro-grade body handles stripping, cutting, and light crimping—perfect for home DIY or on-site techs. Heat-treated, black-oxide blades stay sharp for clean, nick-free results on copper, aluminum, coax, and cable. The auto-adjusting jaws cover AWG 22–10 (0.5–6.0 mm²), delivering consistent pulls across 22–18, 16–14, and 12–10 gauges. A cushioned rubber grip reduces fatigue, while a quick, hassle-free action speeds every task. Backed by responsive support and a satisfaction guarantee, this versatile handheld makes wiring projects faster, safer, and more precise.
👉 Upgrade to Haisstronica wire strippers—our self-adjusting AWG 24–10 design delivers fast, clean pulls. Shop now.

Wrapping Up – Strip Wires Safely: By now, you know that avoiding nicks is essential for electrical safety and wire longevity. Using the proper wire stripping tools, taking your time, and double-checking your work will ensure your stripped wires are clean and damage-free. If you’re serious about doing it right, consider adding a reliable automatic stripper to your toolkit for fast, foolproof strips.
Ready to strip wires like a pro? Don’t forget to equip yourself with a good tool. Check out the Haisstronica Self-Adjusting Wire Stripper (AWG 10–24) – a highly rated wire stripper tool that makes the job easier and helps you avoid those pesky nicks once and for all!