

導入
圧着工具 (ケーブル クリンパ、ワイヤ クリンパ ツール、または圧着ペンチとも呼ばれる) は、電気配線の作業を行う人にとって不可欠な手動ツールです。圧着コネクタ(端子) を圧縮力でワイヤの端に取り付けることで、ワイヤを安全に接続できます。ワイヤを単にねじったりテープで留めたりするだけの場合とは異なり、適切な圧着工具で圧着すると、振動やストレスに耐える強力で恒久的な接続が実現します。実際、圧着接続は信頼性が高いため、電子機器、自動車、航空宇宙、通信の分野で広く使用されています。適切に行われたワイヤ圧着は機械的に堅牢で気密性が高く、酸素や湿気を遮断して腐食を防止します。その結果、振動の多い環境でもはんだ付けされた接続部よりも長持ちする安全な電気接続が実現します。
しかし、良好な圧着を実現するには、適切な工具と技術が必要です。DIY愛好家の方でも初心者の方でもご安心ください。このガイドでは、圧着工具とは何か、圧着工具の使い方をステップバイステップで解説します(もちろん、電線を正しく圧着する方法も解説します)、圧着工具が使用される様々な用途、最適な電線圧着工具の選び方、よくある質問への回答などを解説します。このガイドを最後まで読めば、プロのように圧着作業を始め、信頼性の高い電気接続を確立するために必要な知識がすべて身に付くでしょう。
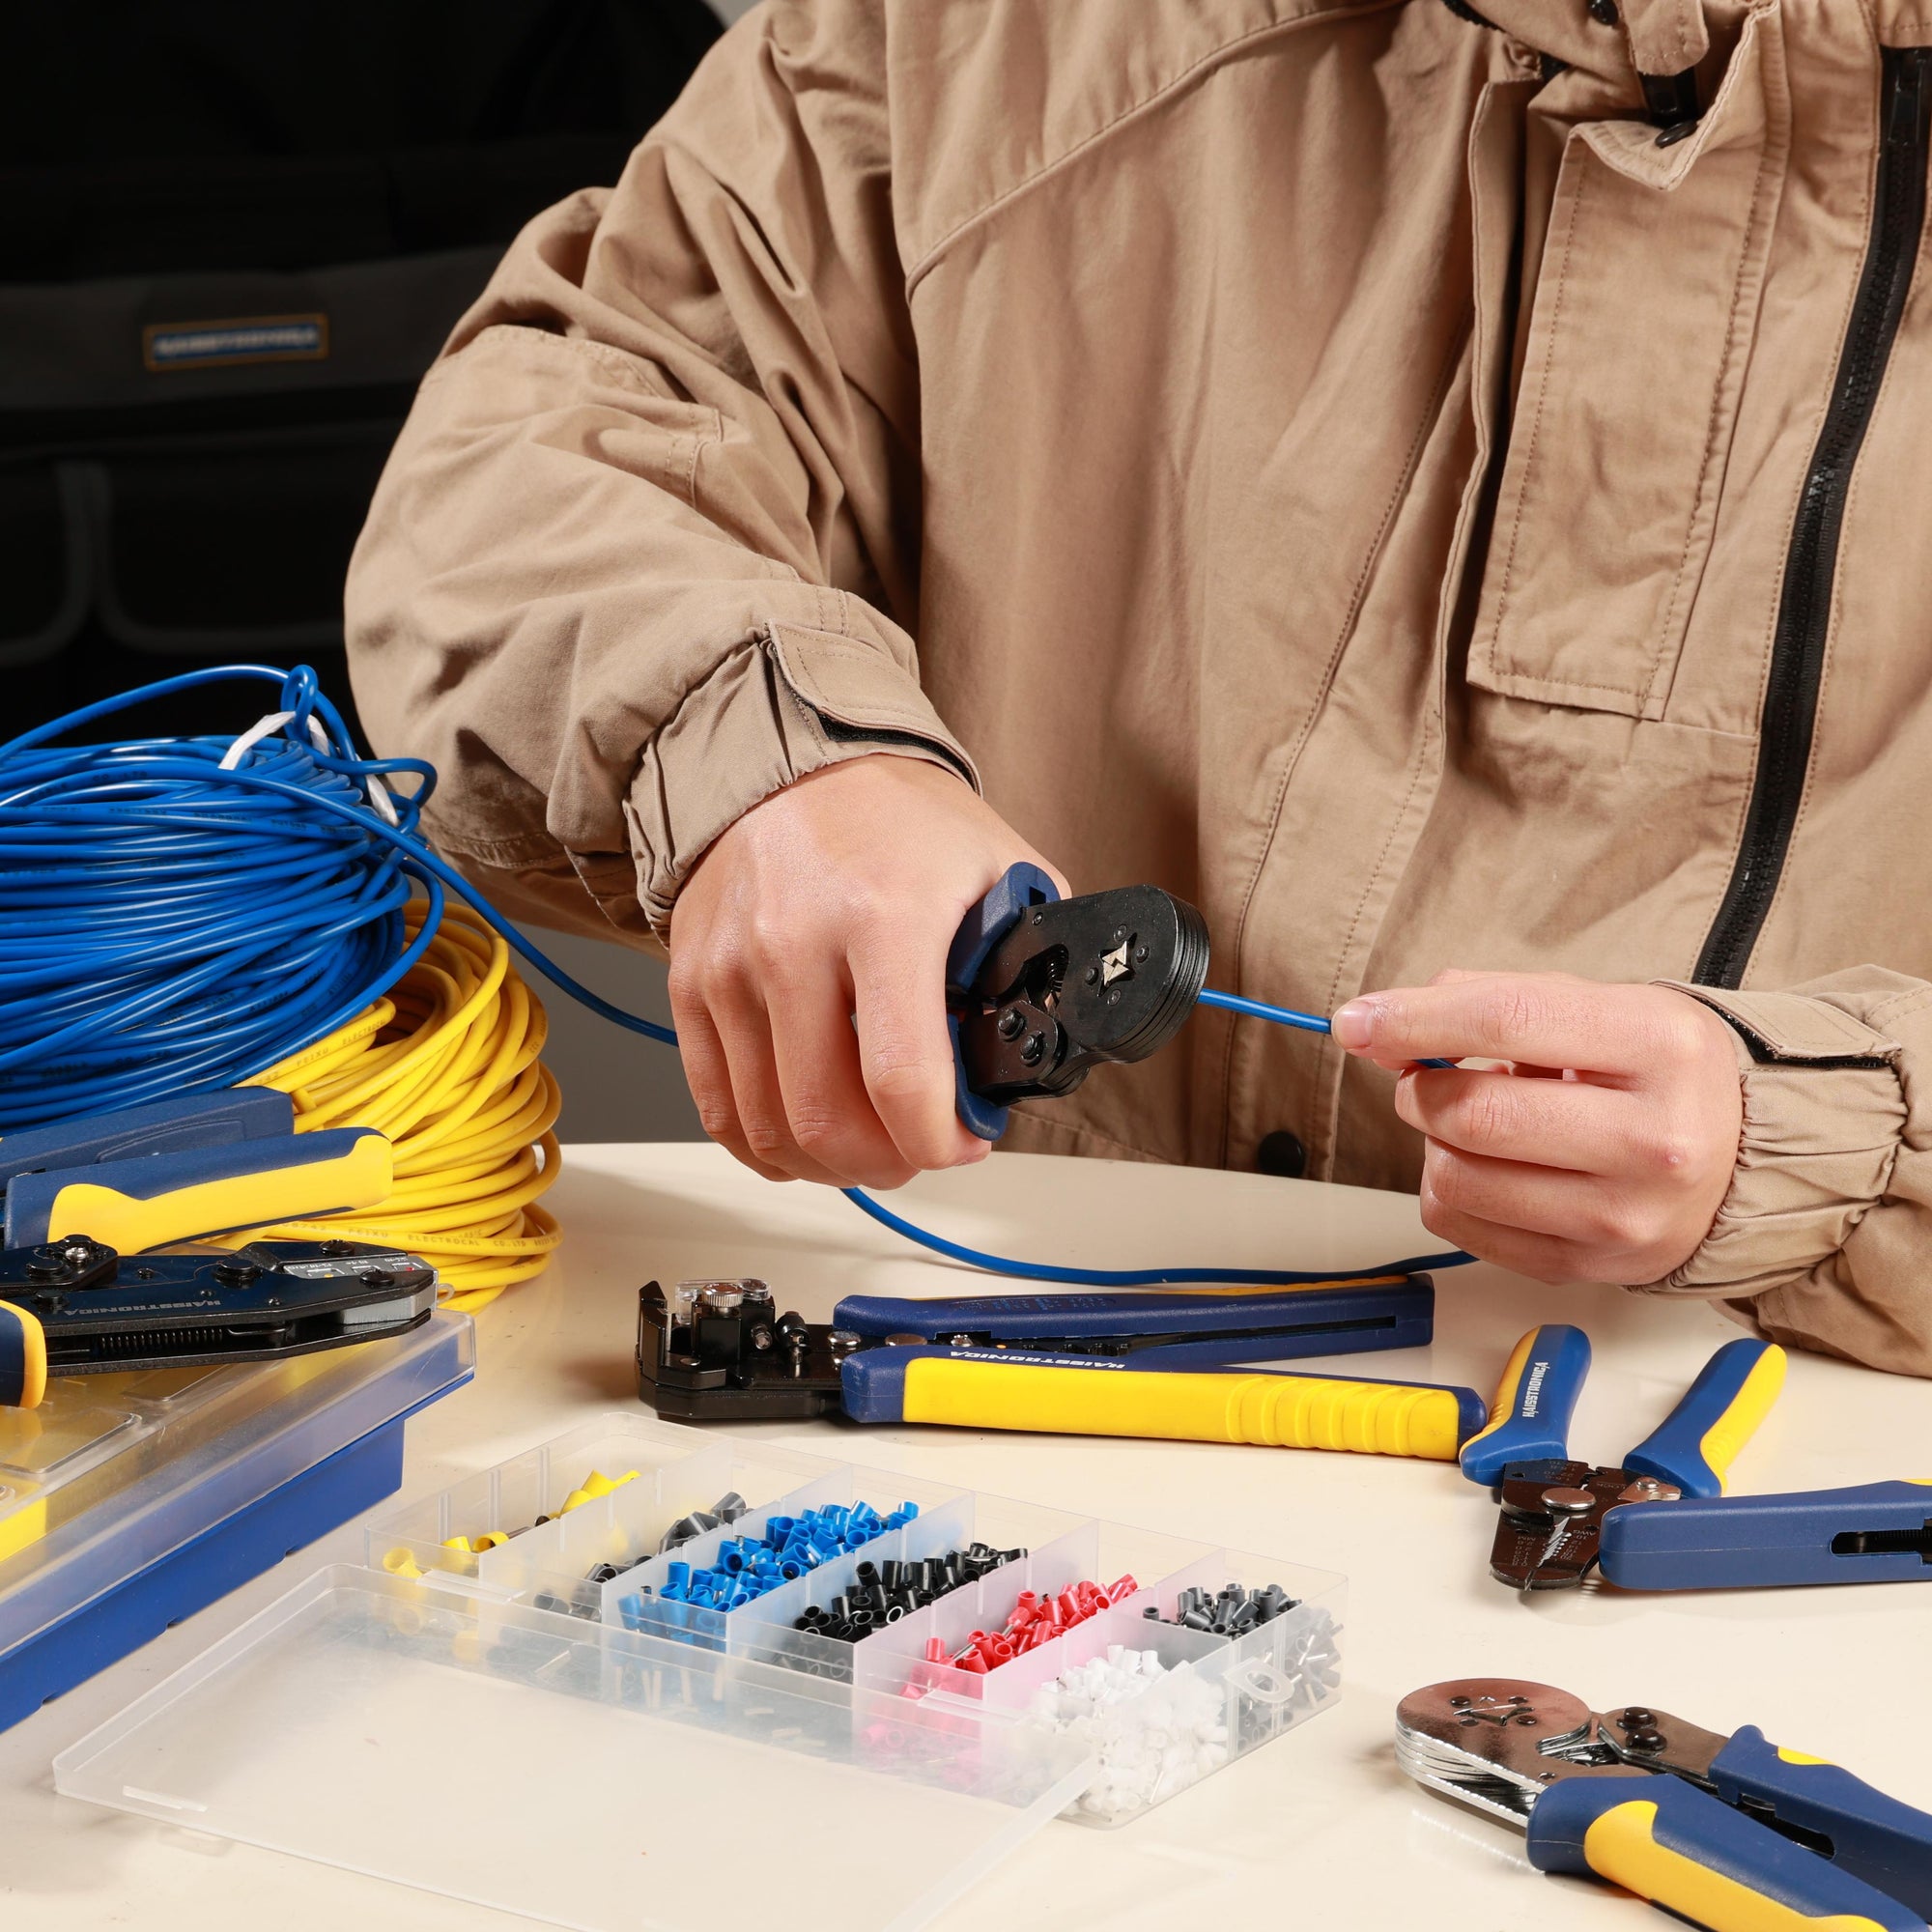
図:様々な圧着ダイスやコネクタを含む、多様なワイヤー圧着工具とアクセサリ。初心者の方は、高品質のラチェット式ワイヤー圧着工具と、ワイヤーの太さと用途に適したコネクタから始めるのがおすすめです。
👉 Haisstronica圧着ラチェット ツールを活用してしっかりと仕上げます。

ケーブル圧着工具とは何ですか?
ケーブル圧着工具(またはワイヤークリンパ)は、2つの材料(通常は金属コネクタと電線)を、しっかりと接合するまで圧縮して接合するための工具です。電気工事において、圧着工具の最も一般的な用途は、電線またはケーブルの端部にコネクタ(端子)を取り付けることです。この工具は、裸線周辺の金属コネクタを変形させることで、実質的に冷間圧接により電線同士を接合します。これにより、はんだ付けを必要とせずに、確実な電気的および機械的接続が実現します。
圧着工具には様々なデザインとサイズがありますが、初心者にとって最も馴染み深いのは手持ち式の圧着ペンチです。通常、2つのハンドルと、様々なコネクタタイプに合わせてサイズ調整可能な、交換式または固定式の圧着ダイス(溝付きジョー)が付いています。コネクタと電線をダイスに挿入し、ハンドルを握ると、ダイスがコネクタと電線をしっかりと押し付けて圧着します。その結果、コネクタが電線にしっかりと固定され、電線の周りに「シール」が形成されるとよく表現されます。はんだを使用しないため、適切な圧着は柔軟性があり、動きや振動にも壊れることなく耐えます。実際、自動車や航空宇宙の配線では、はんだ付け接合部が脆くなる可能性があるため、圧着接続が好まれています。
圧着工具は通常、特定のサイズの電線やコネクタに対応するように設計されていることに注意してください。工具の中には、様々な電線サイズに対応するために複数のノッチやジョーを備えたものもあれば、頑丈な工業用圧着工具は太いケーブル専用のものもあります。圧着工具には、細線用のシンプルな手動ペンチから、太線用の大型のベンチトップ型や油圧式まで、様々な種類があります。手持ち式の端子圧着工具には、一定の圧力をかけ、圧着が完了した時点で解放するラチェット機構が搭載されていることがよくあります(ラチェット機構については後ほど詳しく説明します)。つまり、圧着工具は、電線と端子をはんだ付けせずに、素早く強固に接続するための頼りになる電線圧着工具です。

圧着工具で電線を圧着する方法(ステップバイステップ)
圧着工具の使い方は簡単ですが、正しい手順に従うことで、電線をしっかりと安全に圧着できます。ケーブルの種類(例えば、同軸ケーブルと標準的な銅線)によって手順やコネクタの形状が若干異なる場合がありますが、ここでは電線コネクタを圧着するための一般的な手順を段階的に説明します。これらの手順は、リング端子、スペード端子、バットコネクタ、その他の圧着電線コネクタなどの一般的なコネクタに適用されます。 (説明のために、同軸ケーブルの絶縁体を保護するために慎重な取り扱いが必要となることが多いため、同軸ケーブルに関する考慮事項についても説明します。)
-
適切なコネクタ(端子)を選択してください。電線ゲージ(太さ)と用途に合った圧着コネクタをお選びください。コネクタには様々な種類があります。例えば、電線をネジ留め式ポストに固定するためのリング端子、スライド接続用のスペード(フォーク)コネクタ、2本の電線を端から端まで接続するためのバットスプライスなどです。コネクタのパッケージまたはマーキングには、対応する電線サイズ(AWG)の範囲が記載されています。不適切なサイズの圧着コネクタ(電線に対して大きすぎたり小さすぎたりする)の使用は、圧着不良につながるよくあるミスです。
-
電線端の被覆を剥ぎます。ワイヤーストリッパーを使って、電線端の被覆を慎重に剥ぎ取ります。コネクタに指定された長さ(多くの端子で一般的に約1/4インチから3/8インチ)の導体を露出させます。被覆を剥ぐ際に銅線に傷をつけたり切ったりしないでください。接続が弱くなります。同軸ケーブルの場合は、同軸コネクタの説明書に従って、繊細な内部導体や編組線を傷つけないように注意しながら、層(外被、シールド、誘電体)を剥がす必要があります。
-
電線をコネクタに挿入します。被覆を剥いた電線の端をコネクタのバレルに完全に挿入します。電線の被覆がコネクタの入口に密着し、反対側の端からはむき出しの素線が見えますが、過度に突き出てはいけません。バットコネクタ用圧着工具を使用してバットスプライスで2本の電線を接続する場合は、スプライスの両端に電線を1本ずつ挿入します。クローズドエンドの圧着キャップ(圧着ワイヤナットとも呼ばれます)の場合は、電線をキャップに挿入します。余分な素線が突き出ていないことを確認し、接触面積が最大になるように電線を奥まで挿入してください。
-
コネクタを圧着工具のダイスに挿入します。圧着工具のハンドルを開き、ワイヤが挿入されたコネクタを圧着ダイスの適切なスロットに配置します。ほとんどの圧着工具には、コネクタのサイズに対応する色分けまたはラベル付けされたダイスがあります(例:絶縁端子の場合は赤、青、黄色、または特定のゲージがマークされています)。たとえば、絶縁リング端子を圧着する場合は、端子のバレルを対応するダイスの溝に合わせます。重要:コネクタを正しく向けます。通常、コネクタに継ぎ目がある場合は、丸い窪み(アンビル)があるダイス側をコネクタの硬い側が窪みの歯に当たるように向けます。こうすることで、圧着により継ぎ目が開かずにバレルが均一に圧縮されます。コネクタを逆向きに配置することはよくある間違いです。圧着が完了したように見えても、実際には弱い場合があります。
-
ハンドルを完全に握って圧着します。すべての位置が決まったら、圧着工具のハンドルを一定の圧力で握り締めます。ラチェット式圧着工具を使用している場合は、途中でロックされ、コネクタが電線に圧縮されているのがわかります。ラチェットが解除され、圧着が完了したことを示すまで、握り続けます。(ラチェット式ではない手動圧着工具を使用する場合は、十分な圧力がかかったかどうかを判断する必要があります。しっかりと握ってください。)コネクタの金属バレルが電線の周りに変形し、通常は平らまたはへこんだ形状になります。スパークプラグワイヤ端子やオープンバレルピンなどの特定のコネクタでは、特定のタイプの圧着(導体と絶縁体の両方を固定するダブルクリンプなど)が必要になる場合があります。コネクタメーカーの圧着手順が提供されている場合は、必ずそれに従ってください。
-
圧着接続を解除して点検します。ハンドルを開き、圧着コネクタを取り外します。よく点検してください。コネクタは電線にしっかりと圧着され、緩んだ芯線が見えないようにする必要があります。電線を強く引っ張っても抜けないはずです。また、電線の被覆を圧着していないことも確認してください(ほとんどの端子では、被覆も別途圧着する特定のタイプを除き、圧着はむき出しの電線部分で行われます)。コネクタに亀裂があってはならず、端子の被覆(絶縁タイプの場合)は無傷のままでなければなりません(ダイによる過度の切断やスライスがないこと)。電線をしっかりと固定する均一な圧着が理想的です。歪んでいたり、部分的にしか圧縮されていない場合は、切断して新しいコネクタでやり直す必要があるかもしれません。
-
熱収縮チューブまたは絶縁材を塗布します(該当する場合)。 熱収縮コネクタ(熱収縮スリーブ付きの絶縁端子)を使用した場合は、ここで収縮させます。ヒートガン(または適切な熱源)を使用して、コネクタの絶縁材を均等に加熱し、収縮させて電線の周囲を密閉します。通常、接着剤が端からわずかに滲み出ることで確認できます(接着剤付きコネクタの場合)。これにより、防水性と耐圧性が向上します。標準的な絶縁圧着コネクタの場合は、追加の手順は必要ありません。非絶縁コネクタの場合は、接続部に別途熱収縮チューブを装着し、ここで収縮させて接合部を絶縁します。
-
圧着した電線をテストします。電線をプロジェクトに取り付ける前に、接続テストを行うことをお勧めします。簡単な引っ張りテストを行うことができます(中程度の力で電線が端子から外れないこと)。マルチメーターをお持ちの場合は、圧着接続部の導通または抵抗をチェックして、電気的に正常であること(実質的に抵抗がゼロであること)を確認できます。緩んでいる箇所や疑わしい箇所がある場合は、新しいコネクタで再度圧着してください。ラチェット式ではない工具を使用する場合、圧着不足(力が不十分)は抵抗が高くなったり電線が抜けたりするリスクがあり、一方、圧着過剰(力が強すぎる)はコネクタを破損させたり、電線を切断したりする可能性があります。高品質のラチェット式電線圧着工具は、適切な力を一貫して加えることで、これらの問題を回避します。
図:電線圧着工程の図解 – 電線の被覆を剥がし、コネクタに挿入し、圧着工具でコネクタを圧縮し、熱収縮絶縁端子を加熱して密閉するまで。使用前に必ずコネクタを完全に圧着し、接続がしっかりと固定されていることを確認してください。
ワイヤー圧着工具の用途
圧着工具は、電線を確実に接合または終端する必要がある幅広い用途で使用されます。圧着工具を使用する一般的なシナリオを以下に示します。
-
電気配線(住宅およびDIY):家のリフォームや趣味のプロジェクトでは、新しい照明器具の取り付け、スピーカーケーブルの接続、家電製品の修理など、電線に端子を取り付けるために圧着工具を使用します。例えば、スイッチやブレーカーのネジに接続するために丸型端子を電線に圧着したり、電線を延長するためにバットスプライスを使用したりします。圧着コネクタは、特に高電流を扱う場合、単に電線をねじり合わせるよりも安全で確実な接続を実現します。
-
自動車および船舶配線:圧着工具は自動車作業に欠かせないツールです。車両は振動が大きいため、圧着接続ははんだ付けよりも耐久性に優れています。スピーカーや電子機器用のスペードコネクタ、バッテリーケーブルやアース用のリング端子、さらにはスパークプラグコード用の特殊な点火端子まで、あらゆるものを圧着できます。スパークプラグコードの圧着方法についてご存じですか?特殊な端子と、多くの場合専用の点火プラグコード圧着工具が必要になりますが、基本的にはプラグコネクタを太いケーブルに固定する圧着工具です。船舶用途でも同様に、ボートや船舶の配線には、耐水性の熱収縮圧着コネクタが使用されています。
-
ネットワークと通信:イーサネットケーブルを作ったことがあるなら、モジュラープラグ用の圧着工具を使ったことがあるはずです。ネットワーク圧着工具(多くの場合、RJ45/RJ11コネクタ専用の別工具)は、RJ45プラグの8ピンをCAT5e/CAT6ケーブルのワイヤに一押しで圧着します。電話線、同軸テレビケーブル(F型またはBNC圧着コネクタを使用)、その他の通信ケーブルには、それぞれのコネクタタイプに合わせて設計された圧着工具が必要です。これらのケーブル圧着工具は、繊細な信号線を適切に終端処理し、信頼性の高いデータ伝送を実現します。
-
配管(PEX)とHVAC:すべての圧着が電気的なわけではありません。PEXチューブの配管では、銅製のリングをパイプと継手に圧着して密閉する圧着ペンチが使用されます。これらのケーブル圧着工具は大型で、パイプリングに均一な圧力をかけることができます。同様に、HVACでは、圧着工具は金属ダクトの圧着や継手の固定に使用されます。これらは技術的には異なる工具(多くの場合、圧着プレスまたはパイプクリンパーと呼ばれます)ですが、材料を圧縮して接合するという概念は同じです。
-
ジュエリーとクラフト:意外なことに、圧着工具はジュエリー作りにも活用されています。小さな圧着ビーズやチューブは、ネックレスやブレスレットのビーズワイヤーや釣り糸の端を仕上げるために使用されます。小型の圧着ペンチは、ビーズを潰してストランドを固定したり、留め具を取り付けたりするのに使用されます。これはより繊細な圧着方法ですが、金属片を変形させて何かを固定するという原理は同じです。また、特定のダイを必要とする一部のクラフトや特殊電子機器では、フラグ圧着コネクタも使用されています(上の画像をご覧ください)。
まとめると、はんだ付けなしで何かに接続されている電線を見かけたら、おそらく圧着工具が使われているはずです!家庭の電気修理から複雑な自動車の電気系統、さらにはケーブル端子の圧着(油圧式クリンパを使用して太いバッテリー端子を接続する作業)まで、圧着工具は驚くほど多用途です。重要なのは、それぞれの作業に適したコネクタと工具を使用し、安全で強固な接続を確保することです。
👉 圧着ラチェットのストロークごとに自信を持つ - Haisstronica をご利用ください。

適切な圧着工具とダイの選択
信頼性の高いプロフェッショナルな仕上がりを得るには、適切な圧着工具(およびそれに適したダイスやジョー)を選ぶことが重要です。すべての圧着工具が同じというわけではありません。作業の種類、コネクタ、使用する電線に合わせて工具を選ぶ必要があります。電線圧着工具を選ぶ際に考慮すべき主な要素は次のとおりです。
-
電線ゲージの互換性:圧着工具がどの電線サイズに対応しているかを必ず確認してください。工具の定格は通常、22~10 AWG(ほとんどの自動車および家庭用配線をカバー)など、特定の範囲に対応しています。非常に細い電線(電子機器の28~24 AWGなど)や非常に太いケーブル(バッテリーケーブルの4 AWGなど)を扱う場合は、工具がそれらのサイズに対応していることを確認してください。対応範囲外の電線サイズに圧着工具を使用すると、圧着不良が発生したり、工具が損傷したりする可能性があります。多くの電線圧着工具(Haisstronica製など)は、一般的な電線ゲージ(例:22~10 AWG)に対応していますが、必ず確認してください。また、電線と端子のサイズに合った圧着ダイスを使用することも重要です。ダイスは圧着部の形状を形成するため、適切なサイズにする必要があります。 。
-
端子タイプとダイス形状:圧着するコネクタのタイプを検討してください: 絶縁ビニールまたはナイロン端子ですか? 熱収縮端子ですか? 非絶縁 (裸) 端子ですか? フェルール、フラグ端子、同軸コネクタなどですか? コネクタが異なれば、多くの場合、異なるダイ プロファイルが必要になります。たとえば、絶縁端子圧着工具のダイスは通常、絶縁体を切断しない丸い圧着を作りますが、非絶縁端子のダイスは金属にきつく押し込むことがあります。一部の圧着工具には交換可能なダイスが付属しており、ジョー インサートをさまざまなコネクタ タイプ (絶縁端子用、フェルール スリーブ用、オープン バレル ピン用など) に交換できます。その汎用性が必要な場合は、圧着工具キットまたはクイック チェンジ ダイス付きの圧着工具を探してください。下の画像は、さまざまなダイ インサートと、それらを使用するフラグ端子やフェルールなどのコネクタの例を示しています。
図:様々な圧着ダイインサートと対応するコネクタタイプ。例えば、絶縁フラグスペード端子(上)は、適切な圧着を形成するために特定のダイ(多くの場合、コネクタスタイルに対応するラベルが貼られています)が必要ですが、非絶縁バットコネクタ(下)は異なるプロファイルを使用します。確実な接続を確保するため、必ず圧着コネクタのタイプに合ったダイを使用してください。
-
ラチェット式 vs. 非ラチェット式:初心者だけでなく、経験豊富なユーザーにも、ラチェット式圧着工具を強くお勧めします。ラチェット式圧着工具には、握ると工具がロックされる内部機構があり、圧着が完全に圧縮されたときにのみ解除されます。これにより、毎回一貫した圧力を加えることができます。また、圧着が完了するまで物理的に解放できないため、圧着不足 (すぐに停止してしまうこと) を防ぎ、多くの工具には中止が必要な場合に備えてリリース レバーが付いています。ラチェット式工具を使用すると、繰り返し可能な高品質の圧着を簡単に実現できます。スーパーヒーローのような手の力は必要なく、完全に握るだけで済みます。対照的に、非ラチェット式 (手動) 圧着工具は感覚と力に依存します。機能することはできますが、適切な圧力をかけるにはより高度なスキルが必要であり、一貫性も低くなります。これらの理由から、ラチェット式圧着工具は一般的に初心者にとってより使いやすく、初心者でも信頼性の高い接続を行うことができます。圧着作業を頻繁に行う場合は、ラチェット機構により機械的利点を活用して手の疲労も軽減されます。
-
ツールの品質と構造:良質な圧着工具は、接続品質と工具の寿命に大きく影響します。ダイスとジョーは硬化鋼製の工具を選びましょう。形状が長持ちし、均一な圧着が得られます。人間工学に基づいたクッション性のあるハンドルは、大量の電線を圧着する場合に非常に効果的です(50回も圧着した後に水ぶくれができるのは避けたいものです)。評判の良いブランドの中には、圧着工具に生涯保証を提供しているところもあり、これは耐久性の証です。必ずしも高額な費用をかける必要はありませんが、ダイスの加工精度が悪かったり、工具が曲がってしまう可能性があるため、絶対に安価なノーブランドの圧着工具は避けましょう。有名ブランドの中価格帯のプロ仕様電線圧着工具は、 DIY愛好家にとって優れた投資となる可能性があります。レビューを読むことも賢明です。例えば、多くのユーザーがHaisstronicaの圧着工具の信頼性の高い性能と堅牢な構造を高く評価しています。
-
用途と工具の種類:工具をどこでどのように使用するかを考えましょう。狭い場所(車のダッシュボードの下や電気パネル内など)で作業する場合は、ハンドルが短い、または特殊な形状の小型圧着工具が必要になる場合があります。家庭でたまに使う程度なら、手動のラチェット式ハンドクリンパーで十分です。しかし、ワイヤーハーネスの製造など、大量の圧着作業を行う予定の場合は、電動圧着工具や、大型の端子に対応する油圧/空圧圧着工具といった、より高度なソリューションを検討する必要があるかもしれません。これらの電動圧着工具は、高負荷作業の時間と労力を軽減します。例えば、大口径のバッテリー端子を圧着するには、必要な力が大きいため、油圧式圧着工具、または少なくとも長ハンドルの手動端子圧着工具が必要になることがよくあります。一方、小さなJSTピンコネクタやデュポンピンコネクタを圧着する電子工作愛好家には、それらのピンに対応する高精度ピン圧着工具が必要です。つまり、プロジェクトの規模と環境に合わせて工具を選ぶことが重要です。
-
追加機能:一部の圧着工具には便利な追加機能が搭載されています。スターホイールまたはダイヤルで調整可能な圧着力により、必要に応じて圧縮力を微調整できます。クイックチェンジダイリリースにより、複数のダイセットをお持ちの場合、ダイの交換が簡単になります。一部の圧着ペンチにはワイヤーカッターとストリッパーが一体化されており、オールインワンで便利です。これらの機能は必須ではありませんが、使いやすさを向上させることができます。
電線サイズ、コネクタの種類、工具の機構、品質、用途といった要素を考慮することで、ニーズに最適な圧着工具を選ぶことができます。初めて配線作業を行う場合や、一般的な配線作業を行う場合は、汎用性の高いラチェット式圧着工具キット(複数のダイスとスターターコネクタが付属)が最適です。このキットがあれば、ほとんどの絶縁端子および非絶縁端子に対応できます。より特殊な作業(同軸コネクタ、点火端子、ケーブルラグの圧着など)に取り組む場合は、それぞれの作業に適した工具やダイスを入手できます。適切な工具を使用することで、圧着作業が容易になり、接続が確実に強固になります。
👉 AWG 22~10 用の Haisstronicaラチェット圧着工具にステップアップします。

圧着工具用アクセサリとコネクタ
圧着工具を使用する際には、様々な電線コネクタ(圧着端子またはラグと呼ばれることが多い)や、場合によっては熱収縮チューブなどの追加アクセサリも使用します。最適な結果を得るには、電線に適したコネクタを使用し、適切な圧着工具またはダイスと組み合わせることが重要です。
コネクタの種類:圧着コネクタには様々な形状とサイズがあり、それぞれ目的に合わせて設計されています。最も一般的なタイプには、リング端子(ネジやボルトが通るリング状のもの)、スペードコネクタ(ネジの頭の下に差し込むフォーク状の端部、フォーク端子またはブレード端子と呼ばれることもある)、バットコネクタ(2本のワイヤを端から端まで接続するための管状の接合部)、クイックディスコネクトまたはブレードコネクタ(平らなタブとレセプタクルのペア、自動車のスピーカー接続などによく使用される)、バレットコネクタ(丸いプラグとソケットのペア)、ピンコネクタ(マルチピンプラスチックコネクタに差し込む小さなピン)などがあります。また、クローズドエンド圧着コネクタ(単に圧着キャップまたは圧着ワイヤナットと呼ばれることもある)もあります。これはプラスチックキャップのような形状で、ワイヤを挿入して圧着することでピグテール接続を形成します。これらのコネクタ タイプごとに若干異なる圧着ダイ プロファイルが必要になる場合がありますが、ほとんどの標準絶縁端子 (リング、スペード、バット、バレット) は、適切なスロットを備えた汎用ラチェット圧着工具で圧着できます。
コネクタは通常、圧力を受けても割れることなく変形できる展性金属(通常は錫メッキ銅または真鍮)で作られており、これにより圧着部が電線をしっかりと保持できます。一般用途のコネクタの多くは、ビニール、ナイロン、または熱収縮材で絶縁されており、圧着部を覆ってショートを防止します。絶縁型と非絶縁型:コネクタは、絶縁型(電線サイズの範囲を示す赤/青/黄色の色付きスリーブが付いていることが多い)と非絶縁型(普通の金属)として販売されていることに気付くでしょう。絶縁型のコネクタは便利で、自動車や家庭の配線によく使用されます。非絶縁コネクタは、高温環境や、後から自分で絶縁材(熱収縮チューブなど)を追加する予定がある場合によく使用されます。圧着工具のダイスが、使用しているタイプに適していることを確認してください。たとえば、絶縁コネクタ用の端子圧着工具は通常、プラスチックを切断しませんが、非絶縁コネクタ用のダイスは金属に直接食い込んでしっかりと固定する場合があります。
コネクタとツールのマッチング:最良の結果を得るには、圧着工具と互換性のあるコネクタを使用してください。熱収縮コネクタをお持ちの場合は、圧着中に熱収縮チューブに穴を開けたり破いたりしないように、絶縁コネクタ用に設計された圧着工具を使用することが重要です。フラグ端子(90 度の角度のスペード型コネクタ) やフェルール(複数のより線の端を締め付けるための金属スリーブで、多くの場合ネジ端子に使用されています) などの一部のコネクタでは、特殊な圧着プロファイルが必要です。圧着工具セットにこれらのプロファイルが含まれているか、またはフラグ端子圧着工具またはフェルール圧着工具が別途必要かどうかを確認してください。同軸ケーブル圧着コネクタ(TV ケーブルなど) についても同様で、これらは全く異なるスタイルの圧着 (多くの場合六角形のダイス) を使用します。特定のカテゴリの圧着を頻繁に行うことがある場合は、専用の工具を入手する価値があるかもしれません。
一般的に、圧着コネクタキットを手元に置いておくと非常に便利です。これらのキットには通常、様々なサイズのリング型、スペード型、バット型のコネクタが含まれています。これらのコネクタと高品質の圧着工具を組み合わせれば、ほとんどの配線作業に対応できます。圧着コネクタは使い捨てであることを覚えておいてください。一度圧着したものは再利用できません。間違えた場合は、再度圧着したりはんだ付けしたりするのではなく、コネクタを切断して新しいコネクタを使用してください。
最後に、必要に応じて、圧着接続部の絶縁と保護のために、熱収縮チューブや絶縁テープなどのアクセサリを忘れずに使用してください。絶縁されていない端子を圧着した場合でも、ショートを防ぐために必ずカバーをしてください。多くの電線圧着作業(特に自動車や屋外での作業)では、圧着部の上に熱収縮チューブを被せることで、張力緩和と環境保護の効果が得られます。
まとめると、電線と工具に適した高品質のコネクタを選ぶことが重要です。適切な電線コネクタと互換性のある圧着工具を適切に組み合わせることで、圧着は確実かつ長持ちします。基本的な知識を身につけたところで、圧着工具と圧着技術に関するよくある質問に進みましょう。
👉 あなたにぴったりの製品: 熱収縮端子用Haisstronicaラチェット圧着工具。

よくある質問
Q: 最適なワイヤー圧着工具は何ですか?
A: 「最適な」圧着工具はニーズによって異なりますが、よくできていて使いやすく、最も頻繁に圧着するコネクタに適した工具を探す必要があります。多くの愛好家やプロにとって、柔軟性と一貫した結果を提供するため、交換可能なダイを備えた高品質のラチェット式ワイヤ圧着工具が最良の選択肢です。たとえば、Haisstronica は、堅牢な構造と信頼性の高いパフォーマンスで知られる、市場で最高のワイヤ圧着工具のいくつかを提供しています。これらのツールを使用すると、安全な電気接続に不可欠な、正確で均一な圧着を毎回実現できます。DIY 初心者でも熟練した電気技師でも、優れた圧着工具に投資し、正しく適合するコネクタを使用すれば、トラブルのない配線という形で利益が得られます。つまり、最適な圧着工具とは、ワイヤゲージ範囲をカバーし、コネクタに適したダイタイプを備え、耐久性と高品質の圧着の実績がある工具です。 (多くのユーザーは、快適性と安定性のために、人間工学に基づいたグリップを備えたラチェット式クリンパを好みます。)
Q: 圧着工具にはどのような使い方がありますか?
A:圧着工具は非常に汎用性が高く、主な用途は次のとおりです。
-
電気修理と設置:コンセント、照明器具、カーステレオシステムの設置、または家電製品のコードの修理を行う際は、圧着工具を使用して端子(リング、スペード、バットなど)を取り付けます。基本的に、電線を接合したり、電線をコンポーネントに接続したりする必要がある場合はいつでも、圧着コネクタを使用できます。例えば、延長コードを切断し、再度接続する必要がある場合、バットコネクタを圧着することで電線を再接続し、確実な接続を実現できます。
-
ネットワークと通信:前述の通り、専用の圧着工具はデータケーブルにコネクタを取り付けます。例えば、RJ45プラグをCat6ネットワークケーブルに圧着したり、RJ11プラグを電話回線に圧着したりするには、専用のネットワークケーブル圧着工具を使用します。これは、自宅やオフィス用のイーサネットケーブルをカスタムメイドで製作する場合によく使用される作業です。
-
自動車・船舶配線:圧着工具は、自動車、オートバイ、ボート、RV車のスピーカー、ライト、エンジン接続部の配線に使用されます。クイックディスコネクト用のバレットコネクタや、バッテリー接続用のリング端子を圧着することもあります。また、新しいラジオやフォグランプなどのアクセサリーを追加する場合も、複数の接続部を圧着する必要があるでしょう。船舶グレードの圧着コネクタには、防水のためにヒートシュリンクが内蔵されていることが多く、圧着後に加熱することで接続します。
-
大型ケーブルラグ:高耐久性ケーブル(車のバッテリーケーブル、ソーラーパネルケーブル、パワーインバータなど)の場合、大型のケーブルラグ圧着工具(通常は油圧式またはハンマー式)を使用して、極太の電線にラグ端子を圧着します。これは基本的に大型の圧着ですが、自動車/船舶の電気設備や再生可能エネルギー設備でよく使用されます。
-
配管およびその他の用途:電気・電子機器用途以外では、圧着工具は配管におけるPEXパイプ継手の圧着、ジュエリーにおけるビーズの圧着、そして特定のDIYクラフトにも使用されます。例えば、ロープに金属フェルールを取り付けたり、ケーブルレールを作ったりする際には、スリーブを圧着して端部を固定する必要があります。
本質的に、圧着工具は、金属を別の材料に変形させることで強力かつ永続的な接合が必要なあらゆる場所で使用されます。優れた圧着工具を手に入れれば、様々なプロジェクトで幅広く活用できます。
Q: スパークプラグワイヤー(点火ケーブル)を圧着するにはどうすればいいですか?
A:スパークプラグコードの圧着は、厚い絶縁体と特殊な端子のため、通常のコードとは少し異なりますが、基本的な考え方は同じです。専用のスパークプラグコード圧着工具、または点火端子用に設計されたダイス(多くの場合、自動車用圧着キットに含まれています)が必要です。基本的な手順は以下のとおりです。
-
スパークプラグコードの適切な長さを測り、サイズに合わせて切断します。圧着する前に、スパークプラグ側またはディストリビューター側のゴムブーツをケーブルに差し込んでください(後で固定するためです)。
-
ケーブルの端から外側の絶縁体を約1.5cmほど剥がします。スパークプラグコードは通常、カーボンまたはスパイラル巻きの芯線を使用しています。この芯線を完全に切断せず、露出した芯線をケーブルの残りの絶縁体の上に折り返します。こうすることで、端子が引っ掛かりやすくなります。
-
金属製のスパークプラグ端子(通常は折り畳まれた形状で、ワイヤーを巻き付けるようになっています)を用意します。ケーブルの被覆を剥いた端を端子に挿入し、折り畳まれた導体が金属部分に触れるようにします。端子にはワイヤーを圧着するための2つのタブ(耳)があります。
-
圧着工具の適切なキャビティに電線を取り付けた端子を挿入します(イグニッション端子は多くの場合、専用の「ダブルクリンプ」ダイスが必要です)。工具を握って圧着します。端子の2つのタブが折り畳まれ、電線の芯線と絶縁体をしっかりと包み込み、しっかりと固定します。しっかりと圧着すると、導体が保持され、絶縁体も挟み込まれるため、張力緩和効果も得られます。
-
圧着後、ゴムブーツを端子にかぶせてスライドさせます。これにより、ブーツ内に隠れた端子と電線がしっかりと接続されます。端子を軽く引っ張っても電線が外れない状態です。これで、スパークプラグまたはディストリビューターキャップにブーツをカチッとはめ込むことができます。
スパークプラグコードの圧着は最初は難しいように思えるかもしれませんが、適切な端子圧着工具と少しの練習で簡単にできるようになります。多くのスパークプラグコードキットには説明書と簡易圧着工具が付属していますが、複数セット使用する場合は、安定した仕上がりを得るために専用の点火プラグコード圧着工具を購入する価値があります。
Q: ワイヤー圧着工具を使用する際に避けるべきよくある間違いは何ですか?
A:よくある間違いによって、圧着接続が損なわれる可能性があります。
-
不適切なサイズのコネクタまたはダイの使用:コネクタは必ず電線サイズに適合させ、工具の対応するダイを使用してください。コネクタが大きすぎると電線をしっかりと掴めず(圧着が緩くなります)、小さすぎると電線にフィットしないか、表面的な圧着しかできません。同様に、絶縁端子を非絶縁ダイスで圧着すると(またはその逆)、絶縁体が切断されたり、十分に圧縮されなかったりする可能性があります。
-
被覆の剥がし不足:被覆の剥がしが不十分だと、電線がコネクタバレルの奥まで届かず、銅線ではなく被覆が圧着してしまいます。その結果、電気的な接続が弱くなります。逆に、被覆を剥がしすぎると、コネクタから露出した電線が残り、腐食やショートの原因となります。電線がバレル内に収まるように、必要な長さだけ被覆を剥がしてください。
-
ツールの位置/向きの誤り:前述の通り、コネクタを圧着ツールに正しく挿入しないと(例えば、バレルをダイの中央に配置していない、またはシームが間違った側にあるなど)、圧着不良につながる可能性があります。圧着不良の多く(約50%という報告もあります)は、コネクタの向きが正しくないことが原因です。コネクタをジョーに完全に挿入し、ツールの指示に従って位置合わせしてください。圧着のくぼみは、シームではなくコネクタのソリッド部分を圧縮する必要があります。
-
圧着不足または圧着過剰:ツールのハンドルを完全に押し込まない場合 (または調整ミスによりラチェットが早く解放される場合)、圧着が緩すぎる可能性があります。これは圧着不足であり、ワイヤが簡単に滑り出したり、接触不良 (高抵抗) になったりする可能性があります。ラチェット ツールでは、常に最大圧力がかかるように設計されているため、このような事態が発生する可能性は低くなります。圧着過剰 (強く握りすぎたり、ダイが小さすぎる場合) は、コネクタを損傷したり、ワイヤ ストランドを切断する可能性があります。制御されたしっかりとした握りと適切なダイ設定を使用してください。ラチェット ツールの場合は、ツールの設計によって力が決まります。疑わしい場合は、圧着の引っ張りテストを行ってください。ワイヤを引き抜くことができないはずです。引き抜くことができる場合は、何か問題が発生しています (新しいコネクタでやり直してください)。
-
接続部のテストや固定を怠る:圧着後は、必ず作業内容を二重チェックしてください。各圧着部を引っ張ってテストしてください。また、圧着部が絶縁されていない場合は、必ず絶縁処理を施してください。圧着前に電線に熱収縮チューブを装着し忘れるのもよくあるミスです(絶縁されていない圧着部に熱収縮チューブを装着する場合)。多くの人がこのミスを犯し、圧着をやり直さなければならなくなった経験があるでしょう。最後に、電線を圧着部で配線したり曲げたりする際に、電線に負担がかかるような配線は避けてください。コネクタによってある程度の張力緩和が行われますが、圧着部が機械的な張力を受けないように、少し余裕を持たせて電線を固定することをお勧めします。
これらの落とし穴に注意し、時間をかけて作業することで、よくある圧着ミスを回避できます。初心者の方は、廃材の電線や予備のコネクタを使って数回の圧着練習をし、技術を磨くことをお勧めします。正しく圧着された電線は非常に強力で(多くの場合、元の電線よりも強力です)、長くお使いいただけます。
Q: 1 つの圧着工具を異なるタイプのコネクタに使用できますか?
A:はい、多くの圧着工具は非常に汎用性が高いですが、いくつか注意点があります。汎用圧着ペンチの多くは、様々なサイズの絶縁端子および非絶縁端子に対応できるよう、複数のジョースロットを備えています。さらに、一部の工具には交換可能なダイが搭載されており、1つの工具ハンドルで複数のコネクタタイプを圧着できます(例えば、同じマスターツールで、同軸コネクタ用、点火端子用、フェルール用などのダイを交換できます)。優れた圧着工具キットを購入すれば、幅広い種類のコネクタに対応できる場合が多いです。
とはいえ、1 つの圧着工具ですべてに対応できるわけではありません。コネクタは無数の形状で設計されており、小さなデュポン電子ピンの圧着は、大きなバッテリー ラグの圧着とは大きく異なります。電気圧着工具は通常、特定の範囲の端子サイズとタイプ向けに設計されています。そのため、1 つの工具ですべての自動車用および家庭用配線コネクタを処理できる場合でも、RJ45 ネットワーク プラグ用や太いケーブル ラグ用などに別の圧着工具が必要になることがあります。幸いなことに、一般的な配線 (たとえば 10 AWG ~ 22 AWG 絶縁端子) の範囲内では、適切なダイ セットを備えた 1 つの適切なラチェット圧着工具で、リング、スペード、バット スプライス、バレット コネクタなどを扱うことができます。特定のタイプのコネクタを使用する予定の場合は、必ずツールとダイに互換性があることを確認してください。コネクタ メーカーが必要な圧着工具を指定することがよくあります。互換性のない工具を使用すると、圧着の見た目は問題なくても適切に圧縮されなかったり、コネクタが損傷したりする可能性があります。
まとめると、汎用性の高い圧着工具(特にダイスが交換可能なもの)1つで幅広い用途に対応できますが、必要に応じて、特殊なコネクタ用の専用圧着工具も用意しておく必要があります。コネクタが圧着工具のダイスにぴったりと収まり、圧着形状がそのコネクタタイプに意図された形状と一致していることを常に確認してください。
Q: 「圧着」とは具体的には何ですか? また、単に電線をねじったりはんだ付けしたりするよりも優れているのはなぜですか?
A:圧着とは、片方または両方の部品を変形させて互いに固定することで接合するプロセスです。配線分野では、工具を用いて金属コネクタを電線の周りにしっかりと押し付けることを意味します。これにはいくつかの大きな利点があります。
-
正しく行われると、ワイヤと端子の間に気密性と耐腐食性のある接合部が形成されます(金属表面は実際には顕微鏡レベルで冷間圧接されます)。
-
圧着接続は機械的強度が高く、柔軟性も備えています。はんだ付けではワイヤに硬い部分が生じ、振動により割れる恐れがあるのに対し、圧着ではワイヤの柔軟性がほとんど維持されます。
-
熱を必要としないため、はんだごてで繊細な部品や絶縁体を損傷するリスクを回避できます。また、押し込むだけで接続できるので、接続が早くなります。
-
適切なツールを使用すれば均一かつ繰り返し実行できるため、製造時や多数の接続を行う場合に最適です。
-
圧着コネクタは、迅速な取り付けと交換も考慮して設計されています。例えば、圧着端子が数年後に故障したり腐食したりした場合でも、はんだ付けをせずに切断して新しい端子を圧着するだけで済みます。
こうした理由から、多くの業界やDIYの現場では、配線接続に圧着が好まれています。もちろん、圧着の精度は使用する技術と工具に左右されることを覚えておくことが重要です。不十分な圧着は、はんだ付け不良よりも深刻な問題を引き起こす可能性があります。しかし、このガイドに従い、適切な圧着工具を使用することで、電気的に健全で長持ちする接続を実現できます。さあ、圧着を楽しんでください!
圧着工具の購入:準備はできましたか?ツールキットを揃えるなら、Haisstronicaの圧着工具とコネクタキットのセレクションをぜひご覧ください。初心者向けの基本的なワイヤー圧着工具キットから、交換可能なダイを備えたプロ仕様のラチェット式圧着工具まで、あらゆる製品を取り揃えています。高品質な工具とコネクタがあれば、配線作業がはるかに簡単になり、確実に圧着できます。Haisstronica の圧着工具を購入して、最高の圧着工具を手に入れましょう!(熱収縮コネクタやその他のアクセサリもご用意しておりますので、お好みの工具で圧着作業をお進めください。)
ユーザーフレンドリーなおすすめ
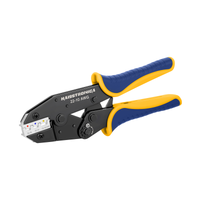
快適なレバレッジ性能を誇るプロ仕様のワイヤー圧着プライヤーは、絶縁体を噛み砕くことなく圧着できます。インデックスホイールが端子圧着工具の力を調整し、マイクロセレーションがフェルールをしっかりと保持します。各ワイヤー端末を、整然とした対称性と確実な導電性で圧着仕上げします。
👉 手のひらサイズの精密さ- Haisstronicaラチェット圧着工具。