
電線の圧着は電気工事の基本スキルですが、間違ったやり方をすると接続が緩んだり、過熱したり、さらには火災につながる可能性があります。DIY愛好家でもプロの電気技師でも、このガイドで圧着のコツを学べます。 ワイヤーを安全かつ効果的に圧着する方法と、高額な費用がかかるミスを避けるためのプロのヒント。
適切な圧着が重要な理由
-
安全性: 圧着が不十分な接続は過熱の原因となり、機器を損傷したり、火災を引き起こしたりする可能性があります。
-
耐久性: 適切な圧着により、振動、湿気、温度変化に耐えます。
-
コンプライアンス: 認定設置に関する NEC (National Electrical Code) および UL 規格に準拠しています。
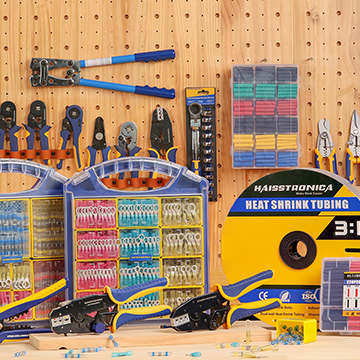
必要なツール
-
ワイヤー圧着工具 (例えば、 ハイストロニカ ラチェット クリンパ
-
一貫した圧力を得るにはラチェットモデルを選択してください。
-
-
熱収縮チューブ (オプション、防水用)

ステップ1:電線の被覆を剥ぐ
-
目標: 1/8 インチから 1/4 インチの裸線を露出します。
-
プロのヒント: ストリッパーのゲージをワイヤのサイズ (例: 12 AWG) に合わせてください。
❌ 避けるべきこと: 撚り線に傷をつけること。導電性が弱まります。
ステップ2:適切な端末を選択する
-
絶縁 vs. 非絶縁: 家庭用/自動車用アプリケーションには絶縁端子を使用します。
-
サイズの一致: 端子バレルはワイヤの直径に適合する必要があります (パッケージのラベルを確認してください)。
一般的なタイプ:
ステップ3:ワイヤーを挿入する
-
被覆を剥がした電線を端子バレルに押し込み、完全に固定します。
-
チェック: バレルの外側に裸線が見えてはいけません。
ステップ4:端子を圧着する
-
端子を圧着工具の適切なダイス(ワイヤゲージのマーク付き)に配置します。
-
ツールが自動的に解放されるまでしっかりと握ります (ラチェット モデル)。
-
検査:
-
バレルは均一に圧縮される必要があります。
-
引っ張りテスト – ワイヤーが抜けてはいけません。
-
💡プロのヒント:高負荷のアプリケーションの場合は、 粘着剤付き熱収縮チューブ クリンプの上。

ステップ5:シールと保護(オプション)
-
熱収縮チューブを圧着部に差し込みます。
-
ヒートガンを使用して収縮させ、防水シールを作ります。
最も一般的な圧着ミス5つ
-
端末サイズが間違っています → 接続が緩んでいます。
-
圧着不足/圧着過剰 → 接着力が弱い、または絶縁体が潰れている。
-
撚線と単線を無視する → 撚線にはフェルールを使用します。
-
綱引きテストをスキップする → 負荷がかかると故障するリスクがあります。
-
圧着ペンチの代わりにペンチを使う → 圧力が一定でない。
高度なテクニック
-
ダブル圧着: 激しい振動(例: 自動車)に対応するために、ワイヤと絶縁体の両方を圧着します。
-
耐候性:圧着と 船舶用熱収縮チューブ。
よくある質問
Q: 圧着端子は再利用できますか?
A: いいえ。圧着すると金属が変形します。端子は必ず交換してください。
Q: ソーラーパネルの配線に最適な圧着工具は何ですか?
A: 使用 Haisstronica の CT-200 シリーズのような、 AWG 10-22 ダイを備えたラチェット圧着工具。
Q: 圧着工具を使わずに圧着するにはどうすればいいですか?
A: やめてください。即席の工具(ペンチ、ハンマー)を使用すると、危険な接続が生まれます。
結論
ワイヤー圧着をマスターすれば、安全で信頼性の高い電気システムを構築できます。プロ並みの結果を得るには、スキルと適切な工具を組み合わせてください。
✅ Haisstronicaのショップ 圧着キット – ラチェット式圧着工具、端子が付属します。


1 コメント
pradeep perelly
Terrific article. I appreciated the structure and the various pcs of information Thanks for sharing this useful information
https://www.couponcode2save.com/
Terrific article. I appreciated the structure and the various pcs of information Thanks for sharing this useful information
https://www.couponcode2save.com/