Introduction
Crimping is a fundamental technique for making secure electrical connections by using wire crimping tools to attach connectors to wire ends. It’s widely used in everything from automotive wiring and aircraft harnesses to home DIY electronics. However, even minor mistakes during the crimping process can compromise safety and reliability, leading to loose connections, overheating, or even fires. Industry experts note that common errors like using the wrong tool, selecting an incorrect connector size, applying improper crimping pressure, or poor wire preparation can all result in connection failures and fire hazards. In this blog, we’ll highlight seven common crimping mistakes – and how to avoid them – so you can achieve safe, rock-solid wire crimps every time.
Recommended next step: Most crimping mistakes come from mismatched wire size, connector style, or tool die. Start with the right wire crimping tool, then match the connector: heat shrink connectors for sealed terminals, butt connectors for splices, or ring terminal kits for battery, stud, and ground connections.
👉Upgrade your toolkit with our AWG 22–10 ratcheting crimper designed for heat-shrink connectors.

1. What Is Crimping? Understanding the Tools and Terminology
Crimping is the process of joining a wire to a connector (terminal) by deforming the connector around the wire, usually with a specialized crimping tool. A proper crimp essentially cold-welds the connector and conductor together, forming a gas-tight bond that is mechanically strong and resistant to vibration. Unlike simply twisting wires together or soldering, crimping with the right wire crimpers creates a reliable connection that won’t easily loosen or corrode. In fact, a well-executed crimp can handle more vibration and prevent oxidation better than a soldered joint.
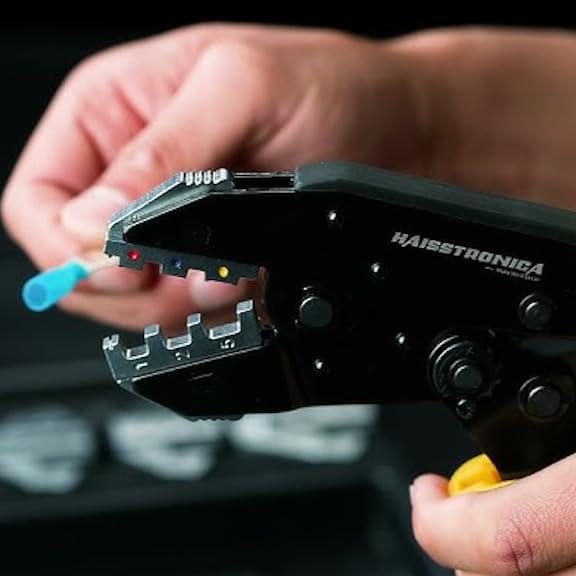
Crimping tools (also known as wire crimping pliers or cable crimpers) come in various types and sizes. Most handheld crimper tools have a pair of handles and interchangeable or fixed crimp dies – the notched jaws that correspond to specific connector sizes. You place a crimp connector (for example, a ring terminal or butt splice) into the die along with the stripped wire, then squeeze the handles to compress the connector onto the wire. The result is called a crimp. High-quality ratcheting crimping tools are popular because they apply consistent pressure and won’t release until a full crimp is achieved, helping to avoid under- or over-crimping.
Common Mistake #1: Using the Wrong Tool. One of the biggest mistakes is not using a proper crimping tool at all. Some DIYers attempt to use pliers or generic tools to crimp wires – this often results in uneven pressure, a deformed connector, or a loose wire that can easily pull out. Always use the correct crimping tool designed for your connector type and wire gauge. For example, if you are crimping insulated electrical connectors, use a wire terminal crimping tool sized for those terminals, not a pair of pliers. The right tool will create a solid crimp; the wrong tool can damage the connector or leave you with a weak connection.

2. How to Use a Crimping Tool Correctly
Using a crimping tool is straightforward, but technique matters. Here’s a quick step-by-step on how to crimp wires properly – and where people often go wrong:
-
Step 1: Prepare the wire. Strip off the right length of insulation from the wire end. A common mistake is skipping proper wire preparation – either not stripping enough insulation or stripping too much. If you expose too little bare wire, it won’t make full contact inside the connector; too much exposure and bare wire will be sticking out, risking a short circuit. Aim to strip just enough wire so that when inserted, only a tiny bit (about 1–2 mm) of conductor is visible beyond the connector barrel. Use a quality wire stripper to avoid nicking or cutting the strands (nicked strands reduce the wire’s strength and current capacity). Clean any dirt or oil off the conductor as well, since contamination can weaken the electrical connection.
-
Step 2: Select the right connector. Always use a connector that matches your wire gauge and application. Using the wrong connector size is a frequent crimping mistake – an undersized connector won’t fit the wire and will get crushed (causing high resistance and heat), whereas an oversized connector will crimp loosely and could pull off or corrode. Most connectors are color-coded by gauge (e.g., red for 22–16 AWG, blue for 16–14 AWG, yellow for 12–10 AWG in many insulated terminal sets). Also, choose the right connector type for the job: for instance, use heat-shrink crimp connectors for automotive or marine projects where moisture is a factor, ring terminals for grounding screws, spade terminals for quick connections, etc. Matching the connector type and size to your needs will prevent many issues.
-
Step 3: Crimp with proper technique. Place the connector (with wire inserted fully) into the crimp tool’s appropriate die notch. Squeeze the handles firmly until the crimper completes the crimp. If you’re using a ratcheting wire crimper tool, it will typically release automatically once the crimp is fully compressed. The mistake to avoid here is over-crimping or under-crimping. If you apply too much force (over-crimp), you can damage the connector or cut into the wire strands; too little force (under-crimp) leaves a loose crimp that can come apart. A good ratcheting crimp tool with the correct die setting virtually eliminates this issue by ensuring uniform, sufficient pressure. If using a non-ratchet crimper, make sure to squeeze hard enough to deform the connector snugly around the wire, but not so hard that you crack the connector. Avoid crimping wires using general-purpose tools (like pliers or vise grips) – they cannot apply the precise, evenly-distributed pressure needed for a reliable crimp.
-
Step 4: Inspect and test. After crimping, always inspect the crimped connection. A proper crimp will have the connector tightly compressed onto the wire with no insulation caught in the metal barrel and no bare wire overly exposed. Give the wire a firm tug (a “pull test”) to ensure it doesn’t slip out of the terminal. Many people neglect to test their crimp connections, which is a mistake that can lead to unnoticed failures later. If the wire pulls out or feels at all loose, the crimp is bad – cut it off and crimp a new connector with a better technique. Taking a few seconds to test each crimped wire can save you from intermittent electrical issues down the road. Remember, a bad crimp might pass an initial continuity test but fail under vibration or load, so it’s best to catch it early.
Application Scenarios: Where to Use Crimping Tools
Crimping tools are used anywhere you need a secure, low-resistance wire connection that can withstand movement and environment stresses. Some common application scenarios include:
-
Automotive and Marine Wiring: Wire crimping tools are indispensable for vehicle electrical work, from installing car audio systems to repairing boat wiring. In these applications, vibration resistance is crucial – crimped connections (especially using insulated or heat-shrink butt connectors and ring terminals) hold up much better than twisted or soldered wires in engines, on motorcycles, or in marine environments. Just be sure to use sealed waterproof crimp connectors (heat-shrink style with adhesive) for any boat or outdoor wiring to prevent corrosion – ignoring environmental factors is a mistake that can cause connectors to corrode or short out when exposed to water.
-
Home DIY and Electronics: Hobbyists and electricians use wire crimpers for projects like home theater installations, appliance repair, Arduino and Raspberry Pi prototypes, and more. For instance, when adding a new light fixture or repairing an appliance cord, you might use an insulated terminal crimper to attach spade or fork terminals. Small crimp connectors (like Dupont pins or ferrules) are used in electronics to make reliable connections to circuit boards or breadboards without soldering. In these delicate projects, using the correct terminal crimping tool (often a precision crimper for smaller AWG wires) and proper technique is vital – a poorly crimped pin can cause a gadget to malfunction intermittently.
-
Industrial and Aerospace: In industrial equipment, aerospace, and telecommunications, professional wire crimping tools are used to create extremely reliable connections. Here, every aspect of the crimp is often done to industry standards (such as IPC/WHMA or NASA specs) to ensure safety. You’ll find everything from large hydraulic crimping tools for heavy-gauge power cables to specialized pin crimping tools for avionics connectors. Mistakes like using the wrong materials or not following specified crimp procedures can lead to serious failures, so professionals are trained extensively in using the right crimp tools and verifying each crimp’s quality. Even if you’re not crimping space-grade connectors, adopting a careful approach will improve your results.
👉Explore pro-grade crimping tools

3. Choosing the Right Crimping Tool for Your Needs
Not all crimping tools are created equal. Using an inappropriate tool for your wire size or connector type is a common mistake that can ruin your work. When selecting a wire crimping tool, consider the following:
-
Wire Gauge Compatibility: Make sure the tool is rated for the wire sizes you will crimp. Crimpers often support a range (for example, AWG 22–10). Using a crimper not designed for your wire gauge can result in insufficient pressure or over-crimping. Always match the tool to the wire and connector size – this ensures you get a proper compression without damaging anything.
-
Tool Type (Design): Choose the style of crimper that suits your projects. A ratcheting crimping tool is highly recommended for most electrical work because it applies consistent, preset pressure for a uniform crimp every time. In fact, features like a built-in ratchet are important for ensuring correct pressure during crimping. By contrast, a simple non-ratchet crimper (sometimes just a notch in a wire stripper tool) requires more user skill to get right. For very large cables (like heavy battery lugs or 0-gauge wires), you may need a hydraulic crimping tool or heavy-duty lug crimper. There are also insulated terminal crimpers with interchangeable dies for different connector types, and specialty crimpers (for example, an RJ45 network cable crimping tool for Ethernet connectors). Choose a crimper tool appropriate for the connectors you will use most often.
-
Quality and Ergonomics: A well-made crimp tool from a reputable brand will produce more reliable crimps. Look for hardened steel dies and solid construction. Cheap or flimsy crimpers might not apply even pressure or could wear out quickly, leading to bad crimps over time. An ergonomic handle and a smooth ratcheting mechanism (if applicable) are pluses, especially if you’ll be doing a lot of crimping. Investing in a good electrical crimping tool is worthwhile for both DIYers and professionals – it ensures each crimp is tight and reduces hand fatigue during large projects. As one engineer put it, the quality of crimps with high-end tools is simply incomparable in terms of reliability.
-
Versatility: If you work with a variety of connectors, consider a crimping tool kit or a crimper with interchangeable dies. Some kits come with multiple die sets to crimp insulated terminals, non-insulated terminals, coaxial cable connectors, ferrules, etc., using one tool frame. This can be cost-effective and convenient. Just be sure to swap in the correct die for each connector type to avoid mistakes (using the wrong crimp die size can cause under/over crimping).
Common Mistake #2: Choosing the Wrong Tool. Using a bargain-bin crimper or simply the wrong style of crimp tool for your connectors can lead to headaches. For example, trying to crimp heavy battery cable lugs with a small handheld crimper meant for 16 AWG wires will result in a poor crimp. Likewise, using a plumbing crimp tool (for PEX pipes) on electrical connectors would be a big mistake – every tool has its intended purpose. Always select a wire crimping tool suited to your specific task. When in doubt, consult the connector manufacturer’s recommendations; they often specify the type of crimp tool or die required.
👉Upgrade to our crimper tool today

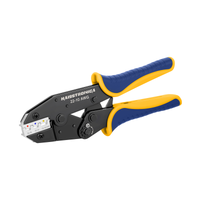
Recommended Product: If you need a reliable all-around crimper for common electrical work, consider the Haisstronica Ratchet Wire Terminal Crimping Tool for AWG 22–10 Heat Shrink Connectors. This tool is designed for the most widely used wire sizes (22-10 AWG), and its ratcheting mechanism ensures you apply the right amount of force every time. The adjustable tension and ergonomic grip help you make professional wire crimps without over-squeezing. It’s an ideal wire crimper tool for insulated butt connectors, ring terminals, spade connectors, and more. (You can find it here: Ratchet Wire Terminal Crimping Tool – AWG 22-10.) By using a high-quality ratcheting crimper like this, you’ll avoid many common crimping mistakes and get consistent results.
4. Accessories and Related Products for Crimping
A crimping tool alone isn’t the whole story – using the proper accessories and compatible components will make your crimping projects successful and mistake-free. Key related accessories and products include:
-
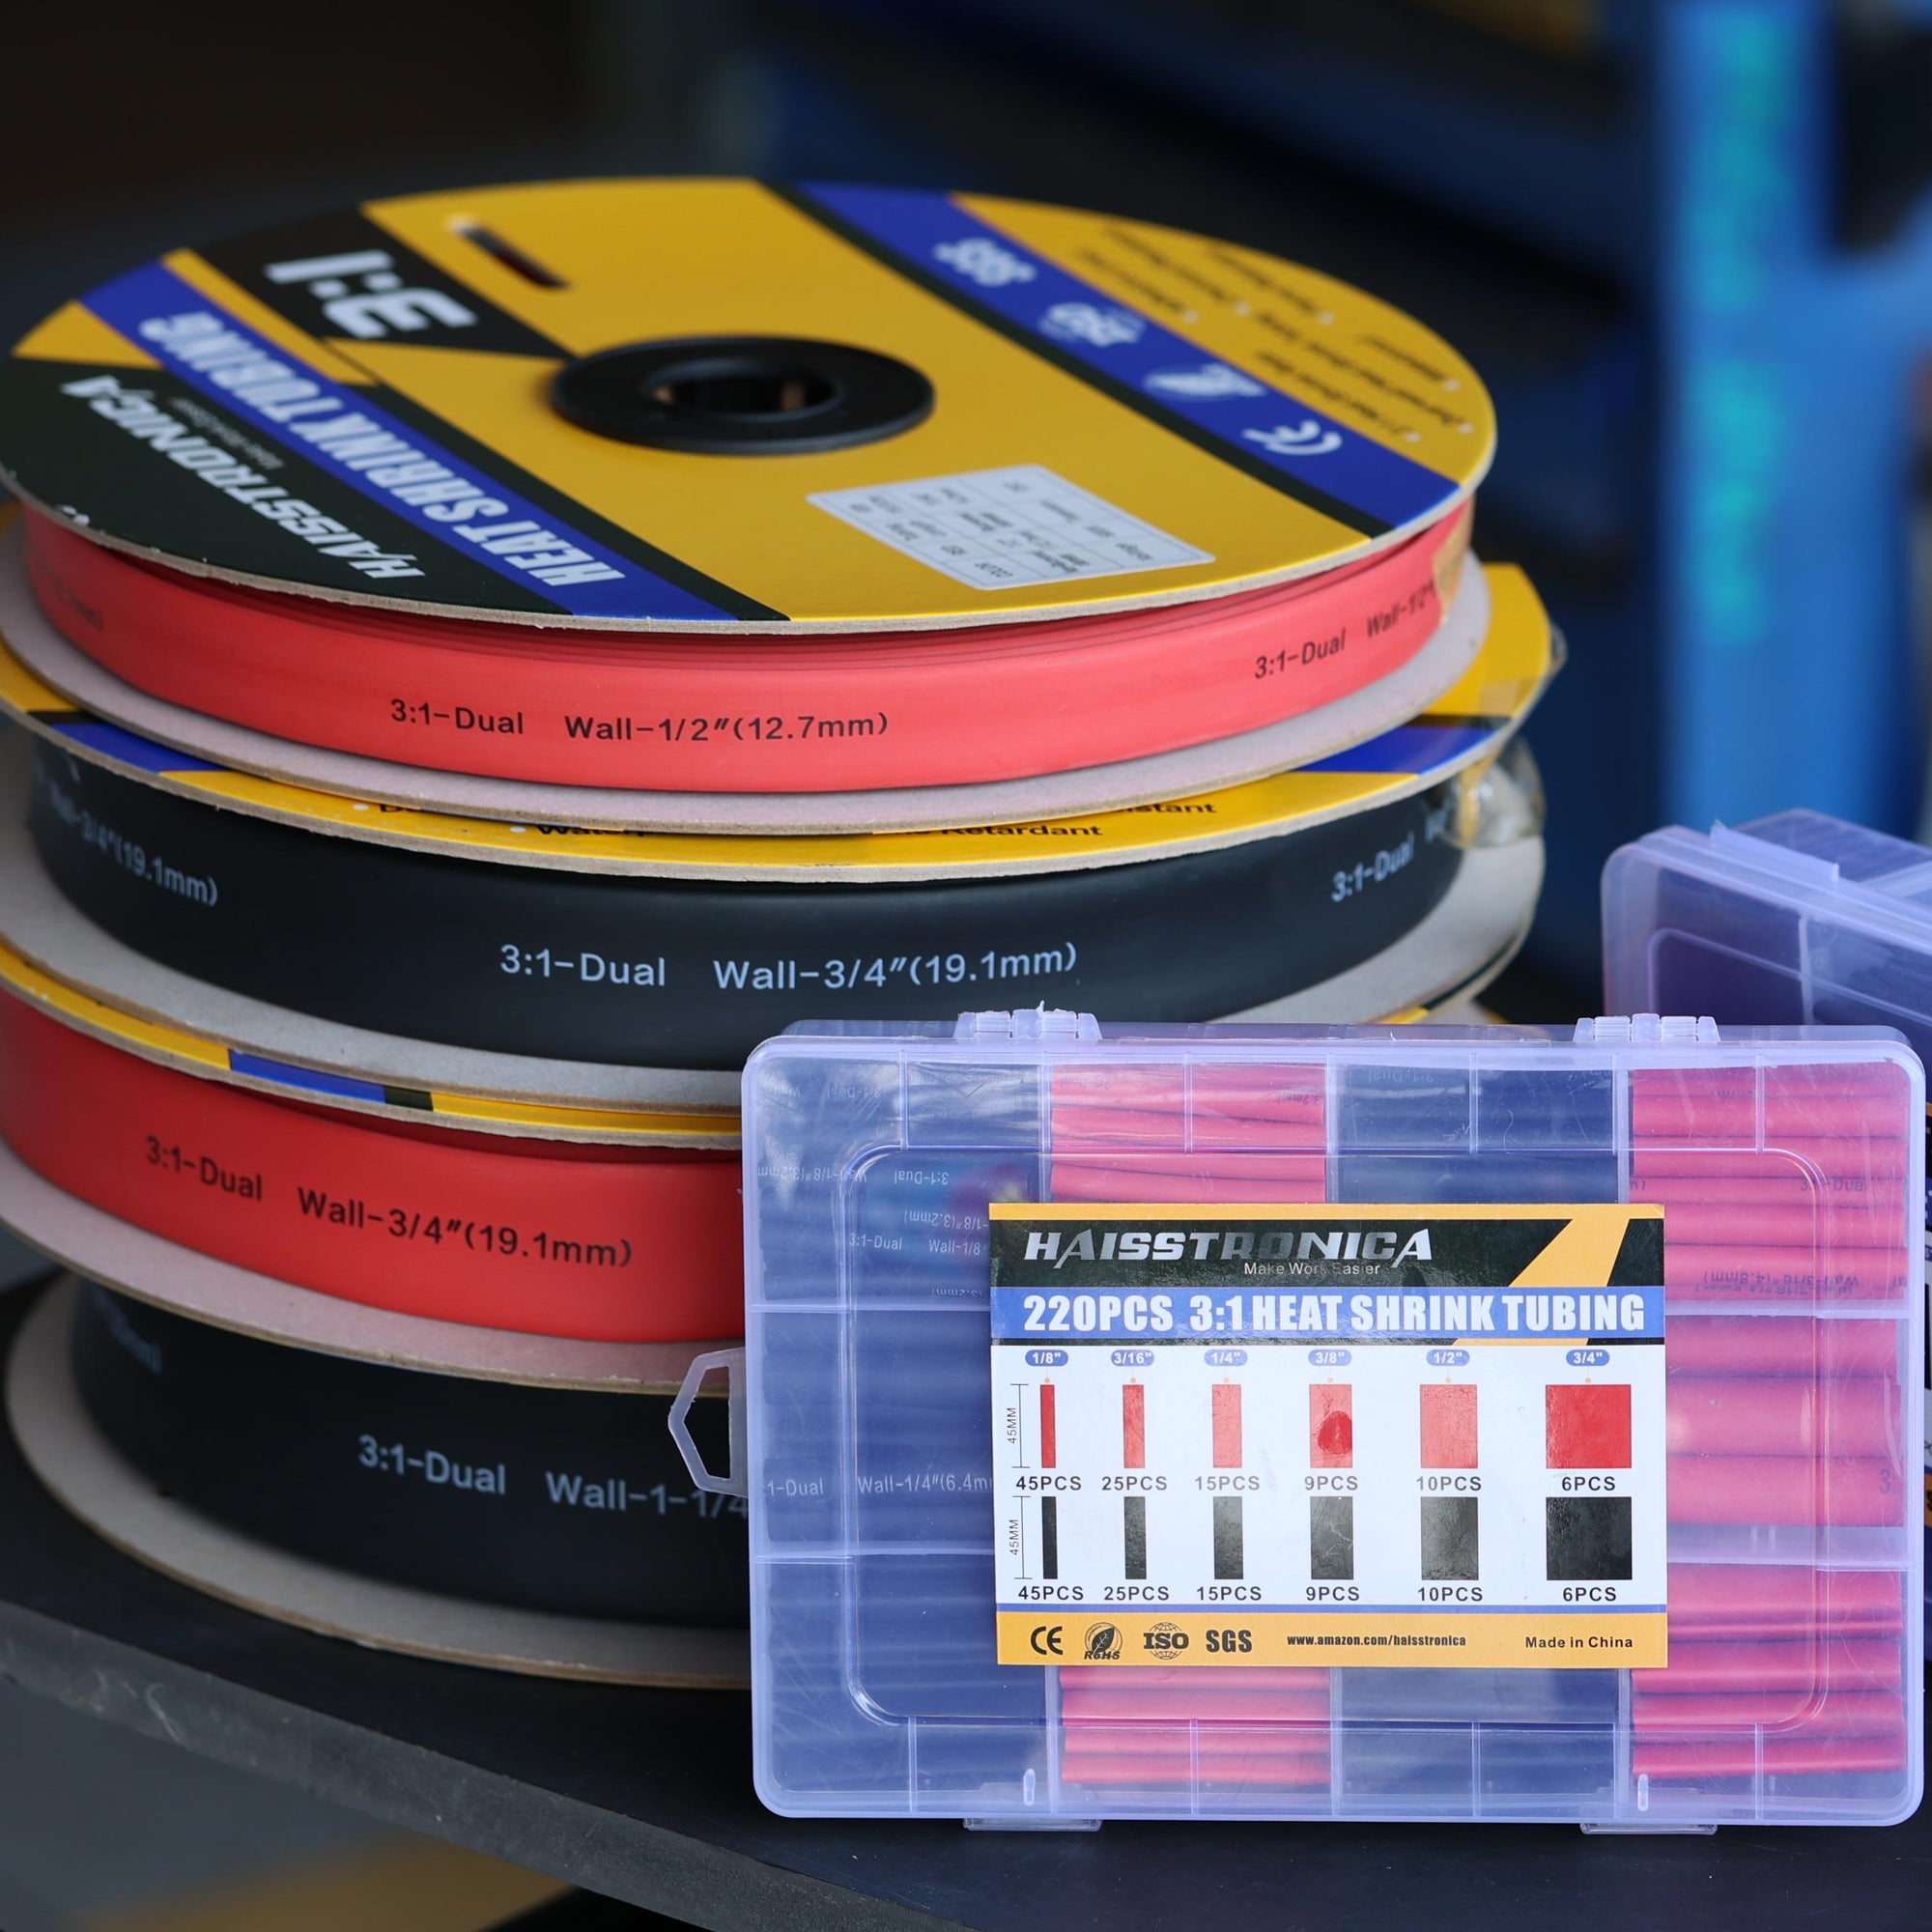
Crimp Connectors and Terminals: These are the pieces you attach to your wires (butt splices, ring terminals, bullet connectors, spade terminals, etc.). Always use quality connectors that match your wire gauge and are suited for the application. Skimping on connector quality or using the wrong type can cause failures. For example, using a non-insulated connector where an insulated one is needed, or using an indoor-rated connector for an outdoor application, is asking for trouble. Different projects call for different connectors – using an indoor-only connector in a high-moisture outdoor environment will lead to premature failure. If your project is exposed to water or weather, use heat-shrink connectors that seal tightly. For high-vibration environments, prefer copper or tinned copper connectors (avoid brittle materials). Having an assortment of the right crimp terminals on hand (and organized by size) will help you avoid mismatches.
-
Wire Strippers and Cutters: A good wire stripping tool is a crimper’s best friend. Cleanly stripping insulation to the correct length is critical for a good crimp. Dull or inappropriate strippers might nick wire strands (weakening the wire) or fail to strip the correct length, leading to the wire stripping mistakes mentioned earlier. Invest in a quality stripper that handles the wire sizes you work with. Some wire crimping tool kits include a stripper/cutter as part of the set. Using the proper wire stripping and cutting tools will ensure you’re feeding neat, undamaged wires into your crimp connectors.
-
Heat Shrink Tubing and Insulation: After crimping, especially for automotive or outdoor connections, you should seal the connection. Heat shrink tubing can be slipped over the wire joint and heated to shrink it, providing insulation and strain relief. Many heat-shrink crimp connectors have built-in tubing that you heat after crimping, which is very convenient. If your connectors aren’t pre-insulated, keep a kit of assorted heat shrink tubes handy to cover your crimps. This prevents moisture ingress and helps crimped wires last longer. Crimp caps (insulated end caps) are another accessory for safely terminating the end of a wire with a crimp when needed (often used in household wiring instead of wire nuts for a more secure hold).
-
Crimping Tool Die Sets and Accessories: If you have a modular crimp tool, additional crimp dies can expand its capability. For example, you might have one die for insulated terminals, another for coaxial cable crimps, another for ignition terminals, etc. Make sure to use the correct die for each connector to avoid a mis-crimp. Some advanced crimpers also have calibration settings or replacement parts – maintain your tool as per the manufacturer’s instructions. A poorly maintained or mis-calibrated crimp tool can start producing bad crimps over time (too loose or too tight).
-
Connector Organizer and Supplies: It’s wise to store your crimp connectors in a labeled organizer box. Poor storage practices – like tossing all your terminals and connectors loosely in a drawer – can lead to dirt or damage on them. Dirt and debris can get crimped into the connection, harming conductivity. Bent or crushed connectors from bad storage are also a problem. Keep your supplies sorted and clean. Some cable crimping tool kits come with a tackle-box style organizer for this reason. Also, having extras of each connector size means you won’t be tempted to “make do” with an almost-fitting connector (which is a mistake). When you have the correct materials on hand, you’re less likely to commit a crimping faux pas.
-
Other Tools: Depending on your project, you might need additional tools like a heat gun (for heat shrink tubing), a wire crimping machine or hydraulic press for very large wires, or even a multimeter to test your connections. If you frequently crimp heavy cables, a bench-top crimping press or an electric crimping tool can make the job easier and more consistent. Also, for certain types of connectors (like coaxial or network connectors), special connector crimping tools are required – for instance, an RJ45 crimp tool for Ethernet plugs or an F-connector crimper for coax TV cables. Using the correct dedicated tool for these specialized connectors is crucial; you can’t crimp an RJ45 with a standard wire crimper. Ensure you have the right accessories and tools for the specific wiring task to avoid mistakes.
By paying attention to these supporting tools and accessories, you’ll avoid common pitfalls like using mismatched components or leaving your connections exposed to the elements. The goal is a reliable, long-lasting crimped connection – and that often means thinking beyond just the crimper itself.
👉Shop the Haisstronica crimp tool

5. FAQ – Frequently Asked Questions (and Answers)
In this section, we’ll address a few common questions (People Also Ask) about crimping, crimpers, and best practices. This FAQ will help reinforce what we’ve covered and include additional crimping tips so you can crimp with confidence.
Q1: What is a crimping tool used for?
A1: A crimping tool is used for attaching a connector or terminal to the end of a wire by tightly compressing (crimping) them together. In other words, it creates a secure mechanical and electrical bond between the wire and a connector. Wire crimping tools are commonly used to join wires with lugs, spade terminals, ring terminals, butt splices, bullet connectors, and many other types of crimp connectors. The purpose is to achieve a strong, low-resistance connection without soldering. For example, an electrician uses a wire crimper to attach an insulated ring terminal to a cable so it can be bolted to a battery, or a networking installer uses an RJ45 crimping tool to attach plugs to Ethernet cables. Crimping tools are essential whenever you need to terminate wires securely for reliable electrical continuity. They are used in automotive wiring, aerospace and aviation (for harnesses), home electronics projects, audio system installations, and more – basically any situation where wires need to be joined or connected to an electrical terminal. By using the correct crimper tool for the job, you ensure the connection is gas-tight and robust, which is exactly what a crimping tool is designed to accomplish.
Q2: Can you crimp wires without a crimping tool?
A2: Technically, it’s possible to attempt crimping a wire without a proper crimping tool, but it is not recommended. Some people try to use pliers, vice grips, or even a hammer to mash a connector onto a wire. While you might get the wire to stay in the connector, the crimp quality will be suspect – there’s a high chance the wire will come loose or the connection will have high electrical resistance. Using pliers, for example, often results in an improper crimp because you cannot apply uniform pressure around the connector barrel. This can leave gaps or damage the connector and wire. Crimping wires with pliers also runs the risk of over-crimping (cutting into the wire) or under-crimping (loose connection) since there’s no calibration. If you don’t have a crimp tool and must attach a connector in a pinch, some alternatives are: twisting the wire onto a screw-down terminal, soldering the wire into the lug (though solder is brittle under vibration), or using a set-screw connector. However, these are not as reliable as a true crimp. Bottom line: You should use a proper wire connector crimping tool whenever possible. They aren’t very expensive, and even a basic electrical crimping tool will ensure the crimp is made correctly. Trying to crimp without the right tool often causes more problems – loose wires, electrical shorts, or intermittent connections – which can be dangerous. For safety and longevity, invest in a decent wire crimper tool instead of improvising. (Many crimp tool kits are available that include the crimper and a variety of connectors, which is great for DIYers.)
Q3: What are the different types of crimping tools?
A3: Crimping tools come in several types, each suited to different tasks and connector types. The main categories of crimp tools include:
-
Handheld Manual Crimpers: These look like pliers and require you to squeeze by hand. They often have multiple notches for various wire sizes. Basic crimping pliers and inexpensive crimper tools fall in this category. They work for light-duty crimping but rely on user technique to get consistent results.
-
Ratcheting Crimping Tools: These are very popular for electrical connectors. A ratcheting wire crimper has an internal ratchet mechanism that locks the tool as you squeeze, ensuring you apply the correct pressure and fully complete the crimp before releasing. Ratcheting crimpers often have interchangeable dies for different connector types. They provide uniform crimps and reduce hand strain, making them ideal for frequent use. For example, most professional terminal crimpers for insulated terminals are ratcheting style.
-
Hydraulic Crimping Tools: These are either hand-pump operated or powered crimpers used for large gauge cables and lugs (like heavy battery cables, welding cables, or power distribution wires). Hydraulic crimpers can generate a lot of force with minimal effort, allowing you to crimp large copper lugs (0 AWG, 2/0, etc.) that a handheld tool cannot handle. They often have interchangeable die sets for different cable sizes. If you’re working on high-current cables or doing industrial electrical work, a hydraulic cable crimping tool might be necessary.
-
Hammer and Bench Crimpers: A simpler type for large lugs is a hammer crimper – basically a tool where you place the lug and wire and strike with a hammer to deform it. There are also bench-mounted crimp presses. These are used for specialized crimping tasks (e.g., crimping many wires in a production setting). They’re not as common for general use but are another type.
-
Cable-Specific Crimpers: There are crimping tools made for specific connectors or cables. For instance, an RJ-45 crimping tool is designed for crimping Ethernet cable plugs; a coaxial cable crimper is made for crimping coax F-connectors or BNC connectors; there are crimpers for fiber optic connectors, etc. These tools usually crimp a very specific kind of connector and often include wire trimming features for that cable. If your project involves these, you’ll need the corresponding crimper (e.g., a network cable crimper for making LAN cables).
-
Automatic and Electrical Crimping Tools: In professional settings, you might encounter electric or pneumatic crimping machines. These automate the crimping process – you insert the wire and connector and the machine presses it with consistent force every time. They are used for high-volume production or very high reliability requirements.
Each type of crimping tool has its use-case. For most hobbyists and electricians working with standard insulated terminals and connectors in the AWG 22-10 range, a good ratcheting wire crimping tool kit will cover your needs. Make sure you use the type of crimper that matches the connectors you’re using. If you try to use the wrong type (for example, using a household wire crimper on an RJ45 plug, or using a Molex pin crimper on an insulated butt splice), it won’t work properly. Knowing the different types of crimpers helps you pick the best crimping tool for the job and avoid frustration.
Our Top User-friendly Picks
Crimp heat-shrink connectors fast and clean with the Haisstronica crimping tool. Whether you’re wiring or rewiring boats, cars, or home appliances, this professional crimper delivers secure, uniform terminations in a single squeeze. Precision-forged jaws apply consistent pressure to prevent splits and insulation damage, producing factory-grade results every time. Unlike generic crimpers that crush or distort connectors, the Haisstronica wire crimper creates tight, reliable seals that withstand vibration and moisture. Choose a durable, ergonomic crimping tool engineered for speed, accuracy, and repeatable performance on every connection.
👉Shop the Haisstronica ratcheting terminal crimper for AWG 22–10 heat-shrink connectors—view specs & pricing.

By understanding these common questions and answers, you’ll be better prepared to use your crimping tools effectively. Remember, the key to perfect crimps is: use the right tool and connector, follow proper technique, and double-check your work. With practice, you’ll crimp wires confidently and create connections that last for years without a hitch. Happy crimping!