


Introduction
If you regularly use a wire crimper (aka crimping tool or crimping pliers) for electrical projects, you know it’s an indispensable tool. But did you know that with proper care, a quality crimping tool can last 10 years or more? A well-maintained crimper ensures every wire crimp connection is solid and safe, so your electrical repairs and installations stay trouble-free. Like any hand tool, crimpers require regular cleaning and lubrication to keep performing at their best. In this guide, we’ll explain what a crimping tool is, show you step-by-step how to clean and oil your crimp tool like a pro, and answer common FAQs – all to help you boost your crimping tool’s lifespan and reliability.
What Is a Crimping Tool? (Definition)
Crimping tools (often simply called crimpers or crimp pliers) are devices used to join a connector to a wire by deforming (crimping) a metal terminal tightly around the wire. In electrical work, crimpers create secure, low-resistance connections for wire terminals, lugs, butt connectors, ferrules, and more. Most hand crimping tools have two levers with jaws (dies) that close down on the connector and wire, compressing them into one firm assembly. Modern ratcheting crimping tools are popular because they apply consistent pressure and won’t release until the crimp is fully compressed, ensuring a uniform crimp every time. This makes ratchet wire crimpers ideal for professional and DIY wiring jobs that demand reliability.
There are various types of crimping tools designed for different tasks. For example, you’ll find small hand crimpers for electronics, heavy-duty cable crimping tools for battery cables, specialized terminal crimpers for insulated terminals, ferrule crimpers for wire ferrules, and even hydraulic or pneumatic crimpers for industrial use. In this article, we focus on maintaining manual ratchet crimping tools (like Haisstronica’s professional ratcheting crimpers) since they are widely used and easy to maintain.
Step-by-Step: How to Clean and Oil a Crimping Tool
Maintaining your crimp tool is straightforward. Regular cleaning and oiling will prevent rust, remove debris, and keep the moving parts working smoothly. Follow these steps to crimp like a pro for years to come:
-
Gather Supplies: You’ll need a soft, lint-free cloth (or shop rag), a soft bristle brush (an old toothbrush or small paintbrush works), and a light machine oil. A 3-in-1 oil or SAE 20 motor oil is ideal for lubricating hand tools. (Avoid heavy grease, which can trap dirt.) You may also use a bit of WD-40 or a mild solvent for initial cleaning if there’s heavy grime, but plan to apply oil afterward since WD-40 is not a long-term lubricant.
-
Wipe Off Dirt and Debris: After each use (or before maintenance), wipe the crimping tool’s jaws, handles, and pivot areas with the dry cloth to remove loose dust, wire trimmings, and debris。 Pay special attention to the crimping dies (the grooves that form the crimps) – clean out any tiny bits of metal from cut wire or connector coatings. Use the soft brush to gently scrub out any stubborn particles in the jaw grooves or hinge. Do NOT use compressed air to blow out the tool, as it can force debris deeper into the mechanism. Also avoid abrasive tools that could scratch the metal surfaces.
-
Remove Rust (If Present): If you spot any light rust on the crimp tool (often on the handles or hinge if the coating wore off), gently remove it with fine steel wool or a bit of penetrating oil on a cloth. Surface rust can often be wiped off; for heavier rust, a rust remover product may be used. Always dry the tool thoroughly afterward to prevent further corrosion.
-
Lubricate the Moving Parts: Now for the important part – oiling your crimp tool. Apply a drop or two of light oil to the tool’s pivot points, hinge, and any other moving parts (such as the ratchet mechanism teeth if accessible). The pivot is where the two handles join; putting a drop there and working the handles open/closed will distribute it inside. If your crimper has a spring or a tension adjustment screw, a tiny drop there can help prevent squeaks. Remember: a thin coat is enough – you don’t want excess oil dripping or attracting dust. Avoid getting oil on the crimping jaw surfaces, as oil or grease on the crimp dies could transfer to electrical connectors and reduce the quality of the crimp. Wipe away any excess lubricant with a clean part of your cloth.
-
Test the Tool: After cleaning and oiling, test your crimping tool by opening and closing it a few times (with no wire) to ensure the action is smooth. A ratchet crimper should easily click through its cycle and release normally at full compression. If the tool has an adjustable tension wheel or calibration setting, verify it’s correctly set (refer to manufacturer instructions). For most users, factory calibration is fine, but heavy use over years might require adjustment or professional recalibration to maintain precision.
-
Proper Storage: Once your crimp tool is clean and oiled, store it correctly. Close the handles (many ratchet crimpers have a handle lock to keep them shut) and keep the tool in a dry, clean area. Avoid tossing it in a damp toolbox or leaving it exposed to the elements. By storing with jaws closed, you prevent the jaws from dinging against other tools and keep dust out. You might even slip the crimper into a zip-lock bag or wrap it in a cloth for long-term storage to protect it from moisture. Proper storage ensures your tool is ready to deliver perfect crimps the next time you need it.
When and Why to Maintain Your Crimping Tool (Application Scenarios)
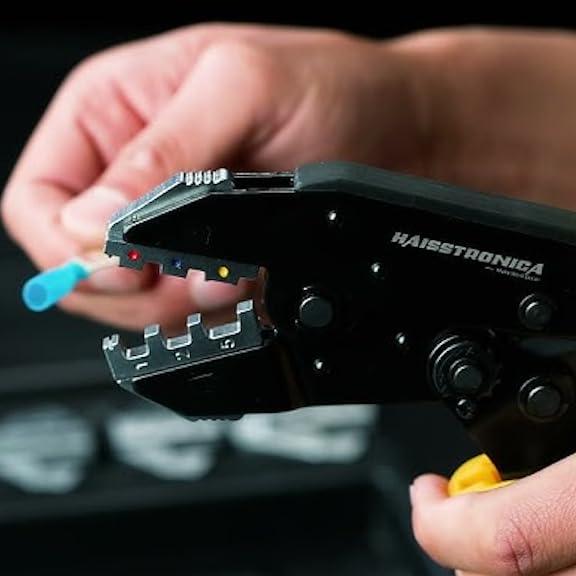
A quality ratcheting crimping tool (like this Haisstronica model) is used for automotive and electrical wiring projects. Regular cleaning and lubrication ensure it consistently crimps wire connectors securely.
Think of your crimping tool as an investment – whether you’re a professional electrician, an automotive enthusiast, or a DIY homeowner, you rely on it to make critical electrical connections. Here are some scenarios and reasons to keep your crimpers in top shape:
-
Frequent Use (Electricians and Technicians): If you use your wire crimping tool daily (for example, in automotive wiring, appliance repair, HVAC installations, or network cabling), you’ll want to clean and oil it at least once a week. In high-use settings with lots of crimping of wires, debris from stripped wires and terminal insulation can build up quickly in the jaws. A quick wipe-down after each day’s work keeps grime from accumulating. Lubricating on a schedule (say every week or biweekly) prevents the ratchet and hinge from wearing out. This minimal upkeep can give your tool a reliable service life of 10+ years, even under heavy use.
-
Occasional Use (DIYers and Hobbyists): For the casual user who crimps wires only on weekend projects or the odd repair, it’s easy to forget about tool maintenance. Always clean the crimper before storing it for a long period. Even if you only did a few crimps, wipe off any residue and add a drop of oil to the hinge before you put it back in the drawer. This prevents rust during inactivity. The next time you grab it to crimp a wire, it’ll be rust-free and ready to go. A well-kept hand crimping tool will be ready for you even if it sits unused for months.
-
Harsh Environments: Are you working on a boat, in a damp garage, or outdoors? Moisture is the enemy of metal tools. In these scenarios, maintenance is critical. You might need to oil your crimping pliers more frequently as a rust preventative. Likewise, if your work environment is dusty (construction sites, woodworking shops), be vigilant about cleaning the crimp tool’s moving parts. Tiny grit can sneak into the ratchet mechanism or hinge and cause binding or wear. Regular cleaning prevents this and ensures smooth crimping action every time.
-
High-Stakes Connections: When you’re crimping important electrical connections – for instance, wiring a car’s battery terminals, boat wiring, or critical home electrical repairs – a poorly maintained crimp tool could make a bad crimp that fails under load. By keeping your cable crimper clean and calibrated, you ensure each crimp is gas-tight and strong. This is especially important for crimping wires in automotive or marine settings where vibrations and corrosion can stress connections.
In short, routine maintenance is worthwhile whether you’re crimping a few wires at home or hundreds on the job. It safeguards not only your tool’s longevity but also the quality of every electrical connection you make. And quality connections = safer projects!
Crimping Tool Purchasing Guide (Choosing the Right Tool & Accessories)
Ready to upgrade your crimping setup or buying your first crimp tool? Choosing a good tool from the start, and using quality accessories, will save you headaches down the road. Here’s what to consider when selecting a crimping tool and related supplies:
-
Match the Tool to Your Needs: Identify what type of crimping jobs you’ll do most. If you’re working on standard automotive or household wiring (typically AWG 22-10 insulated terminals), a versatile ratchet wire crimper tool with interchangeable or built-in dies for that AWG range is ideal. If you need to crimp larger cables (like battery lugs) or specialty connectors (coax, bootlace ferrules, etc.), look for a tool specific to those tasks (e.g., a heavy-duty battery cable crimper, a ferrule crimping pliers, etc.). Haisstronica, for example, offers dedicated crimpers for many connector types – from insulated terminal crimpers to open-barrel crimp tools and even spark plug wire crimpers. Ensure the tool’s capacity (wire gauge range and connector types) covers your requirements.
-
Quality and Construction: Invest in a well-built, professional-grade crimping tool. Look for features like hardened steel jaws, a reliable ratcheting mechanism, and ergonomic handles. A solid tool will produce consistent crimps and simply feel sturdy. High quality electrical crimping tools may cost a bit more upfront but often come with better warranties and will last much longer (remember, we’re aiming for a 10-year lifespan or beyond!). User reviews and brand reputation matter – brands like Haisstronica have built a following for offering durable yet affordable crimpers suitable for both DIY and professional use.
-
Ratcheting Mechanism and Adjustability: We highly recommend ratcheting crimpers for most wire connector jobs because they apply uniform pressure and won’t under-crimp or over-crimp connectors. Check that the ratchet has a quick-release lever (most do) for safety and convenience. Many ratcheting tools also feature an adjustable tension wheel or dial – this lets you calibrate how tight the crimp gets before the ratchet releases. This is useful to fine-tune your crimps as the tool ages or when working with delicate connectors. Ensure any tool you buy has clear instructions on adjusting this, or is pre-calibrated for common connector sizes.
-
Die Style (Fixed vs. Interchangeable): Some crimping pliers have fixed built-in dies (with multiple gauge slots), while others are part of a crimping tool kit with interchangeable jaws for different connector types. Kits with multiple dies can be cost-effective if you need to crimp a wide variety of connectors (for example, Haisstronica’s 8-piece crimping tool kit comes with swap-in dies for insulated, non-insulated, ferrules, etc.). If you only do one kind of crimp (like standard insulated terminals), a fixed-die crimper is simple and robust. Choose what fits your use – but make sure any interchangeable dies are easy to change and secure during use.
-
Comfort and Ergonomics: Since crimping can require significant hand force, look for features like cushioned non-slip handles and a well-balanced design. An ergonomic crimp tool will reduce hand fatigue, especially if you have a lot of wires to crimp. Ratcheting mechanisms already help by multiplying force, but good grip design is a plus. Handle size matters too – ensure it fits your hand size.
-
Warranty and Support: Lastly, look at the warranty or guarantee offered. A company confident in its crimping tools will offer a strong warranty (some even lifetime for manufacturing defects). This can be a good indicator of durability. Also check if replacement parts (like springs or dies) are available. Haisstronica, for instance, offers customer support and stands by the quality of their wiring tools, which is reassuring for long-term use.
By considering these factors, you can pick the best crimping tool for your needs and ensure it serves you well. Remember, even the best crimpers still need maintenance – so once you’ve got your ideal tool, take care of it following the steps above. It will reward you with a decade of flawless crimps!

FAQ: Crimping Tool Maintenance
Q: How often should I clean and oil my crimping tool?
A: It depends on use. For professionals using a crimper daily, a quick wipe-down after each day’s use and a thorough clean/oil weekly is a good practice. For occasional DIY use, clean and oil the tool after each project or at least every few months (and definitely before long storage). Anytime the tool feels gritty, sticky, or shows dirt buildup, give it a cleaning and lubrication. Regular maintenance prevents problems, so it’s better to do it a bit too often than not enough.
Q: What kind of oil is best for lubricating a crimping tool?
A: Use a light machine oil or multipurpose oil. Common choices are 3-in-1 oil, SAE 20 motor oil, or even a drop of household sewing machine oil. These oils are light enough to penetrate hinges and won’t gum up the works. Avoid heavy grease on the crimping jaws or too much oil (excess oil will attract dust). If you don’t have machine oil, a tiny squirt of WD-40 can work in the short term to loosen things, but you should still add a heavier oil after since WD-40 evaporates and isn’t a long-term lubricant. Some users like to use a dab of white lithium grease on the ratchet mechanism for longevity – that’s fine, just use sparingly and keep it off the crimping surfaces.
Q: My ratcheting crimper feels stiff or won’t release – what should I do?
A: First, check if there’s a manual release lever (usually a small thumb latch) on the crimper – engage that to open the tool if it’s stuck mid-cycle. A stiff action often means it’s time to clean and oil the tool. Follow the steps above: remove any debris from the ratchet teeth and hinge, then apply a drop of oil. Work the handles to distribute oil. In many cases, this restores the smooth operation. Also inspect the adjustment wheel (if your tool has one); if the crimp pressure was set too high it might make the tool harder to close/release – adjust it according to the manual. If after maintenance it’s still not working right (e.g., the ratchet is jamming or releasing too soon), the tool’s ratchet mechanism might be worn or damaged – at that point, contact the manufacturer or consider replacing the tool if it’s been through years of heavy service.
Q: Can I wash my crimping tool with water or soak it to clean it?
A: It’s not recommended to wash a crimp tool with water, as this can lead to rust unless you dry and oil it immediately. Soaking is generally unnecessary and could remove factory lubrication. Instead, use the method of wiping and brushing. For very dirty tools, you can use a bit of solvent (like a degreaser or isopropyl alcohol) on a cloth to cut grime, then wipe dry and oil. If you ever do get the tool wet, dry it thoroughly (even using a hair dryer on cool setting can help) and re-oil all moving parts to displace moisture (WD-40 is actually great for that “water displacement” purpose). The key is ensuring no water is left that could cause corrosion.
Q: What should I do if I notice rust on my crimpers?
A: Don’t panic – a little rust can often be cleaned off and the tool can be restored. Use fine sandpaper, emery cloth, or steel wool to gently rub away the rust from the surface. Focus on areas like the hinge, handles, or the crimp die surface if they have rust. After removing as much rust as possible, wipe the tool clean and apply a generous coat of light oil to the affected areas. Let it sit a bit, then wipe off excess. This will often stop further rust. For severe rust (e.g., tool left in rain resulting in heavy corrosion), the tool’s precision might be compromised; you can try a rust remover product or naval jelly to dissolve it, but there’s a chance the tool may need replacement if critical surfaces are pitted. Prevent rust by storing tools in a dry place and occasionally oiling them – prevention is far easier than fixing rust.
Q: Do crimping tools require calibration?
A: Manual ratcheting crimping tools generally come pre-calibrated for the connector sizes they support. For most DIY and casual uses, you won’t need to formally calibrate them. However, in professional settings or over many years, the tool’s jaw alignment and ratchet tension can drift. Some high-end crimpers have calibration instructions (using calipers to check crimp height, etc.) and an adjustment screw to increase or decrease force. If you notice your crimps are too loose or too tight consistently (and you’re sure you’re using the right die size), then calibration might be needed. You can send the tool to the manufacturer for calibration or use gauge tools if provided. But for typical users: as long as your crimps are holding tight and the tool releases properly, you’re good. Just maintain it. If you suspect a problem, you can always do a test crimp and inspect the connector for proper compression as a quick check.
Q: When is it time to replace a crimping tool?
A: A quality crimp tool can last for thousands of crimps – often a decade or more – with good care. But they don’t last forever. Signs it might be time to replace or upgrade: (1) Visible damage or wear – cracks in the frame or handles, springs that are broken or ratchet teeth that are worn smooth. (2) Poor crimp performance – if connectors are slipping out, not fully crimping, or the tool no longer aligns correctly even after cleaning and adjustment. (3) Excessive play or looseness in the hinge or jaws that affects crimp quality. If the cost of repair or calibration is close to a new tool, replacement is often the better choice. The good news is, if you’ve followed our cleaning and oiling advice, your crimping tools should last a very long time before any of this happens. And when you do replace, you’ll likely stick with the same brand if it served you well (we often see folks upgrading to a newer Haisstronica crimper model after many years of service from their first one). Always prioritize safety and quality of your electrical connections – if in doubt, get a new crimper.
Conclusion & Purchase Entry
Maintaining your crimping tool isn’t complicated, but it’s the key to a long lifespan and reliable performance. Just a few minutes of cleaning and oiling can guarantee that your crimp tool delivers perfect crimps for years to come. In fact, these simple steps are often enough to keep a good crimping tool working for 10 years or more without issues. Remember, a well-cared-for tool not only lasts longer but also makes your work easier and your electrical connections safer.