Electrical splices and terminals are often crimped tight to ensure a reliable, gas-tight connection. However, in real-world repairs or upgrades, you may need to uncrimp – or remove – a crimped connector. Whether you’re an electrician, automotive tech, or DIYer, knowing how to undo crimps safely is vital. This guide explains how to uncrimp various connector types (butt splice, terminal lug, ferrule, etc.), what tools to use, and what to do afterward (re-strip, reuse, or replace). Throughout, we’ll reference Haisstronica tools and connectors for illustration and include best practices for automotive and marine wiring compliance.
Common Connector Types
Understanding the connector you’re dealing with is the first step. Below are three common crimp connector types with examples:
-
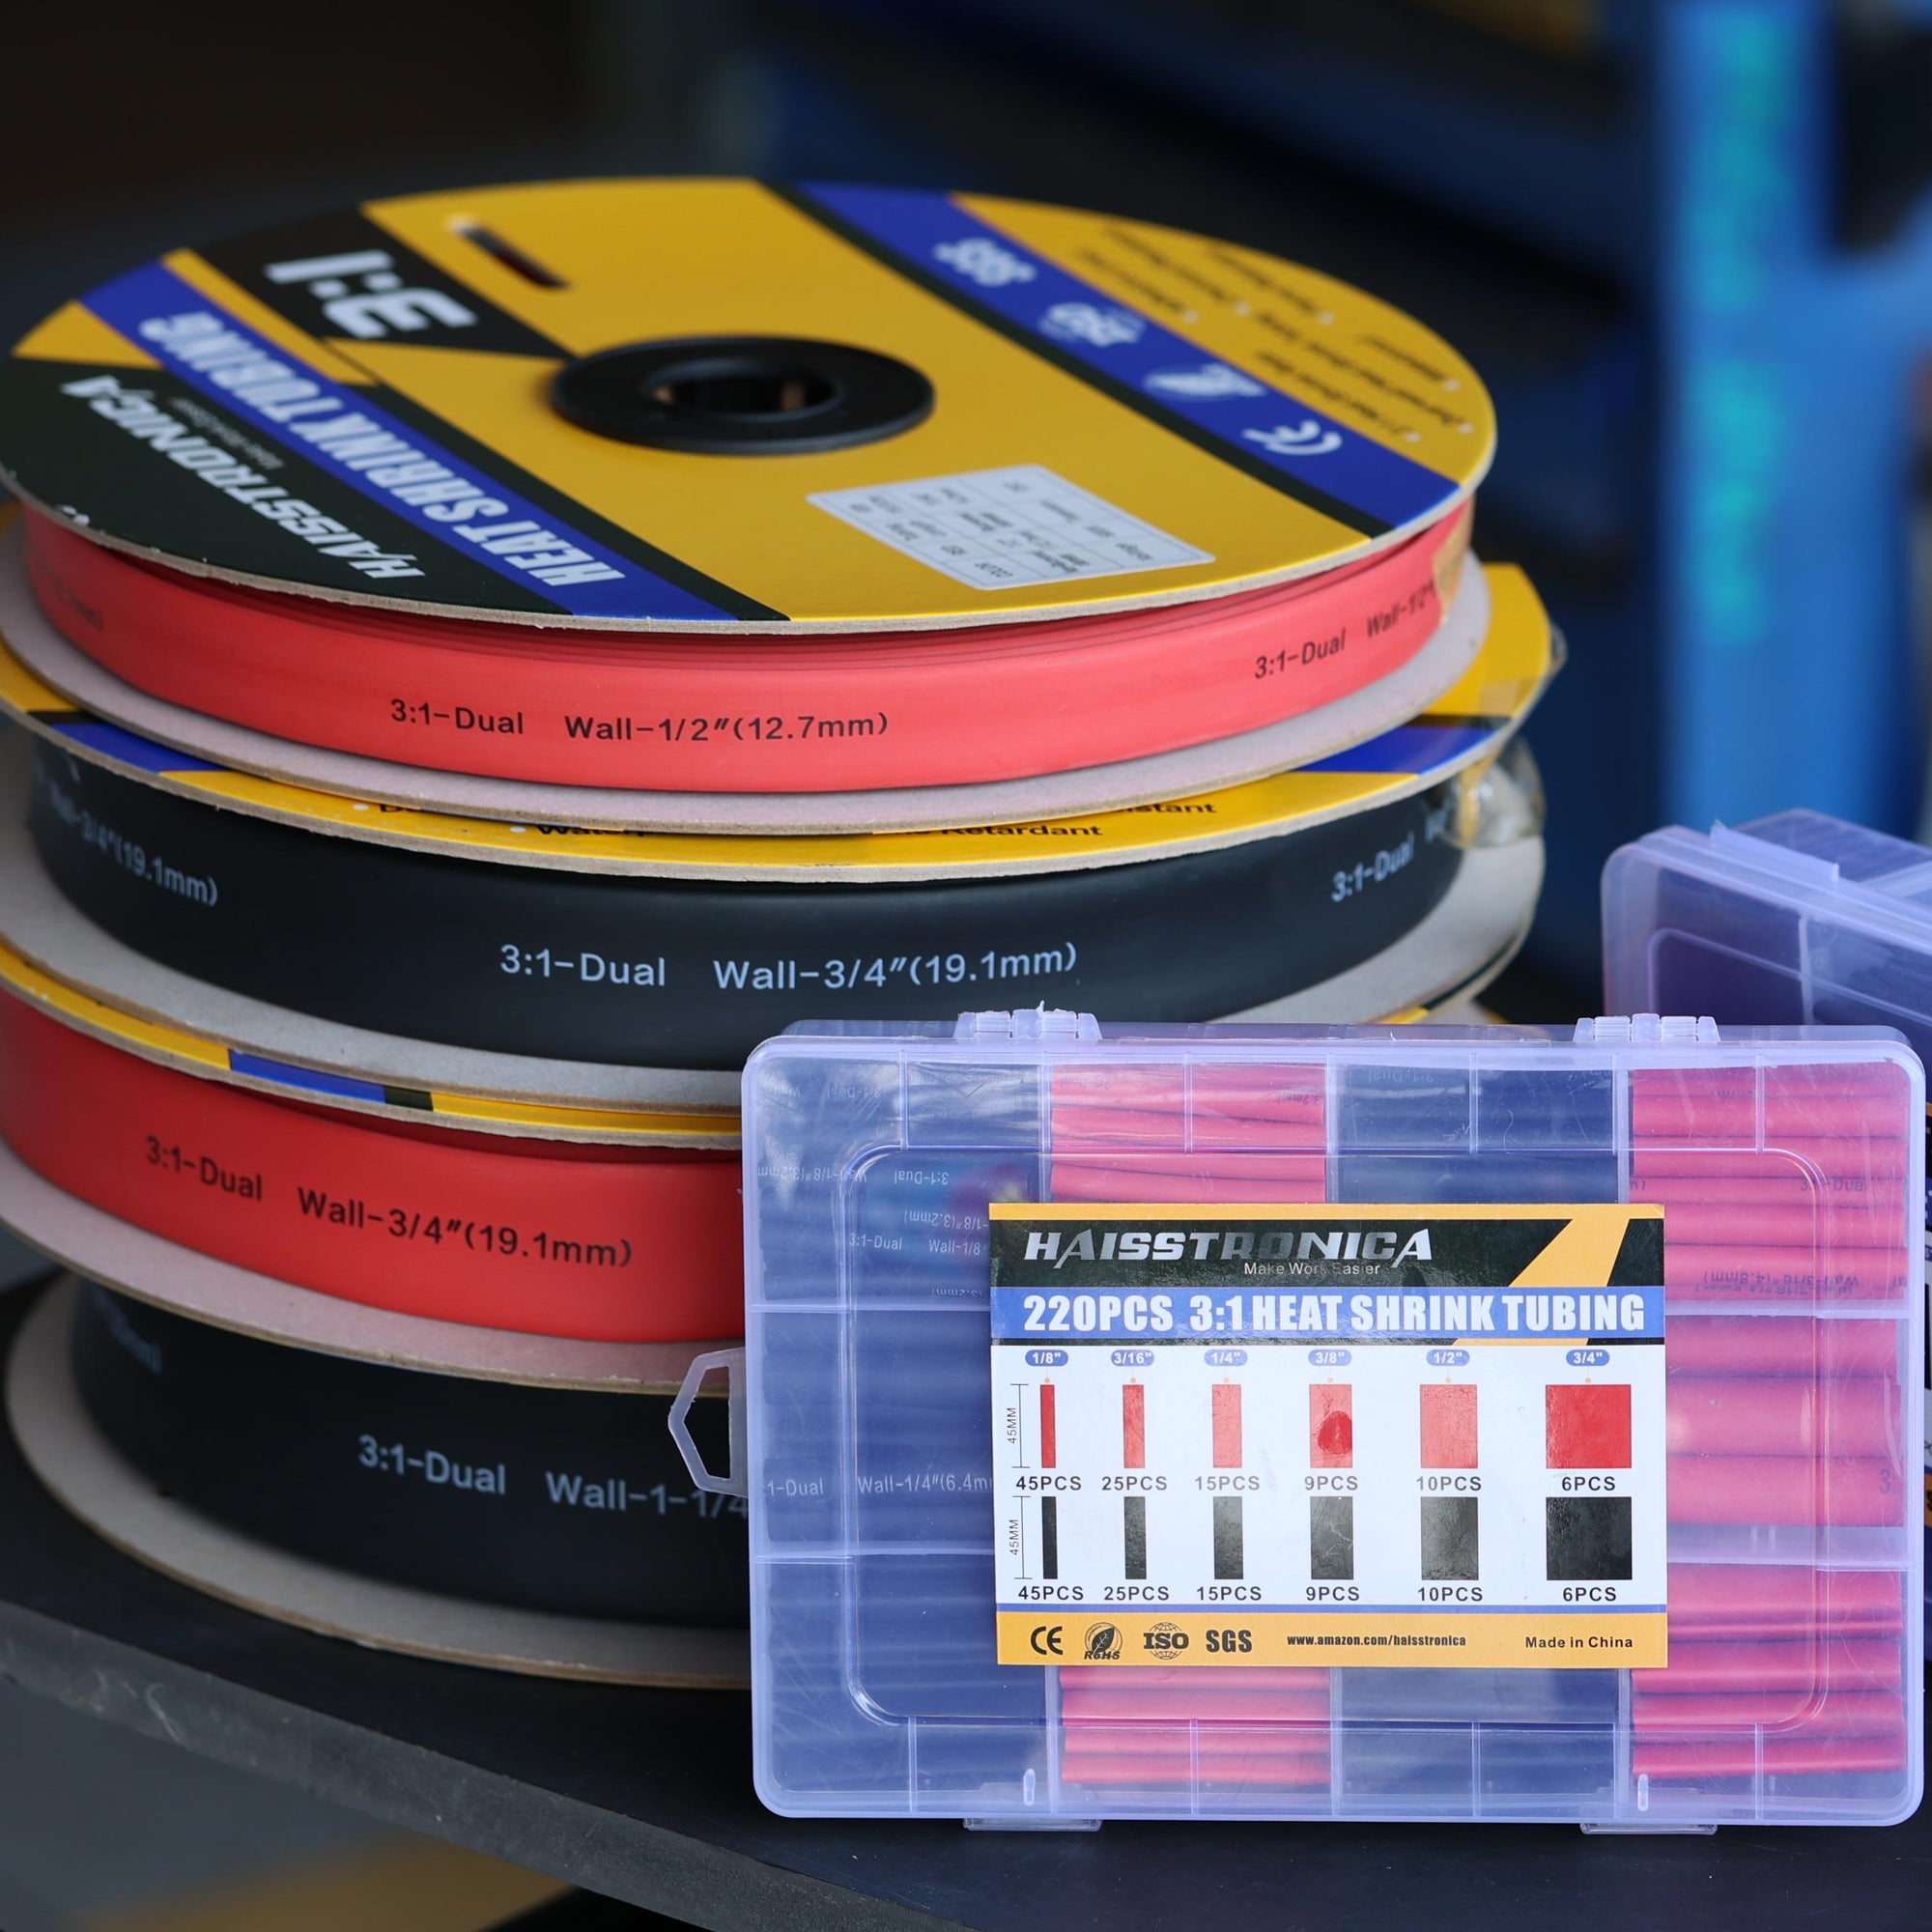
Insulated Butt Splice Connectors: These cylindrical connectors join two wires end-to-end. They have color-coded heat-shrink sleeves (red, blue, yellow, white for AWG ranges) for insulation and moisture protection. For example, Haisstronica heat-shrink butt connectors (in kits) are waterproof and rated for automotive/marine use. When crimped, the metal sleeve cold-welds onto the wire. To remove a butt splice, you must pry open or cut through that metal sleeve.
-
Insulated Terminal Lugs (Ring/Spade): These flat lugs terminate wires to posts or screw terminals. The red ring terminals shown below are crimped onto wires. Non-insulated versions exist too. These connectors create a permanent joint: once the metal barrel is crimped closed, the wire cannot slide out. Typically, you cut the lug off to release the wire. (Haisstronica offers many ring and spade terminal kits for automotive wiring.) Ring/spade connectors are generally weatherproof (insulated) or non-insulated depending on use. Cutting or uncurling the barrel is usually required to uncrimp these.
-
Wire Ferrules (Bootlace Pin): Ferrules are small metal sleeves (often with flared collars) crimped over stranded wires for insertion into screw terminals or blocks. The blue ferrules below show uncrimped versus crimped ends. Ferrules ensure a neat, tinned-like termination and meet DIN/UL standards. Removing a ferrule usually requires cutting or twisting it off the wire. Since ferrules and their crimp are also permanent, you generally discard the old ferrule and crimp on a new one.
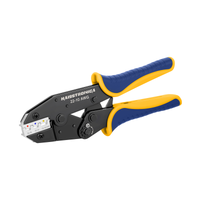
👉Quick pick: the Haisstronica Ratchet Wire Terminal Crimping Tool (AWG 22–10)—built for heat-shrink connectors and repeatable, code-clean crimps.
If your old tool failed, check out our durable ratcheting crimping tools designed for consistent crimps every time.

Each connector type requires slightly different uncrimping steps (detailed below). Safety is paramount: always de-energize circuits before beginning.
Safety and Preparation
-
Disconnect Power: Always remove any power source before tampering with wiring. Turn off circuit breakers or disconnect battery ground cables. Even if the wire was “off,” double-check with a voltage tester.
-
Personal Protection: Wear safety glasses to shield against flying wire strands or metal shards. Use insulated tools if there’s any chance of residual voltage.
-
Workspace: Work on a non-conductive surface (rubber mat or wooden bench). Keep the area well-lit and organized. Label or photograph wire locations if needed, so you can restore the correct wiring order.
-
Verify Equipment: Use the right-sized tools. For example, Haisstronica’s self-adjusting wire stripper (AWG 10–24) or a precision insulation stripper (AWG 24–10) can re-strip wires cleanly after removal. Ensure cutting tools are sharp so you don’t crush the wire.
👉Following these precautions avoids injury and ensures a clean, controlled removal of the old crimp.

Tools and Equipment
Having the right tools makes uncrimping much easier and reduces damage to wires. Key tools include:
-
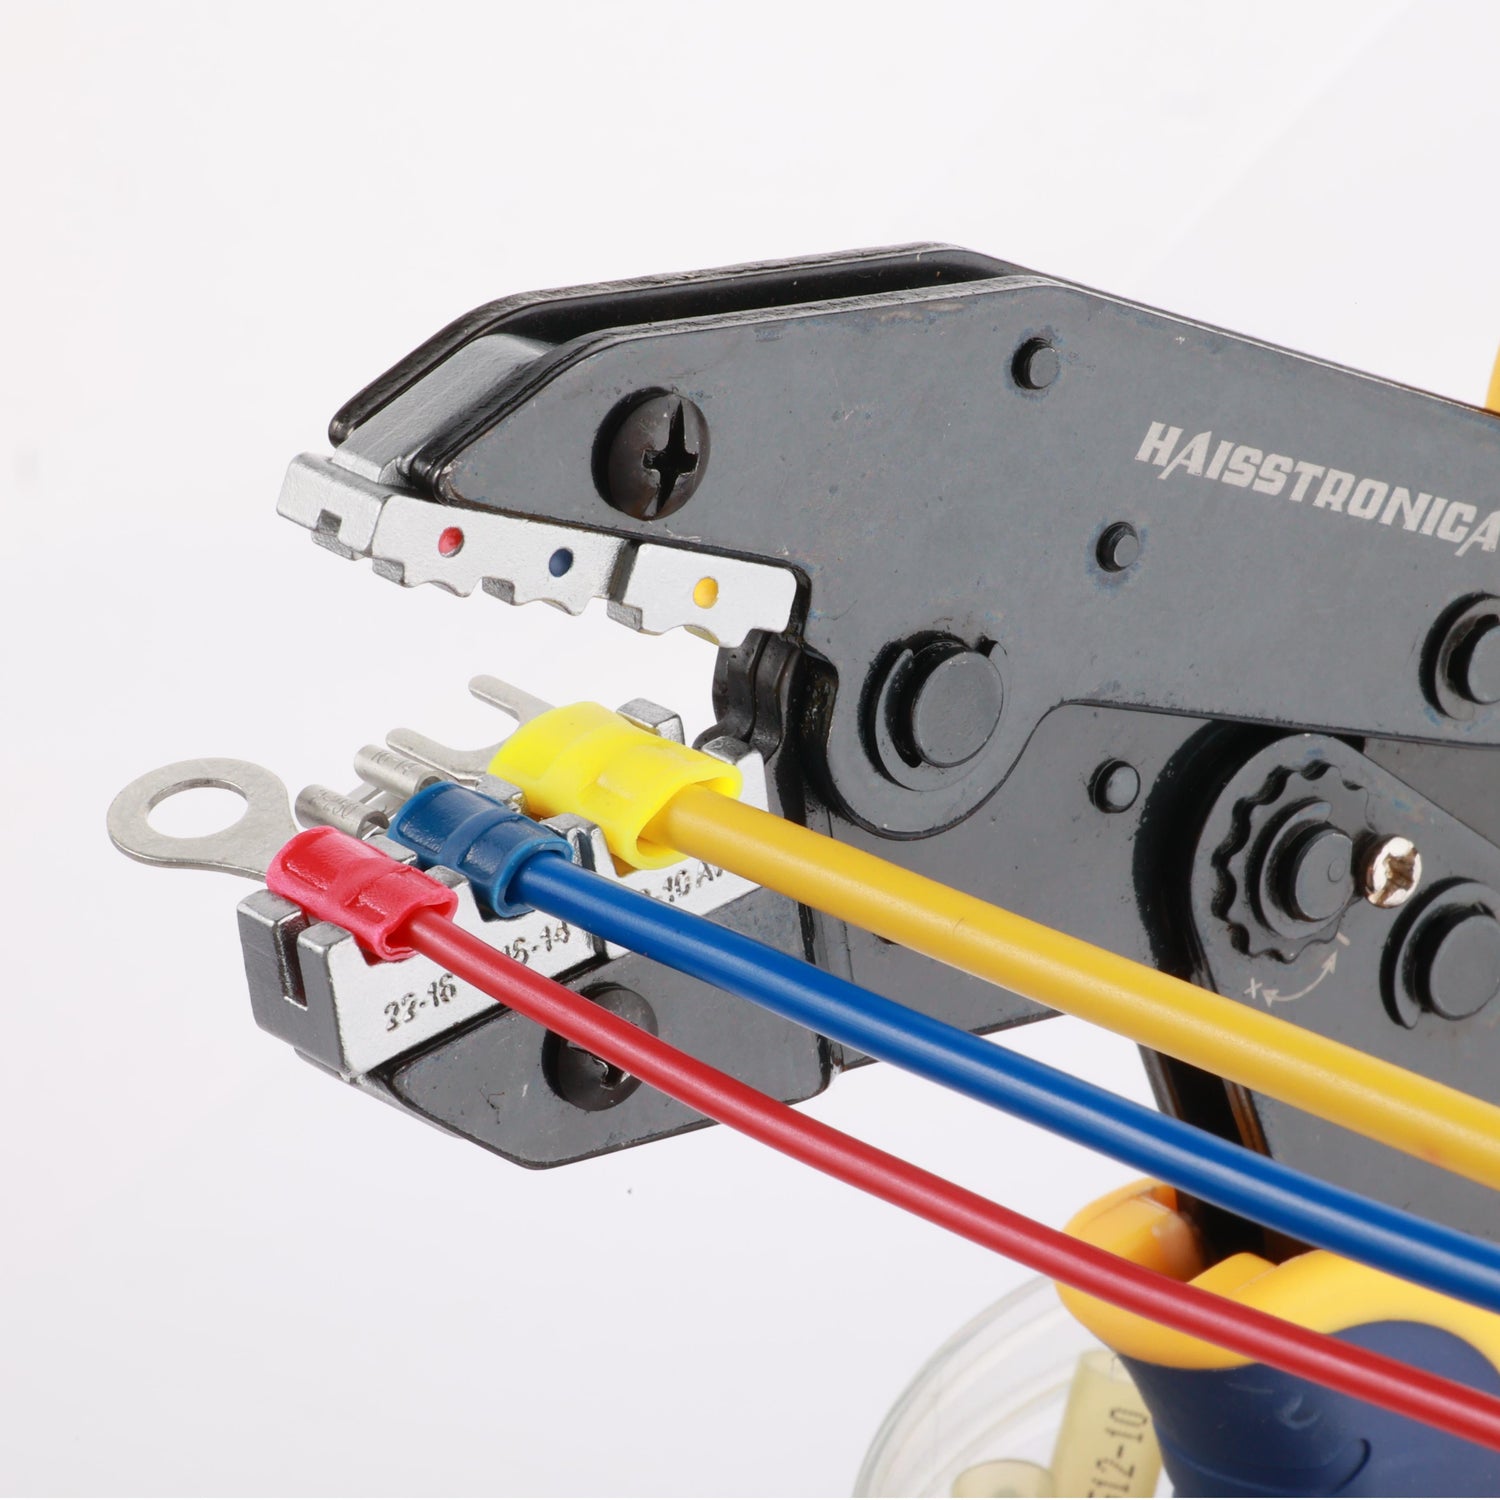
Ratchet Crimping Pliers: A quality wire crimper with a release latch can also help on the way out. For example, the Haisstronica Ratchet Wire Terminal Crimping Tool for AWG 22–10 Heat Shrink Connectors features a ratchet and an open-release lever (for partially crimping or opening the die). This tool is ANSI-compliant and ergonomic, and can help pry slightly on a crimp before it releases.
-
Cutting Tools:
-
Diagonal/Cable Cutters: For slicing through metal crimps. A 4-in-1 cable cutter (Haisstronica) can cut cables, strip wires, and even function as a nut splitter for swaged connectors.
-
Ratcheting Cable Cutter: For very thick cables or battery cable terminations. These ensure a clean, square cut through lug crimps.
-
-
Wire Strippers: Needed after removal to freshen the conductor. Haisstronica’s Self-Adjusting Wire Stripper (AWG 10–24) is handy for automating stripped lengths. Manual strippers (AWG 24–10, 10–24) also work.
-
Terminal-Pin Tools: For multi-pin housings, a terminal release kit or small picks can depress locking tangs. These de-pinning tools save the wire from damage when removing plastic-block connectors.
-
Pliers and Screwdrivers: Standard pliers (needle-nose, lineman’s) to twist or pull, and small flathead screwdrivers or picks to pry crimp tabs.
-
Heat Gun (for Heat-Shrink): If you need to soften adhesive in heat-shrink connectors for easier removal (or to reseal a new one).
Once tools are gathered, have replacement connectors ready if needed (e.g. a pack of assorted insulated terminals or ferrules). Using proper tools like Haisstronica wire strippers and crimpers ensures a clean fix when you reterminate the wire.

Common Tool Examples:
-
Haisstronica [4-in-1 Cable Cutter] or [Ratcheting Cable Cutter] for heavy cables.
-
Haisstronica Wire Ferrule Crimping Tool (AWG 23–10) for reinstalling ferrules.
-
Haisstronica Crimping Tool for Spark Plug Ignition Wires (8.5mm) when working on coil/spark-plug wires.
-
Self-adjusting or multi-hole strippers (for auto and marine wiring).
With tools and safety in place, proceed by connector type as described below.
Uncrimping Butt Splice Connectors
Insulated butt splices (the heat-shrink butt connectors) are common in automotive/marine wiring. To uncrimp:
-
Ensure Power is Off: Confirm that the circuit is de-energized.
-
Access the Connector: Cut or peel back any insulating heat-shrink if needed. (If it’s fused, carefully score it with a knife to expose the metal crimp barrel.)
-
Method 1 – Pry with a Screwdriver: Insert a small flat-blade screwdriver under the edge of the metal crimp barrel. Gently pry the barrel tabs outward on each side. As ToolsWeek notes, a flathead can be “effective for removing most crimp connectors”. Work around the circumference, prying a little at a time. Once the metal sleeve is loosened, try to wiggle and pull the two wires apart. This can work if the crimp wasn’t too tight. However, beware of nicking wire strands during prying.
-
Method 2 – Cut the Connector: If prying fails or risks wire damage, use diagonal cutters or a cable cutter to cut through the metal sleeve at one side. This frees the wires but destroys the connector. ToolsWeek calls this “effective for difficult-to-remove crimp connectors”. Cut as close to the crimp as possible to salvage wire length, then separate the two halves of the connector.
-
Remove and Inspect Wires: Once free, slide the crimp off each wire. Trim any frayed copper, and re-strip about 1/4″–3/8″ (6–10 mm) of insulation using a wire stripper. Use the correct strip length for the new connector’s barrel.
-
Decide Reuse vs. Replace: In most cases, the old butt splice should be replaced. Heat-shrink butt connectors are generally one-time use – they deform permanently when crimped. Haisstronica explicitly notes that “butt connectors create a permanent connection and should not be reused”. Instead, install a new appropriately sized butt connector (for example, red for AWG22–18, blue for AWG16–14, yellow for AWG12–10). If by chance the connector was a non-heat-shrink quick-disconnect type, it might be reusable; otherwise assume replacement.
-
Re-Crimp with Proper Tool: Place the stripped wire ends into a fresh connector and crimp using a quality crimp tool (such as a Haisstronica ratchet crimper) until you get the “click” and the sleeve fully closed. Heat-shrink connectors often include adhesive lining; apply heat after crimping to seal. Always use the correct color-coded die (or ANSI gauge marking) for a gas-tight crimp.
By following these steps, you avoid wire damage and ensure the splice is redone securely. If a screwdown set or other termination is nearby, label it so you reconnect correctly.
👉Ready to wire it right? Add the Haisstronica Ratchet Wire Terminal Crimping Tool (AWG 22–10) to your kit.

Uncrimping Ring/Spade Terminals (Lug Terminals)
Ring and spade (fork) terminal lugs attach wires to studs or screw terminals. Once crimped, their metal barrels are usually permanently closed:
-
Turn Off and Remove Fastener: Unscrew any mounting nut or screw holding the terminal lug if attached to a post. This fully frees the connector.
-
Cut Off the Connector: Since most lug terminals have a sealed barrel, the simplest way is to cut the metal lug from the wire. Using diagonal cutters or tin snips, cut through the barrel tube (just above where it’s crimped onto the wire). You may have to make two cuts or pry the cut edges with pliers to remove the lug.
-
Free the Wire: Slide the chopped pieces off the wire. If it’s a non-insulated open-barrel terminal (common in some automotive harnesses), you might be able to spread open the seam with pliers and pull the wire free, but be aware this can damage the terminal so it’s rarely recommended.
-
Strip and Prepare: Inspect the wire. If the strands were nicked or cut during removal, trim back to clean copper. Re-strip the correct length.
-
Replace the Lug (if needed): Terminals like ring/spade are one-time-use. Discard the old lug and slide on a new insulated terminal of the same type and AWG size. Crimp it securely with a proper terminal crimper. (Haisstronica offers kits of insulated ring and spade terminals.) If it was an uninsulated terminal, you can use a non-insulated replacement or an insulated one rated for the application. In automotive/marine work, insulated (waterproof) terminals are often preferred.
-
Test the Connection: Once reassembled, pull lightly on the wire to verify a solid crimp, and ensure the terminal seats correctly under its screw/bolt.
Tip: Always match connector and wire gauge – using an oversized terminal on a smaller wire (or vice versa) can weaken the crimp. Haisstronica’s connectors are color-coded (and UL-listed) for correct wire sizes, enhancing safety in harsh environments.

Uncrimping Ferrules (Bootlace Pins)
Ferrules (bootlace terminals) are crimped metal sleeves used on stranded wires for terminal blocks. To remove a crimped ferrule:
-
Safety First: Ensure the wire is not live.
-
Cut or Pinch Off: Place the wire on a vise or hold with pliers. Use diagonal cutters to slice the ferrule lengthwise (carefully so you don’t cut all the way through the wire). Alternatively, if a thin hacksaw is available, cut the ferrule open along its length. Pliers can also be used to pinch and break the ferrule’s folded seam. Once the metal is split, it can often be pried off the wire in two pieces.
-
Remove the Ferrule: Slide the opened pieces off the wire. If the ferrule was covered by insulation, the insulation will likely have been included in the cut. Trim any damaged insulation so you have clean conductor exposure.
-
Re-strip Wire: Strip fresh insulation so the conductor is ready for a new ferrule or connector. Ensure you strip the length recommended by your ferrule (usually just enough for the crimp barrel).
-
Reuse or Replace: Do not attempt to re-crimp the same ferrule. Always use a new ferrule of the correct size. Haisstronica recommends new ferrules (and provides kits with hundreds of tin-plated copper ferrules) so each crimp is fresh.
-
Reinstall: Insert the new ferrule on the stripped wire end and crimp it with a proper ferrule crimper (e.g. Haisstronica’s AWG 23–10 ferrule crimp tool). Crimp once firmly so the collar compresses. The result should match images like those in the Haisstronica instructions.
Ferrules provide corrosion resistance and a solid connection, but they must be crimped only once. After removal, always re-crimp using a ferrule crimping tool to meet DIN/UL standards and ensure a gas-tight result.

Uncrimping Multi-Pin and Open-Barrel Connectors
Modern automotive and electronic harnesses often use multi-pin plastic connectors or open-barrel terminals (like flat spade crimps inside a housing). Removal techniques vary:
-
Depinning Multi-Pin Housings: Many plug connectors (e.g. Delphi/Packard, Molex, Tyco) have metal terminals locked into a plastic housing. To extract a wire, you usually insert a pin removal tool into the back of the connector to depress a locking tang on the terminal, then gently pull the wire out. These terminal-release tools (often a set of plastic and metal picks) slide into the holes where the wire enters the housing. Depress the little catch and pull the wire. If the tools aren’t available, a thin pick or small flat screwdriver can sometimes be used, but be very careful not to break the tang or nick the wire. Videos below demonstrate common depinning steps.
-
Open-Barrel (IDC) Terminals: Some harnesses use "flag" or "blade" crimps where the wire is trapped by folding a tongue over it. These often have a release tab. Carefully lift the tab and pull the wire out. If no tab, you may have to cut and replace the crimp.
-
Spring or Butt Splice in Terminals: In some sealed connectors (like Weather Pack), the female/male pins have spring locks. Use the proper tool on each pin as needed.
Video Demo: For an example of releasing terminals, watch the walkthroughs below. They show inserting a release tool and extracting wires from typical automotive connectors:
(The first video shows how to use a terminal extractor on sealed connectors; the second demonstrates removing pins from a block connector.)
After Uncrimping: Re-Strip, Reuse or Replace
Once the old connector is off, follow these steps:
-
Inspect the Wire: Check if the copper conductor was nicked or frayed. If so, trim back to solid copper and strip a new clean length. Use a proper wire stripper (like Haisstronica’s self-adjusting stripper) to avoid nicking strands.
-
Should the Connector Be Reused? Most crimped connectors are not reusable. As noted, heat-shrink butt splices and crimp terminals create permanent joints. Even if you carefully removed one without obvious damage, it’s safer to use a new connector. The metal deformation from a crimp compromises the connector’s integrity. The Haisstronica FAQ confirms that “butt connectors… create a permanent connection and should not be reused”. Similarly, ToolsWeek emphasizes that “most crimp connectors are made for one-time use only”.
-
When Can You Reuse? Removable quick-disconnect terminals or certain push-in connectors might be reused if they weren’t deformed. For example, a slide-on male/female terminal pair (common in HVAC wiring) can sometimes be pulled apart and rejoined. Haisstronica notes that quick-connect terminals can be reused since they have disengageable tangs. If a connector is explicitly labeled “releasable” or has a plastic latch, you can reuse it sparingly. Otherwise assume replacement.
-
Re-strip the Wire: Using the right strip length is crucial. Most butt connectors require about 1/4″ of exposed conductor; ring/spade terminals usually need about 3/8″. Check the connector manufacturer’s spec. Use the wire stripper properly to remove insulation without cutting strands.
-
Install New Connector: Slide a new correct-size connector onto the wire. For example, use a new butt splice for splicing, a new ring terminal for panel mount, or a new ferrule for block terminations. Make sure the wire is fully inserted before crimping.
-
Crimp Properly: Use a proper crimping tool (crimping pliers or ratchet crimper) with the correct gauge slot. Crimp firmly once, then release the ratchet. The metal sleeve should close completely around the wire. A good crimp forms a gas-tight joint (the wire strands flow into the connector metal under compression).
-
Heat-Shrink (if applicable): For heat-shrink connectors, apply heat evenly until the tubing shrinks and the inner adhesive sets. This seals out moisture (important in automotive and marine environments).
-
Test the Connection: Tug the wire gently to ensure it’s locked. Check electrical continuity and insulation. If it’s in an exposed location (engine bay, hull, etc.), consider adding a bit of dielectric grease or additional heat shrink for protection.
-
Compliance Check: For U.S. automotive or marine wiring, use UL-listed connectors and tinned copper (to prevent corrosion). Haisstronica’s heat-shrink kits are UL-approved and commonly used in marine/auto wiring. Follow any relevant codes (e.g. ABYC for boats).
Key Takeaway: Once removed, most crimped connectors are replaced rather than reused. Re-crimping a fresh connector with the right tool ensures a reliable repair. If a connector was accidentally soldered over, it must be re-cut and re-spliced (soldered joints are even more permanent and very hard to undo).
Our Top User-friendly Picks
Crimp heat-shrink connectors fast and clean with the Haisstronica crimping tool. Whether you’re wiring or rewiring boats, cars, or home appliances, this professional crimper delivers secure, uniform terminations in a single squeeze. Precision-forged jaws apply consistent pressure to prevent splits and insulation damage, producing factory-grade results every time. Unlike generic crimpers that crush or distort connectors, the Haisstronica wire crimper creates tight, reliable seals that withstand vibration and moisture. Choose a durable, ergonomic crimping tool engineered for speed, accuracy, and repeatable performance on every connection.
👉Shop the Haisstronica ratcheting terminal crimper for AWG 22–10 heat-shrink connectors—view specs & pricing.

Tips for a Reliable Repair
-
Use the Right Crimping Tool: Crimping pliers or terminal crimpers ensure uniform crimps. Haisstronica tools, for example, have color-coded dies for proper gauge selection.
-
Match Connector to Wire: Don’t mix wire sizes or connector types. A loose fit leads to bad crimps.
-
Avoid Over-Crimping: Once the die bottoms out (you hear/feel the ratchet click), stop crimping. Over-crimping can cut strands.
-
Inspect New Crimps: Good crimps look indented into the wire insulation (where present) and have no gaps. If available, perform a “pull test” by tugging the wire after crimping.
-
Use Heat-Shrink Appropriately: In marine or automotive environments, heat-shrink adds strain relief and water protection. Use connectors with adhesive-lined tubing if salt spray or moisture is a concern.
-
Label and Protect: If working on complex wiring, label each wire. After re-crimping, tape or loom the wires to prevent vibration wear.
-
Understand Connector Ratings: Some terminals are only for specific applications (e.g. high-vibration engine mounts). Use the right type for the job.
When to Get Professional Help
Uncrimping is generally straightforward for DIYers and electricians, but if you encounter:
-
Wires in tight or dangerous locations (high voltage, critical safety systems)
-
Broken connector housings that require soldering/harness replacement
-
Specialized sealed or circuit-board connectors without obvious release tabs
…then consider consulting a professional technician. Always follow NEC (National Electrical Code) or vehicle/marine wiring standards for safety.

Conclusion
Uncrimping wires means carefully undoing a permanent crimp without damaging the conductor, then re-crimping or replacing the connector. By following power-off precautions, using the right tools (see Haisstronica crimping and stripping tools), and taking care with each connector type, you can salvage wires and make secure repairs. Remember that most crimp connectors are one-time-use, so plan to install new connectors. Proper technique and tools will make your repairs as strong as – or stronger than – the original.
Finish strong: choose the Haisstronica Ratchet Wire Terminal Crimping Tool (AWG 22–10) for reliable, waterproof crimps.
👏 You may be interested in the following:
- Are crimps stronger than knots?
- Budget vs. Premium Crimping Tools: A Real‑World Performance Shootout
- Cable crimping tool. Everything You Need to Know
Need a New Crimping Tool?
Shop Wire Crimping Tools →