Why Standards Say “No” —
Across high‑reliability industries, the consensus is clear: don’t solder‑tin the wire end before a crimp. The workmanship goal of a crimp is a gas‑tight, cold‑welded metal‑to‑metal interface between the terminal barrel and untinned copper strands. That interface depends on elastic recovery of the terminal and strand deformation—not on solder. NASA’s workmanship standard for cable and harness assemblies details crimping practices that produce a gas‑tight joint and distinguishes soldered vs. crimped connections for reliability in vibration and thermal cycling.
Recommended next step: Do not tin stranded wire before crimping unless the connector manufacturer specifically allows it. For reliable crimps, match the terminal to the wire gauge and use the correct wire crimping tool. For sealed repairs, choose heat shrink connectors, butt connectors, or solder seal wire connectors based on whether you need a crimped or soldered splice.
Training providers aligned with IPC/WHMA‑A‑620 (the most widely adopted acceptability standard for cable and harness assemblies) teach explicitly that tinning conductors prior to crimping is not acceptable, because it degrades pull strength and long‑term reliability. In parallel, connector manufacturers’ handbooks (e.g., Molex) emphasize that a proper crimp forms a gas‑tight joint with the correct barrel geometry and wire class—not with solder at the interface. Standards covering solderless crimped connections (e.g., IEC 60352‑2) frame the acceptance criteria for a compliant, gas‑tight crimp.
Bottom line: Standards and OEM guidance converge—use the right terminal, the right die, and an untinned conductor to achieve a validated, repeatable crimp.
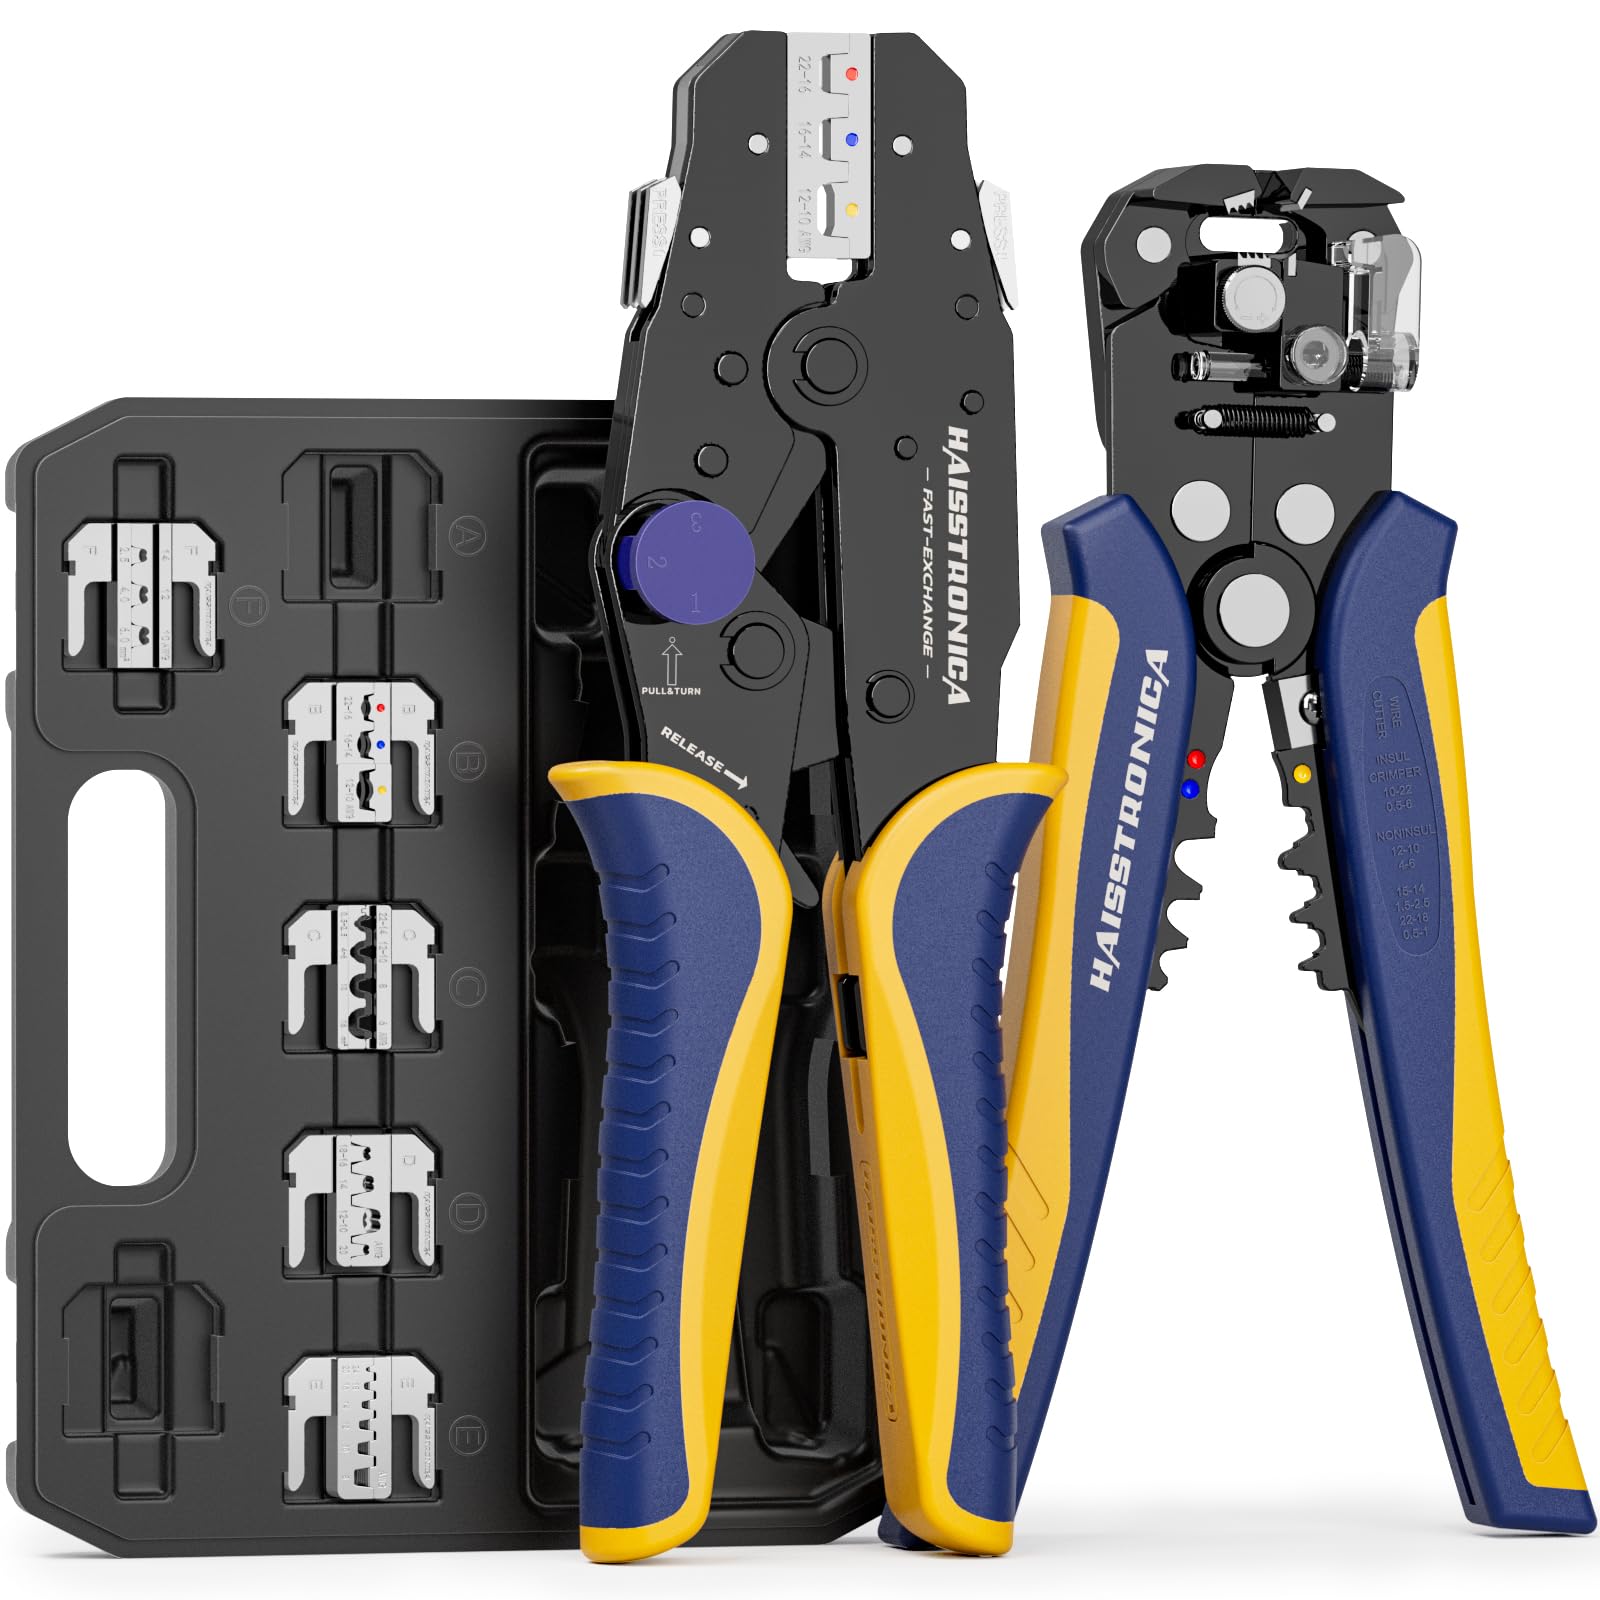
Quick, standards‑aligned upgrade: Use a ratcheting wire crimping tool that won’t release until the full compression profile is met. The Haisstronica ratchet wire terminal crimping tool (AWG 22–10) is tuned for heat‑shrink and nylon terminals and gives beginners pro‑grade consistency. Shop Haisstronica →

Failure Physics —
Why does pre‑tinning fail mechanically? Solder (Sn or SnPb alloys) is soft and subject to creep. Under the sustained compressive load of a terminal barrel, solder cold‑flows over time. That flow reduces contact stress between strands and barrel, eroding the gas‑tight interface. The result is micro‑fretting and oxidation that increase contact resistance, especially with vibration and thermal cycling typical of automotive, marine, and industrial panels. Authoritative crimp handbooks explain that a correct crimp relies on metal‑to‑metal elastic recovery of the terminal and copper—not on a solder layer that can plastically deform.
Why does pre‑tinning fail electrically? As contact stress decays, oxygen diffuses into the interface. You lose asperity‑to‑asperity contact, and milli‑ohms turn into tenths of an ohm. That produces heat (I²R), which accelerates creep further—a feedback loop. In damp or salt‑laden air, any dissimilar‑metal interfaces (e.g., tin‑rich solder against plated brass) can promote galvanic effects. NASA’s workmanship documentation ties reliable crimps to validated conductor classes, proper pull‑out strength, and gas‑tightness—conditions undermined by solder creep at the interface.
Other risk multipliers:
-
Heat (engine bays, enclosures): speeds creep and stress relaxation.
-
Vibration (vehicles, boats): promotes fretting once stress decays.
-
Over‑crimping (wrong die): shears strands; under‑crimping leaves voids. (Connector makers provide die‑match tables and quality checks in their handbooks.)
Do this instead: Strip to the specified length, insert bare stranded copper (no solder), crimp with the correct die profile (insulated vs non‑insulated), then seal with adhesive‑lined heat‑shrink or use heat‑shrink crimp terminals for strain relief and environmental protection.
Tooling that makes it easy: A calibrated, ratcheting with matched dies ensures full compression every cycle. Pair the Haisstronica ratcheting electrical crimper tool with quality terminals or heat‑shrink crimp connectors electrical and you’ll meet the intent of IPC/WHMA‑A‑620 in real‑world conditions. See the tool →

Common Myths vs Facts —
Myth 1: “Tinning makes the connection stronger.”
Fact: Short‑term pull tests can be misleading. With solder present, initial pull may look fine, but long‑term creep reduces clamping force, increasing resistance and heat. Standards‑based crimp joints are validated for retention and resistance without solder.
Myth 2: “Tinning helps the wire slide into the barrel.”
Fact: If insertion is hard, the strip length, wire class, or terminal size is wrong. Correct the sizing instead. Pre‑tinning changes strand diameter and stiffness, defeating the die’s intended compression.
Myth 3: “It’s low‑voltage, so it doesn’t matter.”
Fact: Low voltage does not mean low power. In automotive and marine 12–24 V systems, current is high, and a few hundred milliohms of added resistance can cause heat, voltage drop, and intermittent faults.
Myth 4: “I always solder after crimping for extra security.”
Fact: Wick solder away from the crimp zone is sometimes used in special cases, but it’s generally discouraged for field wiring because solder wicking stiffens the conductor, moving the flex point to the wire exit and increasing strand breakage risk. Correct approach: use adhesive‑lined heat‑shrink or sealed heat‑shrink crimp terminals for environmental sealing and strain relief; keep the crimp itself solder‑free per best practice.
Myth 5: “My pre‑tinned leads are fine—manufacturers sell tinned wire.”
Fact: There’s a critical difference between factory‑plated tinned copper strands (acceptable with many terminals) and hand‑tinning with solder at the strip end (not acceptable for a crimp). The former is a thin, uniform electroplate; the latter forms a soft solder mass that creeps. Connector handbooks discuss acceptable conductor plating classes; the crimping terminal connectors and crimp tool dies are designed around those classes, not around soldered ends.
Upgrade your workflow: Use a matched wire crimping tool, size‑correct terminals, and heat‑shrink crimp connectors instead of solder‑tinning. The Haisstronica ratchet crimping tool (AWG 22–10) is a practical, standards‑aligned path for DIYers and pros. Buy now →

What to do instead (the quick checklist)
-
Select the right terminal (insulated vs non‑insulated; ring, spade, butt splice).
-
Match wire gauge & class (most automotive/marine is Class K/H fine‑strand).
-
Strip to spec (no nicked strands; length matches barrel depth).
-
No flux, no solder on the stripped end—insert bare strands only.
-
Use a ratcheting crimper with the correct crimping tool dies for the terminal type.
-
Pull test (gentle) and inspect for full bellmouth/indent.
-
Seal & relieve strain using adhesive‑lined heat‑shrink or heat‑shrink crimp terminals.
One‑and‑done kit: A ratcheting tool plus heat‑shrink terminals covers most field repairs and upgrades. Start with the Haisstronica wire crimper tool for AWG 22–10. See price & specs →

Conclusion
If your goal is a low‑resistance, gas‑tight, vibration‑tolerant connection, pre‑tinning with solder before a crimp works against you. The standards position is consistent: rely on a validated compression profile between the terminal barrel and untinned copper strands, then seal and support the joint. Follow the strip‑to‑depth, tool‑and‑die match, and inspection steps above and your crimps will pass both the meter and the road‑test.
Ready to do it right? Move to a calibrated, ratcheting wire crimping tool and matching terminals. The Haisstronica ratchet crimping tool (AWG 22–10) makes professional results repeatable for DIYers and technicians alike. Add to cart →