Plan, Measure, and Cut (wiring crimp prep)
Before you touch a spark plug crimping tool, plan the run for each lead. Route mock‑ups with a length of cord from coil/coil‑pack to plug, keeping at least 1–1½ in (25–38 mm) service loop so the wire isn’t in tension at full engine rock. Avoid sharp edges, hot spots (headers), and moving parts. Mark final lengths at the terminal shoulder—not the boot mouth—so finished leads seat fully.
Choose wire diameter and core type. Most performance sets are 8.0–8.5 mm spiral‑wound suppression cable (typical resistance ~40–50 Ω/ft for MSD Super Conductor; some sets like PerTronix Flamethrower list ~500 Ω/ft). Solid‑core copper is not recommended with electronic ignition due to EMI. Match your terminals to cable OD and core style.
Prep your ends: cut square with a sharp cable cutter so the jacket doesn’t flare. Slide the boot onto the wire before you crimp. Strip per the terminal’s instruction—commonly about 5/8 in (15–16 mm) of outer jacket for spark‑plug ends—so the conductor can fold back under the tangs. MSD’s published instructions show the fold‑back method to increase contact area and mechanical retention.

Boots, Angles & Fitment (wiring crimp routing & clearance)
Boot choices affect routing, strain relief, and heat exposure. Common angles are straight (180°), 135°, and 90°. Tight header clearance usually needs 135° or 90° plug boots; coil‑pack towers may prefer straight or 90°. High‑temp silicone boots (200–250 °C) are the norm on performance leads. Taylor and MSD both offer 90° and 135° boot/terminal kits for 7–9 mm cable—use their angle to keep the wire off hot primaries.
Add a tiny smear of dielectric grease inside each boot for easier installation and better moisture exclusion; use just enough to avoid hydraulic lock in the boot. Permatex’s data sheet confirms its dielectric grease is non‑conductive and intended for spark plug boots.
Mind the two different terminals you’ll crimp per lead: a spark‑plug terminal (barrel that grips the folded‑back conductor) and a distributor/coil‑pack terminal (HEI or female tower). Use the die profile meant for spark‑plug barrels—many ratcheting tools have a marked cavity for “spark” or a double‑indent die. Taylor’s and MSD’s instructions show the barrel orientation and fold‑back detail clearly.

Testing & Validation (wiring crimp quality check)
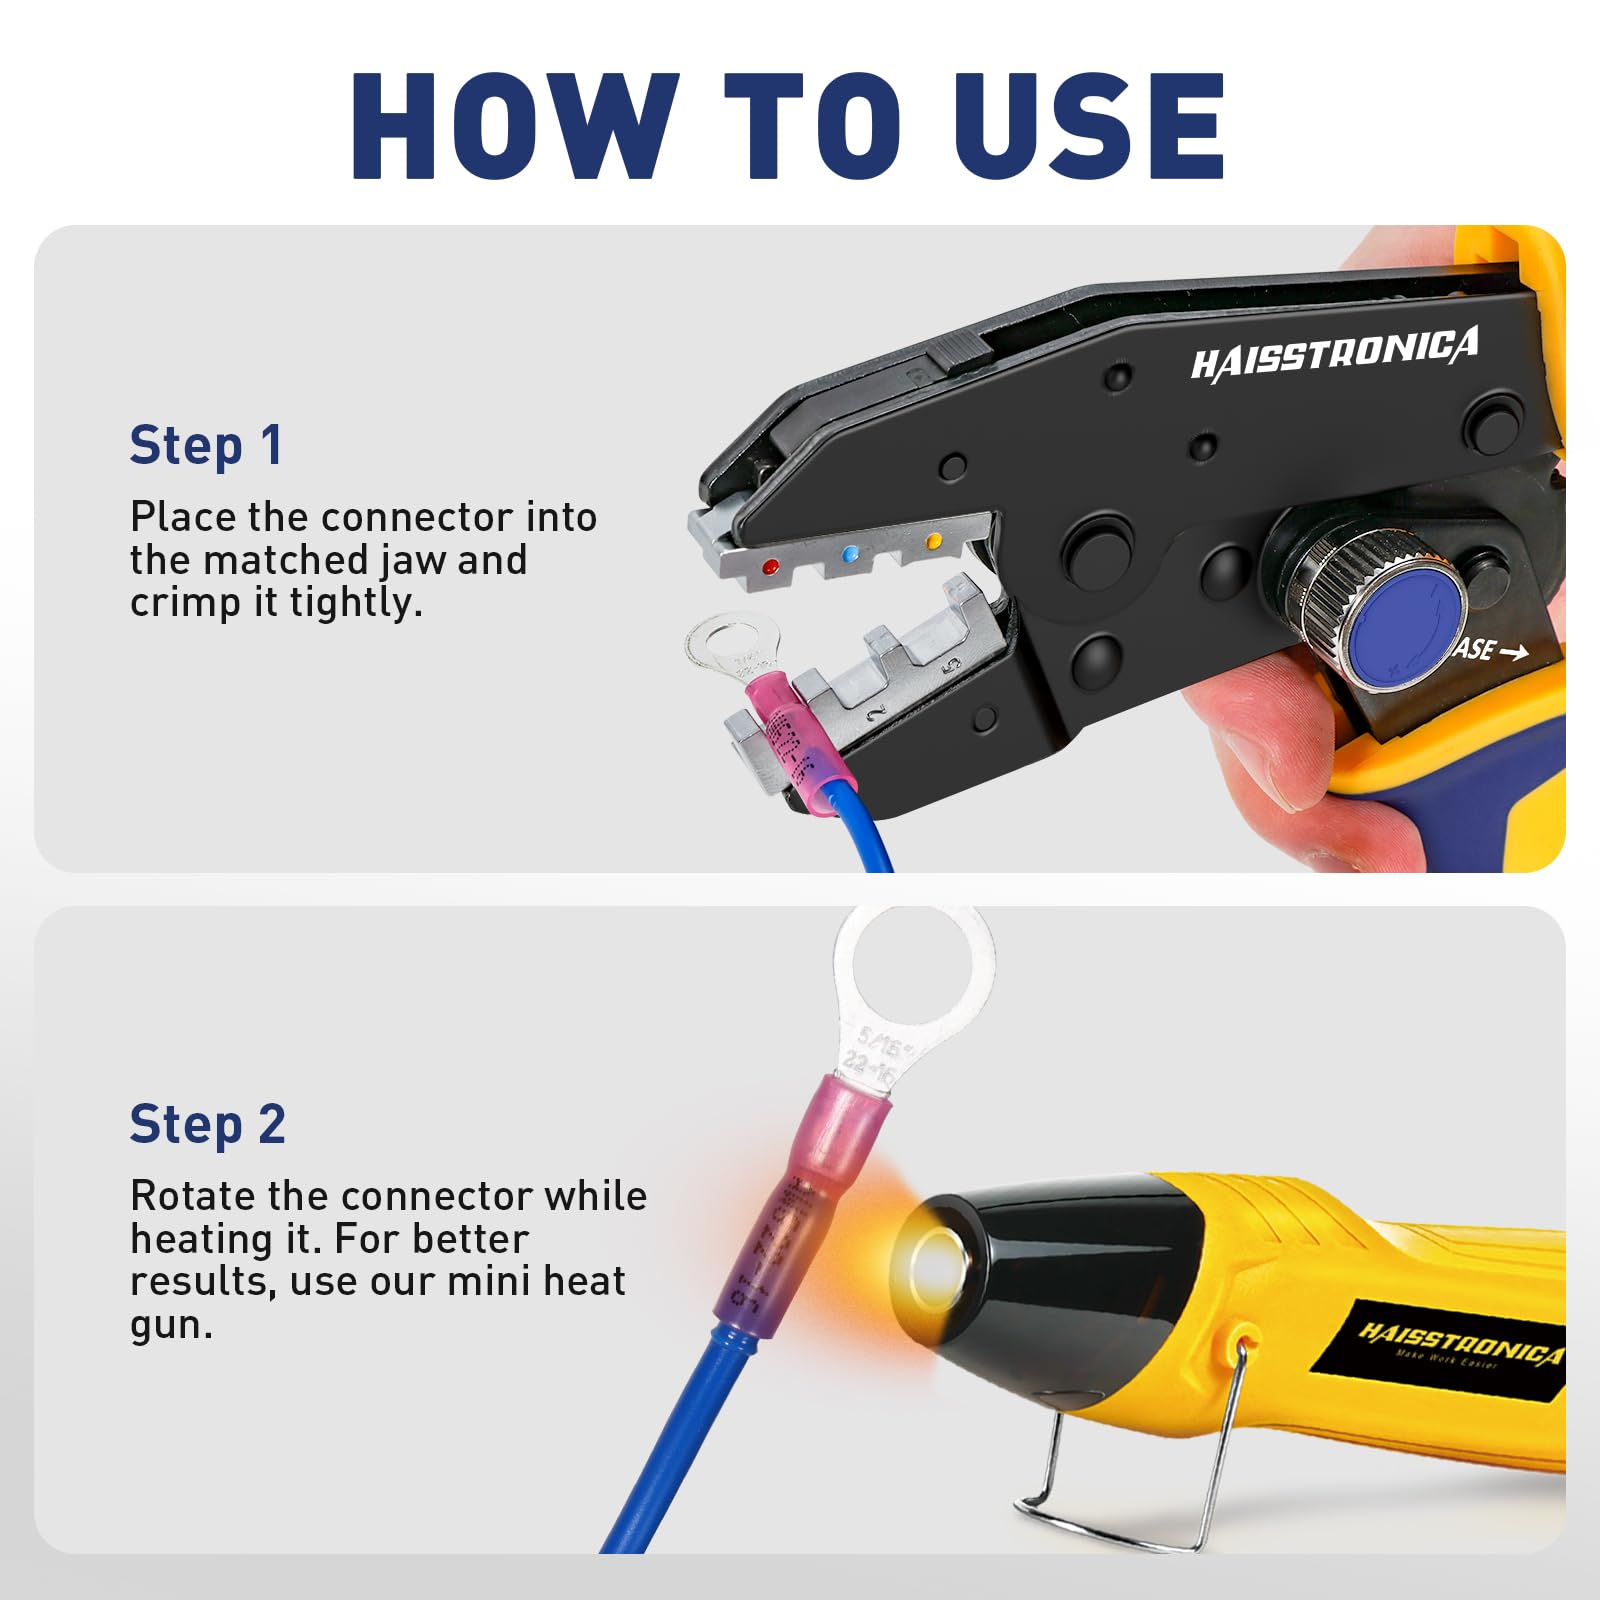
Crimp sequence (spark‑plug end):
1) Strip jacket (~5/8 in / 15–16 mm). 2) Fold the spiral conductor back over the jacket. 3) Insert terminal so the conductor sits under the conductor wings and the jacket sits in the insulation wings. 4) Place in the proper die and cycle the ratcheting handle fully—most dies form a double crimp (one on conductor, one on insulation). 5) Perform a tug test (pull straight, 10–15 lb). MSD/Holley show this fold‑back/dual‑crimp method in their installation sheet.
Boot install & orientation: Push the boot over the terminal until the internal shoulder seats; rotate the boot so the lead exits in the planned direction (90°/135°/straight). A dab of dielectric grease helps. Taylor’s instructions call out boot seating before final routing.
Continuity and resistance: Use a multimeter end‑to‑end. You’re checking for continuity and comparing resistance to the wire’s spec. Spiral‑wound wires vary by brand; MSD’s Super Conductor is about 40–50 Ω/ft, while some suppression sets are in the few‑hundred Ω/ft range. Measure length × spec to get an expected number; large deviations suggest a poor wiring crimp or damaged core.
Fitment & heat management: Snap each boot onto the plug or coil/pack until you feel the terminal click. Route with separators or tube clamps / retainers to keep leads from touching headers or each other (to prevent cross‑fire). If you run close to heat, add sleeves or shields. Holley/MSD’s guides show routing and separation examples.
Diagnostic tip: If a boot won’t click onto the plug, your insulation wings may be over‑crimped and blocking the terminal mouth. Re‑terminate with the correct die station on your spark plug crimp tool.

Common pitfalls (and quick fixes)
-
Nicked core during stripping → replace that end; a nick raises resistance and weakens the crimp. Fix: Use a purpose‑made stripper or carefully score only the jacket.
-
Wrong die cavity → under‑ or over‑crimped barrels. Fix: Check the die markings for spark‑plug terminals versus tower/HEI terminals, then cycle the ratchet fully. Taylor/MSD sheets illustrate the correct barrel shape after crimp.
-
Boot not pre‑installed → you can’t slide it over a finished spark‑plug terminal. Fix: Always slide the boot on first.
-
High resistance reading → poor conductor contact. Fix: Re‑crimp with the fold‑back method and verify with a tug test and ohmmeter. MSD/Holley document the fold‑back technique explicitly.

Final checks (wiring crimp validation before start‑up)
-
Continuity & resistance across every new lead (log your results).
-
Boot clicks at both ends; light twist to verify.
-
Routing through retainers, away from heat and sharp edges; use separators to avoid cross‑fire.
-
Start & scan for misfire counts and EMI‑related noise on radios or sensors. If misfire appears on one cylinder only, inspect that lead’s wiring crimp and boot fit first.
Wrap‑Up
Great spark plug wires are built, not guessed. Plan the route, cut square, strip to spec, fold the conductor back, and use the correct die to create a gas‑tight wiring crimp. Validate with a tug test and ohmmeter, then keep the leads cool and neatly separated. Follow the MSD/Taylor patterns and you’ll end up with professional‑grade results at your bench.