
Know the Temperature Bands for Solder Seal Connectors
Understanding the temperature requirements of solder seal connectors is crucial to using them properly. Each connector is built with multiple components that activate at different temperature “bands” or thresholds:
-
Low-Temperature Solder Sleeve: In the center of the connector is a ring of special solder that melts at a relatively low temperature (around 138 °C / 280 °F). This solder alloy (often Sn42/Bi58, 42% tin and 58% bismuth) becomes fully liquid by about 150–160 °C (300–320 °F). This low melting point is what allows you to solder the wires with a simple heat gun or other heat source, rather than needing a soldering iron. It’s critical to reach at least this temperature in the center of the connector; otherwise, the solder will not flow and bond the wires. If the solder ring doesn’t melt fully, you’ll end up with a weak joint where the wires are only held together by the sleeve (a common failure if insufficient heat is applied). Conversely, significantly exceeding the melting point isn’t immediately harmful to the solder itself, but too much heat for too long can damage the tubing or wire insulation.
-
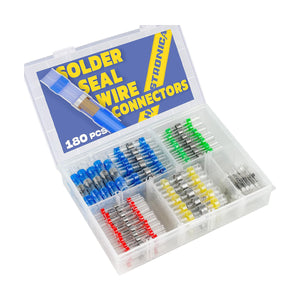
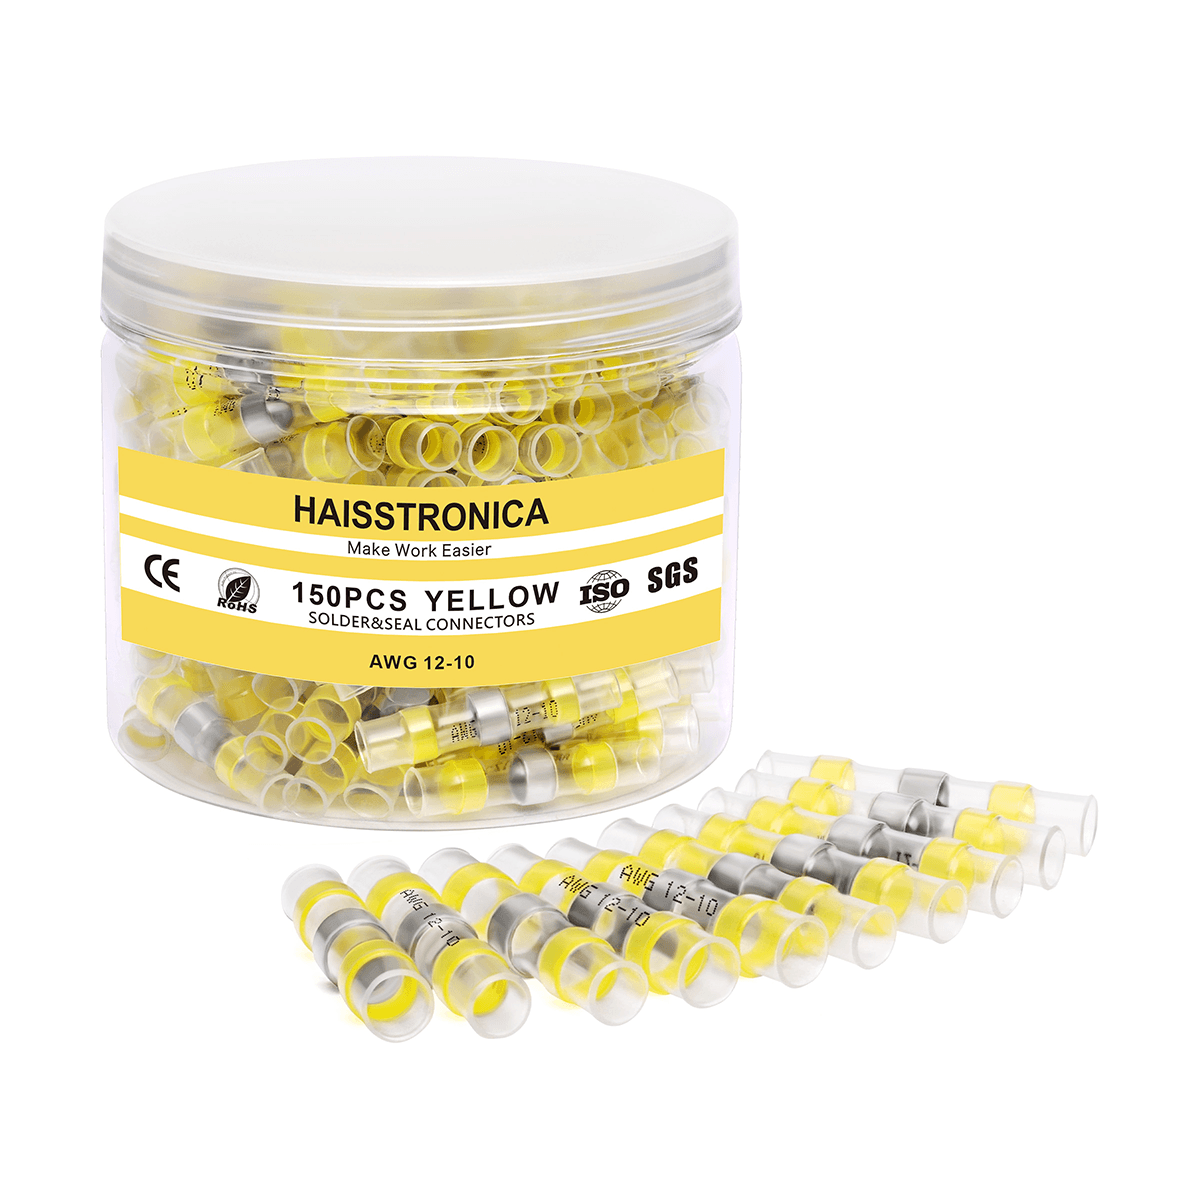
Heat Shrink Tubing & Adhesive: The outer heat-shrinkable tubing is made of dual-wall polyolefin. It begins to shrink at roughly 80 °C (176 °F) and will fully shrink by around 130–140 °C. Inside the sleeve, at each end, are rings of thermoplastic hot-melt adhesive (often visible as colored bands). These adhesive rings usually start to melt and flow around 120 °C or above, helping to seal the connection against water ingress by bonding the tubing to the wire insulation. The colored bands on solder seal connectors actually serve a dual purpose: they indicate the wire gauge size the connector is designed for (e.g. red for 22–18 AWG, blue for 16–14 AWG, white for 26–24 AWG, yellow for 12–10 AWG, etc.) and they are made of the heat-activated adhesive that will act as a wire sealant when melted. In short, the heat shrink provides insulation and strain relief (2:1 shrink ratio is common), and the melted adhesive at the ends creates a waterproof seal around the wires.
👉 Click for Haisstronica solder wire connectors—strong bonds, clean finishes.

Because of these different temperature bands, using the connectors properly means applying the right amount of heat in the right areas. You need to apply enough heat to melt the solder (~138 °C+) while also shrinking the tube and melting the adhesive, but not so much heat that the tube chars or the wire insulation burns. Quality solder seal connectors are designed to handle this heating process – for example, most are made of heat-resistant, flame-retardant tubing that can withstand brief exposure to the necessary temperatures without damage. A typical connector is rated for operating temperatures from around -40 °C up to 125 °C once installed, which covers most automotive and marine environments. (Mil-spec high-temperature solder sleeves exist that use higher melting solder and can handle up to 150–200 °C environments, but those require much hotter heat sources to install.) For the common solder & heat shrink connectors DIYers use, assume about 125 °C (257 °F) max service temperature for the finished connection – so you wouldn’t want to use them on parts of an engine or equipment that regularly exceed that heat. However, in normal automotive wiring, boat wiring, household and electronics projects, etc., they perform well across typical temperature extremes (freezing cold up to under-hood automotive heat ranges).
Key takeaway: Knowing these temperature bands means you’ll know how much heat to use. The tubing will start to shrink in the ~80–130 °C range (you’ll see it visibly tighten around the wire), and the solder ring will melt at ~138–160 °C (you’ll see it turn from a solid ring to a shiny liquid that wicks into the wire strands). If you only heat enough to shrink the tube but the solder never melts, the electrical connection will be poor or non-existent – the wires might be just loosely touching inside. On the other hand, once the solder flows, you have what is essentially a soldered wire connection inside a protective sealed sleeve. As long as you don’t burn the plastic, a properly heated connector will yield a solid low-resistance bond (the solder metallurgically joins the wires) plus a sealed, insulated exterior. In fact, when done correctly, the resulting soldered splice can be as strong as the original wire and highly resistant to corrosion and vibration. So, remember: reach that solder-melting temperature, but don’t overdo the heat after that. In the next section, we’ll discuss a technique that helps achieve this balance.
👉 Seal up with Haisstronica wire connectors solder—lasting conductivity.

Technique That Works for Heat Shrink Solder Connectors
Using solder seal connectors is straightforward, but following a proven technique will ensure you get a reliable soldered connection every time. Here’s a step-by-step method that works, combining best practices from experts and manufacturers for these solder & seal connectors:
-
Prepare and Strip the Wires: Start by cutting any damaged wire ends off, then strip about 1/4 to 1/2 inch (6–12 mm) of insulation from each wire end. The stripped length should be roughly equal to or just a bit longer than the width of the solder ring in your connector. Tip: Using a good wire stripper will help avoid nicking or weakening the copper strands. Make sure the exposed copper is clean – if the wire is old or has any corrosion, you might need to scrape it lightly or use a bit of flux to help solder flow (most soldering connectors come with rosin flux in the solder ring, but it won’t overcome heavy oxidation). Also, do not pre-tin the wires with solder from a soldering iron; you want the wires bare so the connector’s solder can do its job and meld the two conductors together (these are often called “solderless connectors” in the sense that you don’t manually solder them – but they do contain solder).
-
Select the Right Connector and Position It: Choose the correct size solder seal wire connector for your wire gauge. These connectors are color-coded by size (for example, red for small gauge like 22 AWG, blue solder connectors for medium ~16–14 AWG, yellow for larger 12–10 AWG, etc.). Slide the connector onto one of the wires before joining the conductors. Then overlap the stripped wire ends together – you can lay the strands parallel and intermix them, or give a small twist together. For best results, ensure the wires have good contact. Now center the connector so that the solder ring is directly over the exposed part of the twisted wires, and the colored adhesive bands are over the insulated parts of the wires on each side. Double-check that no stray copper strands are poking out and that the wires are nicely aligned inside the tube.
-
Apply Heat Evenly (Focus on the Solder, then Seal): The heating technique is crucial for these soldering connectors. The goal is to melt the solder and shrink the tubing roughly simultaneously. The best tool is a heat gun, as it provides a uniform, controllable heat source. If your heat gun has settings, use a high setting around 600 °F (315 °C) to start. Hold the heat gun a small distance (about 1–2 inches) away from the connector and keep it moving back and forth or in a gentle circular motion around the joint. Do not keep the gun stationary on one spot, and avoid touching the tubing with the nozzle to prevent scorching. A common technique is to begin by heating the middle of the connector (where the solder ring is) first, because the solder typically needs the highest temperature. As you do this, rotate the wire or the heat source so that all sides of the connector get heat – this ensures the solder heats evenly and flows all around. You will see the clear tubing start to shrink and tighten; then the colored adhesive bands at the ends will start to melt and bubble slightly as they form the seal. Within a matter of seconds, the solder ring should melt and turn shiny – you’ll actually see it liquify and get sucked into the wire strands (it often helps to keep the heat mainly on the solder area until this happens). Once you observe the solder flowing, you can sweep the heat gun toward the ends of the connector for a few moments to ensure the tubing there is fully shrunk and the adhesive has melted into the wire insulation. Keep an eye on the connection: a fully melted solder ring will usually collapse slightly (no longer a solid ring, but a fill around the wires), and a bit of melted adhesive may ooze out at the ends – these are signs of a successful solder and seal. If the solder still looks like an unmelted band after the tube has shrunk, you need to apply more heat (focus back on the center) – if you stop too soon, the wires might not actually be soldered together inside.
-
Cool and Inspect: After the solder has completely melted and the tubing has fully contracted, remove the heat source. Do not disturb the joint while it’s cooling. Let it sit for a minute or so to cool down and allow the solder to solidify. This is important – moving or pulling on the wires while the solder is still molten can result in a weak “cold solder” joint, which might look okay but can fail or have high resistance. Once cooled, inspect your work through the clear sleeve: you should see a shiny solder fillet that has wicked into the wire strands, and the tubing should be tightly shrunk with no signs of burning. The adhesive rings should have visibly melted and fused to the wire insulation (often you can see a slight bead of glue at the edges, indicating a waterproof seal). Give the connected wires a gentle tug to verify the mechanical strength – a properly made soldered wire connector will hold firm, and typically the wire will break elsewhere before the soldered splice ever does. The finished connection will be strong, electrically conductive, and protected from the elements.
👉 Choose a Haisstronica butt connector with solder for watertight reliability.

By following this technique, you ensure that the solder fully wets the wires (creating a true metallurgical bond) and that the heat shrink and adhesive do their job in sealing the joint. It addresses the common pitfalls people sometimes face, such as not heating enough (resulting in only a crimped-looking connection without actual solder bonding) or overheating (scorching the tubing). In fact, one common complaint about cheap solder seal connectors is that it’s “easy to overheat the shrink tube before melting the solder”. Using the method above – focusing heat on the solder first and moving the heat continuously – helps avoid that issue. And using a quality connector also helps (good connectors have tubing material that withstands the needed heat without splitting). If you ever find that the solder isn’t melting but the tube is already fully shrunk, it means your heat source is not hot enough or you’re too far away. In that case, increase the temperature or move the heat gun a bit closer, and concentrate on the solder ring until it flows. Remember that even heating is key: some professionals use a heat gun with a reflector attachment that wraps heat around the connector for this very reason, but manually rotating the wire achieves a similar result for DIYers.
Lastly, while a heat gun is the ideal tool (as we’ll discuss next), in a pinch you can use other heat sources with caution. For example, a butane micro-torch or even a lighter can work on small connectors, but you must keep the flame moving and not actually touch the sleeve (use the edge of the flame, not the inner blue part, and continually sweep it under the connector). This carries a higher risk of burning the connector, so only do it if you have no other option – and never use an open flame near flammable surroundings. A standard hair dryer will not work for solder seal connectors, as it cannot reach a high enough temperature to melt the solder. (Typical hair dryers top out around 60–70 °C, which might shrink the tube slightly but won’t melt the solder ring at all.) If you don’t have a heat gun and must use a lighter, use a soft flame type and be extremely careful. In all cases, the technique remains the same: evenly heat until you see solder melt and adhesive seal, then stop and let it cool. Follow this approach, and you’ll get a solid, sealed splice with these heat shrink solder connectors that is as neat as it is effective.
👉 Upgrade to Haisstronica solder on wire connectors for pro-grade results.

Tool & Kit Recommendations for Soldering Connectors
One big advantage of solder seal connectors is that you don’t need a full soldering setup or crimping tool – but having the right tools will make the process much easier and ensure a good result. Here are the recommended tools and some kit suggestions for using these solder and seal connectors:
-
Heat Gun (Primary Tool): A quality heat gun is the preferred tool for installing solder seal connectors. Look for an electric heat gun with at least two settings (high/low) or variable temperature control, and a power of ~1000 watts or more (this ensures it can output the needed heat). Many basic heat guns have a high setting of around 600 °F (315 °C), which is usually sufficient to melt the low-temp solder quickly. In fact, experts often recommend using the high setting – around 600–700 °F – to get the solder to flow in a few seconds, rather than using a lower temperature for a longer time. A higher heat for a shorter duration tends to be better, because prolonged heating at lower temp can cause the tubing to overheat or split before the solder melts. If your heat gun is adjustable, a range up to about 800 °F (427 °C) gives you flexibility; in practice most users find 600–800 °F works well. (For instance, a Popular Mechanics review noted that a 1200W heat gun reaching 750–1000 °F is ideal for these connectors.) Tip: If available, use a reflector nozzle or a diffuser on the heat gun. Some heat guns come with a spoon-shaped reflector attachment that curves the hot air around the wire – this can heat the connector more evenly and quickly. It’s not mandatory, but it helps. Always remember to keep the heat gun moving and not too close to avoid burning the tubing. With a proper heat gun, you’ll find that these solder heat shrink connectors install in seconds and yield a nicely soldered connection.
-
Alternative Heat Sources: If a heat gun is not available, a small butane torch (micro torch) can be used. There are pocket torches designed for heat shrink tubing that have lower intensity flames or broad flame tips – those can work for solder seal connectors as well. Use the torch on a low setting and keep it a couple of inches away, moving constantly. Another option some DIYers use is the tip of a soldering iron – in a pinch, you could heat the solder ring by touching a hot soldering iron to it to get it melting, while the barrel of the iron radiates some heat to shrink the tube. This is a bit clumsy and not how the product is intended, but it can work for bench setups. Important: Do not use a flame like a cigarette lighter unless you have to – open flames produce very high temperatures and no air flow, meaning you can scorch the connector easily. If a lighter must be used, use the largest flame setting gently and shield the wire from direct flame contact. Always have good ventilation and safety measures (no flammables around, wear eye protection) when using any open flame.
-
Wire Stripper/Cutter: A reliable wire stripping tool is essential for any wiring job. When using solder seal connectors (often also called solder splice connectors), you want a clean strip of the insulation without cutting into the copper strands. Tools that have precise gauge notches or automatic stripping action can make this faster and prevent accidentally shortening the wire or leaving frayed strands. Also keep a wire cutter or snips handy to trim off any damaged ends before you start. Proper preparation of the wire leads to a better soldered connection.
-
Holding Tools (Optional): While not absolutely required, you might find it handy to have a way to hold the wires steady while heating. The connector and wires will get hot, so you don’t want to hold them with bare fingers. You can use a pair of heat-resistant pliers, clamps, or even a third-hand tool to secure the wires as you apply heat. This is especially useful for small gauge wires or awkward locations. Heat-resistant gloves can also be used if you need to support the wire with your hand without getting burned by rising heat. Ensuring the wires don’t move during heating and cooling will help avoid any chance of a disturbed joint.
-
Quality Connector Kits: Not all solder seal wire connectors are created equal. As we’ve hinted, using a high-quality connector kit can make a big difference. Reputable brands use better materials – for example, tubing that won’t easily scorch or split, and solder rings with the right amount of solder and built-in flux to ensure a solid bond. Haisstronica, the brand behind this guide, is known for producing premium solder seal connectors (marine-grade dual-wall tubing, tinned copper solder rings with ample rosin flux, etc.). Many DIYers report that quality connectors like these result in strong joins where the solder holds tight and the connection is truly waterproof. In contrast, some off-brand cheap connectors have been found to contain too little solder or poor flux, resulting in weak bonds where the wire can simply pull out of the joint. In fact, an independent test by Practical Sailor magazine showed that cheap no-name solder connectors “pulled apart far below standard requirements” and often only the heat shrink was holding the wires, due to poor solder wetting. Meanwhile, a high-quality connector from 3M in the same test exceeded the strength of the wire itself, making a joint as strong as a traditional crimp or solder job. The takeaway: invest in a good kit from a trusted brand. For example, the Haisstronica 180pcs Heat Shrink Solder Seal Wire Connectors Kit (AWG 26–10) is an excellent starter kit for DIYers, providing a range of sizes for different wire gauges in a convenient case (this kit covers everything from very thin 26 AWG wires up to heavy 10 AWG wires) (available here). It includes the common color-coded connectors (white, red, blue, yellow) so you’ll always have the right size on hand. By using a comprehensive wire connector solder kit like this, you can tackle automotive wiring repairs, boat wiring, or home electrical fixes with confidence that your solder seal connectors are up to the task.
-
Extras: If you’re doing a lot of wiring, you might also want to have some additional heat shrink tubing (for areas where you might want to double-cover a splice for extra protection, as some do in marine installs), and maybe a crimp tool and regular connectors as a backup. It’s worth noting that some connectors on the market combine crimp and solder – for example, crimpable butt connectors that also have a solder ring and heat shrink. Those aim to provide the “belt and suspenders” approach (mechanical crimp plus solder and seal). However, they require doing a crimp first. If you’re using pure solder seal connectors as in this guide, you don’t need a crimp tool at all. Just something to keep in mind if you encounter the hybrid style connectors.
In summary, the only must-have tool for installing solder seal connectors is a good heat source (ideally an adjustable heat gun capable of at least ~600 °F). Everything else – wire cutters/strippers, etc. – you likely already have if you’re doing wiring projects. And when it comes to the connectors themselves, use a quality kit from a known brand. It’s false economy to buy super cheap “solder seal” connectors to save a few dollars, as they might fail you when it counts. As one tester concluded, “under no circumstances buy no-name solder seal connectors” if you want a reliable connection. Instead, stick with vetted products (3M, Haisstronica, Wirefy, etc.) that have good reviews and specifications. These sealed connectors can deliver excellent results – even in demanding applications like automotive and marine wiring – as long as you pair them with the proper tools and technique we’ve discussed.
Our Top User-friendly Picks
Built for harsh environments, our solder heat shrink sleeves form rugged cable-entry seals that block salt, dust, and splash. The result: sealed solder connectors that shrug off abrasion and impact. Add a wire sealer level of protection to every connection—without extra steps.
👉 Shop Haisstronica solder connectors—trusted performance, simple heat-seal.

Conclusion: Using solder seal connectors can greatly simplify your wiring projects – you get a strong soldered wire connection and a waterproof seal all in one, without needing a soldering iron or crimp tool. As we’ve covered, the keys to success are knowing the temperature requirements (and not skimping on heat when it’s time to melt the solder), following a good technique to ensure full solder flow and proper shrinking, and equipping yourself with the right tools (primarily a decent heat gun) and quality connectors. When done properly, a solder seal connector yields a tidy, professional-looking splice that won’t pull apart, corrodes less, and keeps moisture out. DIY enthusiasts and professionals alike appreciate these connectors for their convenience – they’re especially handy for automotive or marine repairs where vibration and water exposure are factors, since the solder forms an electrically solid join and the heat shrink adds mechanical strength and sealing. Keep in mind the limitations: avoid using them in areas that get hotter than their rated temperature, and always give the joint a quick inspection and tug test after installation. With the information and tips provided here, you’re well-equipped to use solder seal wire connectors properly. Grab your heat gun, slip on a connector, and watch the solder and heat shrink do their magic – you’ll have a secure, long-lasting connection in seconds, making your wiring projects easier and more reliable than ever.
References: