
Les connecteurs bout à bout (également appelés épissures bout à bout ou connecteurs bout à bout) sont indispensables pour les projets de câblage électrique, automobile et domestique. Ces connecteurs électriques bout à bout permettent de raccorder deux fils solidement, tandis que les connecteurs bout à bout thermorétractables ajoutent une gaine adhésive pour une meilleure résistance à l'eau et à la corrosion. Cependant, même les meilleurs connecteurs peuvent tomber en panne s'ils sont mal installés. Nous abordons ci-dessous dix problèmes fréquents (notamment avec les connecteurs bout à bout à gaine thermorétractable et les épissures bout à bout thermorétractables ) et expliquons comment les résoudre. Nos conseils s'adressent aux bricoleurs, aux électriciens et aux techniciens de réparation automobile. Par exemple, l'utilisation d'un kit de haute qualité (comme le kit de connecteurs bout à bout à sertir thermorétractables de Haisstronica), doté de conducteurs en cuivre étamé et d'un code couleur clair, permet d'éviter bon nombre de ces problèmes.
👉 Améliorez votre câblage avec les connecteurs bout à bout thermorétractables à sertir électriques Haisstronica AWG 22-10 — conçus pour ce connecteur.

1. Utilisation d'un connecteur de mauvaise taille
Problème : Un connecteur et un calibre de fil inadaptés entraînent des joints desserrés ou écrasés. Un connecteur trop grand ne serre pas fermement le fil (les fils risquent de s'arracher), tandis qu'un connecteur trop petit est difficile à insérer et peut le casser. Cela entraîne un mauvais contact, une résistance élevée, voire une surchauffe. Haisstronica prévient d'ailleurs que les connecteurs sous-dimensionnés « écrasent le fil, provoquant résistance et surchauffe », tandis que les connecteurs surdimensionnés laissent des espaces propices à la corrosion.
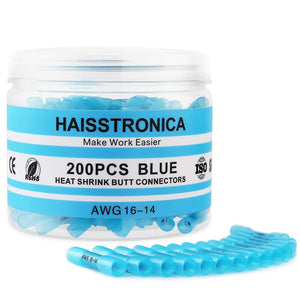
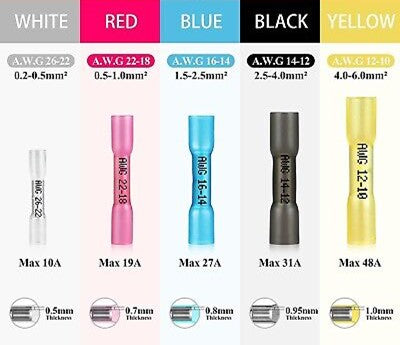
Solution : Veillez à toujours adapter le calibre du fil à la plage nominale du connecteur. La plupart des connecteurs thermorétractables sont codés par couleur (par exemple, rouge pour 22-16 AWG, bleu pour 16-14, jaune pour 12-10). Consultez l'étiquette ou les spécifications du produit. En cas de doute, mesurez le diamètre du fil dénudé à l'aide d'une jauge. Insérez ensuite le fil dénudé dans un connecteur de la bonne taille ; il doit remplir parfaitement le corps, sans aucun brin exposé ni serré. .
Conseils : Utilisez un kit de code couleur ou un tableau de calibres pour choisir le connecteur adapté. Les kits Haisstronica incluent des calibres AWG 12 à 26 pour répondre à la plupart des besoins. Évitez de forcer un fil à la mauvaise section.
-
Test : Avant de chauffer ou de sertir définitivement, tirez légèrement sur chaque fil. S'il se détache, vous aurez besoin d'un connecteur plus gros ou de sertissages plus nombreux.
2. Longueur de dénudage des fils incorrecte
Problème : Dénuder trop ou pas assez d’isolant empêche une jonction solide. Laisser trop d’isolant empêche le cuivre de pénétrer dans le fût, et le sertissage ne retient que le plastique (connexion lâche et de mauvaise qualité). Dénuder trop loin expose des fils supplémentaires à l’extérieur du connecteur, ce qui risque de provoquer des courts-circuits et de la corrosion.
Solution : Dénudez soigneusement le fil à la longueur recommandée (généralement environ 6 à 10 mm dans le connecteur). Seul le cuivre nu doit remplir le corps ; l'isolant coloré doit être en contact direct avec l'extrémité du connecteur. Une bonne pince à dénuder auto-ajustable ou l'encoche adéquate de votre outil garantit un dénudage net et uniforme. Après le dénudage, évasez légèrement les brins, glissez le fil dans le connecteur jusqu'à ce qu'il soit bien en place sur l'isolant, puis sertissez.
-
Conseils : Vérifiez la longueur de dénudage : examinez le corps du connecteur : l’isolant doit être en contact avec sa lèvre d’entrée. Utilisez une pince à dénuder de calibre AWG adapté.
-
Si votre sertisseuse dispose d'un dénudeur intégré (comme la sertisseuse de fils de Haisstronica), utilisez cette fonction.
3. Connexions desserrées ou sous-serties
Problème : Un sertissage faible (pression insuffisante) entraîne un mauvais serrage. Le fil peut glisser, se rompre sous l'effet des vibrations ou provoquer des défauts intermittents. Les connecteurs sous-sertis présentent des espaces ou une sensation de jeu, ce qui compromet la conductivité.
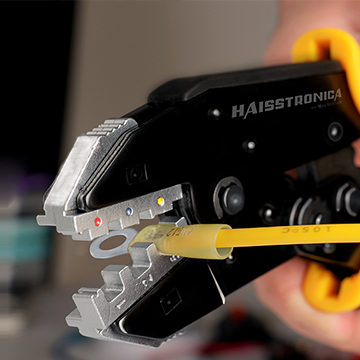
Solution : Utilisez une pince à sertir à cliquet conçue pour les cosses isolées (une pince sans cliquet ou un outil générique n'appliquera pas une pression uniforme). Positionnez le connecteur entièrement entre les mâchoires de couleur correspondante de la pince à sertir (par exemple, utilisez la matrice bleue (16–14 AWG) pour un connecteur bleu) [18†]. Serrez fermement jusqu'à ce que le cliquet se libère, ce qui garantit un sertissage complet à 360°. Si votre outil possède des empreintes préréglées, utilisez-les.
-
Étapes à suivre :
-
Insérez le connecteur dans la jauge de la pince à sertir adaptée à cette taille de fil.
-
Sertir jusqu'à ce que l'outil termine son cycle (le cliquet se libère).
-
Inspectez visuellement le sertissage : il doit entailler le fût métallique sans écraser l'isolant.
-
Testez le fil en tirant dessus : il ne doit pas se détacher.
-
👉Scellez chaque épissure avec les connecteurs bout à bout thermorétractables à sertir électriques Haisstronica AWG 22-10 — idéaux pour les connecteurs bout à bout.

4. Sertissage excessif ou endommagement du fil
Problème : Une force de sertissage excessive (ou une technique incorrecte) peut écraser les brins du fil ou déchirer l’isolant. Un connecteur trop serti peut présenter un fût pincé ou un tube aplati, fragilisant ainsi la jonction. Dans les cas les plus graves, les brins de cuivre se rompent intérieurement, provoquant une défaillance de la connexion sous l’effet de la charge ou des vibrations.
Solution : Appliquez une force ferme mais contrôlée. Utilisez une pince à sertir munie d'un cliquet ou d'une jauge pour éviter une pression excessive. Arrêtez-vous lorsque le corps du connecteur se déforme pour saisir le fil, et non lorsqu'il se gonfle ou se fend. Avec un outil approprié, vous entendrez un clic ou remarquerez que l'outil se libère. En cas de doute, entraînez-vous sur un fil de récupération : commencez par une pression modérée, puis resserrez légèrement si le fil se détache encore.
-
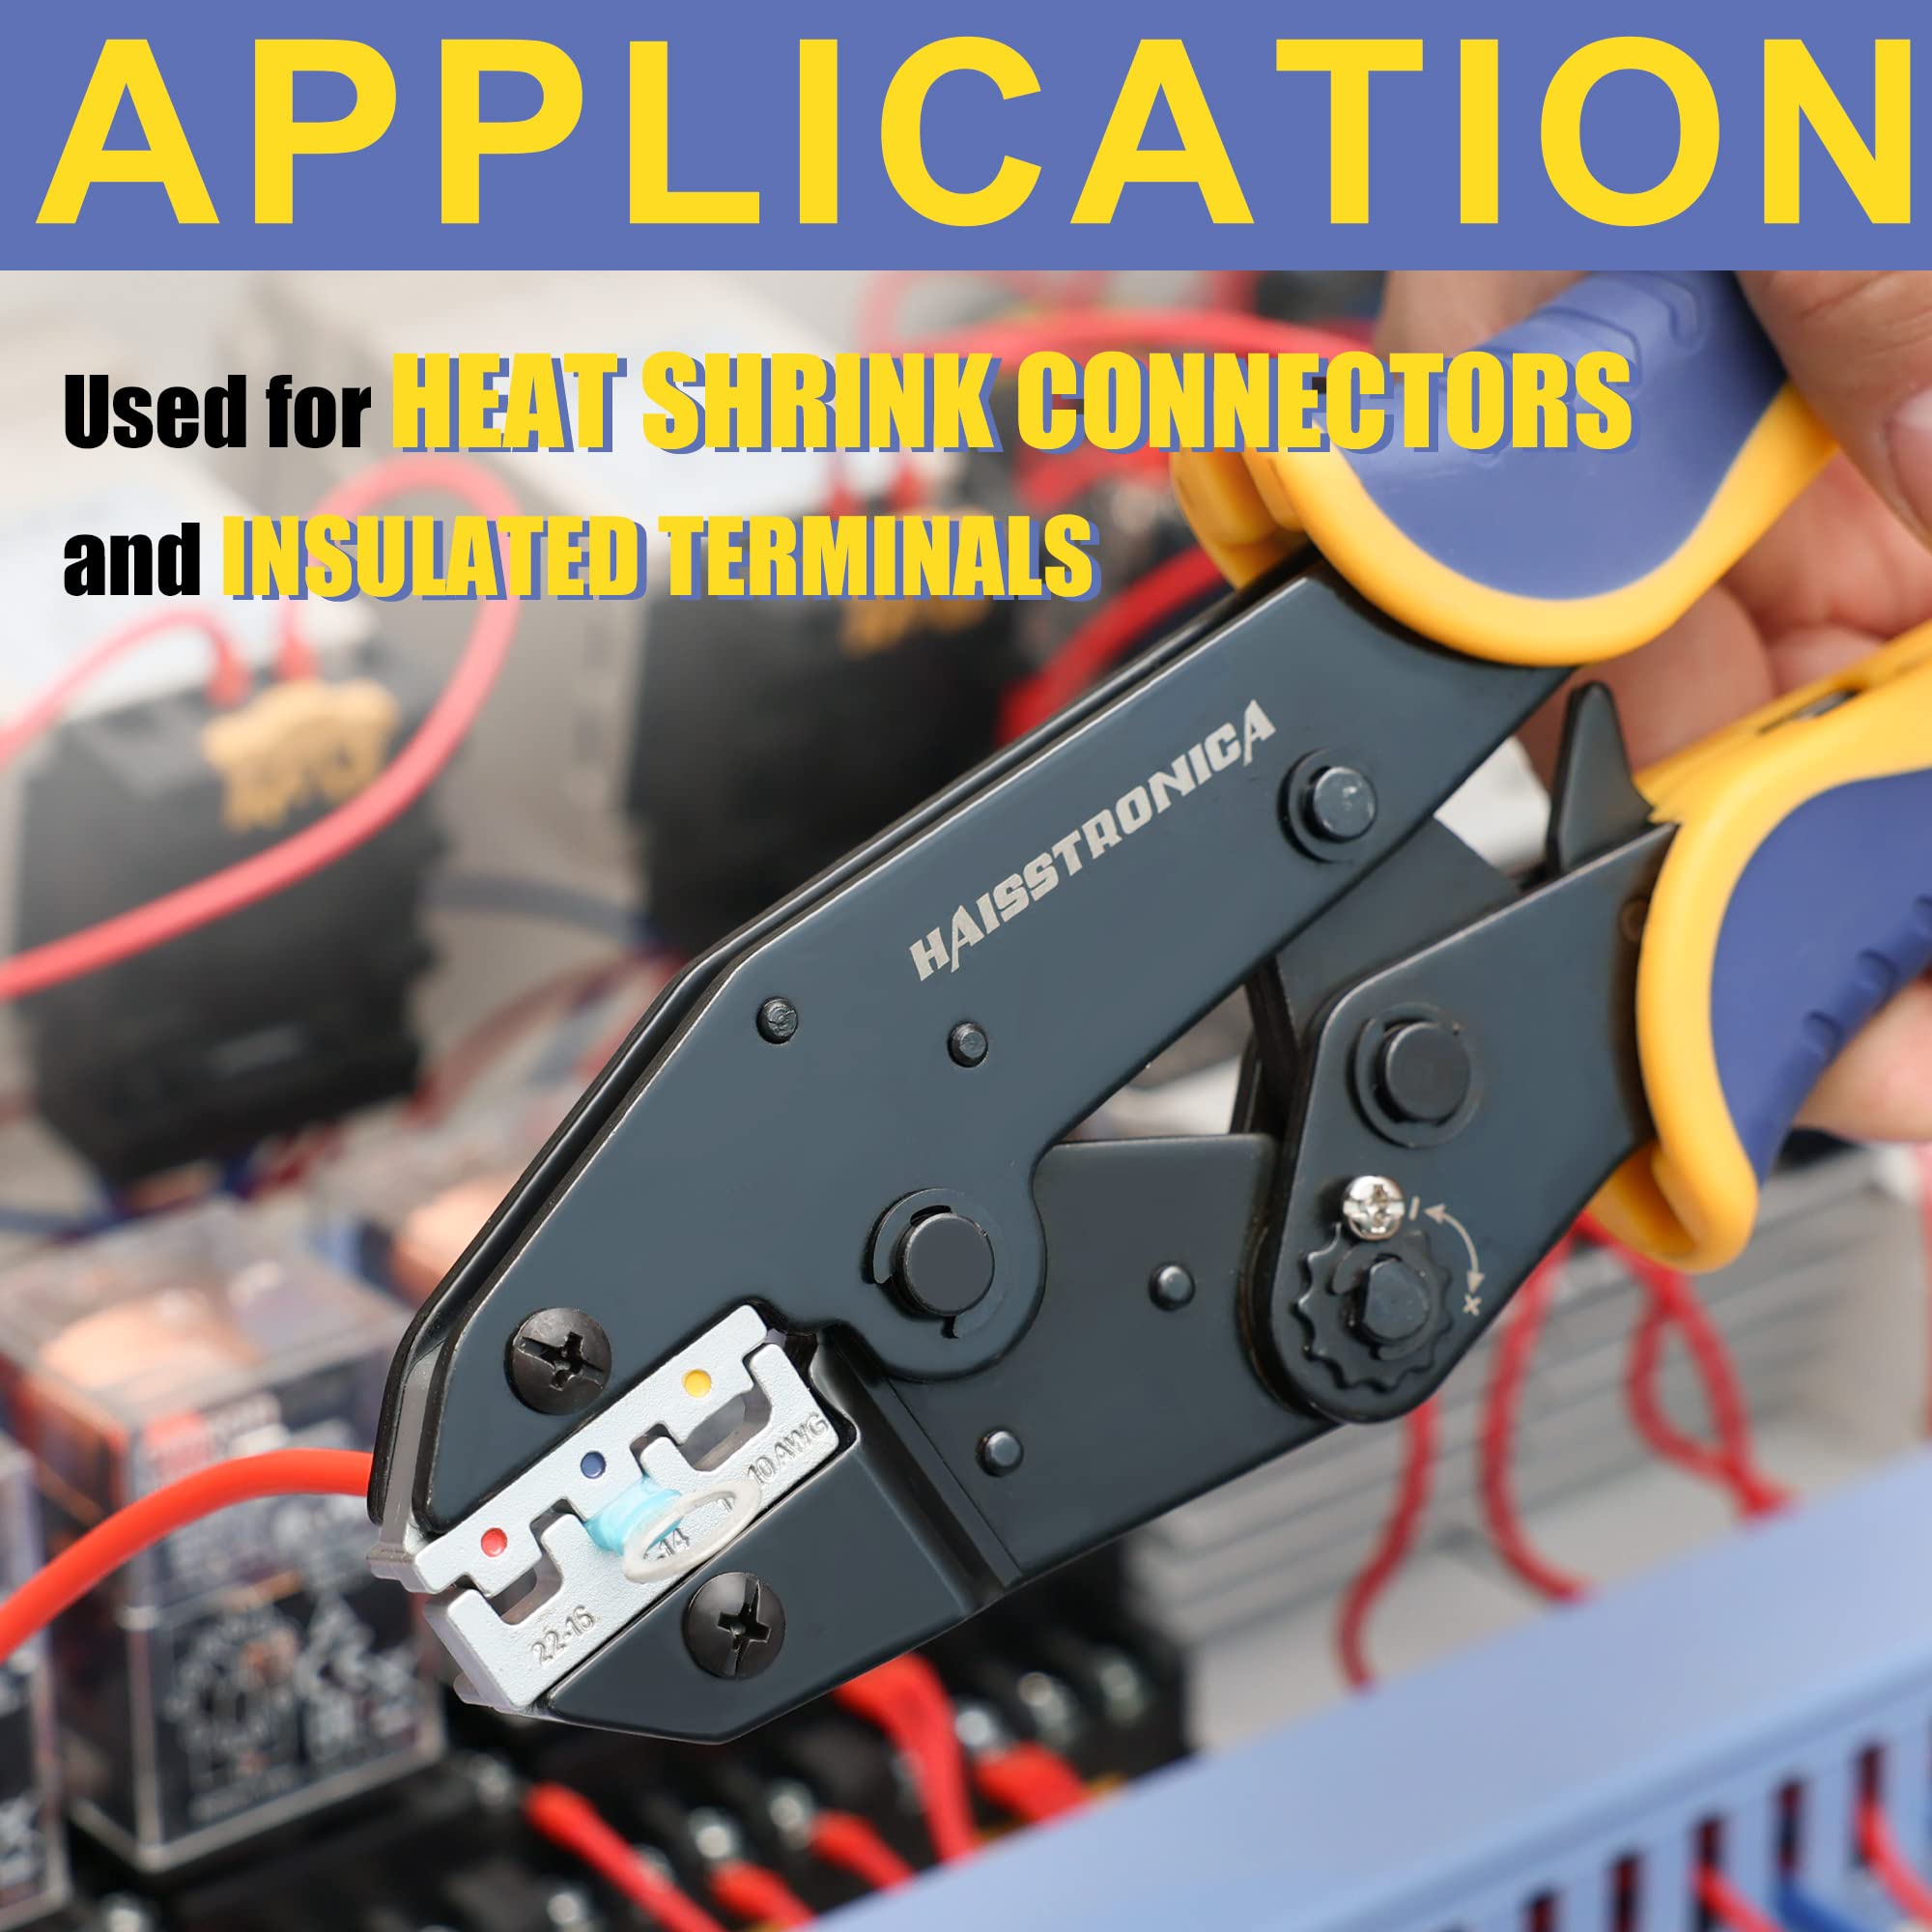
Conseil : Les outils à force de sertissage réglable sont utiles (certaines pinces à sertir permettent de régler la tension). Si votre pince à sertir est équipée de poignées colorées comme celles de Haisstronica, assurez-vous d'utiliser la fente de la bonne couleur (rouge/bleu/jaune) afin d'éviter de sursertir accidentellement un connecteur plus petit dans une matrice plus grande.
5. Utilisation d'outils incompatibles ou de mauvaise qualité
Problème : L’utilisation de pinces, de pinces-étaux ou d’un sertissage générique peut endommager une épissure. Ces outils s’alignent rarement avec le connecteur, appliquant une force inégale. Il en résulte des sertissages faibles qui se desserrent avec le temps. De même, des outils anciens ou usés peuvent glisser ou mal sertir.
Solution : Investissez dans une pince à sertir pour cosses isolées adaptée. Les pinces à cliquet (comme les pinces à cliquet de précision ) fournissent une pression constante et se desserrent automatiquement au bon endroit [19†]. Assurez-vous que votre outil est conçu pour les connecteurs isolés (il doit être équipé de matrices de couleur pour les calibres 22 à 10 AWG). Maintenez les mâchoires de l'outil propres et alignées. Rangez votre pince dans son étui pour maintenir son calibrage.
-
Lien interne : Par exemple, la pince à sertir professionnelle Haisstronica (avec mâchoires à cliquet réglables) est recommandée pour des sertissages fiables dans ces kits. Utiliser les bons outils est la clé de toute épissure de fil.
6. Mauvaise application du thermorétractable
Problème : Avec les connecteurs bout à bout thermorétractables , si le tube n'est pas complètement chauffé, la gaine adhésive ne sera pas étanche. Des espaces ou un rétrécissement incomplet pourraient apparaître. Un connecteur partiellement rétracté n'est pas étanche et peut laisser passer l'humidité ou l'air, compromettant ainsi l'épissure. De plus, une application de chaleur inégale peut laisser un côté non étanche ou brûler le tube.
Solution : Après le sertissage, utilisez un pistolet thermique (et non un briquet ou un sèche-cheveux) pour activer le film adhésif. Chauffez chaque connecteur uniformément du centre vers l'extérieur, en effectuant des rotations, jusqu'à ce que le tube se contracte fermement autour des fils [18†]. Le tube transparent deviendra légèrement opaque une fois complètement rétracté, et vous devriez voir de l'adhésif fondu au niveau des joints.
-
Liste de contrôle pour le chauffage :
-
Sertissez d'abord, puis fixez le fil pour qu'il ne glisse pas.
-
Utiliser une source de chaleur appropriée (plage de 150 à 200 °C).
-
Chauffer jusqu’à ce que le tube rétrécisse uniformément (cela ne prend que quelques secondes).
-
Laisser refroidir sans déplacer le joint.
-
👉Choisissez les connecteurs bout à bout thermorétractables à sertir électriques Haisstronica AWG 22-10 pour un connecteur bout à bout fiable.

7. Ne pas sceller ou imperméabiliser les joints extérieurs
Problème : L’infiltration d’eau est fatale à une épissure. En extérieur ou dans des environnements humides (marine, automobile, éclairage de jardin), l’utilisation d’un connecteur bout à bout non étanche favorise la corrosion et les courts-circuits. Même avec une gaine thermorétractable, l’omission de la rétracter ou l’omission d’un cordon de silicone peut laisser entrer l’eau.
Solution : Pour toute connexion extérieure ou en zone humide, utilisez toujours des connecteurs bout à bout étanches (type thermorétractable à double paroi) et chauffez à fond. Le revêtement adhésif fondu crée une étanchéité IP67 [17†]. Si une protection supplémentaire est nécessaire, ajoutez une goutte de silicone ou enveloppez l'épissure de ruban adhésif auto-soudant avant le déploiement.
-
Citation : Les connecteurs thermorétractables forment un « joint étanche, empêchant l'humidité d'atteindre les fils » , réduisant considérablement les courts-circuits et la corrosion.
-
Lien interne : Le guide de Haisstronica sur le sertissage des connecteurs étanches souligne ceci : « Une application de chaleur insuffisante laisse des espaces dans les gaines thermorétractables » , exactement le problème à éviter.
👉

8. Utilisation de connecteurs de mauvaise qualité ou incompatibles
Problème : Les connecteurs bout à bout bon marché ou génériques lésinent souvent sur la qualité du métal ou de l'adhésif. Un connecteur dont l'âme est mal plaquée ou mal mélangée peut se corroder ou se casser plus facilement. De même, l'utilisation de connecteurs en PVC (non thermorétractables) simples à l'extérieur ou sur des fils isolés en fibre de verre favorise les pannes.
Solution : Utilisez des connecteurs bout à bout électriques de haute qualité avec âme en cuivre étamé. L'étamage et le cuivre pur optimisent la conductivité et résistent à la corrosion. Vérifiez toujours que les connecteurs sont adaptés à l'environnement (par exemple, « étanches » ou « qualité marine »).
-
Conseil : Évitez de réutiliser les connecteurs. Une fois sertis et étirés, ils ne peuvent plus se refermer correctement. Jetez toujours tout connecteur après un sertissage raté.
-
Remarque : les kits avancés (comme ceux de Haisstronica) utilisent un film thermorétractable à double paroi avec adhésif et répondent aux normes ISO/ROHS, garantissant ainsi la durabilité.
9. Ne pas fournir de soulagement de tension ou de mou
Problème : La tension ou le mouvement d'une épissure finit par la défaire. Si les fils sont tendus ou soumis à des vibrations (véhicules, machines, voire ouvertures fréquentes de portes), le sertissage peut lentement se déformer ou se déconnecter. Nous avons constaté des défaillances de connecteurs lorsque le câblage manquait de souplesse.
Solution : Laissez toujours une petite boucle ou du mou dans le fil près du connecteur afin qu'il puisse fléchir légèrement. Attachez ou fixez le faisceau de câbles près de l'épissure (à l'aide de colliers de serrage ou de serre-câbles) afin que toute traction sur le fil soit absorbée par le fil fixé, et non par le connecteur. Pour les applications critiques, ajoutez des manchons anti-traction ou du ruban adhésif autour de la jonction.
-
Rappel : Si une épissure doit rester mobile (par exemple sur un panneau amovible), réalisez une boucle douce afin d'éviter toute contrainte sur le sertissage.
-
Citation : Les experts soulignent que l’omission de Slack « peut entraîner des déconnexions » dans les applications en mouvement.
👉Obtenez des joints étanches et propres grâce aux connecteurs bout à bout thermorétractables à sertir électriques Haisstronica AWG 22-10 — parfaits pour les connecteurs bout à bout.

10. Ignorer l'inspection et les tests
Problème : Après tout ce travail, il est facile de penser que « tout semble en ordre » et de passer à autre chose. Mais une épissure sous-sertie, mal alignée ou défectueuse ne montrera de signes évidents qu'après une défaillance. Sans intervention, cela peut entraîner des pannes intermittentes, voire une surchauffe ultérieure.
Solution : Inspectez et testez toujours chaque connexion avant de terminer un projet. Vérifiez visuellement que l'isolant n'est pas déchiré, que le tube du connecteur est bien rétracté et qu'aucun brin ne dépasse. Testez ensuite la continuité et la résistance. Utilisez un multimètre (ou un simple testeur de continuité) pour vérifier que le circuit fonctionne à travers l'épissure. Tirez doucement sur chaque fil pour vous assurer qu'il est bien fixé.
-
Liste de contrôle:
-
Vérification de la continuité du multimètre (fil épissé à la charge finale).
-
Vérifiez la chute de tension si un courant élevé est prévu.
-
Test de poussée/traction sur le fil.
-
Inspectez les morceaux de fils parasites ou les fuites d’adhésif.
-
Des tests réguliers « garantissent non seulement la sécurité des connecteurs bout à bout, mais aussi leur bon positionnement » . Détecter les problèmes dès maintenant permet d'éviter des soucis ultérieurs.
Liste de contrôle et conseils de prévention
-
Associez tout : Associez toujours le bon calibre de fil au connecteur à code couleur approprié
-
Utilisez les bons outils : une pince à sertir à cliquet et une pince à dénuder de qualité font toute la différence
-
Suivez les étapes : dénudez, sertissez, puis chauffez (pour les types thermorétractables). Ne négligez pas la préparation ni le chauffage des fils.
-
Choisissez des connecteurs appropriés : pour l'extérieur, utilisez des connecteurs bout à bout étanches . Pour l'intérieur, des connecteurs bout à bout isolés standard suffisent.
-
Optez pour la qualité supérieure : les connecteurs haut de gamme (âme en cuivre pur, tube épais) offrent de meilleures performances. Les connecteurs thermorétractables à double paroi de Haisstronica, par exemple, sont dotés de « cuivre étamé pour une circulation de courant optimale et une résistance à la corrosion » .
-
Organisez les pièces : Séparez les connecteurs de différentes tailles pour éviter les confusions. Un bac ou un organiseur étiqueté évite les erreurs.
Recommandation vidéo : Pour un guide visuel rapide, regardez un tutoriel YouTube sur l'installation correcte des connecteurs bout à bout thermorétractables (par exemple, « Comment utiliser un connecteur bout à bout thermorétractable » ). Voir les étapes de sertissage et de chauffage en action peut renforcer ces conseils (l'intégration d'une vidéo explicative pertinente serait idéale).
👉Construisez-le correctement avec les connecteurs bout à bout thermorétractables à sertir électriques Haisstronica AWG 22-10 pour les connecteurs bout à bout.

Conclusion et kit recommandé
La plupart de ces problèmes courants sont liés à la technique, aux outils et aux matériaux. En préparant soigneusement le fil, en adaptant les tailles de connecteur, en utilisant l'outil de sertissage approprié et en activant complètement le joint thermorétractable, vous obtiendrez des épissures de qualité professionnelle à chaque fois. Un test final de traction et un contrôle de continuité permettent de détecter tout défaut avant qu'il n'entraîne une interruption de service.
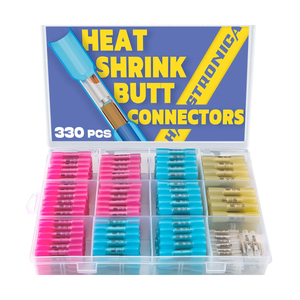
Pour une expérience sans stress, pensez à utiliser un kit complet de haute qualité. Par exemple, le kit de connecteurs bout à bout électriques thermorétractables à sertir de Haisstronica (330/420/580 pièces) comprend plusieurs tailles de connecteurs bout à bout isolés (AWG 26-10) et est même fourni avec une pince à sertir à cliquet de précision. Tous les connecteurs sont dotés d'âmes en cuivre étamé et d'un tube à double paroi étanche, résistant ainsi à la corrosion et aux vibrations. Ce kit résout de nombreux problèmes mentionnés ci-dessus de par sa conception.
En bref : Utiliser les connecteurs bout à bout électriques appropriés et les sertir correctement (calibre, outil et chaleur appropriés) est essentiel. Suivez les étapes ci-dessus, revérifiez votre travail et vous éviterez les sertissages mal serrés, la corrosion et autres défaillances. Des connecteurs de qualité, notamment les connecteurs thermorétractables , associés à une attention particulière aux détails, garantissent des réparations de fils solides et fiables.
Nos meilleurs choix conviviaux
Fabriqués avec des corps en cuivre étamé pur à 99,9 %, ces connecteurs électriques offrent une résistance ultra-faible et des performances anti- oxydation . Le manchon adhésif 3:1 assure une étanchéité parfaite pour une jonction étanche et résistante à l'usure. Choisissez nos connecteurs bout à bout thermorétractables pour des épissures fiables et des résultats professionnels.
👉 Choisissez les connecteurs bout à bout thermorétractables à sertir électriques Haisstronica AWG 22-10 pour des connecteurs bout à bout thermorétractables fiables.

Pour plus de conseils sur le sertissage et l'étanchéité des connecteurs de fils, consultez les guides Haisstronica sur les erreurs de sertissage courantes et le sertissage des connecteurs étanches pour des conseils pratiques détaillés. N'oubliez pas : un petit investissement dans des connecteurs et des outils de qualité permet des connexions durables et sans problème.