


Introduction
Low-voltage landscape lighting is a popular DIY project in the US, offering a safe and energy-efficient way to illuminate your yard. To install or repair such a system, you’ll need to work with low voltage landscape wire (typically 12V) and know how to strip its insulation properly. Stripping the insulation from landscape wire is a basic but crucial skill for connecting lights, transformers, or landscape wire connectors. In this guide, we’ll start from the basics – explaining what landscape lighting wire is, then walk through the steps to strip and connect low voltage landscape lighting wire. Along the way, we’ll cover tools like wire strippers, application scenarios, buying tips (gauge selection, etc.), and answer FAQs to help you install landscaping lighting with confidence.
Definition: What Is Low-Voltage Landscape Wire?
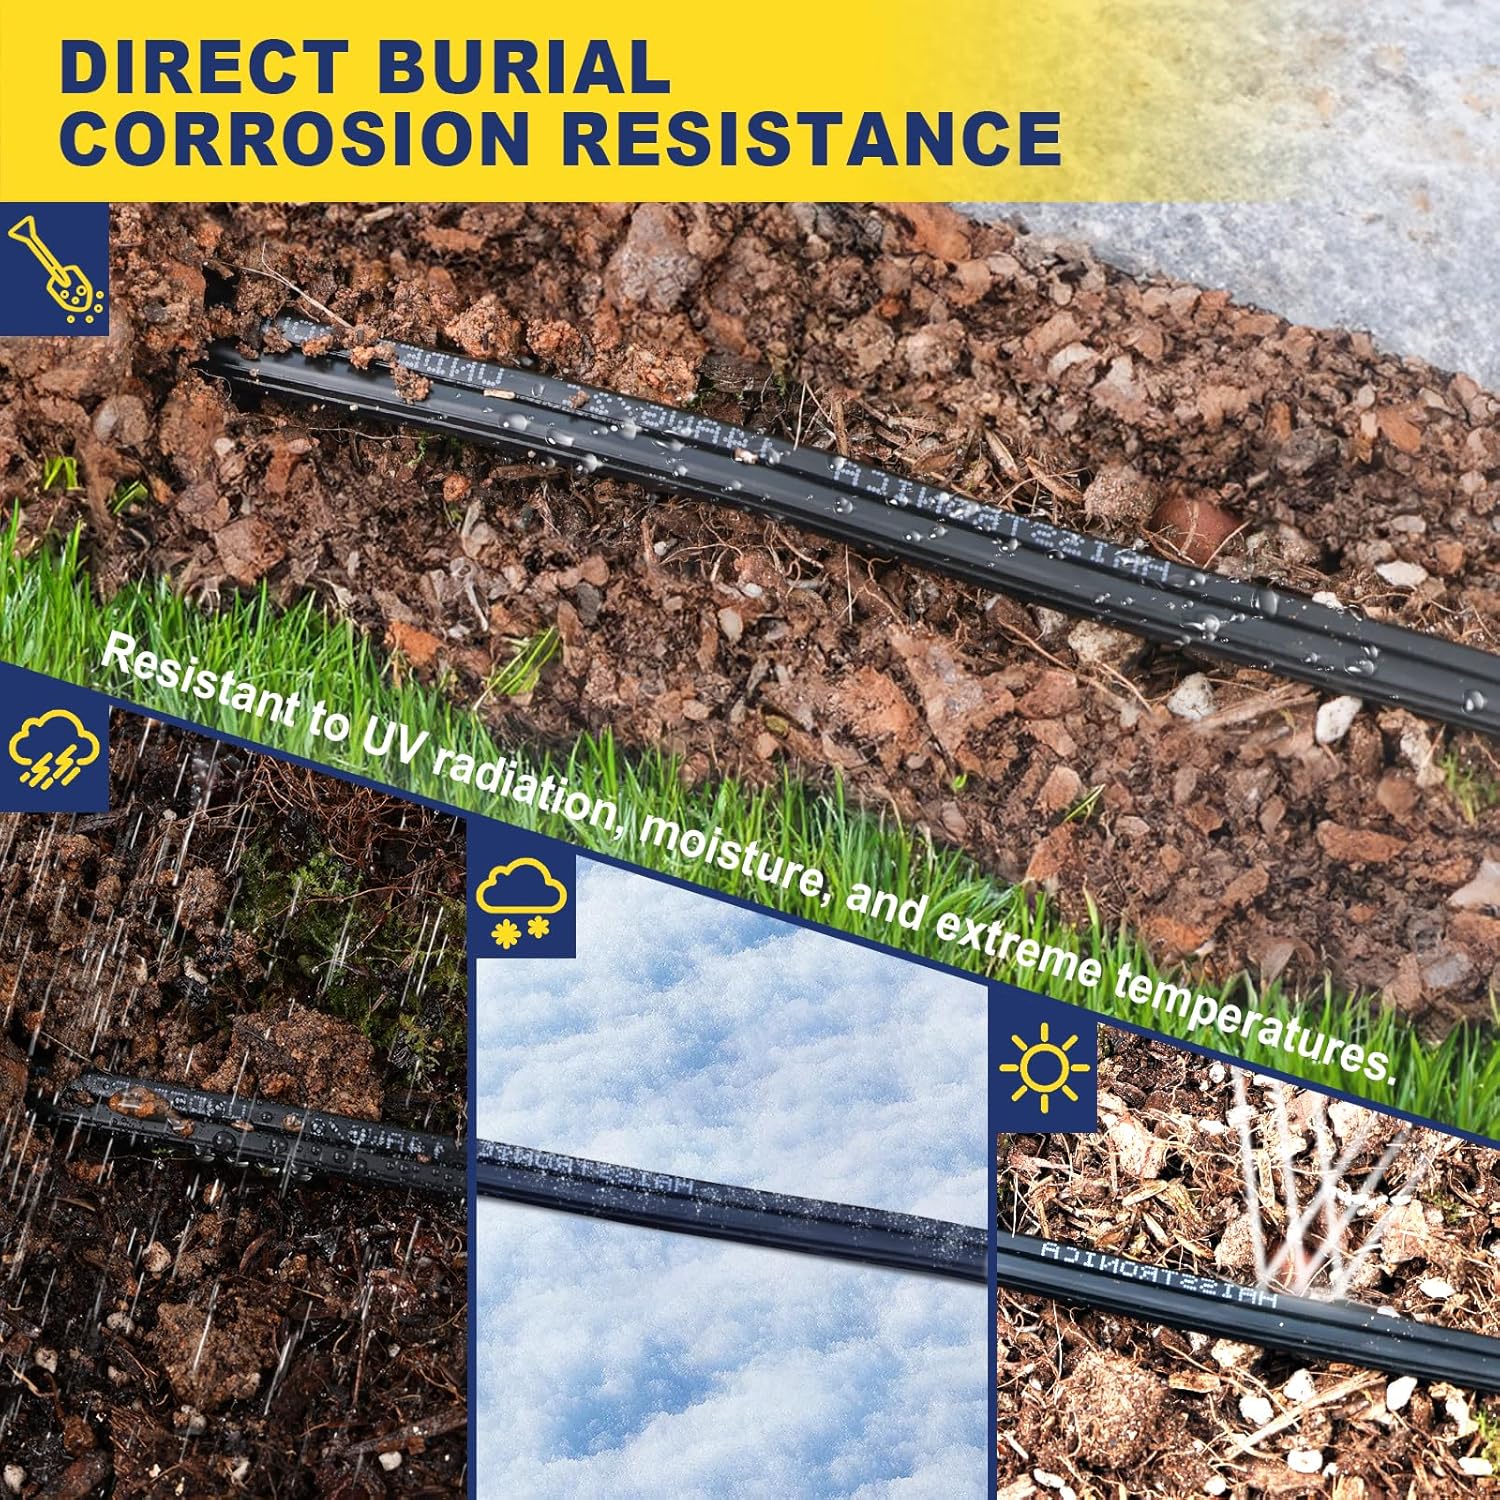
Low-voltage landscape wiring refers to the two-conductor electrical cable that powers outdoor lights (path lights, garden spotlights, etc.) from a low-voltage transformer. It is usually labeled by gauge and conductor count, e.g. 14/2 landscape wire or 12/2 landscape wire (14 or 12 gauge, 2 conductors). The most common sizes are 12, 14, and 16 AWG two-stranded cables. A lower gauge (e.g. 12 AWG) means a thicker wire that can carry more current over longer distances, whereas higher gauge (16 AWG) is thinner and suitable for shorter runs. Each conductor in the landscape low voltage wire is insulated with durable PVC, and the pair is often bonded together in a flat “zip-cord” style for easy separation. This insulation is designed for direct burial and outdoor use (UV and moisture resistant), meaning the electrical wire for outdoor lighting products like landscape lights can be buried in soil without conduit (per NEC code, at least 6 inches deep for safety).
Landscape lighting wire connectors are the fittings used to join or terminate these cables. Common types include twist-on landscape wire connectors filled with silicone gel, crimp-and-heat-shrink connectors, and clamp-on splice connectors. “Stripping a wire” means removing a short section of insulation from the end of the cable to expose the metal conductor. By stripping the landscape light wire, you can attach it to a fixture lead, connect two landscape wires together, or hook it up to a transformer terminal. It’s important to strip insulation cleanly without cutting the copper strands – a proper wire stripper tool will make this easy while preserving the wire’s integrity (cutting off strands can reduce conductivity and is unsafe). Fortunately, low-voltage wiring is forgiving: there’s no polarity to worry about (the two conductors carry AC from the transformer, so either wire can connect to either fixture lead). Next, we’ll go through the step-by-step process to strip and splice low voltage landscape wiring safely.
Operation Steps: How to Strip Low-Voltage Landscape Wire
Cutting, splitting, and stripping low-voltage landscape wire is straightforward with the right tools.
-
Shut Off Power: Before working on any outdoor lights electrical wiring, turn off or unplug the low-voltage transformer. Even though landscape low voltage wire carries only 12–15 volts, it’s best practice to cut the power for safety while you work.
-
Cut and Separate the Wires: Determine where you need to splice or connect. If adding a light or repairing a cable, use wire cutters (or the cutter built into your wire strip tool) to cut the cable at that point. The cable has two conductors stuck together; grab each conductor and pull them apart (“split” the cable) for about 4–6 inches to give yourself room to work. The goal is to have two free wires that can be individually stripped.
-
Strip the Insulation: Take a manual wire stripper (or an automatic wire stripping tool) and select the slot matching your wire gauge (e.g. 14 AWG). Clamp it around the end of one conductor, about 1/2 inch from the end, and pull to strip off the insulation sleeve. You should see about 0.5–1 inch of bare copper exposed. Strip wire from both conductors of the cable (and the fixture’s lead wires if they aren’t already pre-stripped). If done correctly, the copper strands will be intact and twisted together. (Tip: If using a knife instead of a wire stripper, lightly score around the insulation and pull it off – but be very careful not to nick the metal strands.)
-
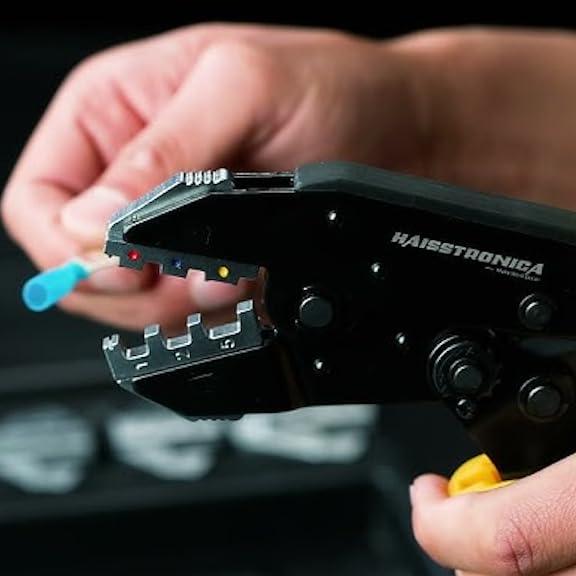
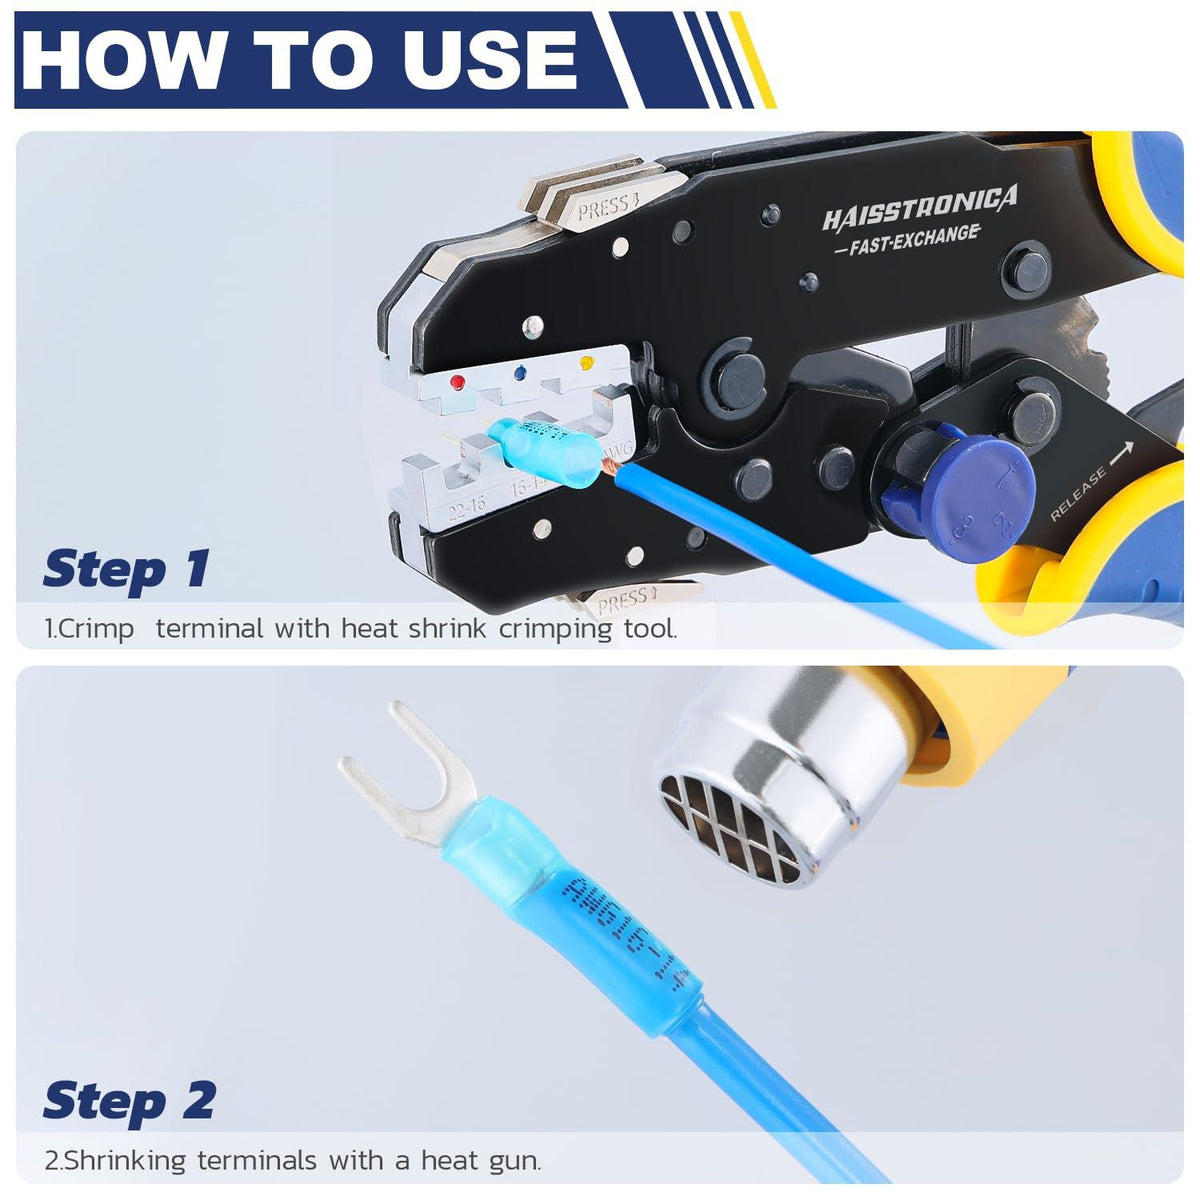
Join the Wires with Connectors: Now the low-voltage conductors are ready to connect. For attaching a light fixture, splice each fixture lead to a stripped end of the main cable using a landscape lighting wire connector. Commonly, you would twist one fixture wire and one side of the main cable together (make sure the copper strands are twisted snugly), then screw on a landscape lighting wire connector (a waterproof gel-filled wire nut) until tight. Repeat for the other conductor with the other fixture lead. Alternatively, you can insert the stripped ends into a crimp-style butt connector and crimp it securely using a crimping tool, then heat-shrink it for a waterproof seal. How to splice low voltage landscape lighting wire depends on the connector type – just ensure the connection is waterproof and mechanically secure. (Many experts advise using gel-filled wire nuts or heat-shrink landscape wire connectors rather than the cheap plastic snap-on connectors that come with some lights, as the latter can fail over time.)
-
Test and Bury: After all connections are made, turn the transformer back on to test your lights. If everything illuminates properly, you can proceed to bury or conceal the cable. Bury the landscaping wire about 6 inches deep in garden beds or lawn (deeper, ~18 inches, under any driveways or sidewalks) to protect it. In mulch beds where deep burial isn’t practical, you can simply cover the wire for outdoor lights with mulch or use landscape staples to keep it in place near the soil surface.
Following these steps, you’ve successfully stripped and connected your landscape light wiring. Next, we’ll discuss where low-voltage wiring is used and what tools or wire specifications to consider for your project.
Application Scenarios
Low-voltage landscape lighting wire can power various outdoor fixtures – garden spotlights, pathway lights, deck lights, etc. – all on one circuit.
You will need to strip and handle landscape wires in a variety of outdoor projects. The most common scenario is installing a new landscaping lighting system: for each light fixture, you’ll strip the main landscape lighting wiring and connect the fixture’s pigtails to the supply line. Low-voltage wire is also used for other outdoor applications like pond pumps, irrigation controllers, or decorative LED tape lights – all of which might require splicing or extending cables. In landscape lighting wiring specifically, you often run a single long cable from the transformer, then make T-splices or parallel connections at each fixture (since landscape lights are wired in parallel, not series, to maintain equal voltage). Knowing how to splice low voltage landscape lighting wire is helpful if you need to add more lights later or repair a cut cable (for example, if a shovel accidentally cuts the wire, you’d strip the broken ends and join them with a waterproof splice).
Another scenario is when connecting the wire to the low-voltage transformer or a junction box – typically, you’ll strip about 1/2" of insulation off the cable ends to attach them under screw terminals or into clamp connectors of the transformer. Low-voltage landscape wiring is also analogous to automotive or speaker wiring: hobbyists installing car amplifiers or outdoor speakers might strip similar wire cable. If you have automotive wire strippers for 12V car projects, they can usually handle landscape low voltage wire too, since the gauges overlap. In short, any time you’re dealing with wire for outdoor lights at 12 volts – whether to install, extend, or repair – you’ll apply these same stripping and connecting techniques.
Buying Guide: Tools, Wire Selection, and Connectors
When shopping for landscaping wire and related tools, keep the following in mind:
-
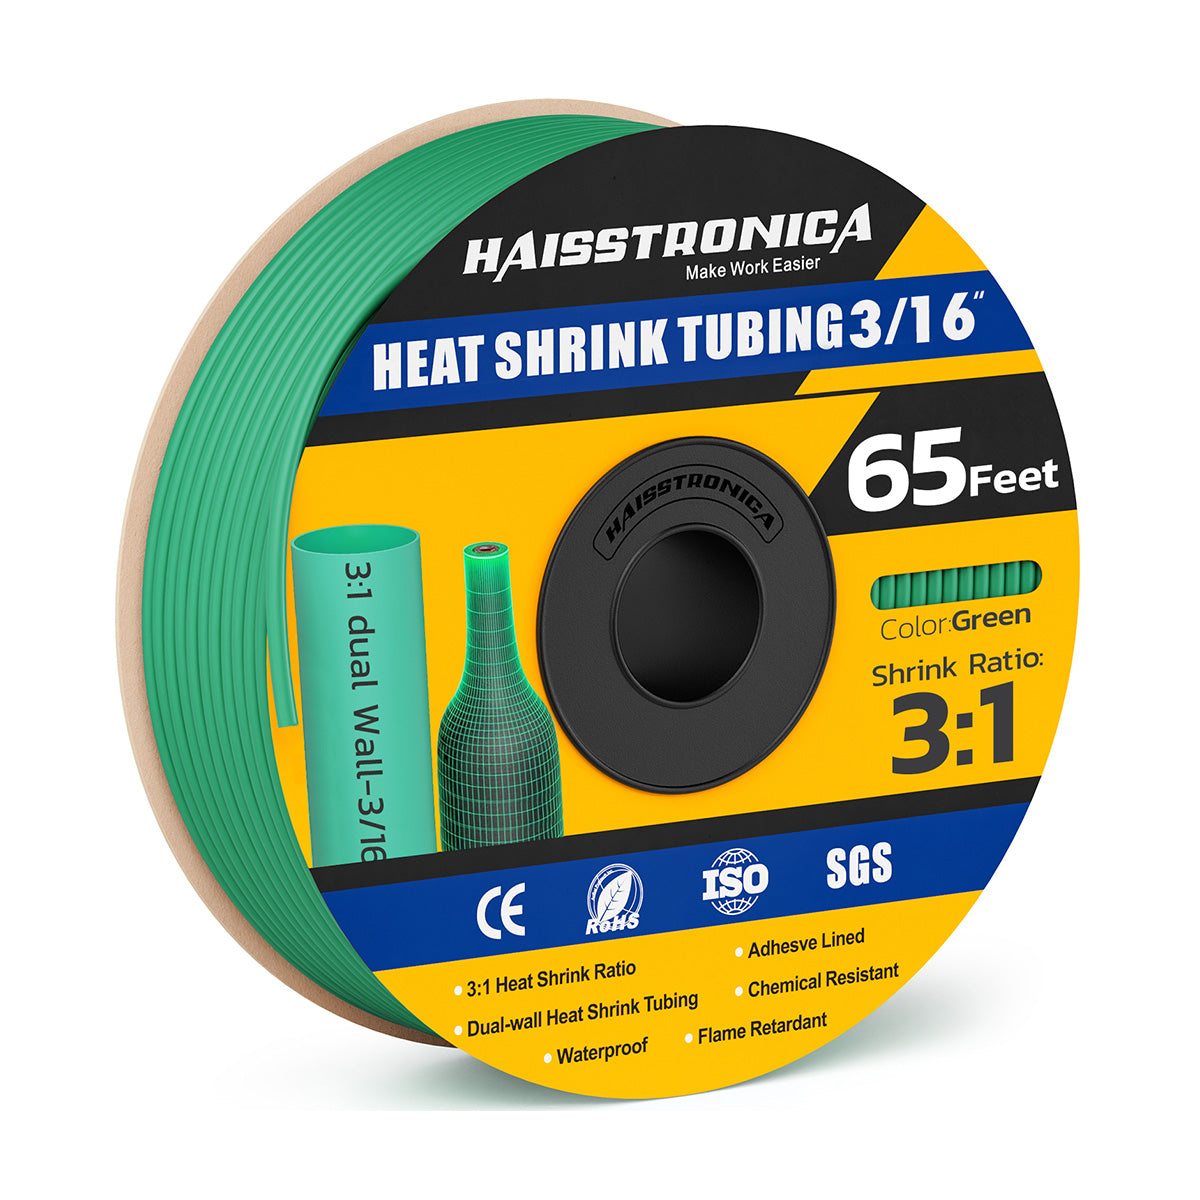
Wire Gauge and Length: Choose the right gauge for your project size. As a rule of thumb, 16/2 landscape wire is fine for very short runs (<50 feet) or a few LED lights, 14/2 low voltage landscape wire works for medium runs (~100 feet supporting up to ~90 watts total), and 12/2 low voltage landscape lighting wire is best for longer distances or higher wattage loads (100+ feet or >100W). Thicker wire (lower AWG) has less voltage drop, so all your lights maintain brightness. If in doubt, going with 12 AWG provides extra capacity and is the best wire for landscape lighting in most professional installs. Also buy an appropriate length – landscape wire is sold in 50ft, 100ft, 200ft, etc. (e.g., 14/2 landscape wire 200ft spools for typical yard projects). Always use direct-burial rated cable for outdoor lighting (UV-resistant insulation, pure copper strands for conductivity) to ensure safety and longevity. Haisstronica offers high-quality low-voltage wire made of pure copper (41 strands in 14 AWG) for superior conductivity and minimal voltage drop. This landscape lighting wire is UL-listed, weatherproof, and flexible for easy installation, making it ideal for garden and pathway lighting projects.
-
Wire Stripping Tools: Using a proper wire stripper tool is key to quick and clean insulation removal. There are various options: a simple manual wire strippers (scissor-like tool with gauged holes) works well if you match the correct slot to your wire gauge. If you’re new to this, a self-adjusting wire stripper can be a game-changer – this automatic wire stripping tool grips and strips the insulation in one squeeze without needing to choose a slot. Self-adjusting or auto cable strippers accommodate a range of wire sizes (often AWG 10–24) and are great for DIYers since they prevent cutting too deep. Many electricians also use these for speed and consistency. There are even heavy-duty electric wire strippers (thermal strippers that use a heated element to cut insulation) and specialty automotive wire strippers for ignition wires, but those aren’t necessary for standard landscape lighting wire. A good mid-range choice is a ratcheting wire strip tool or stripper kit that combines functions – for example, some wire strippers and cutters also have built-in crimpers for terminals, giving you a wire stripper and crimping tool kit in one. These multi-tools let you strip, cut, and crimp connectors with a single device. Haisstronica’s Self-Adjusting Wire Stripper (AWG 24–10) is an example of a convenient automatic tool with an adjustable tension dial, and it even comes in different colors (you might find a blue or pink wire strippers version to suit your style!). The bottom line: invest in a decent wire strip tool – it will save you time and ensure you don’t damage your wire landscape during installation.
-
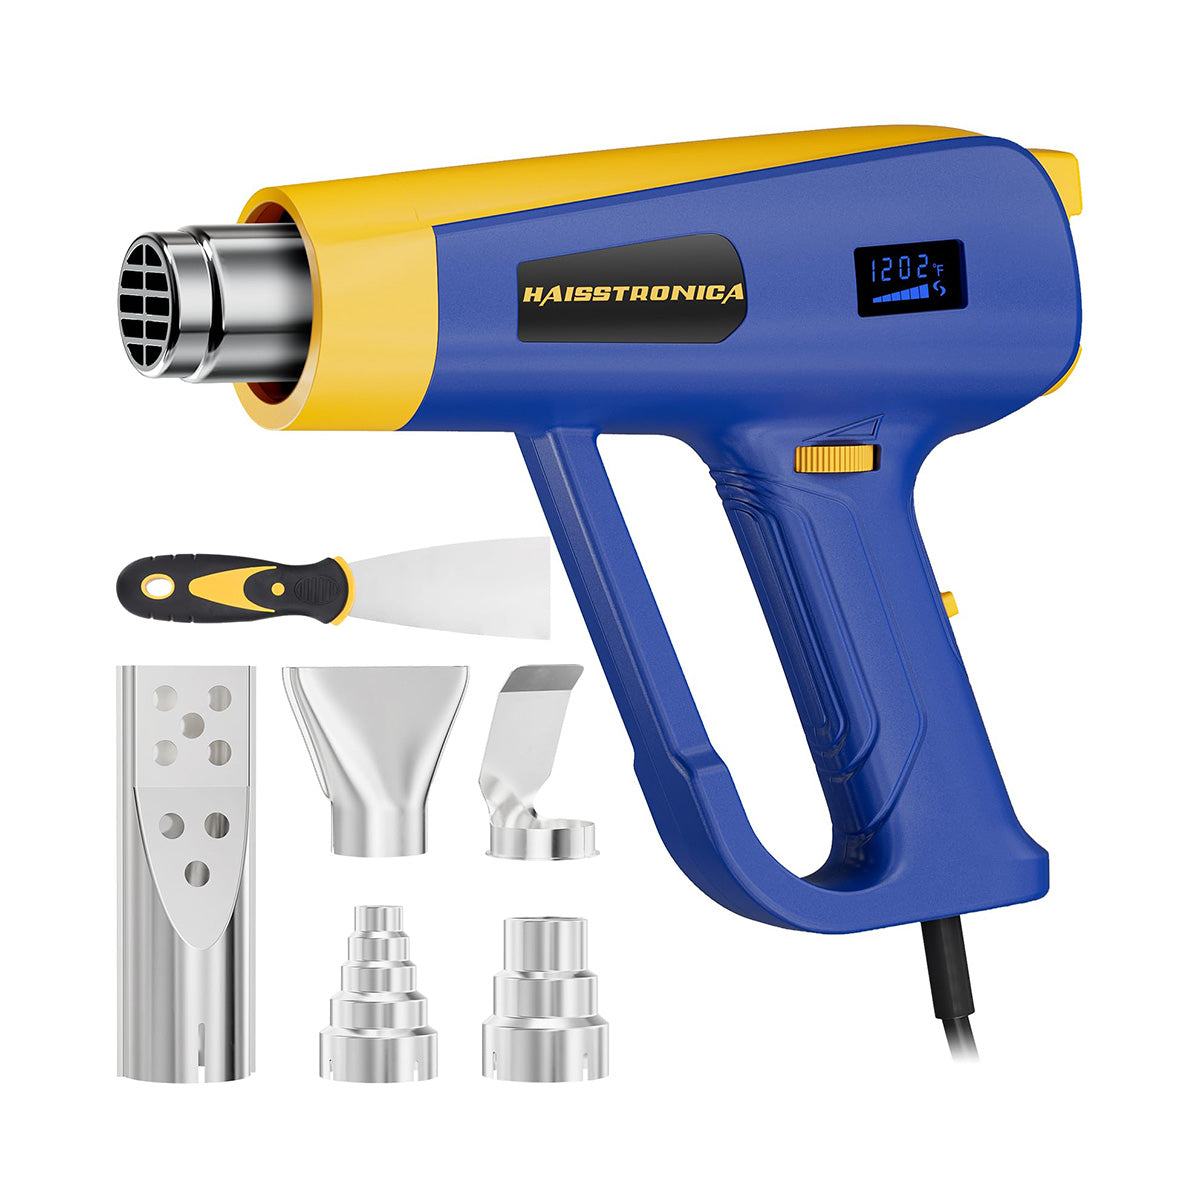
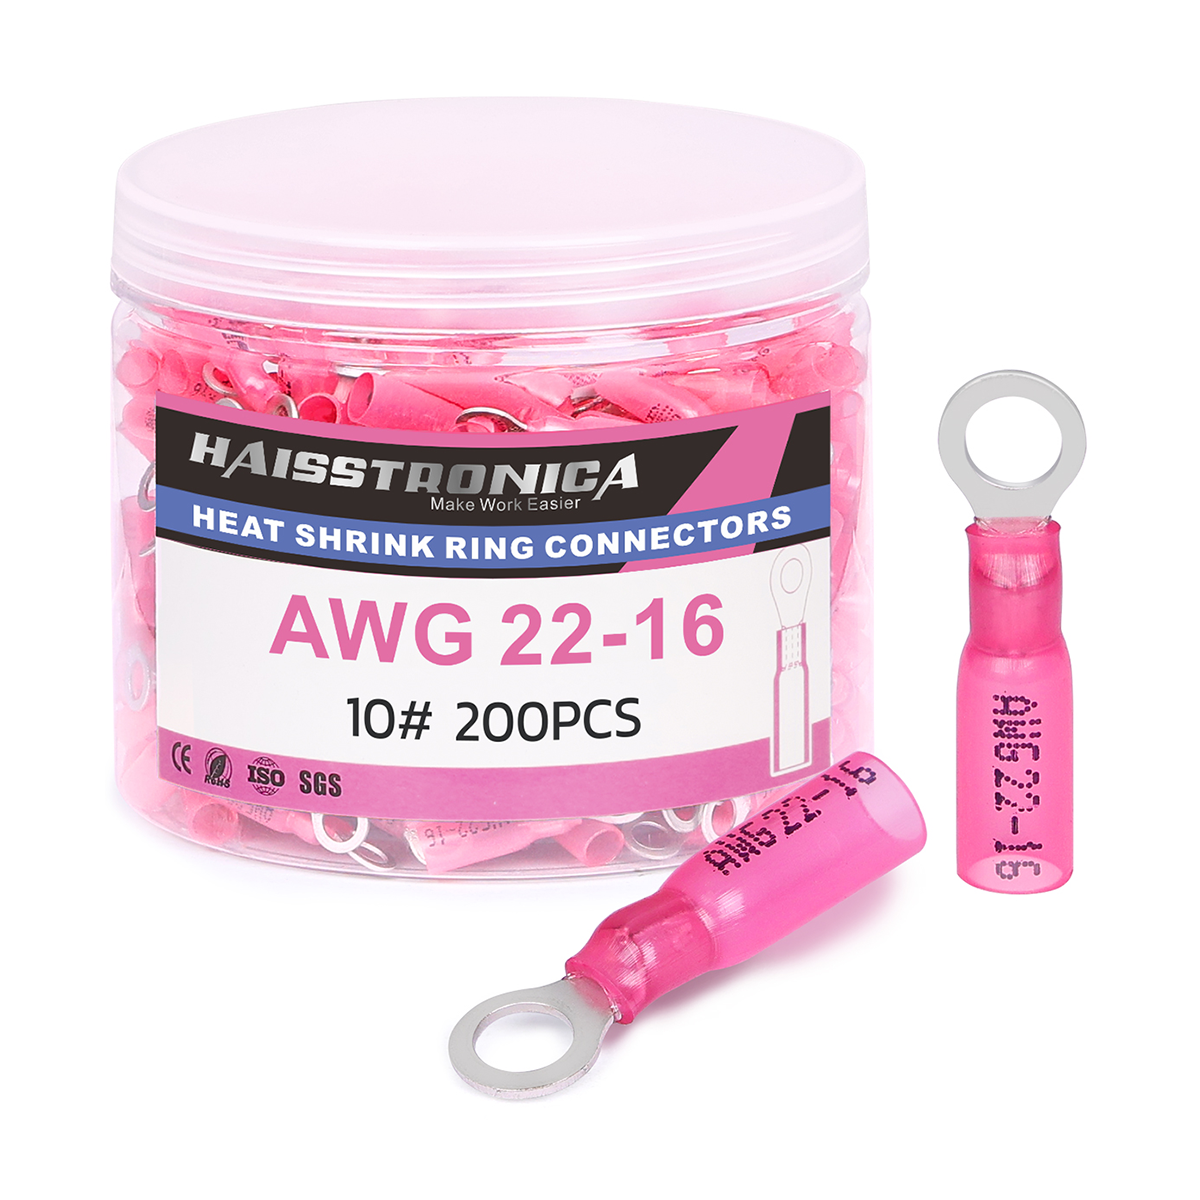
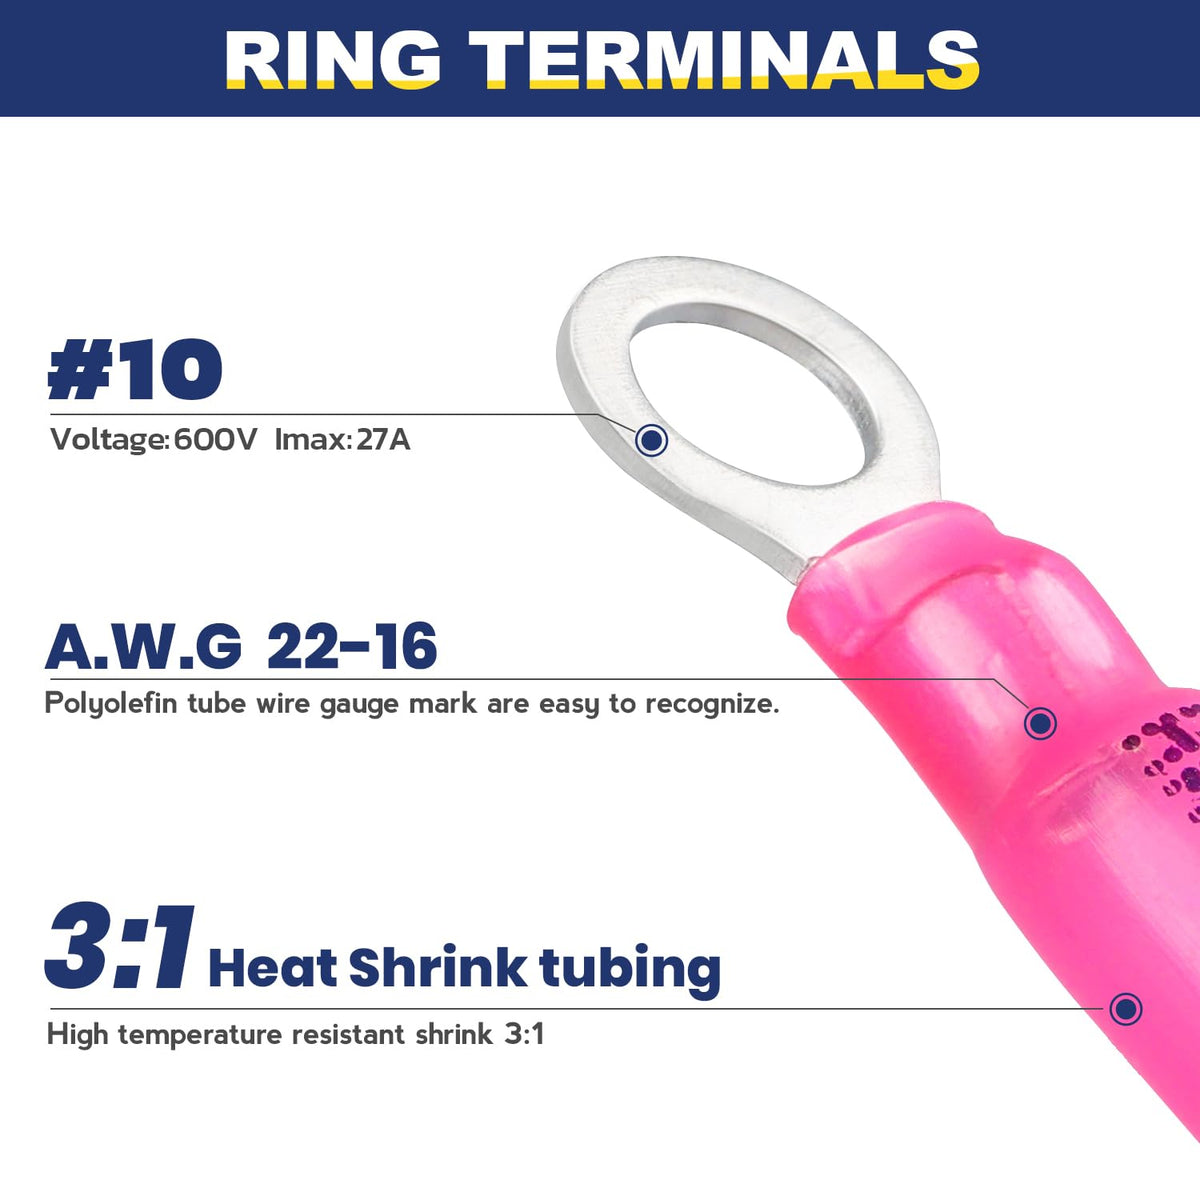
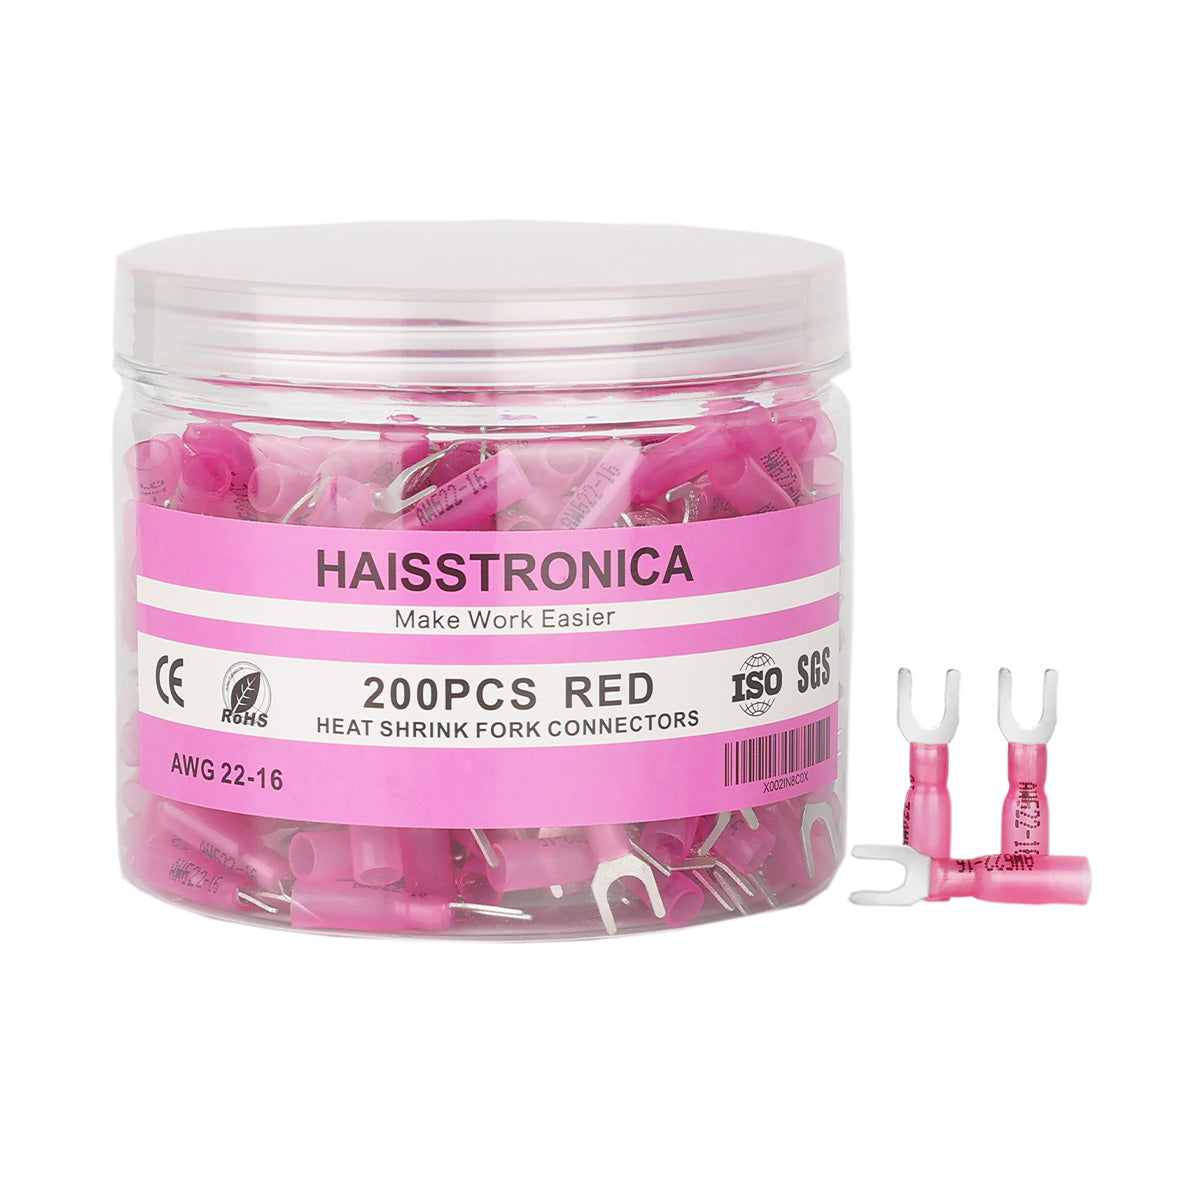
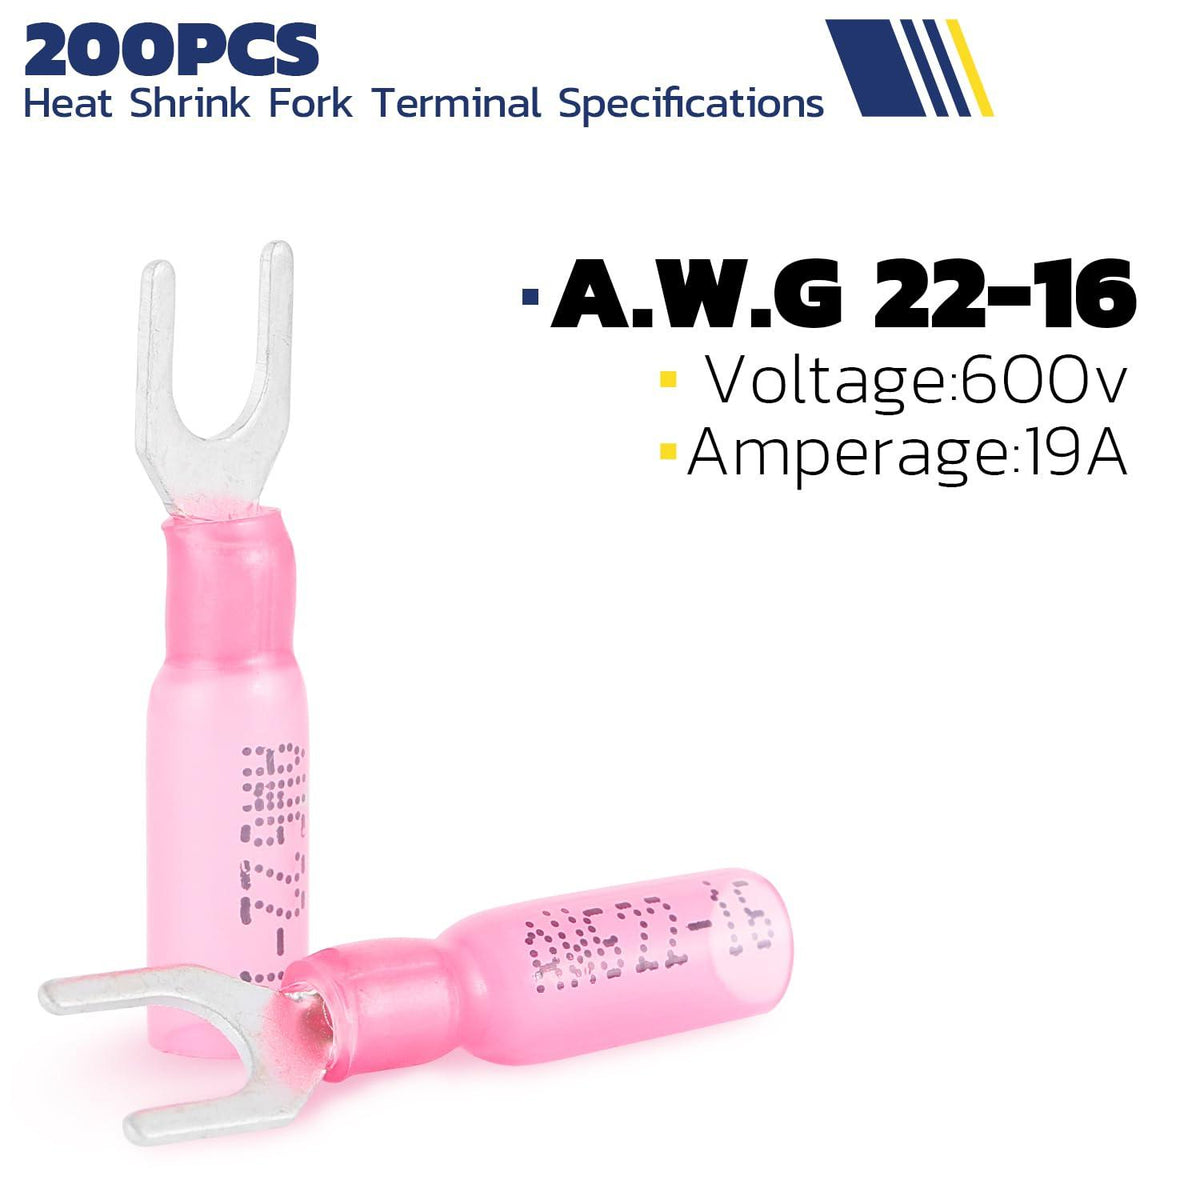
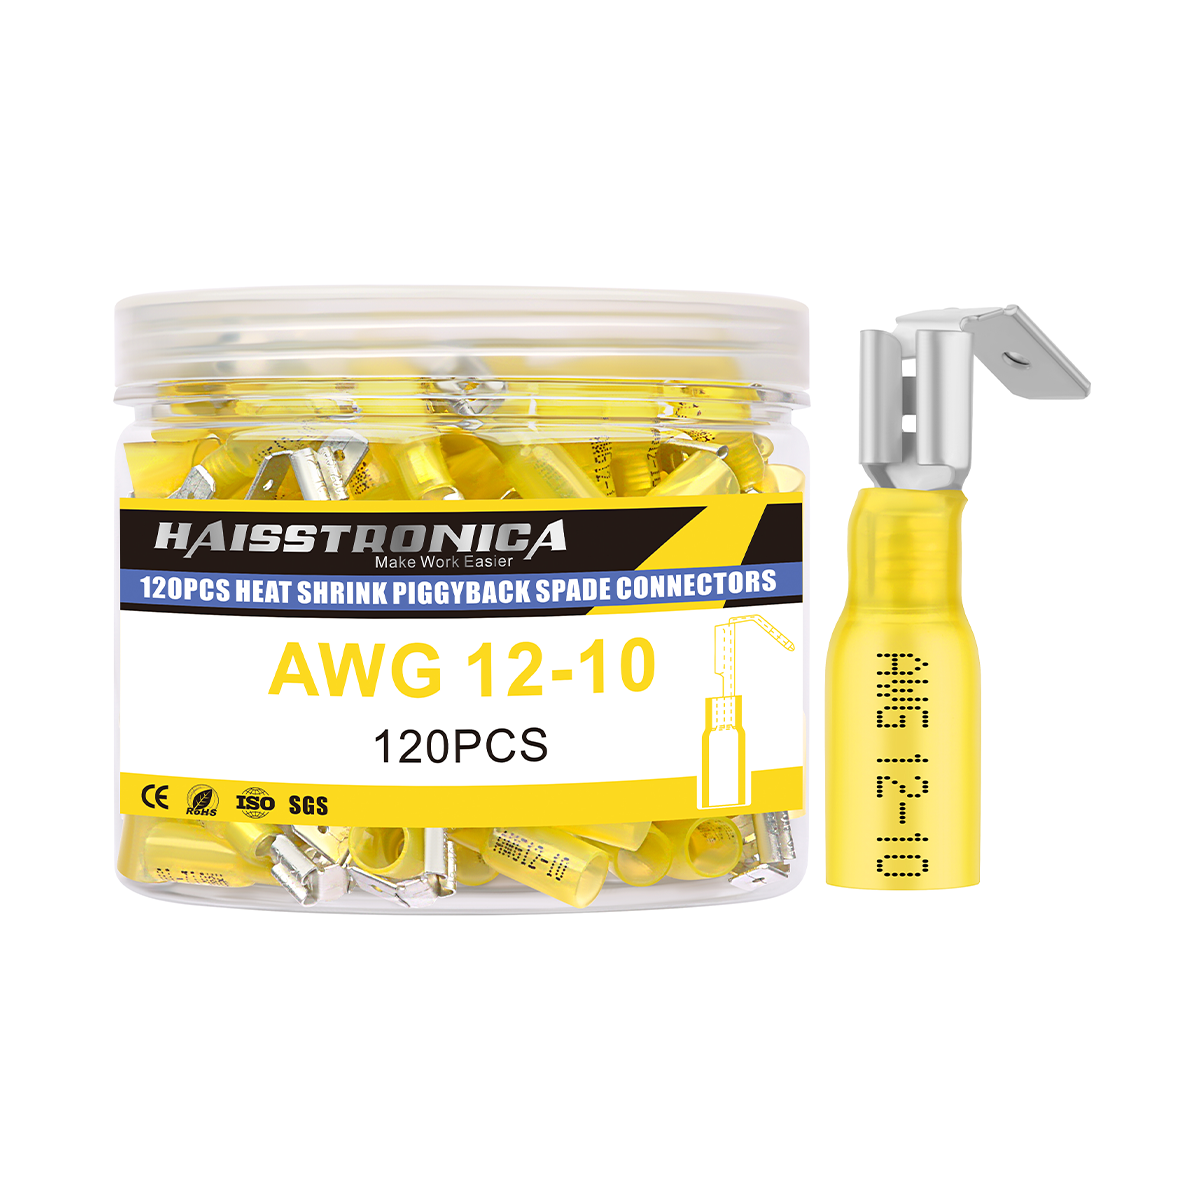
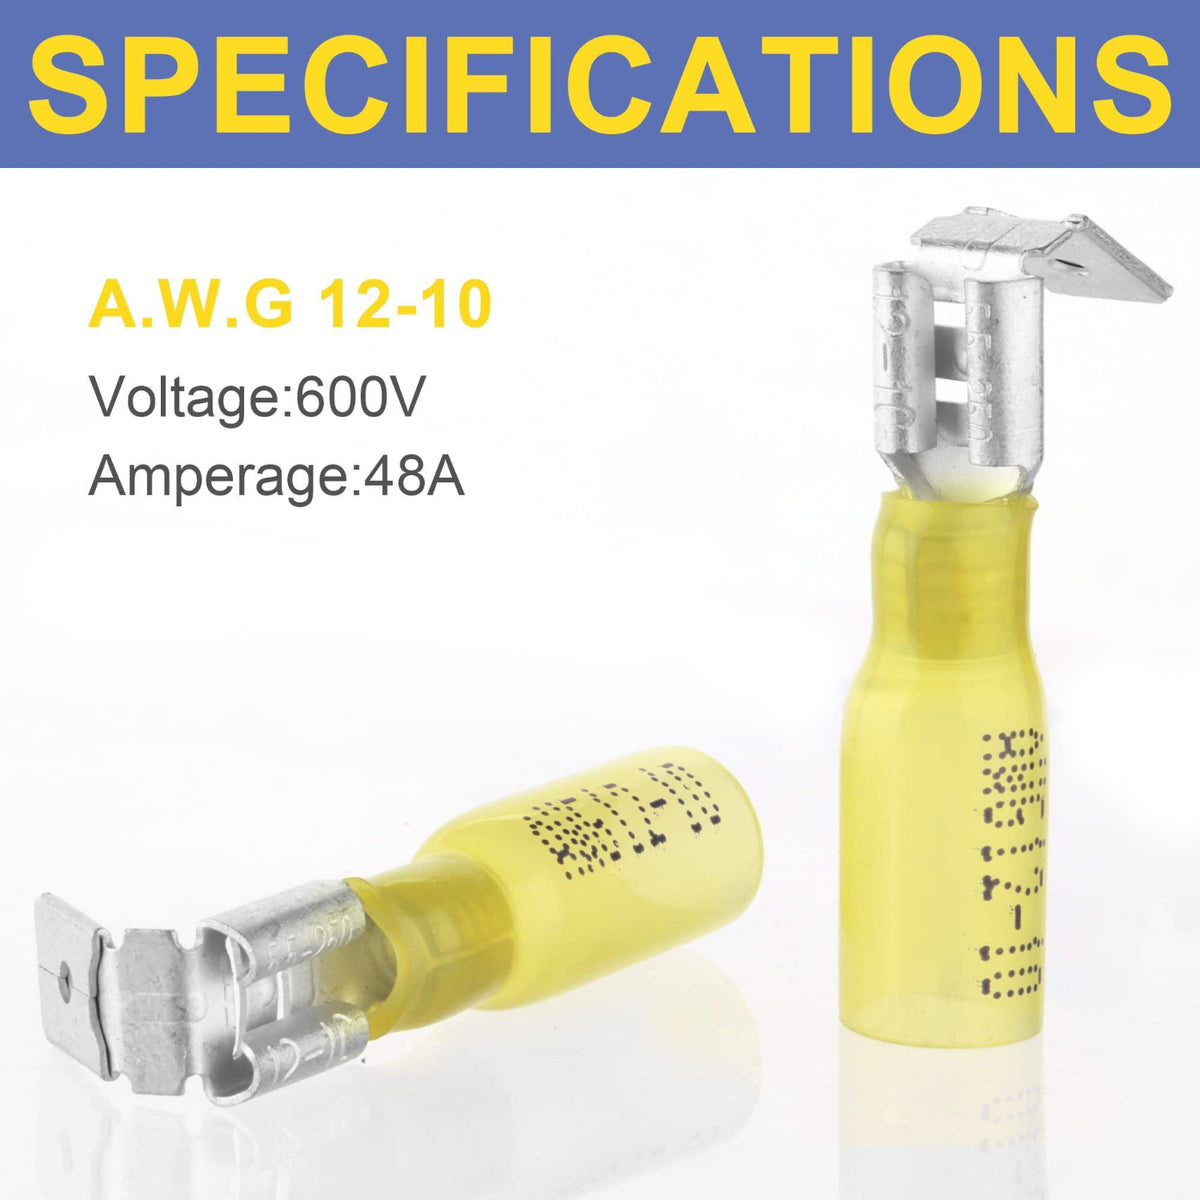
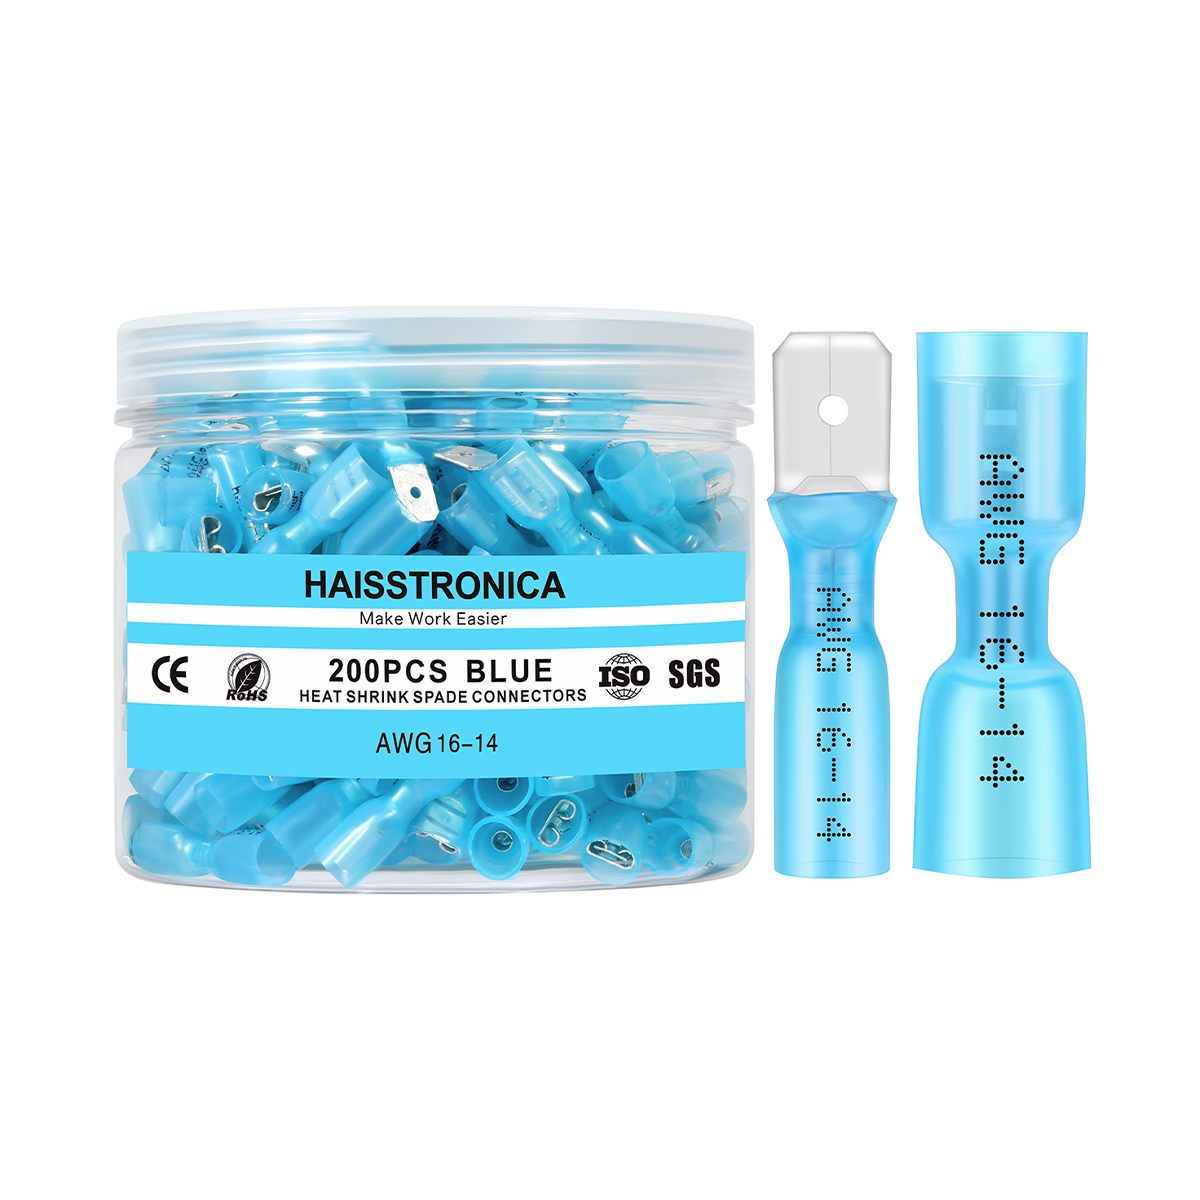
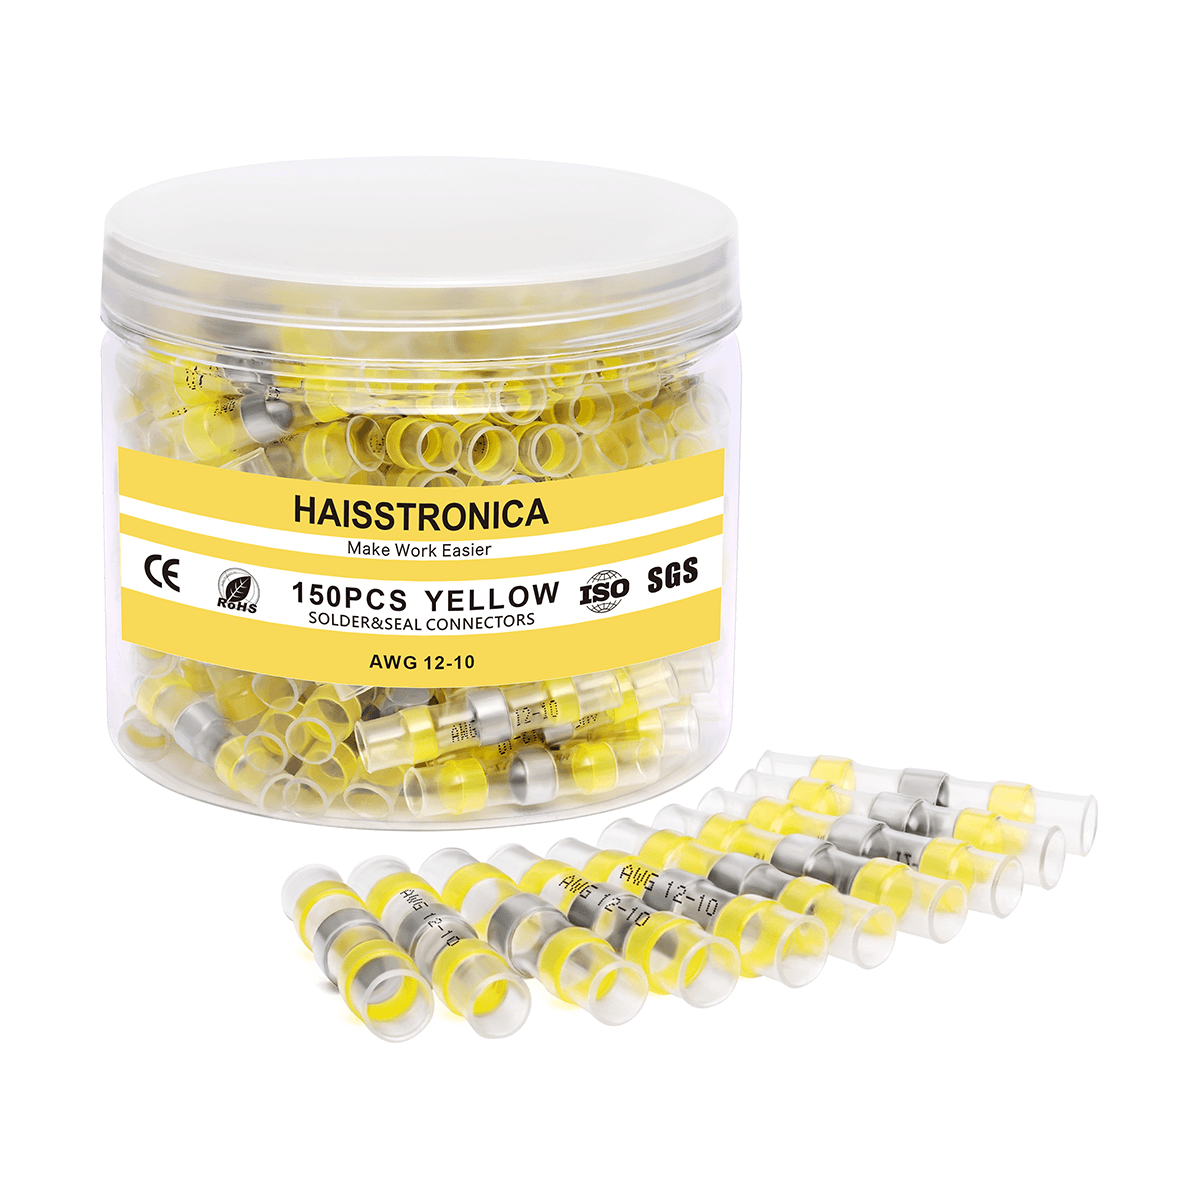
Connectors and Accessories: As mentioned, use only waterproof landscape wire connectors for outdoor splicing. Gel-filled twist-on connectors (rated for direct burial) are easy and reliable – just insert stripped wires and twist. For a more permanent splice, heat shrink wire connectors (butt splices) are excellent: insert the wires on each end, crimp them with a crimping tool, then heat with a heat-gun so the tubing shrinks and sealant inside melts, making a waterproof bond. Haisstronica sells heat shrink butt connectors and even a ratchet wire crimping tool specifically for such insulated terminals. If you prefer a secure crimp, consider using a dedicated crimping tool rather than pliers – for example, the Ratchet Wire Terminal Crimping Tool for AWG 22–10+ ensures a tight, professional crimp “like a solder” connection on heat shrink connectors. (After stripping your wires, you would insert them into the connector and squeeze the ratchet wire stripper/crimper until it releases, guaranteeing a firm crimp every time.) Lastly, don’t forget other accessories: electrical tape (to wrap connectors if needed), cable ties or staples for neat routing, and a voltage tester to troubleshoot as needed. With quality wire and the right tools in hand, you’re set up for a smooth installation.

FAQ (Frequently Asked Questions)
Q1: What gauge wire should I use for low-voltage landscape lighting?
A: It depends on the length of your runs and the wattage of your lights. Commonly, 14/2 landscape wire works for moderate setups (up to ~100 feet run with ~90W load). If you have longer distances or more lights, use 12/2 landscape wire to minimize voltage drop. For very short runs or tiny LED loads, 16/2 landscape wire can suffice, but many installers avoid 16 AWG for anything beyond 50 feet. Using a thicker wire than needed won’t hurt (aside from cost), but using too thin a wire can cause dim lights due to voltage drop. When in doubt, go with 12 AWG for reliability, or consult a wire gauge chart for your specific wattage and distance.
Q2: How deep do I need to bury low-voltage landscape wire?
A: The National Electrical Code (NEC) specifies at least 6 inches of burial depth for low-voltage (under 30V) wiring in typical garden areas. This depth protects the cable from accidental damage by shovels or edgers. Under driveways or high-traffic areas, the requirement is deeper (18–24 inches). In practice, most people tuck the landscape wiring 6–8 inches underground along planter bed edges or under lawns. If burying is difficult in some spots, you can cover the wire with mulch or use protective conduit, but generally direct burial is fine. Just be sure to bury landscape wire deep enough that it won’t be unearthed easily and remember where you ran it (so you don’t cut it during future digging!).
Q3: What’s the best way to splice or extend low-voltage landscape wires?
A: The best method is to use waterproof connectors for landscape lighting. First, strip about 1/2 inch of insulation off the ends of the wires you’re splicing. Then join them using either: (a) gel-filled twist connectors (insert wires and twist the cap tight), or (b) heat-shrink crimp connectors (crimp the wires together in a butt connector and apply heat to seal it). Both methods provide a reliable, weatherproof connection. Avoid plain twist wire nuts or electrical tape alone – those won’t keep water out. Also, never just twist bare wires together without a connector, as they will corrode quickly outdoors. If done properly with quality connectors, a splice in low voltage landscape wire can be as durable as an unbroken run. Many landscape lighting pros prefer the grease-filled wire nuts for their convenience, while others like the solid permanence of a crimped and heat-shrunk splice – either is fine as long as it’s rated for direct burial.
Q4: Does low-voltage landscape wiring need to be in conduit?
A: No, not in most cases. Low voltage landscape lighting wire is designed for direct burial and outdoor conditions, so you do not have to run it in conduit. The insulation on these cables is tough enough for burial and exposure. In fact, skipping conduit makes it easier to make taps/splices along the run and to repair if needed. You can simply bury the cable in the ground or hide it under mulch. That said, there are a few scenarios where conduit might be used: if the wire must pass under a hardscape (sidewalk or driveway) where extra protection is desired, running it through a short PVC conduit sleeve can prevent damage when pulling it through and allow easy replacement later. Also, if you have critters that chew wires, or you’re running the wire up a wall or along a structure, a conduit or protective sleeve could be added. But for general yard use, landscape electrical wire does not need conduit – just bury it to code depth and you’re all set.
Ready to Get Started?
Setting up your own landscape lighting is easier than it looks – with the right wire and tools, even a beginner can do it safely. If you’re looking for quality materials, Haisstronica has you covered. Check out our premium 14/2 Low Voltage Landscape Wire (pure copper, flexible, direct-burial rated) for reliable outdoor lighting performance. And don’t forget a good stripper/crimper tool – our Ratchet Wire Terminal Crimping Tool (AWG 22–10) will make wiring connectors a breeze. With proper technique and equipment, you’ll strip, connect, and install landscape lighting like a pro, brightening your outdoor space for years to come.
Bonus – Watch & Learn: For a hands-on demonstration, check out this helpful YouTube tutorial: How To Strip Low Voltage Wire. It shows the process in action and offers extra tips on handling wire strippers and making solid connections. Happy lighting!