Crimping isn’t “one tool fits all.” The connector style, wire gauge, and crimp profile determine whether the joint ends up secure and electrically stable—or loose and failure-prone. This guide breaks down the main types of crimping tools, what each one is designed for, and how to match a tool to real-world jobs like wire ferrules, spark plug wires, battery cable lugs, and small insulated terminals.
Already have specific tasks in mind? Jump to:
-
Ferrules → [How to Crimp Wire Ferrules for Clean and Safe Connections]
-
Spark plug wires → [how to crimp spark plug wires]
-
Battery lugs → [how to crimp lugs on battery cable]
-
Small insulated wires → [How to Crimp Small Insulated Wires]
-
General cable tools → [Cable crimping tool. Everything You Need to Know]
Why “Tool Type” Matters More Than Brand
A crimp is successful when the tool applies the correct shape and pressure to the connector barrel:
-
Correct crimp profile (indent, hex, square, “B” crimp, etc.)
-
Consistent compression (so every crimp is repeatable)
-
Proper wire/connector match (so strands fill the barrel correctly)
Use the wrong tool profile (or the wrong range) and you can get:
-
Loose connections that heat up under load
-
Cut strands from over-compression
-
Bent terminals or uneven crimps that fail pull tests
The Main Crimping Tool Families (and What They’re For)
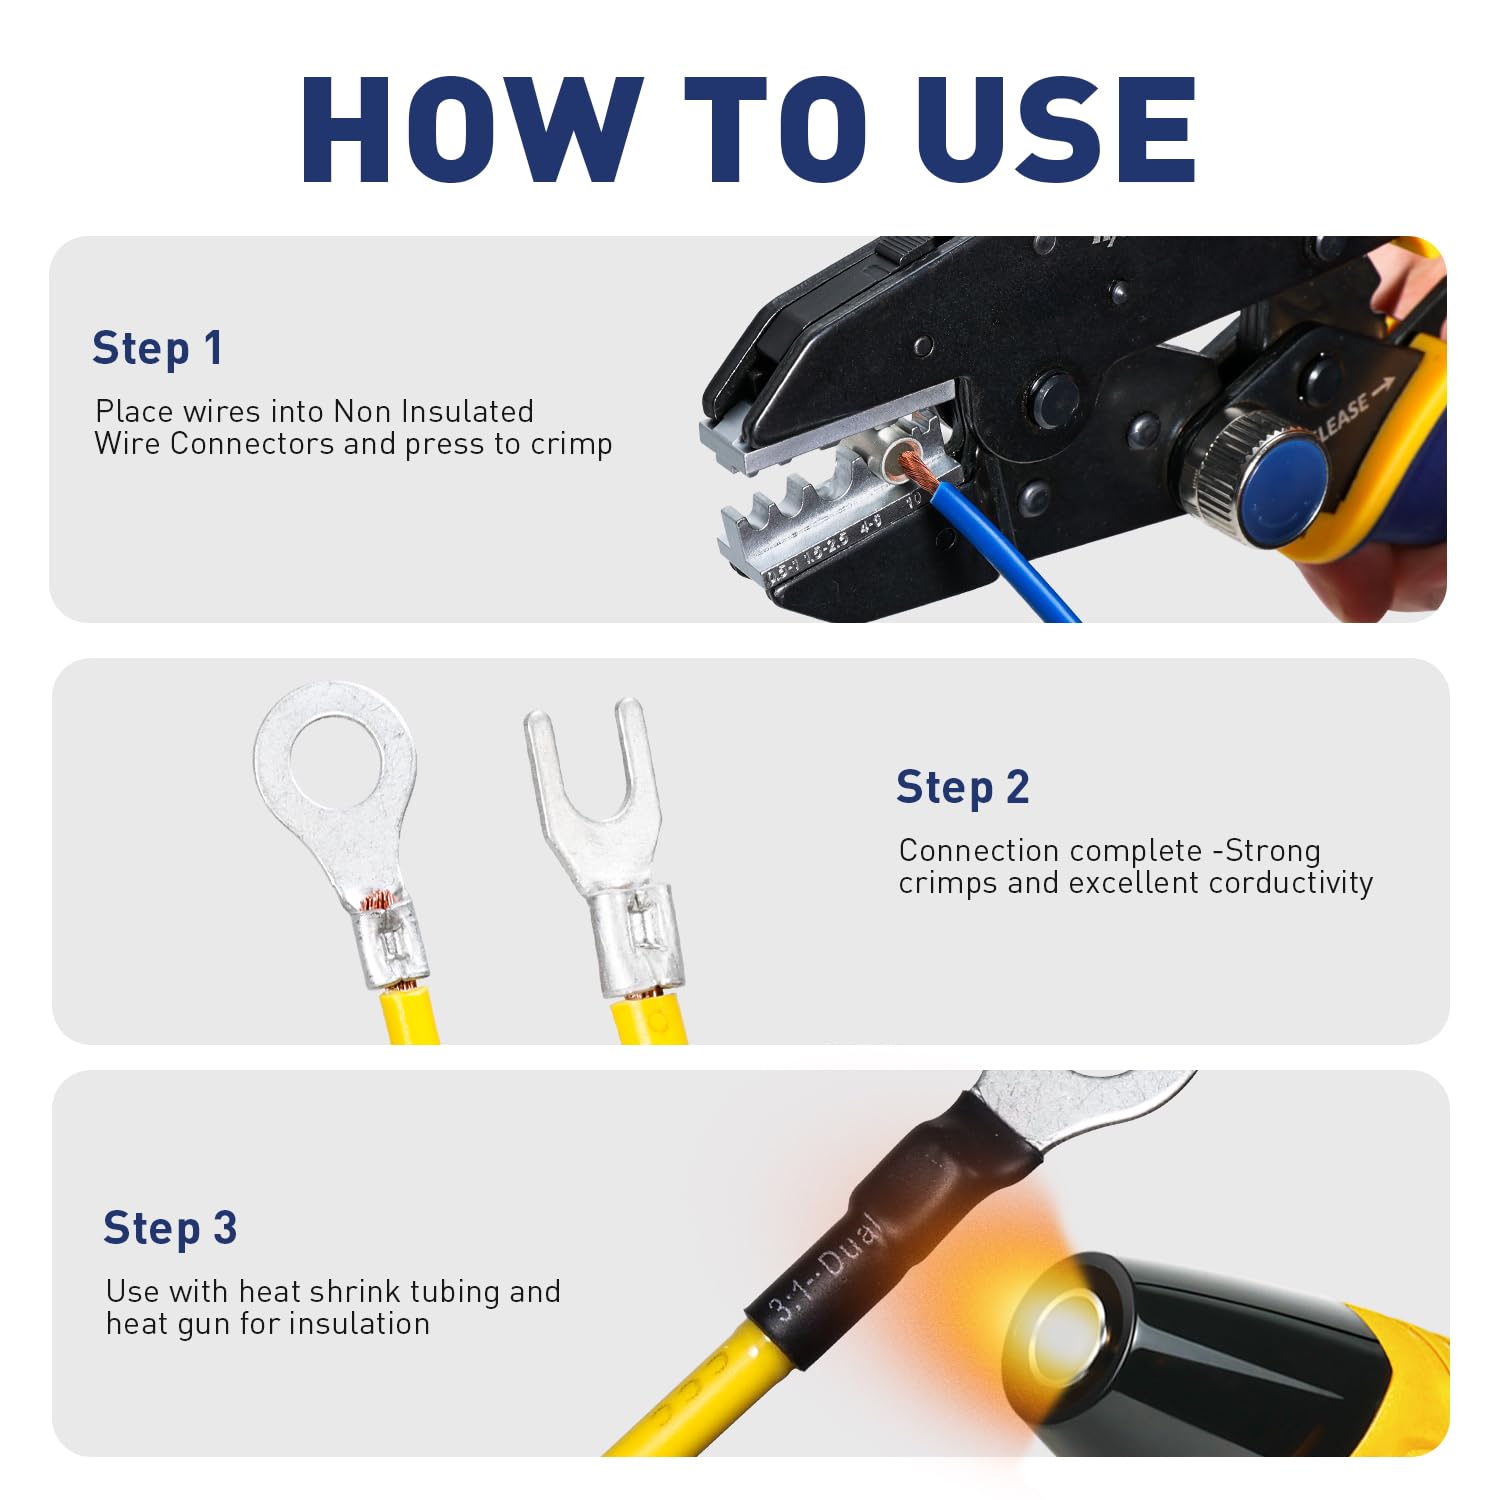
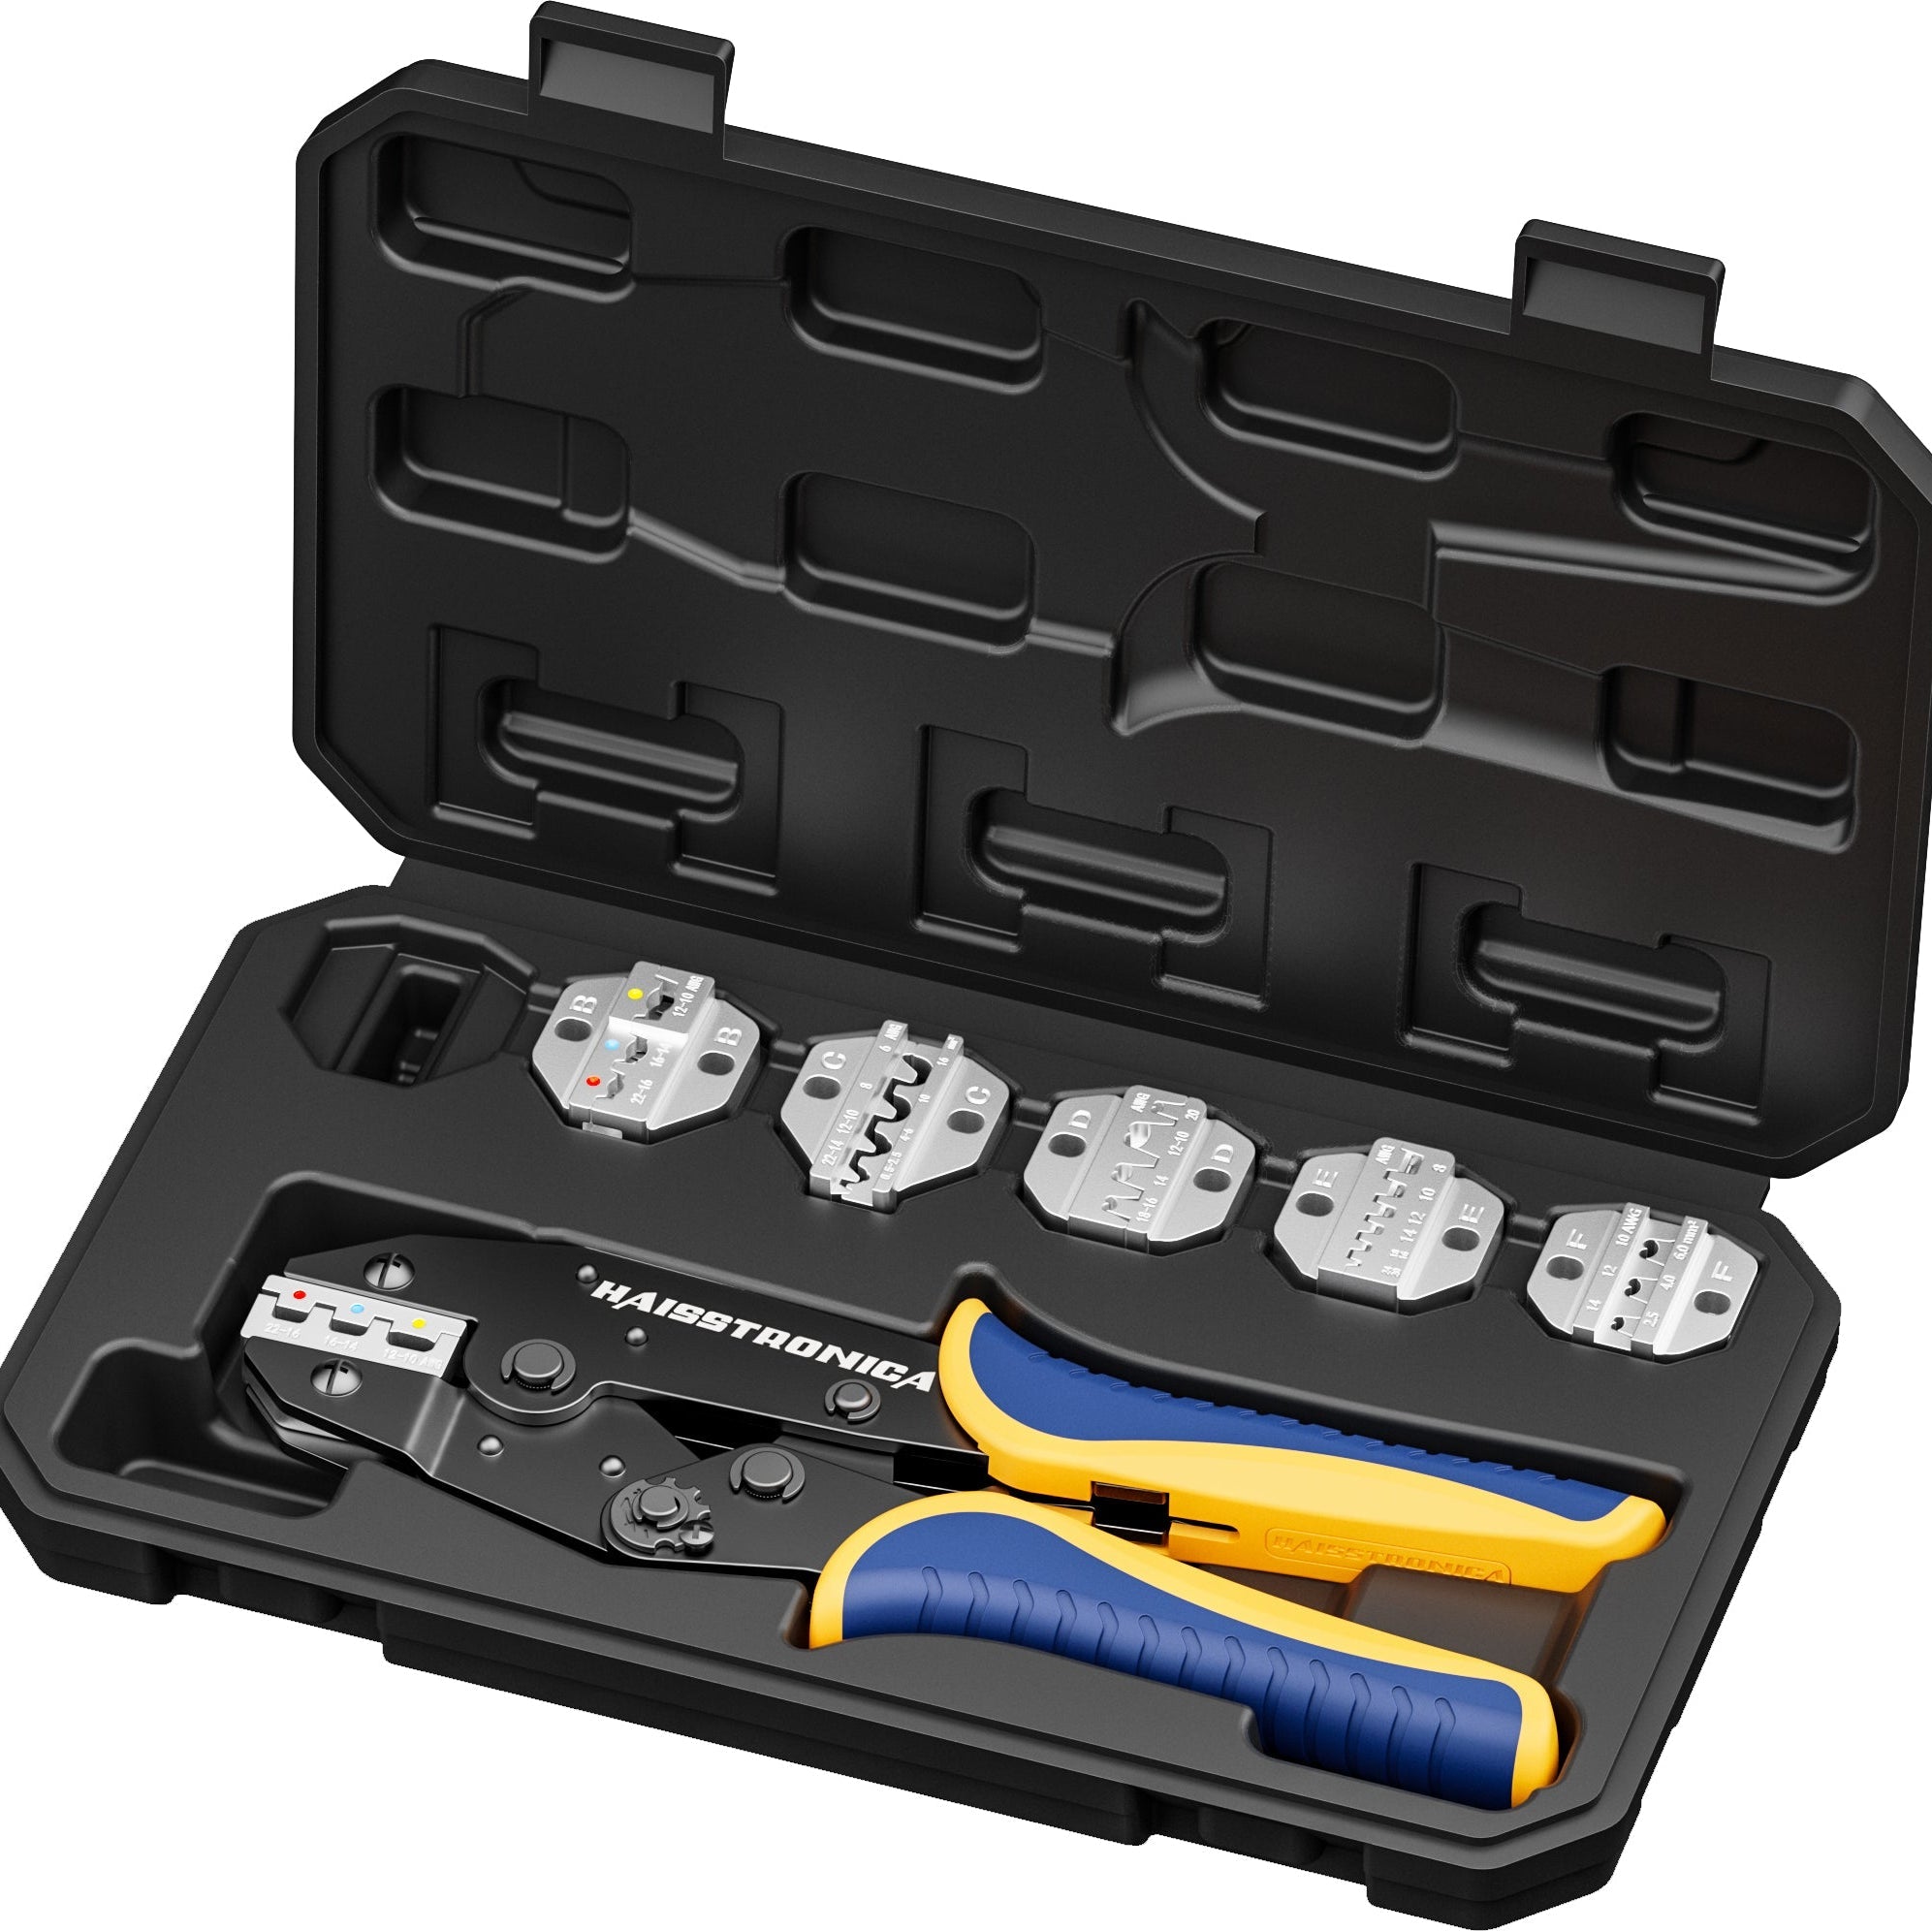
1) Ratcheting Hand Crimpers (Most Common for Terminals)
Best for: insulated terminals, heat-shrink terminals, many non-insulated terminals (with the right die)
Why they work: ratchets force the tool to complete the compression cycle before releasing, improving consistency.
Typical uses
-
Butt connectors
-
Ring/fork terminals
-
Spade/disconnect terminals
-
Heat-shrink terminals (when matched dies are used)
Choose this if you
-
Do repeated wiring work
-
Want fewer “half-crimps” from inconsistent hand pressure
-
Need reliable crimps across multiple wire gauges
When not ideal
-
Large battery cables / heavy lugs (too much force needed)
-
Open-barrel terminals (needs a different profile)
2) Non-Ratcheting Crimpers (Simple, but Skill-Dependent)
Best for: occasional repairs, basic insulated terminals (when used carefully)
Tradeoff: quick and cheap, but results vary by hand pressure.
Use these if you crimp rarely and can perform a pull test every time. For regular work, ratcheting tools are usually easier to get consistent outcomes.
3) Ferrule Crimpers (Square/Hex Profiles)
Best for: wire ferrules used in screw terminals, control panels, DIN rail gear
Ferrule crimpers compress stranded wires into a neat, solid termination that seats cleanly under a clamp or screw terminal.
-
Square crimp: very common for control panels
-
Hex crimp: great for larger ferrules and high-fill terminations
If ferrules are part of your workflow, don’t “make do” with a terminal crimper—use the correct ferrule tool and profile.
➡️ Step-by-step guide: [How to Crimp Wire Ferrules for Clean and Safe Connections]
4) Open-Barrel Crimpers (B-Crimp for OEM-Style Terminals)
Best for: automotive connectors, JST/Molex-style terminals, harness work
Open-barrel terminals require a B-crimp that forms wings around the conductor and insulation.
Key detail: open-barrel crimps typically need:
-
A conductor crimp + an insulation crimp
-
Correct terminal-specific die geometry
-
Proper strip length so conductor wings wrap correctly
This is one of the most common places people use the wrong tool and end up with crooked, weak crimps.
5) Lug / Heavy Cable Crimpers (Hex or Indent)
Best for: copper lugs, battery cable lugs, welding cable lugs, inverter/solar cables
When wire sizes get large, hand crimpers struggle. Lug crimpers are built to deform thick barrels properly.
Two common profiles:
-
Hex crimp: even compression around the barrel (common in power applications)
-
Indent crimp: “dimple” compression that locks strands tightly
Tool formats
-
Manual leverage crimpers (medium gauges)
-
Hydraulic crimpers (large gauges, repeated work)
➡️ Practical walkthrough: [how to crimp lugs on battery cable]
6) Spark Plug Wire Crimpers (Ignition Terminals)
Best for: spark plug wire terminals and ignition leads
Spark plug wire crimps are their own category because:
-
You’re crimping onto a conductor core (often spiral or suppression)
-
The terminal design expects a specific fold and retention method
-
Insulation support and terminal orientation matter a lot
➡️ Full how-to: [how to crimp spark plug wires]
7) Small-Gauge / Precision Crimpers (Fine Insulated Wires)
Best for: small insulated wires in electronics, accessories, sensors, lighting
Small wire ranges require tighter dies and cleaner stripping. Using a general terminal tool often causes:
-
Flared insulation support
-
Pinched conductor
-
Off-center crimps
➡️ For small-wire technique and tool choice: [How to Crimp Small Insulated Wires]
8) “Cable Crimping Tools” (A Category Name That Often Gets Confused)
People search “cable crimping tool” and mean different things:
-
Terminal crimpers for electrical cables
-
Lug crimpers for heavy cables
-
Coax crimp tools (connectors)
-
Network modular crimpers (RJ style)
If you want a broader overview of what “cable crimping tool” can mean—and how to pick the right one—use this as your reference point:
➡️ [Cable crimping tool. Everything You Need to Know]
How to Choose the Right Crimping Tool (Fast Decision Guide)
Step 1: Identify the connector style
-
Insulated / heat-shrink terminals → ratcheting terminal crimper
-
Ferrules → ferrule crimper (square/hex)
-
Open-barrel terminals → open-barrel B-crimp tool
-
Copper lugs / battery lugs → lug crimper (manual or hydraulic)
-
Spark plug terminals → ignition/spark plug wire crimper
-
Small electronics wires → precision crimper for small gauges
Step 2: Confirm wire gauge + connector spec
Your tool must match:
-
Wire gauge range (AWG/mm²)
-
Terminal barrel size
-
Recommended crimp profile (some connectors specify hex vs indent)
Step 3: Match tool format to workload
-
Occasional repairs → non-ratcheting may be fine (test every crimp)
-
Regular wiring → ratcheting tools improve consistency
-
Large lugs or repeated heavy work → hydraulic saves effort and improves repeatability
Tool-Type Pitfalls (and How to Avoid Them)
Pitfall A: Using a “generic” crimper for ferrules
Result: ferrule flares, strands escape, clamp loosens over time.
Fix: use a dedicated ferrule tool and correct profile.
➡️ [How to Crimp Wire Ferrules for Clean and Safe Connections]
Pitfall B: Using terminal crimpers on battery cable lugs
Result: barrel doesn’t compress fully, lug heats under load.
Fix: use hex/indent lug tooling sized for the cable.
➡️ [how to crimp lugs on battery cable]
Pitfall C: Small wires with large dies
Result: conductor cut, insulation support misshaped.
Fix: use a small-gauge tool matched to the wire range.
➡️ [How to Crimp Small Insulated Wires]
Pitfall D: Spark plug wires with the wrong crimp fold
Result: intermittent ignition, poor terminal retention.
Fix: use a spark plug wire crimper and follow terminal-specific folding steps.
➡️ [how to crimp spark plug wires]
Quick Inspection Checklist (Works for Most Tool Types)
After crimping:
-
Visual: crimp is centered, no cracks, no sharp burrs
-
Wire fill: strands fully inserted; no copper sticking out where it shouldn’t
-
Retention: firm pull test—wire should not shift
-
Electrical: continuity stable; resistance not fluctuating under movement
-
Insulation support: strain relief grips insulation (where applicable)
Recommended Internal Links for This Cluster Page (TOOLS)
Place these as “Next reads” or as contextual links above:
Closing: Build a Tool Set That Matches Your Connectors
The best crimping results don’t come from squeezing harder—they come from using a tool with the correct profile, range, and compression behavior for the connector you’re installing. Start by matching the tool family to the connector type, then refine by wire gauge and workload. If you do that, your crimps become repeatable, inspectable, and dependable in real installations.