Introduction
Le sertissage est-il plus efficace que la soudure pour les connexions électriques ? Cette question suscite le débat parmi les bricoleurs et les professionnels. Le sertissage (à l'aide de connecteurs dédiés) est rapide et mécaniquement fiable dans la plupart des applications de câblage, tandis que la soudure crée une liaison électrique solide si elle est réalisée correctement. Traditionnellement, de nombreux experts automobiles privilégient les connecteurs à sertir dans les faisceaux de câbles pour leur résistance aux vibrations. Les connexions soudées, en revanche, offrent des joints à faible résistance, mais peuvent être sujettes à la fissuration sous contrainte si elles ne sont pas correctement maintenues. Heureusement, il existe une troisième option : les connecteurs de fils thermorétractables à soudure (aussi appelés connecteurs à souder et à sceller ou connecteurs bout à bout ). Ces connecteurs innovants combinent les avantages de la soudure et de l'isolation thermorétractable. Dans cet article, nous définirons chaque méthode, fournirons des instructions d'utilisation étape par étape, explorerons des scénarios d'application (de l'automobile à la marine), fournirons un guide d'achat et répondrons aux questions fréquentes. À la fin, vous comprendrez quand les connecteurs de fils thermorétractables et soudés peuvent être le meilleur choix pour votre projet – et comment les connecteurs de fils scellés à la soudure peuvent rendre le câblage plus facile et plus fiable.
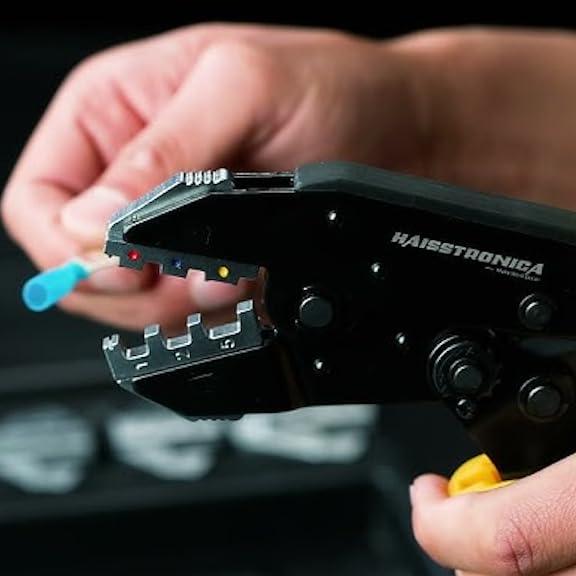
👉 Des faisceaux de câbles propres commencent avec la précision de l'outil de sertissage de câblage Haisstronica.

Définition
Sertissage : Le sertissage utilise un connecteur métallique (épissure bout à bout, cosse à œil, etc.) comprimé autour des fils à l'aide d'une pince à sertir. Cela crée une liaison mécanique et électrique solide sans chaleur ni soudure. Un sertissage réussi consiste à souder à froid le fil au connecteur. Les connexions serties sont largement utilisées dans le câblage automobile et industriel, car elles sont rapides, constantes et résistent bien aux vibrations lorsqu'elles sont réalisées correctement. Cependant, les joints sertis doivent être isolés par la suite (souvent avec une gaine thermorétractable ou des connecteurs à sertir isolés) pour éviter la corrosion et les courts-circuits.
Soudure : La soudure consiste à faire fondre un alliage de soudure (généralement du plomb/étain ou similaire) sur les extrémités des fils dénudés pour les joindre. Une soudure correctement réalisée forme un connecteur soudé où les fils sont liés au niveau moléculaire par la soudure refroidie. Les connecteurs soudés présentent une excellente conductivité et peuvent être très compacts. Comme pour le sertissage, la soudure doit être isolée après la soudure (avec de la gaine thermorétractable ou du ruban adhésif). L’inconvénient est que le processus de soudure applique de la chaleur, ce qui peut recuire (ramollir) le fil et le rendre moins flexible. Les soudures peuvent également se fissurer sous l’effet des vibrations si elles ne sont pas détendues. La soudure requiert également généralement plus de compétences et d’outils (fer à souder, soudure, flux) que le sertissage.
Connecteurs de fils soudés : Les connecteurs soudés (également appelés connecteurs à souder thermorétractables , manchons à souder ou connecteurs bout à bout ) sont une solution relativement récente qui combine les deux méthodes en un seul connecteur isolé auto-soudable . Ils sont constitués d'un tube thermorétractable transparent muni d'une bague de soudure à bas point de fusion au centre et d'anneaux adhésifs thermo-activables à chaque extrémité. Il s'agit en fait de connecteurs bout à bout avec soudure préinstallée. Sous l'effet de la chaleur, le tube se rétracte, l'adhésif fond et scelle l'isolant, tandis que l'anneau de soudure fond pour souder les fils ensemble . Ce procédé de soudure et de scellement s'effectue en une seule étape à l'aide d'un pistolet thermique. Il en résulte une connexion soudée, étanche et protégée contre les contraintes grâce à la gaine thermorétractable collée, alliant les avantages électriques de la soudure à la robustesse d'un sertissage étanche. Les connecteurs à souder sont parfois commercialisés sous le nom de « connecteurs thermorétractables de qualité marine », car ils permettent des épissures étanches et résistantes à l'eau, idéales pour les environnements humides ou corrosifs.
👉 Outils de sertissage de fils de niveau professionnel — choisissez Haisstronica pour une compression uniforme.

Étapes de l'opération
L'utilisation de connecteurs thermorétractables à souder est simple : ni outil de sertissage ni fer à souder ne sont nécessaires. Voici comment utiliser ces connecteurs à souder , étape par étape :
-
Dénudez les fils : retirez environ 6 à 12 mm d’isolant aux extrémités des fils à raccorder. Assurez-vous d’avoir des brins de cuivre propres et dénudés. (Conseil : torsadez les brins dénudés ensemble pour faciliter l’insertion).
-
Insertion et superposition : Poussez les extrémités dénudées des deux fils l'une contre l'autre afin que leurs brins se mélangent, ce qui permet de les épisser bout à bout. Glissez le connecteur à souder (le tube transparent) sur cette jonction, en centrant la bague de soudure interne sur la zone dénudée du fil. Les bandes colorées du tube doivent recouvrir l'isolant du fil de chaque côté ; elles contiennent la colle thermoréactive pour l'étanchéité.
-
Appliquer une chaleur uniforme : Utilisez un pistolet thermique (recommandé) ou une autre source de chaleur pour chauffer progressivement le connecteur. Répartissez la chaleur pour rétracter le tube uniformément. Le tube va d’abord se rétracter étroitement autour des fils, puis les anneaux adhésifs vont fondre et se sceller à l’isolant du fil, et enfin l’anneau de soudure à basse température va fondre et s’infiltrer dans les brins du fil. Le thermorétractage commence généralement à environ 150 °C (300 °F), et la soudure fond à une température plus élevée ; un pistolet thermique conçu pour une température d’environ 400 °C à 600 °C (750 °F) est idéal. Vous verrez l’anneau de soudure se liquéfier et être aspiré par les fils. (Évitez si possible les flammes directes ; une petite torche ou un briquet peuvent faire l’affaire, mais il est facile de brûler le tube. Un pistolet thermique offre une chaleur plus uniforme.)
-
Laissez refroidir : Retirez du feu et laissez le connecteur refroidir sans le toucher pendant quelques secondes. La soudure se solidifiera, formant un connecteur soudé solide à l’intérieur, et l’adhésif prendra, rendant la jonction étanche et solide. La connexion terminée doit présenter une soudure visible reliant les conducteurs et aucun cuivre exposé. Tirez légèrement dessus : une épissure soudée bout à bout correctement réalisée ne se défait pas facilement.
Et voilà ! Résultat : une connexion étanche et robuste, sans sertissage ni ruban adhésif. Contrairement aux connecteurs traditionnels à sertir et à sceller (où l'on sertit un connecteur bout à bout puis le thermorétracte), ces connecteurs à souder éliminent entièrement l'étape de sertissage : il suffit de chauffer pour souder et sceller en une seule opération. Cela simplifie grandement les réparations et les épissures de fils dans les espaces restreints ou lorsque vous n'avez pas d'outil de sertissage électrique à portée de main.
Scénarios d'application
Les connecteurs thermorétractables à soudure peuvent être utilisés dans presque tous les cas de raccordement de fils, notamment pour une épissure étanche . Voici quelques applications courantes :
-
Câblage automobile : Idéal pour la réparation du câblage des voitures, motos, camping-cars et camions. Les véhicules subissent des vibrations constantes et parfois de l'humidité, et ces connecteurs de câbles automobiles créent une jonction étanche et résistante aux vibrations . Ils sont parfaits pour les installations stéréo, le câblage de remorques ou les épissures dans le compartiment moteur (évitez les zones de chaleur directe du moteur ou de l'échappement). Nombreux sont ceux qui les trouvent supérieurs aux sertissages traditionnels pour les projets automobiles de rechange.
-
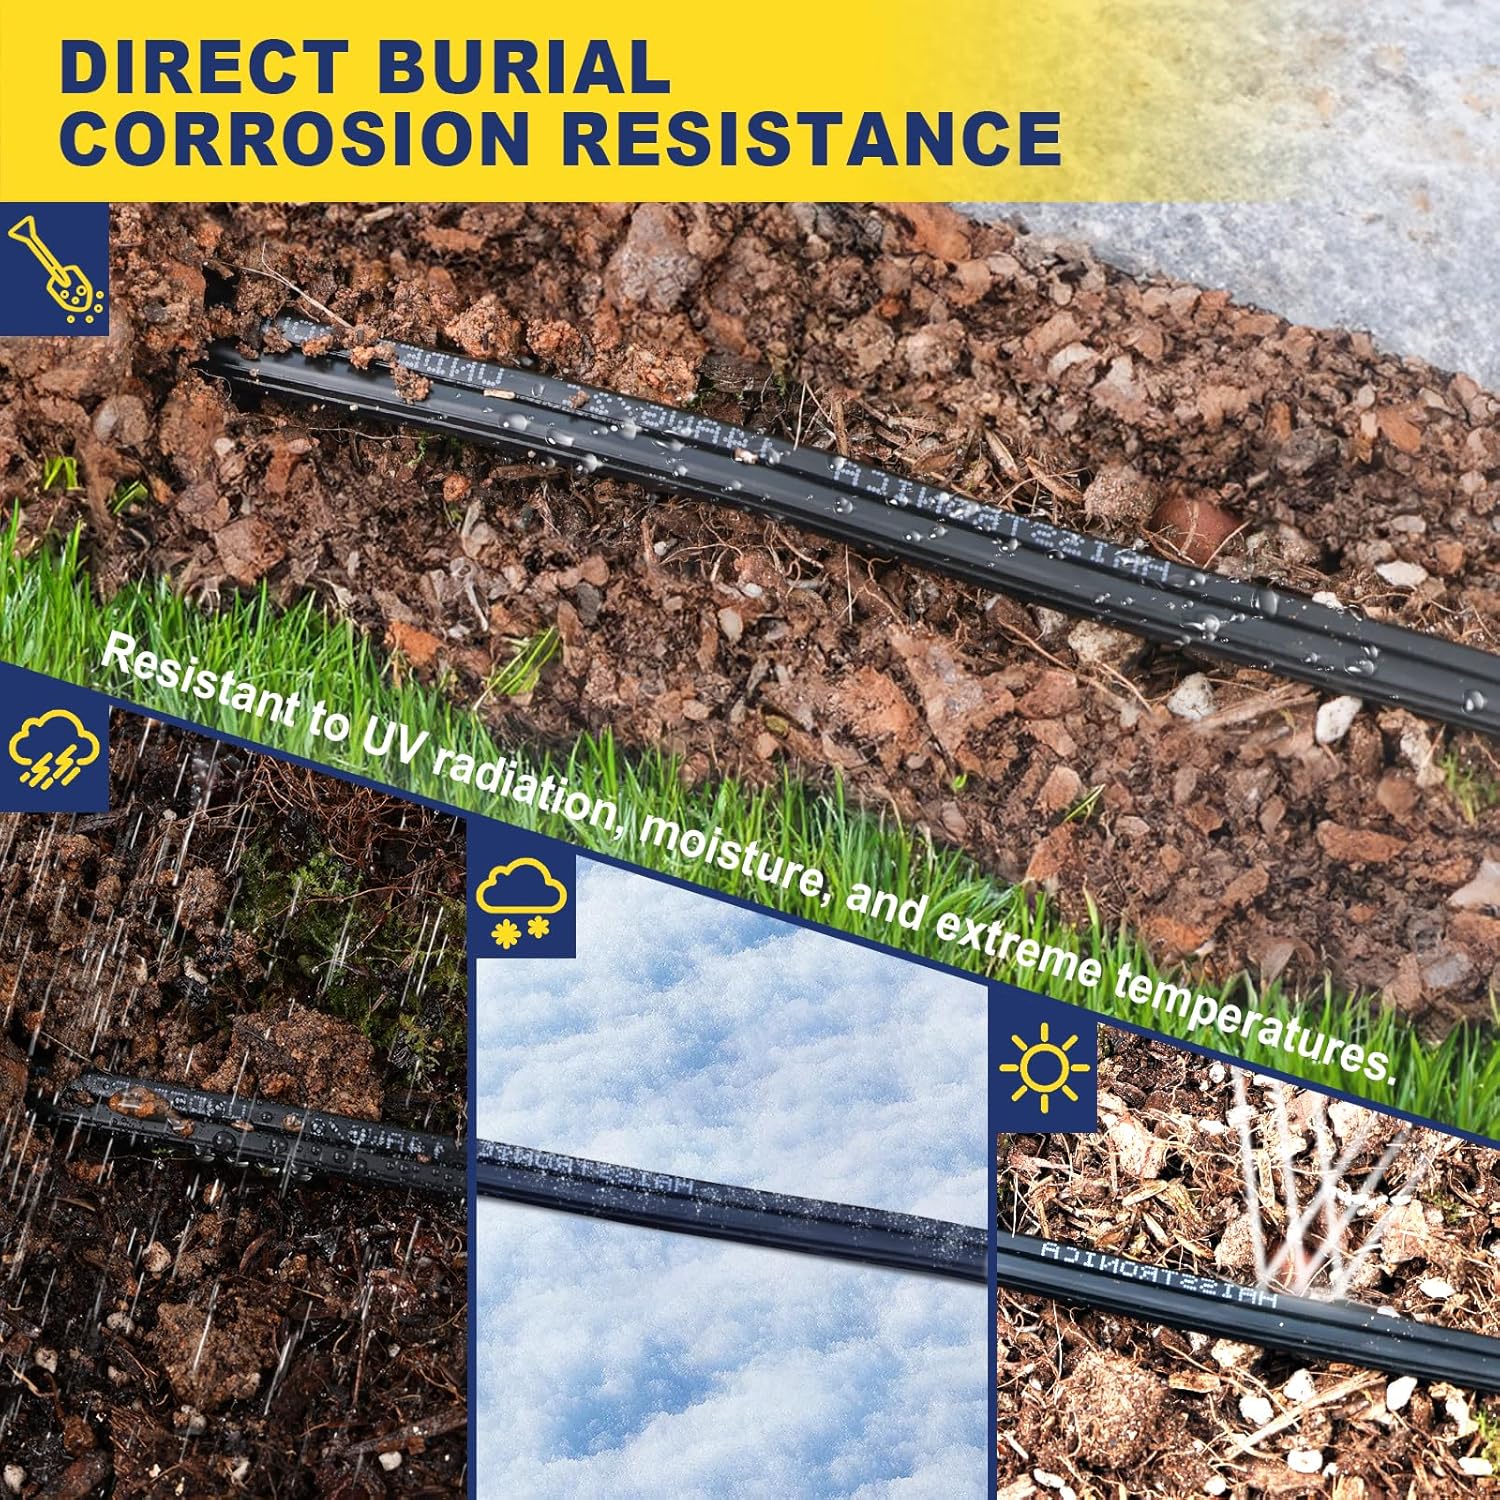
Électronique marine et bateau : Les connecteurs étanches sont indispensables pour les bateaux, les jet-skis et autres environnements marins. Les connecteurs à souder sont souvent vendus comme connecteurs bout à bout thermorétractables de qualité marine , car leur gaine thermorétractable à double paroi avec adhésif assure une étanchéité parfaite contre l'eau salée et la corrosion. Ils garantissent des connexions fiables pour les pompes de cale, les feux de navigation, les sondeurs et autres appareils électroniques marins.
-
Projets pour la maison et l'extérieur : Utile pour tout câblage extérieur ou de jardin, comme l'éclairage paysager, les systèmes d'irrigation (vannes d'arrosage), les pompes de piscine ou les raccordements de panneaux solaires. Ils peuvent remplacer les serre-fils vissés encombrants par une épissure étanche et discrète qui empêche l'eau de pénétrer. Par exemple, connecter des éclairages paysagers basse tension ou réparer des fils d'arrosage souterrains est plus simple avec un connecteur d'épissure à souder étanche qu'avec des capuchons remplis de graisse.
-
Bricolage électronique et électroménager : Les bricoleurs qui construisent des kits DIY, des avions radiocommandés, des drones ou réparent des appareils électroménagers peuvent également en bénéficier. Ces connecteurs auto-soudables permettent de gagner du temps lorsqu'il s'agit de relier deux fils à un appareil. Ils assurent une jonction nette et isolée pour les câbles audio, les bandes LED ou la réparation de fils d'appareils effilochés, sans avoir à souder au fer dans les espaces restreints.
Globalement, les connecteurs de fils à souder et à sceller excellent dans tous les cas exigeant une liaison durable et résistante aux intempéries. C'est pourquoi ils sont généralement inclus dans les kits de connecteurs automobiles et les ensembles de connecteurs électriques marins . Cependant, dans les systèmes critiques soumis à des vibrations extrêmes ou soumis à des normes de sécurité (par exemple, les normes électriques de l'aviation ou du bâtiment), il est important de toujours vérifier si les joints à souder sont autorisés ou si une borne à sertir ou à vis est obligatoire. Dans la plupart des applications automobiles et de loisirs, ces connecteurs offrent des performances exceptionnelles, combinant le meilleur des techniques de sertissage et de soudure.
👉 Le connecteur de fil solide se sertit à chaque fois avec le cliquet de Haisstronica.

Guide d'achat
Lorsque vous achetez des connecteurs de fils à souder , tenez compte des facteurs suivants pour vous assurer d'obtenir les meilleurs connecteurs à souder pour vos besoins :
-
Calibres (AWG) et codes couleur : Ces connecteurs sont disponibles en différentes tailles pour s'adapter à différents calibres de fil. Les codes couleur courants sont le rouge, le bleu, le blanc, le jaune, etc., chacun couvrant une gamme de calibres de fil (par exemple, rouge pour 22 à 18 AWG, bleu pour 16 à 14 AWG, jaune pour 12 à 10 AWG, etc.). Un kit de calibres mixtes AWG est pratique si vous travaillez avec des fils de calibres variés. Assurez-vous que le kit ou le pack que vous achetez correspond au calibre de fil dont vous avez besoin. Les bandes thermorétractables colorées ne sont pas seulement esthétiques : elles contiennent l'adhésif et indiquent la compatibilité des calibres.
-
Quantité et contenu du kit : Déterminez le nombre de connecteurs dont vous avez besoin. Ils sont souvent vendus en kits de 50, 100, voire plus de 300 pièces. Si vous effectuez des réparations occasionnelles, un kit plus petit peut suffire, tandis que les bricoleurs ou les professionnels opteront pour un pack en vrac. Certains kits incluent également une mallette de tri, et les kits haut de gamme peuvent inclure un pistolet thermique. Pour un projet d'envergure comme le recâblage d'un bateau ou d'une voiture, pensez à un kit de connecteurs de fils automobiles ou de connecteurs à souder pour bateaux, qui contient suffisamment de pièces.
-
Qualité et certification : Tous les connecteurs à souder ne se valent pas. Recherchez des marques réputées et des avis sur les produits. Les bons connecteurs utilisent une soudure basse température qui fond à la bonne température et un tube suffisamment adhésif pour assurer une parfaite étanchéité des extrémités. Les connecteurs bon marché sans marque peuvent manquer de soudure ou de colle, ce qui peut entraîner des épissures fragiles ou des fissures sous tension. Haisstronica , par exemple, est une marque réputée ; un critique a noté que Haisstronica fabrique « les meilleurs que j'ai trouvés », avec une soudure qui tient sous tension et des joints « incroyablement solides et étanches » . Les connecteurs de haute qualité peuvent être certifiés UL ou CE, indiquant qu'ils ont passé les tests de sécurité (les connecteurs à souder Haisstronica sont certifiés UL, CE et SGS). Investir un peu plus dans des connecteurs à fils à souder haut de gamme peut s'avérer rentable en termes de fiabilité.
-
Source de chaleur/Outils : N’oubliez pas d’avoir un décapeur thermique ou un chalumeau adapté. Si vous n’en possédez pas déjà un, vous pouvez opter pour un kit comprenant un outil thermique ou en acheter un séparément. Un décapeur thermique électrique de base atteignant au moins 300 à 400 °C est recommandé pour ces connecteurs thermorétractables avec soudure . Certains connecteurs indiquent même la plage de température idéale. Utiliser le bon outil permet de faire fondre complètement la soudure sans carboniser le tube. (Un petit chalumeau au propane peut faire l’affaire pour les réparations sur site, mais veillez à ne pas surchauffer un point précis).
Où acheter : Vous trouverez des connecteurs à souder dans les magasins automobiles (comme AutoZone ou Harbor Freight) et en ligne. Pour une solution tout-en-un pratique, pensez au kit de connecteurs de fils à souder Haisstronica (calibre 5 AWG mixte) . Il propose une gamme de tailles dans un seul emballage et est conçu pour les projets de câblage automobile, maritime et général.
👉 Achetez ici le kit de connecteurs de fils à souder pour un ensemble de connecteurs fiables et étanches qui répond à des normes de qualité élevées.

FAQ
Q1 : Les connecteurs à souder sont-ils vraiment meilleurs que les connecteurs à sertir ?
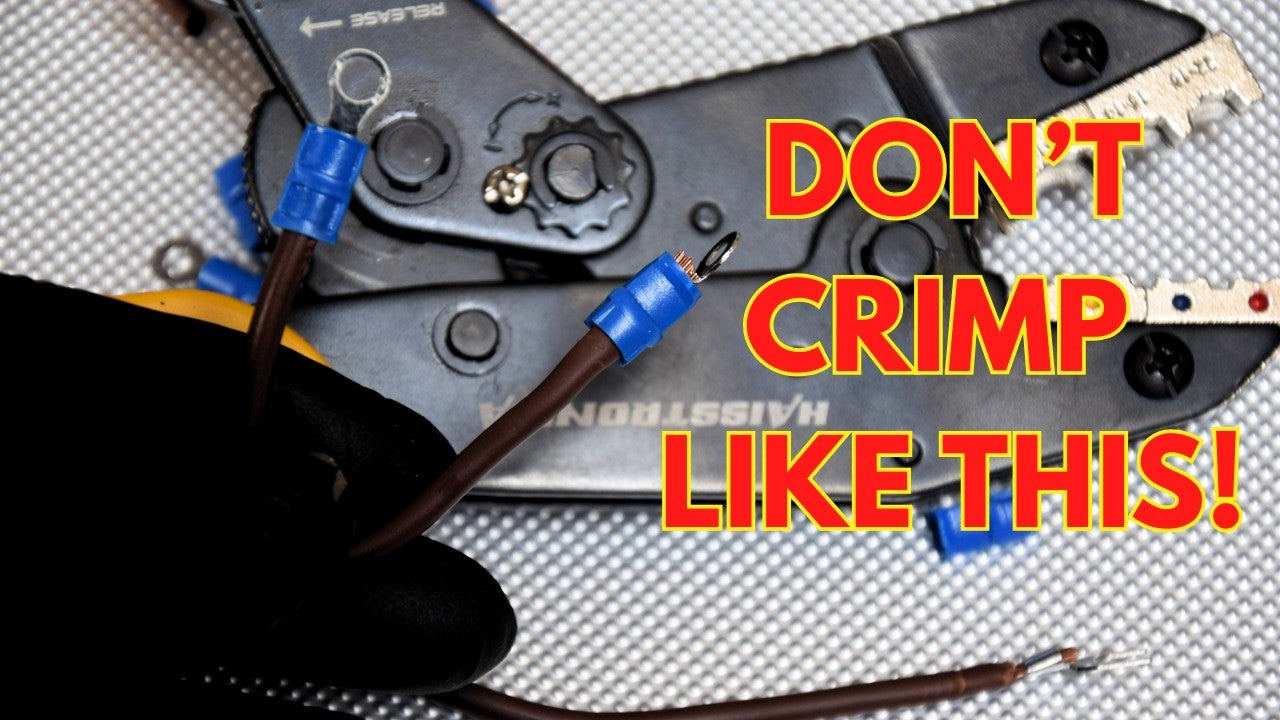
R : Dans de nombreux cas, oui. Les connecteurs à souder offrent le meilleur des deux mondes. Ils forment une connexion soudée solide, difficile à démonter, et un boîtier isolé et étanche, qui protège de l'eau et des saletés. Comparé à un connecteur à sertir standard, un joint à souder correctement installé est souvent plus solide et plus résistant à la corrosion. Il prend également moins de place et évite l'encombrement des cosses à sertir. Cela dit, un bon sertissage reste très fiable, et le sertissage reste la norme industrielle dans de nombreuses applications OEM grâce à des tests à long terme. Les sertissages peuvent être plus performants que la soudure en cas de vibrations extrêmes pendant de nombreuses années (par exemple, dans les voitures de course ou les avions), tandis que les joints à souder peuvent se fissurer s'ils ne sont pas maintenus. Les connecteurs à souder atténuent ce problème en encollant la gaine thermorétractable , ce qui soulage le fil soudé. En bref, pour la plupart des applications de bricolage, automobiles ou marines, les connecteurs à souder constituent un excellent choix, souvent supérieur, car ils sont plus faciles à utiliser et assurent une liaison durable. Cependant, dans les situations critiques à fortes vibrations, certains professionnels préfèrent encore le sertissage (ou utilisent une soudure avec serre-câble supplémentaire). Privilégiez toujours une technique appropriée : un mauvais sertissage ou une soudure froide entraînera une défaillance dans tous les cas.
Q2 : Comment utiliser les connecteurs de fils à souder et à sceller ?
R : Pour utiliser ces connecteurs à souder et thermorétractables , suivez trois étapes simples : dénudez les fils , glissez le connecteur et superposez les extrémités dénudées , puis chauffez jusqu'à ce que la soudure fonde et que le tube soit étanche. Nous avons détaillé la procédure ci-dessus, mais la chaleur sertira le connecteur en faisant fondre la soudure et en rétractant l'isolant. Utilisez un pistolet thermique pour rétracter uniformément le connecteur et observez la formation d'une couche argentée sur le fil. Une fois refroidi, l'épissure est terminée ; ni outil de sertissage ni ruban isolant ne sont nécessaires. Il est important de le laisser refroidir sans le toucher afin que la soudure se solidifie. Si vous débutez, exercez-vous d'abord sur un fil d'essai pour vous familiariser avec le temps de chauffe. En résumé, comment utiliser les connecteurs à souder : dénudez, insérez et chauffez jusqu'à ce que la soudure se rétracte et se soude – une seule étape. (Voir la section « Étapes de fonctionnement » ci-dessus pour plus de détails.)
Q3 : Ai-je besoin d'un pistolet thermique spécial pour ces connecteurs ou puis-je utiliser un briquet ?
R : Un pistolet thermique est l'outil recommandé pour les connecteurs thermorétractables à souder . Il fournit une chaleur contrôlée et uniformément répartie, essentielle pour bien rétracter le tube et faire fondre la soudure sans brûler. Pour de meilleurs résultats, privilégiez un pistolet pouvant atteindre environ 315 à 540 °C (600 à 1 000 °F). De nombreux pistolets thermiques bon marché, voire des sèche-cheveux puissants (en cas de besoin), conviennent aux petits connecteurs. L'utilisation d'un briquet ou d'une petite torche est possible (certains bricoleurs le font), mais veillez à maintenir la flamme en mouvement et à ne pas brûler le tube. Une flamme nue peut également déposer de la suie. Si vous n'avez pas d'autre solution, utilisez la partie bleutée de la flamme , maintenez-la à quelques centimètres et faites tourner le fil en continu pour chauffer tous les côtés. Mais globalement, investir dans un bon pistolet thermique est judicieux si vous prévoyez d'utiliser souvent ces connecteurs (ils sont relativement bon marché et également utiles pour les gaines thermorétractables classiques, le décapage de peinture, etc.). En bref, oui, utilisez un pistolet thermique pour des résultats uniformes. Vous obtiendrez une soudure thermorétractable parfaite avec moins de risque de surchauffe. (Conseil bonus : certains connecteurs sont équipés d'un indicateur de fusion de la soudure qui change de couleur ou qui permet de voir la soudure fondre ; utilisez-le comme signal pour arrêter la chauffe.)
Q4 : Dois-je sertir le connecteur et le souder pour plus de solidité ?
R : Non, il n'est pas nécessaire de sertir les connecteurs à soudure. Ils sont conçus pour éliminer le sertissage. En réalité, il est impossible de sertir ces tubes transparents (vous risqueriez de fissurer la bague de soudure et le plastique). En câblage courant, certains se demandent s'il faut à la fois sertir et souder une connexion (par exemple, sertir un connecteur puis ajouter de la soudure). La réponse est généralement non : combiner sertissage et soudure sur une même connexion peut la fragiliser. Lorsque vous soudez une connexion déjà sertie, la soudure peut pénétrer dans le fil au-delà du sertissage et le rigidifier, ce qui peut entraîner une rupture sous l'effet des vibrations. Un sertissage correct seul est fiable, tout comme une soudure correcte seule est fiable – mais les experts déconseillent de combiner les deux méthodes. Par conséquent, avec les connecteurs à soudure , il suffit de suivre la méthode prévue : chauffer pour souder et sceller. Aucun sertissage supplémentaire n'est nécessaire (ni recommandé). Le résultat, une fois réalisé correctement, sera une connexion sûre et étanche , sans renforcement supplémentaire.
Q5 : Les connecteurs à souder sont-ils étanches et adaptés à une utilisation en extérieur ?
R : Oui. L'un des principaux avantages de ces connecteurs à souder et à sceller est leur étanchéité . La gaine thermorétractable est recouverte d'un adhésif qui fond et adhère à l'isolant du fil, empêchant ainsi toute infiltration d'eau. Une fois refroidie, la connexion est étanche à l'humidité et même, dans une large mesure, aux produits chimiques. Cela les rend parfaits pour toute application extérieure ou en milieu humide : châssis de voiture, câblage de bateau, éclairage paysager, etc. Lors de tests et d'avis, des utilisateurs ont immergé des connexions réalisées avec des connecteurs à souder de qualité et n'ont constaté aucune fuite ni corrosion à l'intérieur. Les connexions sont également protégées de l'oxydation en milieu humide ou salin. L'étanchéité suppose une installation correcte (rétrécissement complet de la gaine sans l'entailler). Ils sont au moins aussi résistants à l'eau que les connecteurs à sertir étanches utilisés dans les applications marines et automobiles, voire plus, car la soudure remplit l'espace entre les fils, empêchant ainsi la capillarité de l'eau. Alors oui, vous pouvez utiliser ces connecteurs de fils résistants aux intempéries en toute confiance pour les éclairages extérieurs, les systèmes d'arrosage, les remorques de bateau et autres situations susceptibles d'être exposées à la pluie, aux éclaboussures ou même à une immersion occasionnelle. Il suffit d'inspecter soigneusement l'épissure pour vous assurer que la colle a bien coulé aux extrémités et que le tube est bien serré. Dans les cas extrêmes (comme une immersion permanente sous l'eau), vous pouvez ajouter une couche supplémentaire de gaine thermorétractable sur le joint, mais généralement, le joint intégré suffit. En résumé, les connecteurs à soudure sont étanches lorsqu'ils sont correctement chauffés et sont conçus pour résister aux conditions difficiles.
Nos meilleurs choix conviviaux
Réalisez des épissures étanches avec une pince à sertir dédiée aux connecteurs bout à bout . Les mâchoires hexagonales empêchent l'arrachement à chaque sertissage , et le cliquet assure une compression complète avant de relâcher les épissures. Réalisez des réparations de faisceaux impeccables avec des épissures de sertissage uniformes sur les calibres AWG 22 à 10.
👉 Connecteurs à sertir sans soudure ? Haisstronica simplifie la tâche.