
Le sertissage des fils est une compétence fondamentale en électricité, mais une mauvaise exécution peut entraîner des connexions desserrées, une surchauffe, voire un incendie. Que vous soyez bricoleur ou électricien professionnel, ce guide vous apprendra. Comment sertir des fils de manière sûre et efficace — ainsi que des conseils de pro pour éviter des erreurs coûteuses.
Pourquoi un sertissage correct est important
-
Sécurité : Une connexion mal sertie peut surchauffer, endommager le matériel ou provoquer des incendies.
-
Durabilité : Les sertissages appropriés résistent aux vibrations, à l'humidité et aux variations de température.
-
Conformité : Conforme aux normes NEC (National Electrical Code) et UL pour les installations certifiées.
Outils dont vous aurez besoin
-
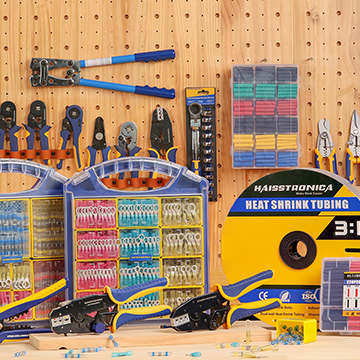
Outil de sertissage de fils (par exemple, Pince à sertir à cliquet Haisstronica )
-
Choisissez des modèles à cliquet pour une pression constante.
-
-
gaine thermorétractable (facultatif, pour l'imperméabilisation)
-
Bornes/Connecteurs (par exemple, cosses à fourche , cosses à anneau , connecteurs bout à bout

Étape 1 : Dénuder le fil
-
Objectif : exposer 1/8" à 1/4" de fil nu.
-
Conseil de pro : faites correspondre le calibre de la pince à dénuder à la taille du fil (par exemple, 12 AWG).
❌ Évitez : de couper les brins – cela affaiblit la conductivité.
Étape 2 : Choisir le bon terminal
-
Isolé ou non isolé : utilisez des bornes isolées pour les applications domestiques/automobiles.
-
Correspondance des tailles : le corps du terminal doit s'adapter au diamètre du fil (vérifiez les étiquettes d'emballage).
Types courants :
| Terminal | Idéal pour |
|---|---|
| Cosses à anneau | Bornes à vis permanentes |
| Cosses à fourche | Panneaux à déconnexion rapide |
| Bornes de connecteur bout à bout | Joindre deux fils |
Étape 3 : Insérez le fil
-
Poussez le fil dénudé dans le corps du terminal jusqu'à ce que les brins soient complètement en place.
-
Vérification : Aucun fil nu ne doit être visible à l'extérieur du canon.
Étape 4 : sertir le terminal
-
Placez la borne dans la matrice appropriée de la pince à sertir (marquée pour le calibre du fil).
-
Appuyez fermement jusqu'à ce que l'outil se libère automatiquement (modèles à cliquet).
-
Inspecter :
-
Le canon doit être comprimé uniformément.
-
Test de traction : le fil ne doit pas se détacher.
-
💡 Conseil de pro : pour les applications intensives, ajoutez gaine thermorétractable doublée d'adhésif sur le sertissage.

Étape 5 : Sceller et protéger (facultatif)
-
Faites glisser le tube thermorétractable sur le sertissage.
-
Utilisez un pistolet thermique pour le rétrécir, créant ainsi un joint étanche.
Les 5 erreurs de sertissage les plus courantes
-
Mauvaise taille de terminal → Connexion lâche.
-
Sous-sertissage/sertissage excessif → Liaison faible ou isolation écrasée.
-
Ignorer les fils toronnés et les fils solides → Utiliser des embouts pour les fils toronnés.
-
Sauter le test de traction → Risque de défaillance sous charge.
-
Utiliser une pince au lieu d'une pince à sertir → Pression incohérente.
Techniques avancées
-
Double sertissage : sertissez à la fois le fil et l'isolant pour les fortes vibrations (par exemple, automobile).
-
Étanchéité : Combiner le sertissage avec gaine thermorétractable de qualité marine .
FAQ
Q : Puis-je réutiliser une borne sertie ?
R : Non, le sertissage déforme le métal. Remplacez toujours les cosses.
Q : Quelle est la meilleure pince à sertir pour le câblage des panneaux solaires ?
A : Utilisez un Pince à sertir à cliquet avec matrices AWG 10-22 , comme la série CT-200 de Haisstronica.
Q : Comment sertir sans outil de sertissage ?
A : Ne le faites pas ! Les outils improvisés (pinces, marteaux) créent des connexions dangereuses.
Conclusion
Maîtriser le sertissage des fils garantit des systèmes électriques sûrs et fiables. Pour des résultats professionnels, associez vos compétences aux bons outils :
✅ Achetez chez Haisstronica Kits de sertissage – Comprend des pinces à sertir à cliquet et des cosses.


1 commentaire
pradeep perelly
Terrific article. I appreciated the structure and the various pcs of information Thanks for sharing this useful information
https://www.couponcode2save.com/
Terrific article. I appreciated the structure and the various pcs of information Thanks for sharing this useful information
https://www.couponcode2save.com/