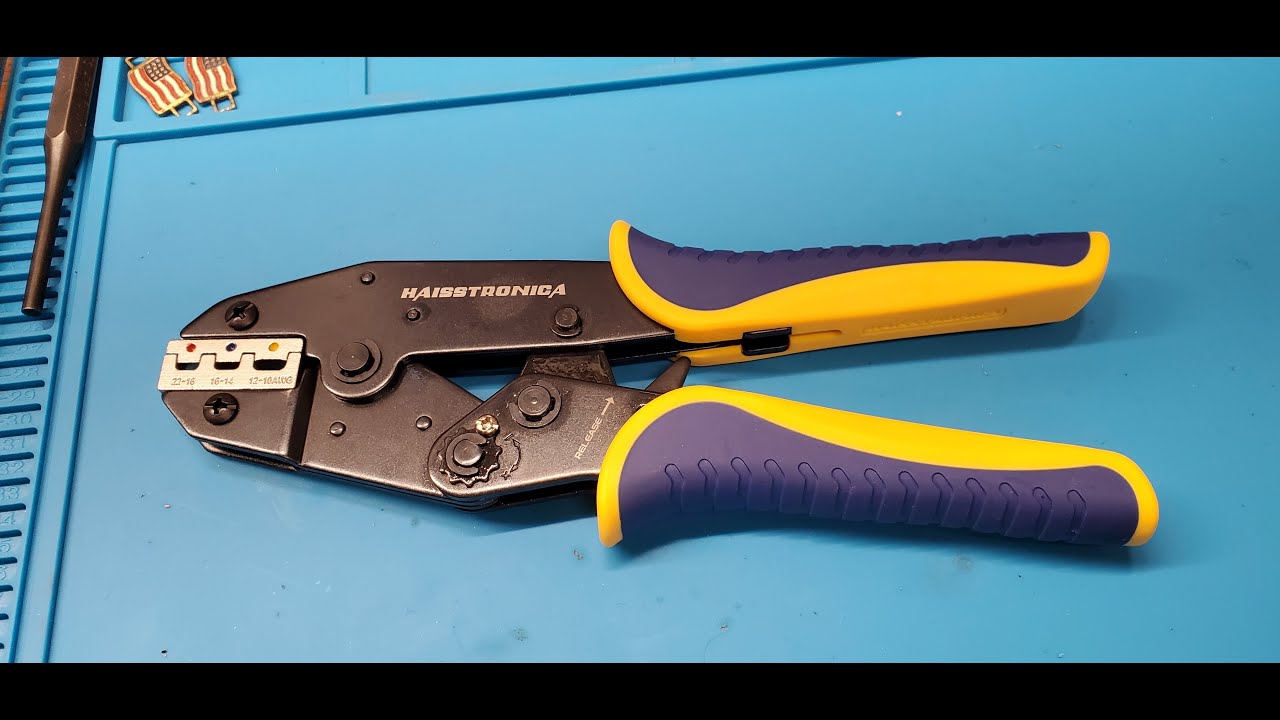
Pliersman review · 6-in-1 MultiCrimp
The upgrade is the die change.
The older version uses Phillips screws to retain the dies. The newer version reviewed here uses release levers and slide-in dies. The buying question is simple: how often do you switch connector profiles?
Watch the side-by-side comparison, check the six die families, then choose an upgrade or a first-time setup that matches your work.
Old vs new · What actually changes?
A screwdriver or a quick-release mechanism.
| Compare | Older screw-fastened version | Quick-change version reviewed |
|---|---|---|
| Changing dies | Older versionRemove and refit Phillips screws when swapping profiles. | Quick-change versionPress the side release levers and slide the matched die halves out or in. |
| Storage shown | Older versionMolded plastic case with individual die slots. | Quick-change versionZippered carry bag with retaining straps and a mesh compartment. |
| Die markings observed | Older versionThe reviewer's older sample shows metric and imperial markings. | Quick-change versionThe newer sample shown has metric markings; check the supplied reference and actual cavity. |
| Reason to choose | Older versionKeep it if the profiles fit your work and infrequent changes are not a problem. | Quick-change versionConsider the upgrade when repeated changes between connector families slow the job. |
These are observations of the two samples in Pliersman's video, not a promise that every old or new bundle is identical. Both samples include six die sets. Do not assume the two versions' dies are interchangeable.
Original review · Pliersman
See the mechanism before choosing the upgrade.
The video compares the cases, die retention and markings, then demonstrates a ferrule crimp. It does not test all six connector families or provide laboratory pull-force results.
The ferrule demonstration produces a one-sided impression. Do not mistake it for a square or hexagonal ferrule crimp. Select the profile required by the ferrule and equipment connection.
After the die-change demonstration
Release. Seat. Check the lock.
-
Open the unloaded tool and release the dies
Keep wires and connectors out of the jaws. Operate the head's two side release levers as instructed, then remove the existing die halves.
-
Seat the matching replacement pair
Select the required profile and cavity. Slide each matching half fully into its holder until the locking mechanism engages.
-
Check retention, then make a sample crimp
Confirm both halves are seated and retained. Test on the specified connector and wire; inspect the result before starting repeated work.
“No screwdriver required” describes die changes. Pressure adjustment may still involve a retaining screw; follow the instructions supplied with your exact tool.
Want the screwdriver-free die-change version?
The current 6-in-1 Ratcheting Crimper with 6 Interchangeable Dies is the crimper-focused buying path. Look for the quick-change head, the six required die profiles and the listed carry bag.
Check the package before ordering. Do not assume that a separate wire stripper or connectors are included. Similar-looking bundles can have different contents.
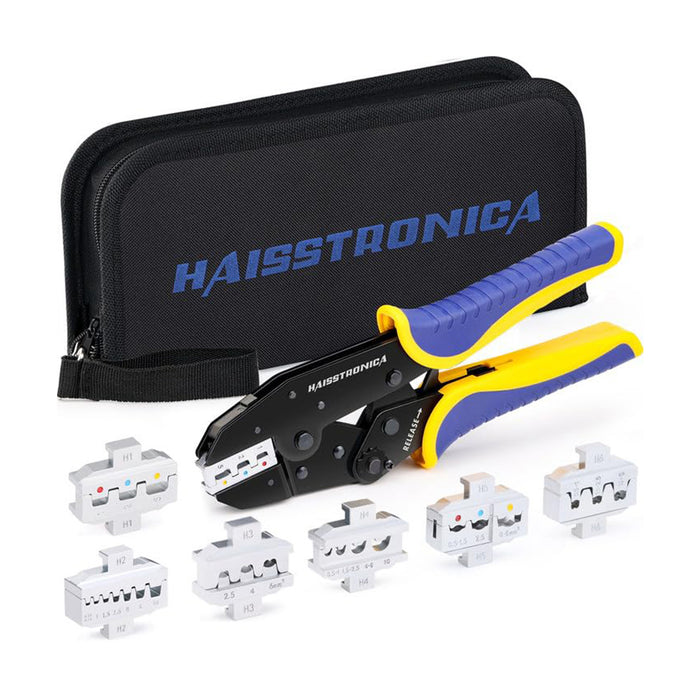
Six profiles · One selection checklist
Choose by connector construction, then wire size.
The ranges below follow the kit's published die chart. They describe coverage—not proof that every terminal within an AWG band is compatible. Match the terminal's required profile, conductor type and actual cavity marking.
Heat-shrink terminals
Listed range: 22–10 AWG
For compatible heat-shrink-insulated barrels, including suitable butt, ring or spade terminals. Crimping makes the joint; shrinking the sleeve is a separate finishing step.
Wire-end ferrules
Listed range: 24–8 AWG
For compatible ferrules on prepared conductors. Check the resulting profile and terminal-block requirements; do not assume this die produces a square or hex crimp.
Male / female contacts and solar terminals
Listed range: 14–10 AWG
Use only for the exact contact family and tooling combination permitted by its manufacturer. A solar label is not approval for every PV connector or MC4-type contact.
Non-insulated terminals
Listed range: 22–8 AWG
For compatible bare terminal barrels. Match the cavity to the conductor and barrel; this is a different profile from the heat-shrink and insulated-terminal dies.
Insulated terminals
Listed range: 22–10 AWG
For compatible insulated-terminal barrels. The same AWG range as H1 does not make the profiles interchangeable—identify the insulation and terminal construction first.
Open-barrel terminals
Listed range: 20–10 AWG
For compatible open-barrel contacts. Check the conductor wings, insulation-support geometry and required sequence for the particular terminal.
Keep the selection in one place. Check the current six-die kit and chart → before choosing. For OEM, PV or other specified work, the connector or equipment maker's approved tooling takes priority over a general category label.
Pressure, release and hand feel
Convenience does not replace a correct crimp.
Adjust pressure only after matching the parts.
A tension setting cannot correct the wrong die, terminal or wire size. Use the tool's adjustment instructions, including any retaining screw, and validate the setting on a sample. Do not treat the wheel as automatic calibration.
Know which release you are using.
The head levers release the dies. The ratchet release opens an interrupted cycle. An interrupted crimp is not automatically finished or acceptable; inspect it and remake it when required.
Judge the work position as well as the grip.
Check handle clearance, the force needed over repeated cycles and whether you can hold the terminal squarely. Completing the ratchet cycle alone does not prove a sound joint—inspect the barrel and conductor, and perform the checks required for that connection.
This is a manually operated ratcheting tool, not a powered electric crimper. The reviewer's comments on machining and feel concern the samples shown; they are not a durability or strength certification.
Optional wire preparation
Prepare the wire before it reaches the die.
Add a stripper only if your setup needs one.
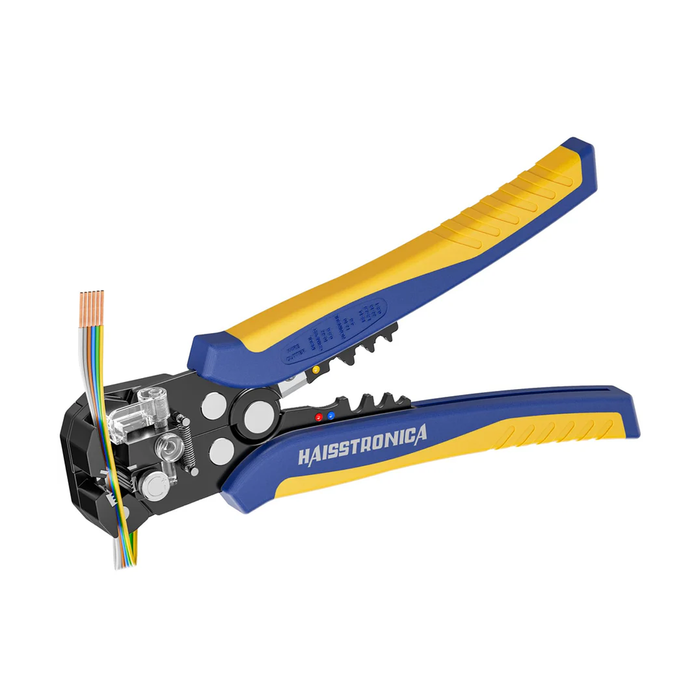
A self-adjusting stripper can help with repeated preparation across compatible wires. Set the strip length to the terminal requirement, test the tension on a scrap end and inspect every strand.
Range check: the linked self-adjusting stripper is listed for 24–10 AWG. Some dies in the crimper kit extend to 8 AWG; that does not make this stripper suitable for 8 AWG. Use a preparation tool rated for the actual wire.
Already have a suitable stripper and cutter? Keep them. The crimper upgrade does not require replacing your wire-preparation tools.
Choose your buying path
Already own the old version—or buying your first?
Start with the connector profiles you actually use. Then decide whether faster die changes are worth adding to your setup.
Existing MultiCrimp owner
Upgrade for frequent die changes.
If moving between profiles repeatedly costs time, the quick-change mechanism is the relevant benefit. If your current tool makes acceptable crimps and you rarely swap dies, keeping it can be the better decision. Do not assume old dies fit the new head.
Compare the Quick-Change Upgrade →First-time buyer
Build around your required connector families.
Check the six profiles, your actual AWG range and the connector maker's tooling requirements. Confirm the package contents, then add compatible wire-preparation tools and connectors separately where needed.
View the 6-in-1 Crimper Kit →