





Wire-preparation ergonomics · Find the source first
Fewer repeated motions. More good terminations.
Where does the effort build up: stripping insulation, closing a crimper, or finding and changing tools? Start with that step. A different handle cannot fix the wrong wire range, a mismatched die or an awkward work position.
Step 1 · Identify the extra work
Which motion are you repeating?
Observe a few normal, de-energized work cycles. Note re-grips, failed pulls, repeated positioning and tool searches. This is a task check—not a medical diagnosis or a speed challenge.
A · Stripping fatigue
You keep pulling, re-setting or selecting another notch.
Check first: wire and insulation compatibility, blade condition, strip length and grip-pressure setting. Do not pull harder through a damaged or unsuitable setup.
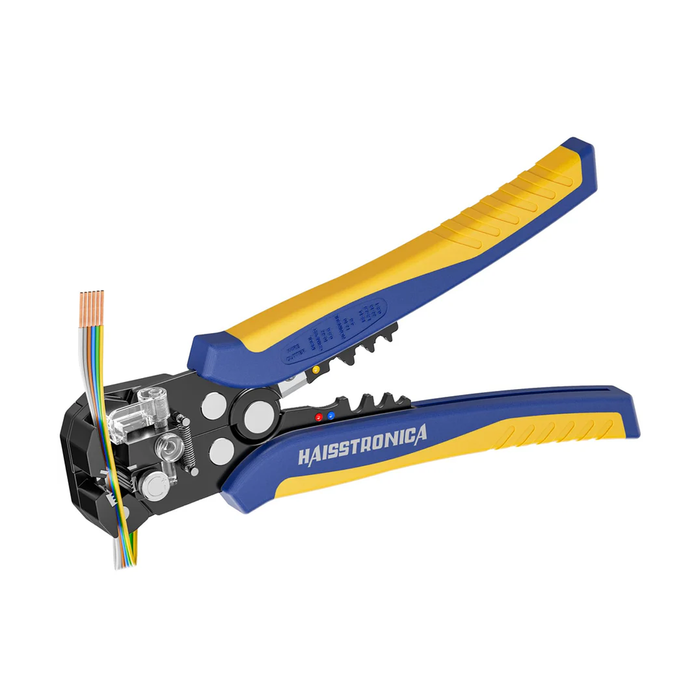
Tool direction: a self-adjusting stripper for compatible mixed-gauge work; a correctly sized manual profile when closer control is needed.
B · Crimping fatigue
Your hand tires while completing the crimp cycle.
Check first: connector family, AWG, die, tool condition and wrist position. Unexpectedly high force can signal a mismatch.
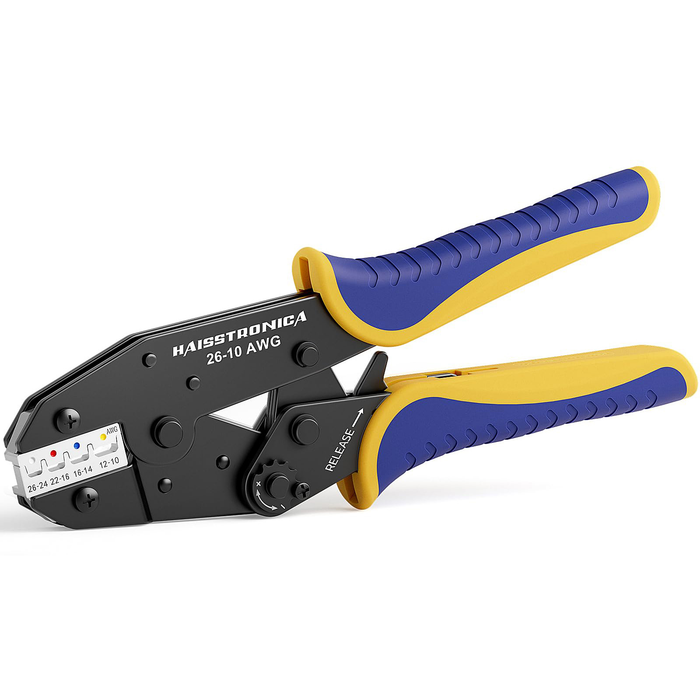
Tool direction: a compatible ratchet crimper supports a defined closure cycle. Handle fit and leverage still matter; “ratchet” alone does not prove lower hand force.
C · Tool-change fatigue
You spend more time reaching and resetting than making joints.
Check first: arrange tools in use order and group compatible jobs by terminal family and gauge.
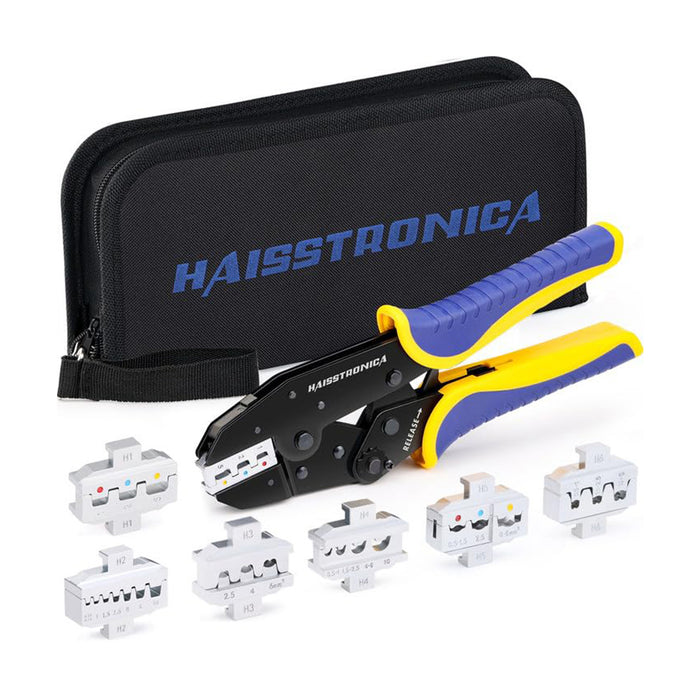
Tool direction: an organized interchangeable-die kit for varied work. If every joint uses the same die, a dedicated tool may avoid more changes.
Discomfort is not a production target. Stop if the task causes pain or persistent symptoms; seek appropriate health or workplace-safety advice. Do not use a tool purchase as a substitute for addressing symptoms.
Step 2 · Check the hand, tool and task together
Comfort is more than a padded grip.
- Grip: can you control the tool through its working range without overstretching your hand or pressing a handle end into your palm?
- Wrist: reposition the work so the hand stays closer to a straight, neutral position. Change the work angle rather than twisting harder.
- Force and repetition: count unnecessary pulls, squeezes and re-grips. A smooth-looking cycle may still demand too much effort for sustained work.
- Duration: plan breaks or changes of activity. Do not convert every saved second into a longer uninterrupted batch.
NIOSH identifies force, repetition and posture as important task factors; its hand-tool guide emphasizes matching the tool to both the work and the user. Hand-tool selection guide · Task risk factors. These are general principles, not a certification of any product below.
Path A · Reduce repeat stripping attempts
Reduce repeat pulls and strip-length resets.
The Self-Adjusting Wire Stripper AWG 24–10 adapts its stripping mechanism within its stated range, with tension control for different insulation. It may remove repeated notch selection; it does not eliminate setup or inspection.
- Confirm the wire construction and insulation are supported. Set the strip length required by the terminal.
- Test on a scrap end from the same cable. Adjust only as instructed if the insulation slips or the conductor is marked.
- Keep the wire aligned, complete the intended cycle and inspect the remaining insulation and strands.
Manual can still be right: a matched fixed-notch or precision stripper can suit a small, stable-gauge batch. For jackets or unusual insulation, use the tool specified for that job.
Path B · Complete a controlled crimp
Match the terminal. Then check the grip.
The AWG 22–10 Ratchet Crimping Tool is for compatible heat-shrink insulated terminals. Its marked positions, full-cycle ratchet and release support controlled operation. It is not a universal ferrule, open-barrel or battery-lug crimper.
- Confirm terminal family, conductor gauge and required die profile before testing the handle feel.
- Support and position the work so you can close the tool without bending the wrist around an obstruction.
- Complete the specified cycle and inspection. If force feels excessive, stop and check the setup and tool condition.
Do not lower crimp pressure just to make squeezing easier. Adjustments must follow the tool and terminal instructions and produce an acceptable crimp. A click is not a substitute for the required checks.
Path C · Reduce searching and repeated setup
Keep the right dies within reach.
The 6-in-1 Ratcheting Crimper with 6 Interchangeable Dies keeps a crimping frame and different profiles together. The illustrated version is a crimper-and-dies kit; it does not include a separate wire stripper.
- Choose by the terminal families you actually use. Read the AWG markings for each die; the frame has no single universal range.
- Group compatible work before changing dies. Check that each die is correctly seated and secured.
- Keep a dedicated tool ready if one profile dominates the job; constant die swapping can add work rather than remove it.
Need stripping in the same kit? The 8PCS listing includes a crimper, wire stripper, six dies and a case. Confirm the selected kit's contents before ordering.
Step 3 · Improve the station before increasing pace
Give every tool and wire a clear next step.
- Make the work safe and stable.
De-energize the circuit and verify it is safe to work on. Support the cable or assembly without damaging its insulation.
- Bring the work to a usable height and angle.
Use adequate lighting and an appropriate fixture so you can see the conductor without holding a bent wrist or raised shoulder.
- Stage the operation in order.
Place the cutter, stripper, terminals, crimper and inspection area within comfortable reach. Separate accepted work from material that needs rework.
- Batch only where it removes setup.
Group matching gauges and connector families, but keep batches manageable. Preserve traceability and the specified inspection sequence.
- Maintain the tools and vary the task.
Remove debris and maintain moving parts as instructed. Replace damaged blades or dies. Keep planned breaks and changes of activity in the work schedule.
Keep the quality gate: verify strip length, conductor condition, insertion and crimp formation to the applicable instructions. Perform the specified pull/retention and electrical checks. Faster preparation does not justify a lighter inspection.
Step 4 · Compare the whole job
Measure good output—not just fast squeezes.
Try a small, equal batch with the same wire, terminals and acceptance criteria. For example, compare 20 wire ends per setup at a normal pace; 20 is a trial size, not a safety limit. Change one factor at a time and record both quality and effort.
| What to record | Baseline | Revised setup |
|---|---|---|
| Total attempted / first-pass accepted | ___ / ___ | ___ / ___ |
| Final accepted units | ___ | ___ |
| Repeat pulls, re-grips and tool changes | ___ | ___ |
| Reworked / scrapped units | ___ / ___ | ___ / ___ |
| Elapsed minutes, including setup, checks, rework and breaks | ___ | ___ |
| Effort and comfort observations | Notes | Notes |
Accepted output rate = final accepted units ÷ elapsed minutes.
First-pass yield = first-pass accepted units ÷ total attempted units × 100%.
Keep the change only if it maintains the required quality without worsening effort or discomfort. Repeat the comparison on representative work before claiming a speed improvement. No fixed percentage gain is promised here.
Choose the result you need
Buy for the wasted motion you can remove.
If better staging fixes the issue, keep your current tools. If a tool remains the limiting step, use the matching path below.
Fewer repeated strip setups
For compatible mixed-gauge preparation where notch selection and repeat pulls are the problem.
Compare the Self-Adjusting Stripper →A repeatable, matched crimp cycle
For supported AWG 22–10 heat-shrink terminals, with the correct profile and required checks.
Compare the Ratchet Crimper →Less searching across several terminal families
For varied work where organized tools and planned die changes remove repeated setup.
Compare Tool-Kit Configurations →






















































